Transfercase input shaft swap write-up.
 07-02-2006, 05:01 PM
#1
How do I change this text
Thread Starter
iTrader: (26)
Join Date: Jan 2005
Location: Behind the TIG welder
Posts: 7,294
Likes: 0
Received 2 Likes
on
2 Posts
This is a write-up that z7199 and I made. Feel free to ask any questions about this. Please remember Safety first!
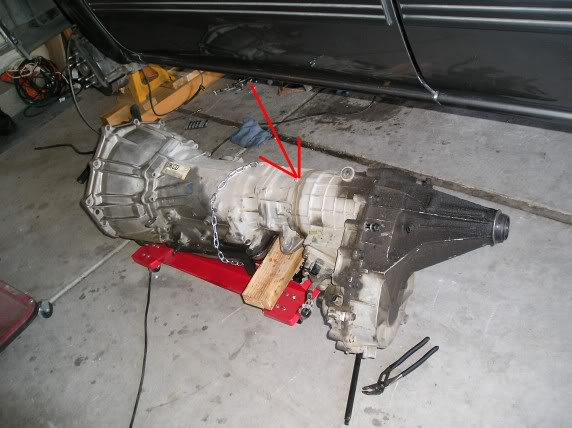
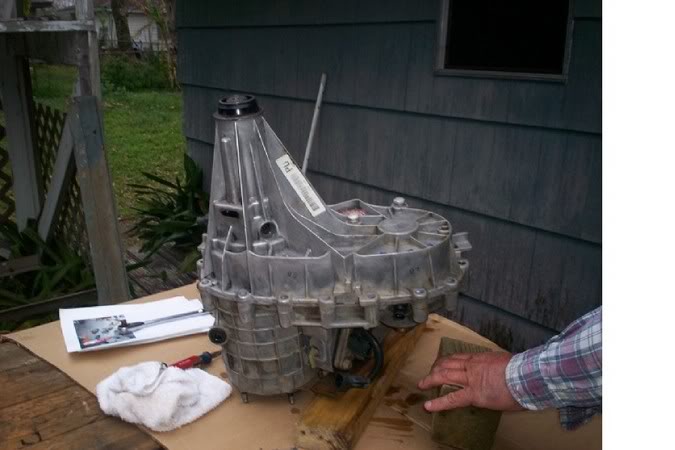
This write-up starts assuming the trans and t-case are out of the truck.
Step one separate the Transmission from the transfer case.
(optional step2)
Clean the transfer case you don�t need to but if you don�t want crap getting in there then do it.
Then remove the black bolts with the aluminum washer from around the transfer case that holds the two halves together.
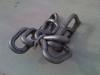
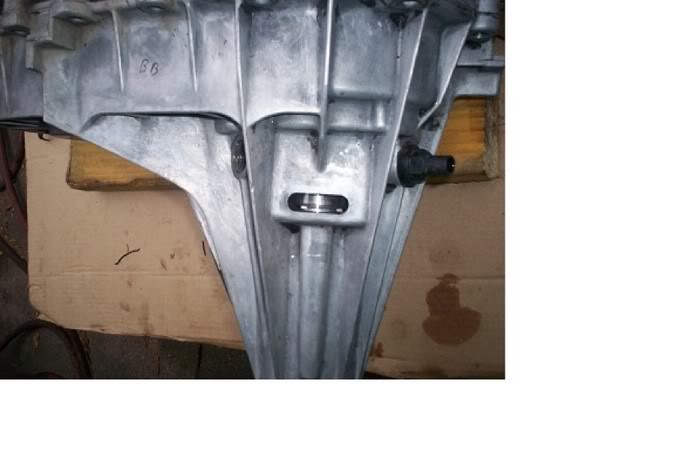
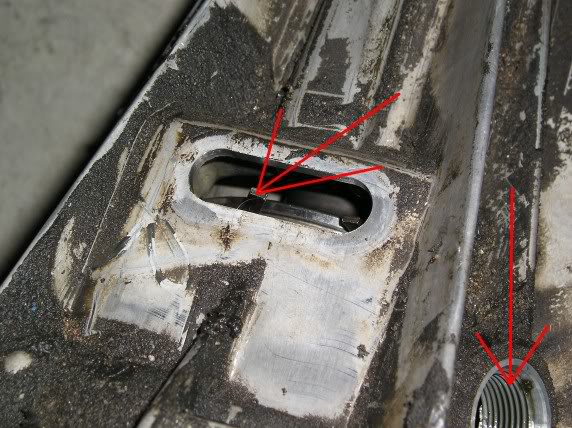
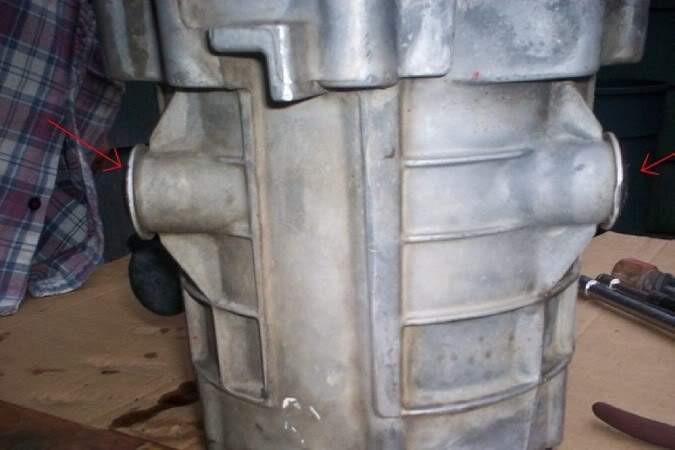
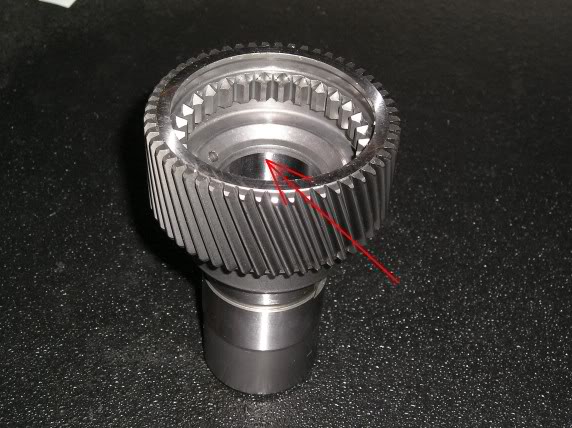
Next remove the black rubber oval shaped hole plug, inside you will see a snap ring.
There are two speed sensors, (here is a pick of ones location and snap ring mentioned above) which should be removed so they don't get broken.
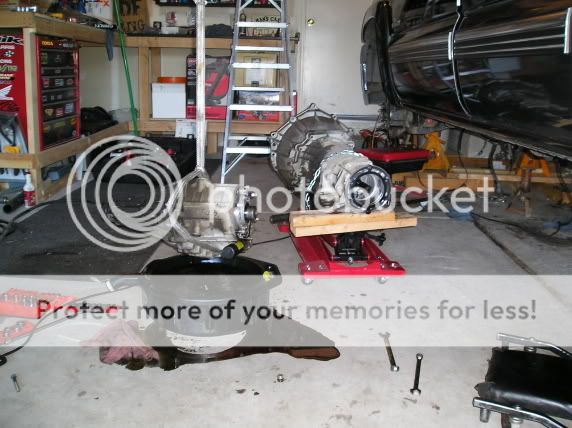
After that, stand the Transfer case on end so that the small end (or where the REAR drive shaft goes in, is pointing towards the sky). (I used blocks of wood to help it balance)
Insert your snap ring pliers in the hole where the snap ring is and open the snap ring up as far as you can. (the snap ring will NOT come out just open it)
While you are doing this there are two little slots on each side of the transfer case that will fit a screwdriver, while holding the snap ring open put a screw driver in and pry the case apart while hitting the upper (or tail section) with a rubber hammer. (DO NOT Pry very hard because the case is aluminum)
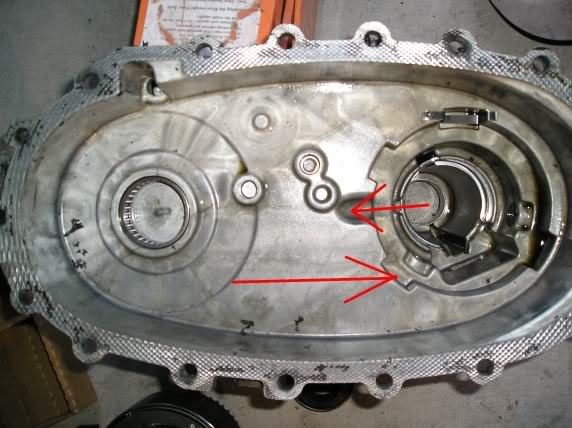
Now that the cases have come apart a little bit you can see inside the case note where the oil pump pickup tube is (it slides in a little grove in the case) take the chain off the bottom gear (or front half of the case) the chain will go with the tail section set this half aside. Also on a side note the chain will be lose and has A LOT of play in it. Note the position of the oil pump flanges and pick-up tube.
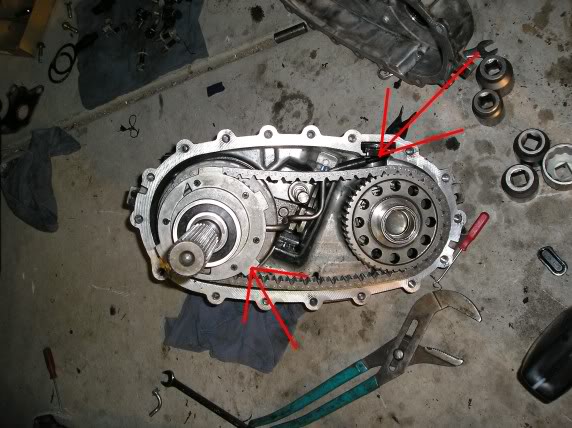
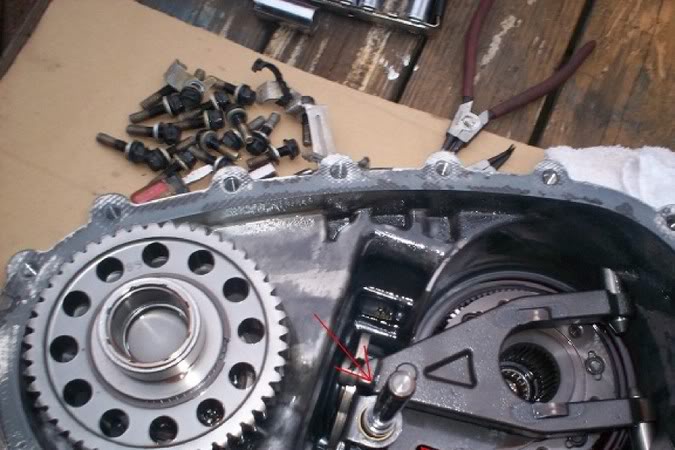
Now you will need to remove the Two 12mm Allen Head screws that are on either side of the case. After you do that the (fork) that is in there will pull right out.
There is a shaft that is to the side of the gear we are trying to get to pull it out and remove the arm that it goes through.
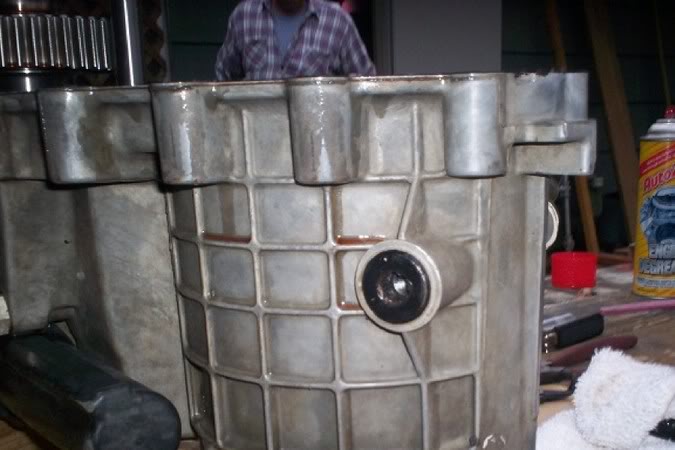
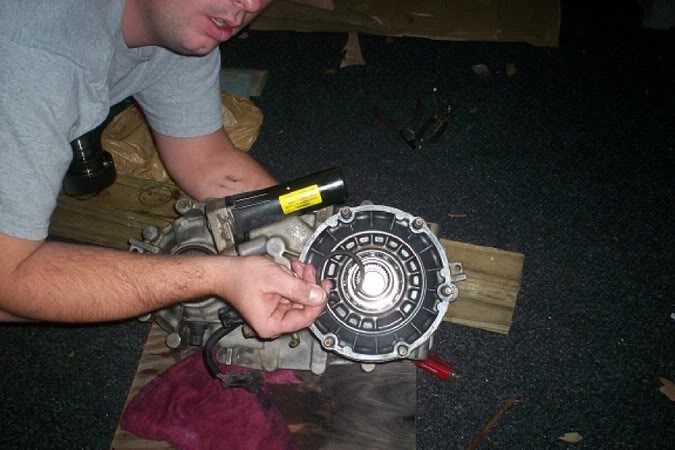
Now that you have all that removed flip the case over so that you are looking at the input shaft (the part that goes on the Transmission) You are going to remove the seal that is their.
After you pull that seal out you will see yet another snap ring, that needs to be removed also. (when you do this, the whole assembly will fall out)
Now that the whole assembly is out remove the next snap ring that holds the input shaft in the gear assembly
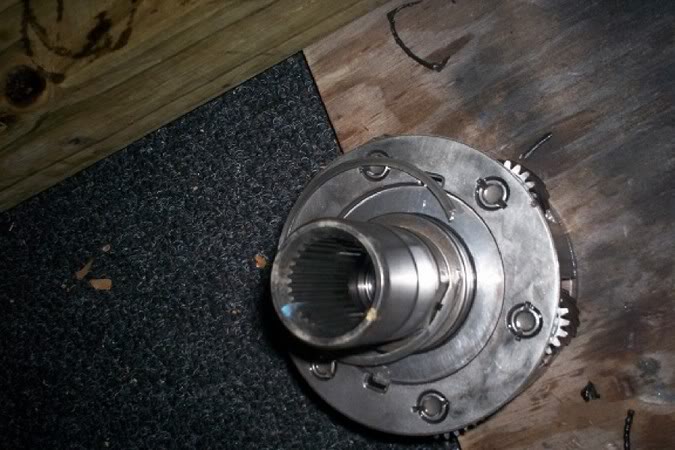
Pull out the input shaft.
Verify the new input shaft has a bushing installed on the planetary side.
Then reassemble in reverse order.
Be sure the transfer case oil pump clip is secure, and the pump flanges line up.

Also note the notch to hold the oil pump pickup tube. Don't forget to check and clean the pick-up screen.
I used flange sealant rather than RTV. for the t-case halves.
There will be more info posted later, and PLEASE post up any advice that would aid in this write-up.
This write-up starts assuming the trans and t-case are out of the truck.
Step one separate the Transmission from the transfer case.
(optional step2)
Clean the transfer case you don�t need to but if you don�t want crap getting in there then do it.
Then remove the black bolts with the aluminum washer from around the transfer case that holds the two halves together.
Next remove the black rubber oval shaped hole plug, inside you will see a snap ring.
There are two speed sensors, (here is a pick of ones location and snap ring mentioned above) which should be removed so they don't get broken.
After that, stand the Transfer case on end so that the small end (or where the REAR drive shaft goes in, is pointing towards the sky). (I used blocks of wood to help it balance)
Insert your snap ring pliers in the hole where the snap ring is and open the snap ring up as far as you can. (the snap ring will NOT come out just open it)
While you are doing this there are two little slots on each side of the transfer case that will fit a screwdriver, while holding the snap ring open put a screw driver in and pry the case apart while hitting the upper (or tail section) with a rubber hammer. (DO NOT Pry very hard because the case is aluminum)
Now that the cases have come apart a little bit you can see inside the case note where the oil pump pickup tube is (it slides in a little grove in the case) take the chain off the bottom gear (or front half of the case) the chain will go with the tail section set this half aside. Also on a side note the chain will be lose and has A LOT of play in it. Note the position of the oil pump flanges and pick-up tube.
Now you will need to remove the Two 12mm Allen Head screws that are on either side of the case. After you do that the (fork) that is in there will pull right out.
There is a shaft that is to the side of the gear we are trying to get to pull it out and remove the arm that it goes through.
Now that you have all that removed flip the case over so that you are looking at the input shaft (the part that goes on the Transmission) You are going to remove the seal that is their.
After you pull that seal out you will see yet another snap ring, that needs to be removed also. (when you do this, the whole assembly will fall out)
Now that the whole assembly is out remove the next snap ring that holds the input shaft in the gear assembly
Pull out the input shaft.
Verify the new input shaft has a bushing installed on the planetary side.
Then reassemble in reverse order.
Be sure the transfer case oil pump clip is secure, and the pump flanges line up.
Also note the notch to hold the oil pump pickup tube. Don't forget to check and clean the pick-up screen.
I used flange sealant rather than RTV. for the t-case halves.
There will be more info posted later, and PLEASE post up any advice that would aid in this write-up.
Last edited by Yelo; 07-05-2006 at 04:21 PM.

 07-02-2006, 05:39 PM
#3
How do I change this text
Thread Starter
iTrader: (26)
Join Date: Jan 2005
Location: Behind the TIG welder
Posts: 7,294
Likes: 0
Received 2 Likes
on
2 Posts
Originally Posted by dewmanshu
Holy bejesus that's a great write up!!!! Great JOB!!! Many in the future will thank you guys, that's for sure.
Thank,
 Do you see anything there that I left out?
I know I did'nt talk about the clutch pack and such but that will come.
07-03-2006, 05:34 PM
#4
Staging Lane

Join Date: Jun 2004
Location: Formerly Hayden, AL . . . Now Attleboro Falls, MA
Posts: 87
Likes: 0
Received 0 Likes
on
0 Posts
Yeah, Wilde. It's definitely a great write-up! I don't know that there's much you could add . . . although the case body on mine is Magnesium, not Aluminum.
It's going to save me some $$ for sure . . . Thanks again!
It's going to save me some $$ for sure . . . Thanks again!
07-05-2006, 10:58 AM
#5
Staging Lane
Join Date: Jun 2004
Location: Formerly Hayden, AL . . . Now Attleboro Falls, MA
Posts: 87
Likes: 0
Received 0 Likes
on
0 Posts
Originally Posted by Wilde Racing
Be sure the transfer case oil pump clip is secure . . .
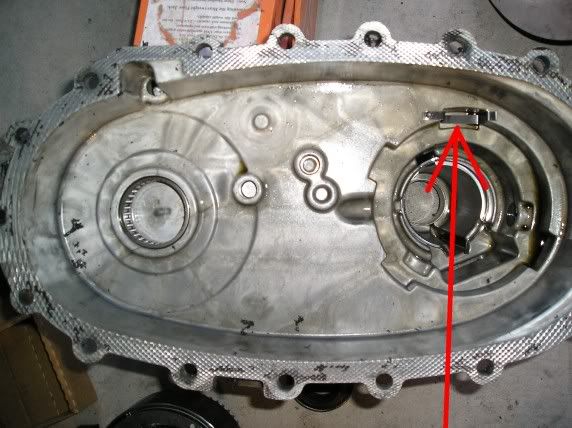
This is REALLY important! If this spring clip is not there, you will end up having to replace the back case half, after the tabs on the oil pump wear through it! I know, I'm having to do just that because the clip broke in my transfer case. The dealership even lists the clip as a retainer/wear protector. (It's part # 12470559 if anyone ever needs it).
 09-13-2006, 08:37 PM
#7
TECH Apprentice
Join Date: Sep 2003
Location: Houston
Posts: 312
Likes: 0
Received 0 Likes
on
0 Posts
Wilde glad to see you got our stuff up here I hope this will help alot of people and I think ecthelion is right it is Magnesium not Aluminum like I said either way that cast stuff will crack pretty easy!!!!
Trending Topics
05-14-2007, 09:12 PM
#8

You might want to add 5 freakin hands would be helpful. Im in the middle of this crap and I dont have a 12mm allen wrench and my snap ring pliers suck, I got the case apart but thats where I get to stop till tomorrow when I get some more tools.
