
Bigger Whipple and intercooler upgrade
 01-31-2007, 01:31 AM
#1
I haven't posted any news on the Tahoe here in a while, so here's an update.
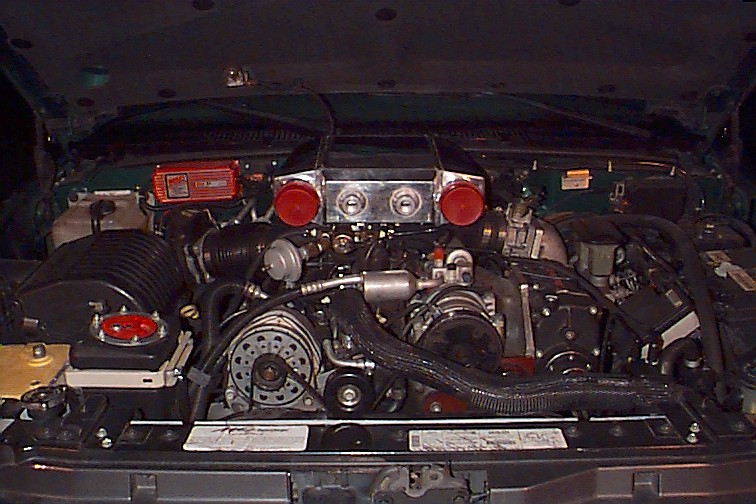
The supercharger is off right now for mockup of a whole new setup. The 1.6L Lysholm compressor is still in perfect order after 50k miles, but it's just too small. Even with the tiny 2.5" pulley on it spinning it past 17,000 RPM (way past redline) I was only getting 5 psi on the 383.
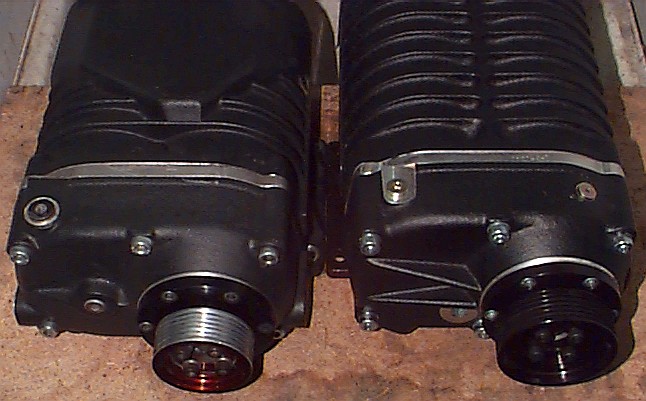
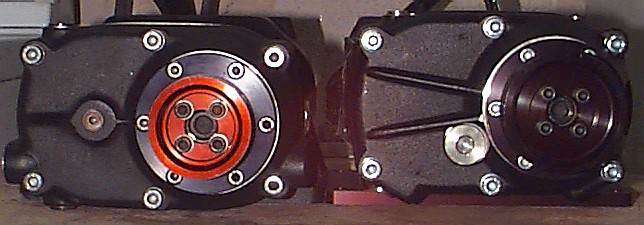
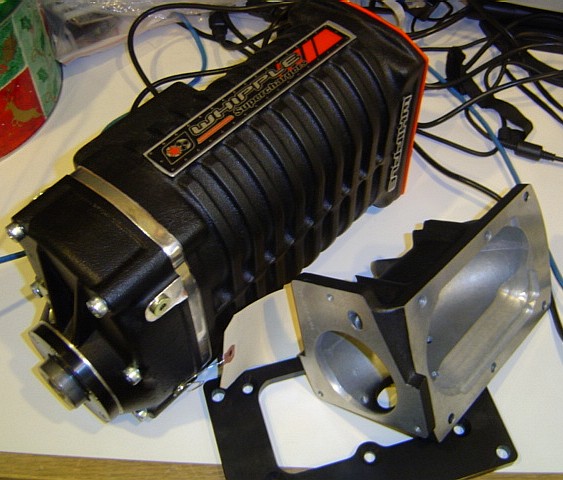
Decided to upgrade to the new Whipple-designed and manufactured 2.3L W140AX.
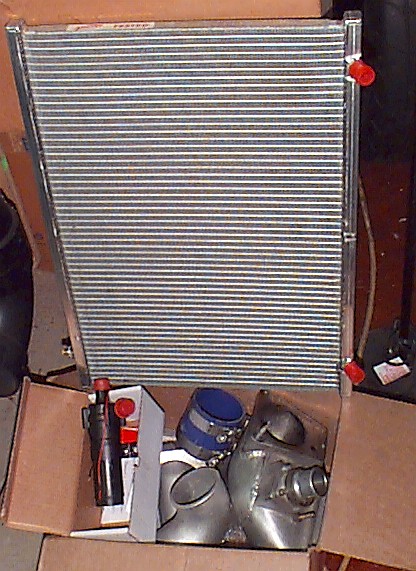
I found a "1200HP capable" air-to-water intercooler on EBay for a good price. It's huge but I'm going to make that fit under the stock hood above the intake manifold:
The old block, heads, intake and some accessory brackets are being used to help lay out the plumbing:
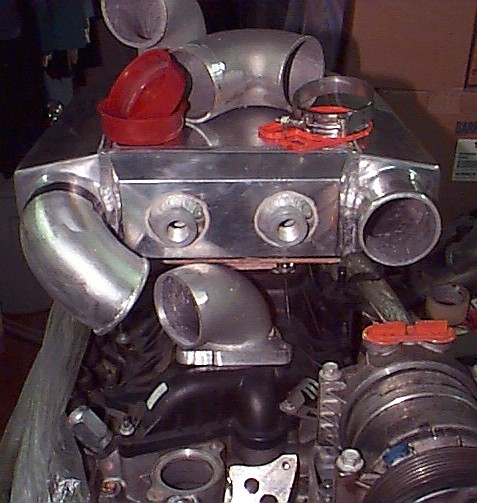
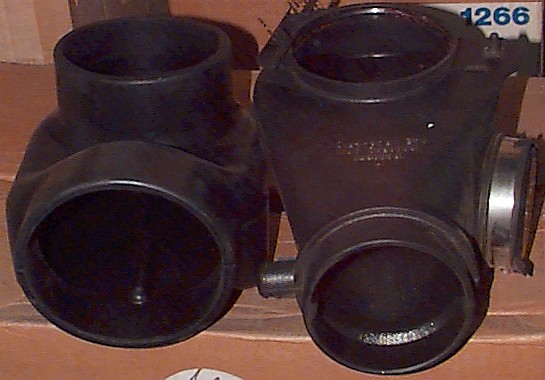
I will be retaining the side-mount bracket but will be chopping up most of it to redirect the discharge rearward from which point it will curve upward and then forward and then to the side in a complicated sort of "S" path. I have to do this to clear A/C and EGR lines. The part of the Whipple casting pointed to the passenger side under everything here will be cut off:
Various other acquired parts: coolant radiator from Lingenfelter, a Johnson magnetic-coupled 6.9GPH coolant pump, cast elbows, Whipple intake, T-bar clamps and silicone hoses, etc:
I needed a few pieces from Whipple to make this possible - an adapter for the discharge port to make it like the old 1.6L, and a new intake casting compatible with the 2.3L compressor. I am adapting the original intake casting used with the Gen-III kit for use with this. Some bypass valve plumbing will also have to be fabricated. Here's the intake casting:
The throttle body will now be pointed up instead of to the passenger side as before, so I'm going to try to fit a 4" cobra-head elbow in there. I'd like to keep 4" all the way to the MAF (Gen-III) and to the filter for the intake. Space is going to be a little bit tight, might have to run that up front. The stock intake elbow is on the left:
I will end up with 1" clearance to the firewall and 1.25" to the hood. The intercooler will be mounted angled slightly higher in the back to allow room for the wiring harness under it and to match the slope of the hood and counter the drivetrain incline. I will probably need to upgrade the injectors. I've only got 36lbs/hr (~41 @ 4Bar) injectors in here right now. Logs will tell me if that's needed once I get there.
I just welded my first practice piece of aluminum two weeks ago. I am hoping I have enough skill to pull this off. All the boost/vacuum plumbing will be heavy cast aluminum sections welded together to minimize the deafening noise twin screws make. Noise is just one of several reasons that only air-to-water intercooling is practical for Roots and Screws.
I'm also considering swapping the stock radiator out for a Be-Cool unit and Flex-A-Lite's new huge dual 6000CFM fan for 34" cores. Haven't decided on that yet - lot's of cash for that setup.
So, that's it. Hopefully in a few weeks I'll have it together.
The supercharger is off right now for mockup of a whole new setup. The 1.6L Lysholm compressor is still in perfect order after 50k miles, but it's just too small. Even with the tiny 2.5" pulley on it spinning it past 17,000 RPM (way past redline) I was only getting 5 psi on the 383.
Decided to upgrade to the new Whipple-designed and manufactured 2.3L W140AX.
I found a "1200HP capable" air-to-water intercooler on EBay for a good price. It's huge but I'm going to make that fit under the stock hood above the intake manifold:
The old block, heads, intake and some accessory brackets are being used to help lay out the plumbing:
I will be retaining the side-mount bracket but will be chopping up most of it to redirect the discharge rearward from which point it will curve upward and then forward and then to the side in a complicated sort of "S" path. I have to do this to clear A/C and EGR lines. The part of the Whipple casting pointed to the passenger side under everything here will be cut off:
Various other acquired parts: coolant radiator from Lingenfelter, a Johnson magnetic-coupled 6.9GPH coolant pump, cast elbows, Whipple intake, T-bar clamps and silicone hoses, etc:
I needed a few pieces from Whipple to make this possible - an adapter for the discharge port to make it like the old 1.6L, and a new intake casting compatible with the 2.3L compressor. I am adapting the original intake casting used with the Gen-III kit for use with this. Some bypass valve plumbing will also have to be fabricated. Here's the intake casting:
The throttle body will now be pointed up instead of to the passenger side as before, so I'm going to try to fit a 4" cobra-head elbow in there. I'd like to keep 4" all the way to the MAF (Gen-III) and to the filter for the intake. Space is going to be a little bit tight, might have to run that up front. The stock intake elbow is on the left:
I will end up with 1" clearance to the firewall and 1.25" to the hood. The intercooler will be mounted angled slightly higher in the back to allow room for the wiring harness under it and to match the slope of the hood and counter the drivetrain incline. I will probably need to upgrade the injectors. I've only got 36lbs/hr (~41 @ 4Bar) injectors in here right now. Logs will tell me if that's needed once I get there.
I just welded my first practice piece of aluminum two weeks ago. I am hoping I have enough skill to pull this off. All the boost/vacuum plumbing will be heavy cast aluminum sections welded together to minimize the deafening noise twin screws make. Noise is just one of several reasons that only air-to-water intercooling is practical for Roots and Screws.
I'm also considering swapping the stock radiator out for a Be-Cool unit and Flex-A-Lite's new huge dual 6000CFM fan for 34" cores. Haven't decided on that yet - lot's of cash for that setup.
So, that's it. Hopefully in a few weeks I'll have it together.


 01-31-2007, 07:13 PM
#7
TECH Fanatic
iTrader: (8)

Join Date: Oct 2005
Location: Fresno, Ca
Posts: 1,066
Likes: 0
Received 0 Likes
on
0 Posts
when youre done with it make sure to get some good pictures. ill show them to whipple when im in there. ill show them what they cant seem to be able to do lol
awesome project!
awesome project!
Trending Topics
02-01-2007, 08:48 PM
#8
Thanks guys. I actually talked to Michael over at Whipple to get the parts. He nailed it right on the first try. He's interrested in photos of it too.
I can tell you right now that prerequisites to doing this on an L31 will be:
- Hydroboost to lose the huge vacuum booster
- True multi-port injection with no auxiliary injectors or boost-a-pump nonsense
- Gen-III MAF sensor. The stock L31 one can't measure the required flow
- Electric fans (need the extra room to get a 4" cold air tube to the passenger side
- Tuning
- Revised passenger-side belt tensioner. The one from an 8.1 is what I'll be using. Modifications will be made to the accessory bracket to that if the belt is pulled tight by the accessories overspinning the engine (after shift) the belt will not contact the tensioner housing. An additional Idler pulley next to the stock tensioner in the right place will accomplish the same goal.
02-04-2007, 02:52 AM
#9
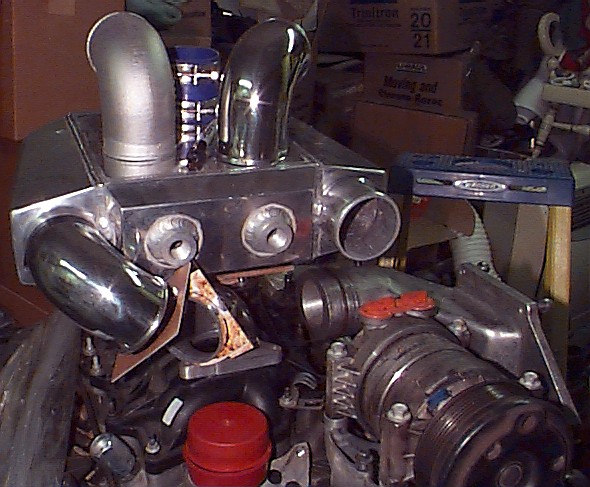
More pictures. I finished welding the compressor bracket the way I want it today down at the shop. I still need to add the bypass valve and I think I would prefer to get a different angled one rather than try to make what I've got work - it's not optimal.
The funky plumbing had to be done this way in order to include a disconnect point. I couldn't just run it straight up and over. With the plumbing this way the A/C return line will clear it running below.
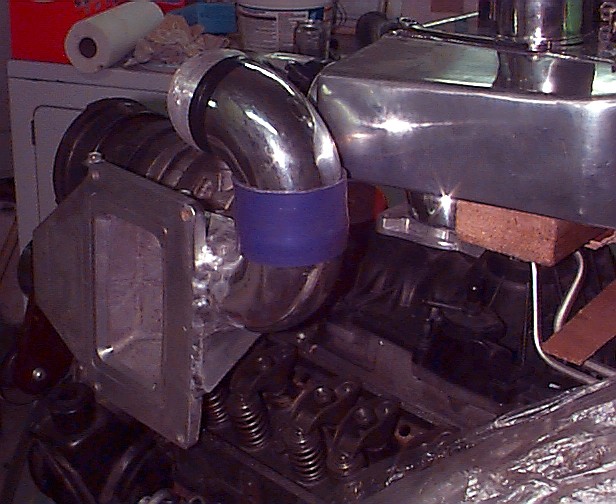
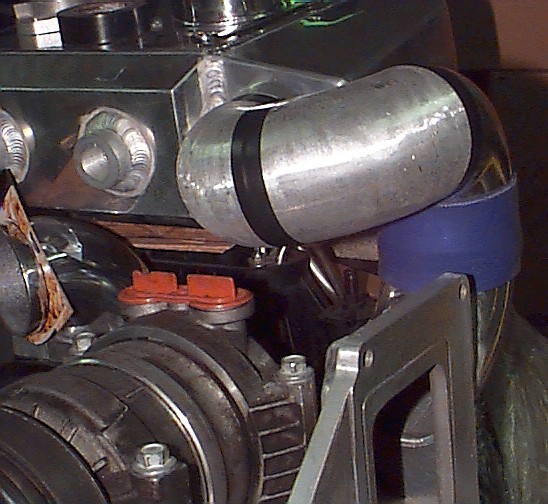
The funky plumbing had to be done this way in order to include a disconnect point. I couldn't just run it straight up and over. With the plumbing this way the A/C return line will clear it running below.