The Procharger, bosch, FMIC, catch can install is complete PICS
 04-23-2010, 07:52 PM
#1
TECH Fanatic
Thread Starter
iTrader: (13)

Join Date: Feb 2006
Location: Kenosha WI
Posts: 1,102
Likes: 0
Received 0 Likes
on
0 Posts
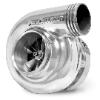
Well this is what i have been up to for the past few weeks. It was a fun project and turned out great. I bought the Procharger D1sc new from procharger and the bracket. I purchased a FMIC off ebay and some piping. I was worried that the pipe would be **** but it was really nice stuff. 2mm thick and the bends were very nice. I made my own intercooler setup and welded the flange on for the Race bypass. Then when i was done with the FMIC setup i was upset that i couldnt see it so i customized the front airdam. Turned out really nice for the few hours that it took to do it.
Then came the lowering kit and Bosch 044 install. So i removed the bed to make things easier. I installed a 2" rear hanger kit that i bought a few months ago and never install because the bed would have to be removed. The bosch fuel pump was prolly one of the most time consuming things to do. Just followed Mangled thread and away i went. Then i decided to mod the fuel pump sock because i seen that some people were having problems with the filter sucking shut. So i took a grinder with a cutoff wheel and put a few notches it so that if the sock was to suck shut. it would always have a place to pull fuel from.
Then came the 60# fuel injectors. This was the easiest part of the install. Even cutting and solder all the connectors on was a cake job.
I then installed two catch can for the pcv system. I installed one on the passengers side valve cover off of the oil fill cap. This catch can/breather is just one line running to the tank. It doesnt have a vacuum line running to it. The next catch can is installed on the drivers side valve cover. This is hooked to the valve cover with a check and then through the catch can and into the intake of the the procharger. So that this one pulls a vacuum on the engine.
The tuning of the truck is by me and help from Justin at blackbear performance. Im running a 2 bar COS3 SD tune. So far the truck has made a total of 12# of boost with a 4" pulley. Track times will follow. Enjoy!
[IMG]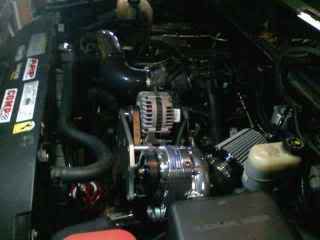 [/IMG]
[IMG]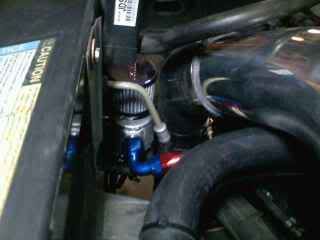 [/IMG]
[IMG]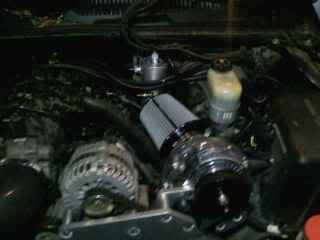 [/IMG]
[IMG] [/IMG]
[IMG]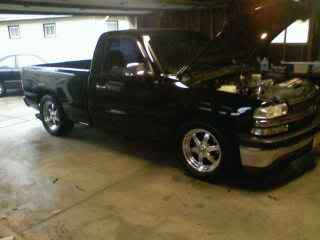 [/IMG]
[IMG] [/IMG]
[IMG]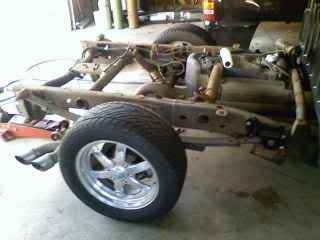 [/IMG]
[IMG][IMG]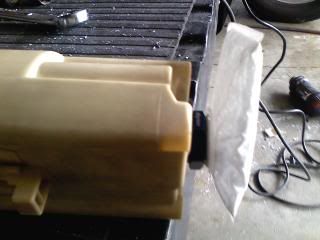 [/IMG][/IMG]
[IMG]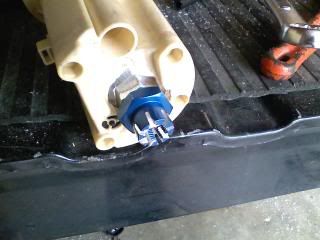 [/IMG]
Then came the lowering kit and Bosch 044 install. So i removed the bed to make things easier. I installed a 2" rear hanger kit that i bought a few months ago and never install because the bed would have to be removed. The bosch fuel pump was prolly one of the most time consuming things to do. Just followed Mangled thread and away i went. Then i decided to mod the fuel pump sock because i seen that some people were having problems with the filter sucking shut. So i took a grinder with a cutoff wheel and put a few notches it so that if the sock was to suck shut. it would always have a place to pull fuel from.
Then came the 60# fuel injectors. This was the easiest part of the install. Even cutting and solder all the connectors on was a cake job.
I then installed two catch can for the pcv system. I installed one on the passengers side valve cover off of the oil fill cap. This catch can/breather is just one line running to the tank. It doesnt have a vacuum line running to it. The next catch can is installed on the drivers side valve cover. This is hooked to the valve cover with a check and then through the catch can and into the intake of the the procharger. So that this one pulls a vacuum on the engine.
The tuning of the truck is by me and help from Justin at blackbear performance. Im running a 2 bar COS3 SD tune. So far the truck has made a total of 12# of boost with a 4" pulley. Track times will follow. Enjoy!
[IMG]
[/IMG] [IMG]
[/IMG][IMG]
[/IMG][IMG]
[/IMG][IMG]
[/IMG][IMG]
[/IMG][IMG]
[/IMG][IMG][IMG]
[/IMG][/IMG][IMG]
[/IMG]
Last edited by gao8302; 04-23-2010 at 08:51 PM.


 04-23-2010, 08:46 PM
#5
TECH Fanatic
Thread Starter
iTrader: (13)
Join Date: Feb 2006
Location: Kenosha WI
Posts: 1,102
Likes: 0
Received 0 Likes
on
0 Posts
Thanks guys!! Ill get some videos of it running. Its a beast man. The 370ci really came alive with some boost. Then engine is 9.5-1 CR. Im going to put some meth on it and some drag tires and see if i can dial it into a 10sec pass. Just working with Justin from black bear on the tune. Its a little rich on the top end so just have to get it all dialed in. Then add a little more spark to it.
04-23-2010, 08:52 PM
#6
TECH Fanatic
Thread Starter
iTrader: (13)
Join Date: Feb 2006
Location: Kenosha WI
Posts: 1,102
Likes: 0
Received 0 Likes
on
0 Posts
Here is a link to the engine build i did for anyone that is interested in knowing what else is done to the truck.
https://www.performancetrucks.net/fo...&highlight=370
https://www.performancetrucks.net/fo...&highlight=370