
2013 Chevy Silverado 5.3 FlexFuel Modification
 01-06-2019 | 09:48 PM
#1

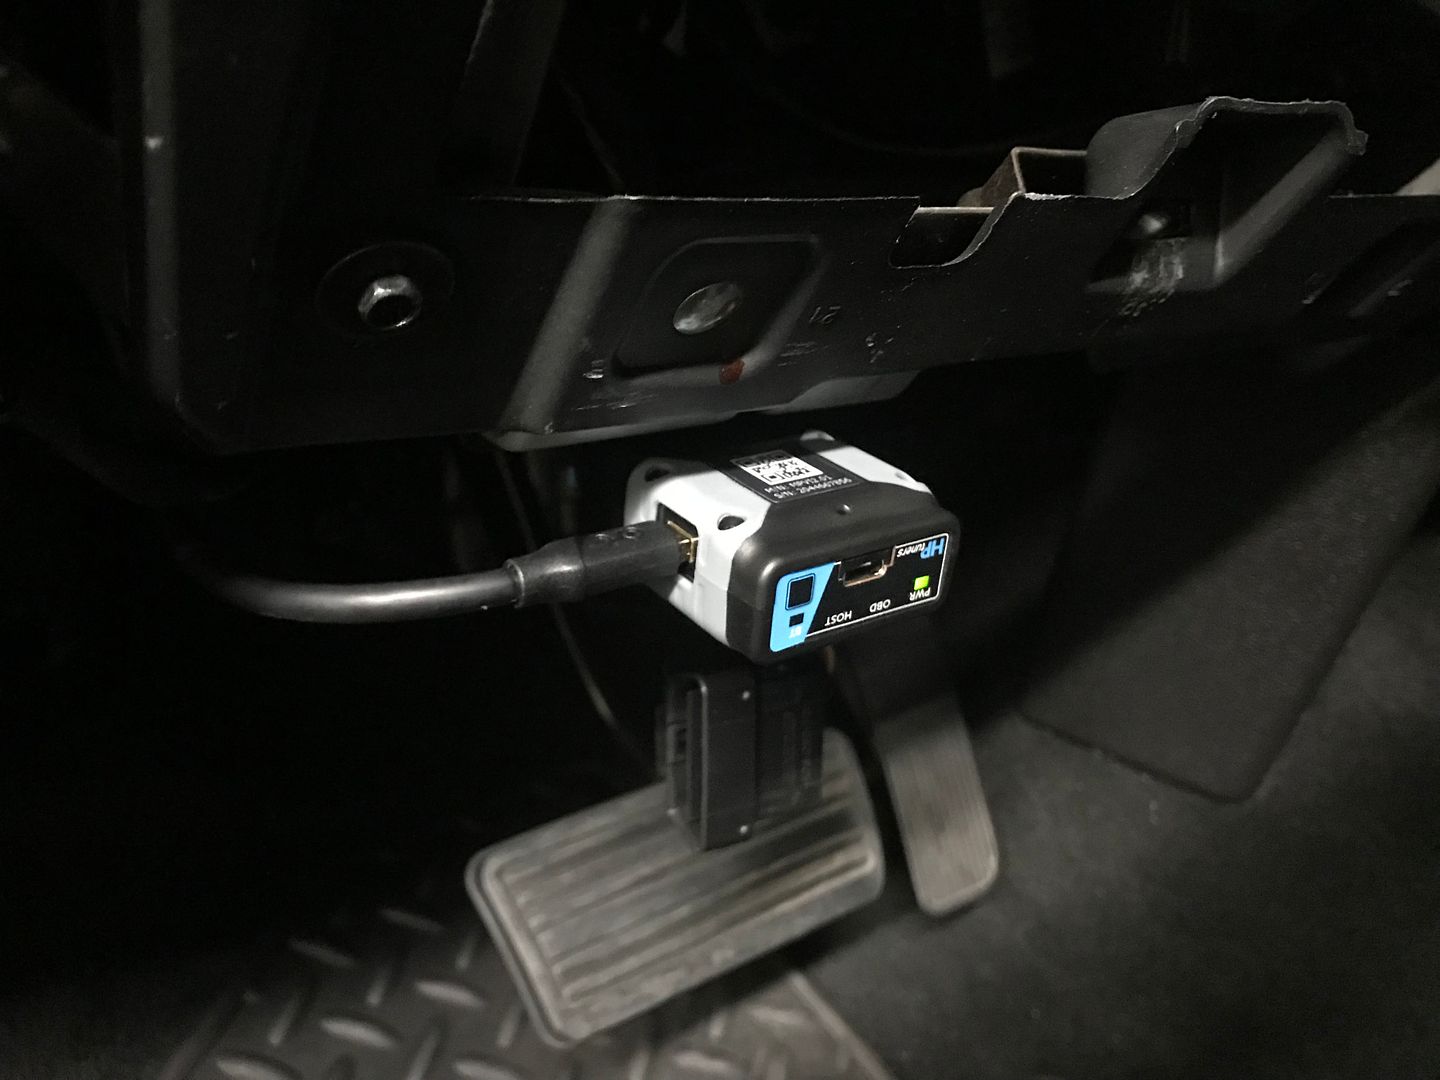
I have a 2013 SIlverado with factory flex fuel. It has 40000 miles on it. I have modded the suspension (coilovers, caltracs, etc) and misc other aspects of the truck. Along the way attempting to prep it, as I intend to supercharge it sometime in the near future... I have maintained and taken care of the truck very well, from 0 miles on. Recently, the truck started running really bad (after a trip to the gas station), and the check engine light came on. LTFT was > -20, etc. I was loosely aware of the Virtual flex fuel sensor and issues with it, thought it may be that... drained the gas tank a bit, re fueled and drove the truck for quite a while, until it finally reset. I added a wideband, purchased HPTuners/MVPI2 Pro and verified that everything was now ok (while tuning the truck a little and learning the software etc.).
I dont want to deal with any further issues with the virtual flex fuel setup (and any future modifications i intend to do), so I decided to add an actual sensor. Installed it today, just need to wire it up now... This isnt a "how-to', just wanting to start posting and sharing some of the things i do with the truck, before i get too much further into it. Maybe someone may find any of this helpful to them. There may be a cheaper way to do this (depending on fittings, prices etc.), but i set a budget of around $150 (as I was going to buy a "kit" that sells for around $300 and I didnt necessarily like the way the hardlines/etc in the kit were)... Im just sharing what I did and how... I used the following:
-GM Part Number 13577429 (Continental Flex Fuel Sensor) $52.92
-GM Part Number 13352241 Flex Fuel Sensor Harness $10.44
-GM Part Number 13575575 Wire, with pin connector for E38 (ECM) $6.67
-Shipping for the above was $9
-Russell Performance 611233 (-6AN Hose end to 3/8 EFI, 180-degree) $19.99 (used 2, so total was $39.98)
-Summit SUM-240603BP (Prem. Braided Nylon Hose, rated for E85) $23.99
-Shipping for above was $9.99
Total came to $152.99

Unnecessary additional item purchased, to make the install much cleaner, etc.. could have purchased the bare connectors separately (to save approx. $18), but out of all the tools i have, i do not have a crimping tool for the little pins.. .will pick one up for future use... however, the following is the last item I purchased to complete the install:
-Ballenger Motorsports CONN-85931 (GM Delphi/Packard- 4way GT150 Power breakout for some GM truck ignition coils, with index keyway) $39.99
-Shipping for above was $9.40
The grand total price in parts for this install (the way I accomplished it) was $202.38

I dont want to deal with any further issues with the virtual flex fuel setup (and any future modifications i intend to do), so I decided to add an actual sensor. Installed it today, just need to wire it up now... This isnt a "how-to', just wanting to start posting and sharing some of the things i do with the truck, before i get too much further into it. Maybe someone may find any of this helpful to them. There may be a cheaper way to do this (depending on fittings, prices etc.), but i set a budget of around $150 (as I was going to buy a "kit" that sells for around $300 and I didnt necessarily like the way the hardlines/etc in the kit were)... Im just sharing what I did and how... I used the following:
-GM Part Number 13577429 (Continental Flex Fuel Sensor) $52.92
-GM Part Number 13352241 Flex Fuel Sensor Harness $10.44
-GM Part Number 13575575 Wire, with pin connector for E38 (ECM) $6.67
-Shipping for the above was $9
-Russell Performance 611233 (-6AN Hose end to 3/8 EFI, 180-degree) $19.99 (used 2, so total was $39.98)
-Summit SUM-240603BP (Prem. Braided Nylon Hose, rated for E85) $23.99
-Shipping for above was $9.99
Total came to $152.99
Unnecessary additional item purchased, to make the install much cleaner, etc.. could have purchased the bare connectors separately (to save approx. $18), but out of all the tools i have, i do not have a crimping tool for the little pins.. .will pick one up for future use... however, the following is the last item I purchased to complete the install:
-Ballenger Motorsports CONN-85931 (GM Delphi/Packard- 4way GT150 Power breakout for some GM truck ignition coils, with index keyway) $39.99
-Shipping for above was $9.40
The grand total price in parts for this install (the way I accomplished it) was $202.38
Last edited by LSCustoms; 01-10-2019 at 11:19 PM.
The following users liked this post:
Smile_E_Face (10-08-2020)
01-06-2019 | 09:48 PM
#2
Mocked it up and determined the length of hose needed and the orientation of the fitting's nut (that goes on the hose before tightening the main fitting to the hose, so that it would place the sensor in a decent position, or at least where i wanted it). 3" of hose was used. It was very easy to put it together. Taped the hose, then cut it, used a lighter to lightly singe the ends before removing the tape, etc. Made sure the nut was oriented the way i wanted and put the fittings and hose together. When I was done, it looked like this...
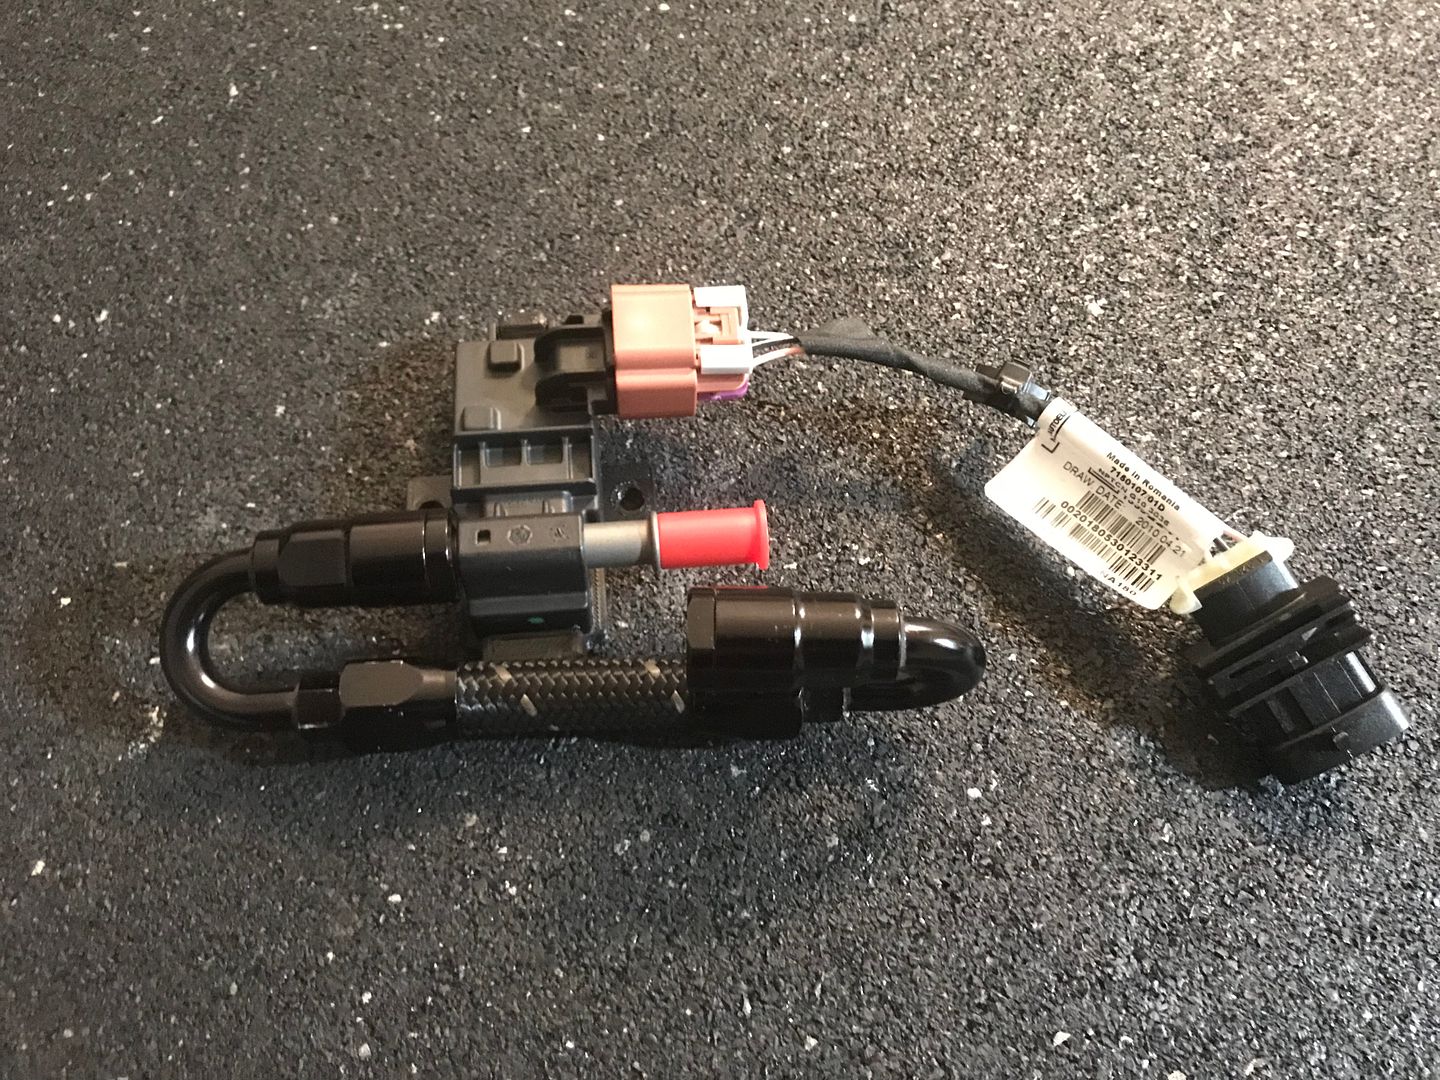
could have oriented the fittings like this also and it would have fit nicely as well, but i wanted the sensor to be tucked away as tight as i could get it...
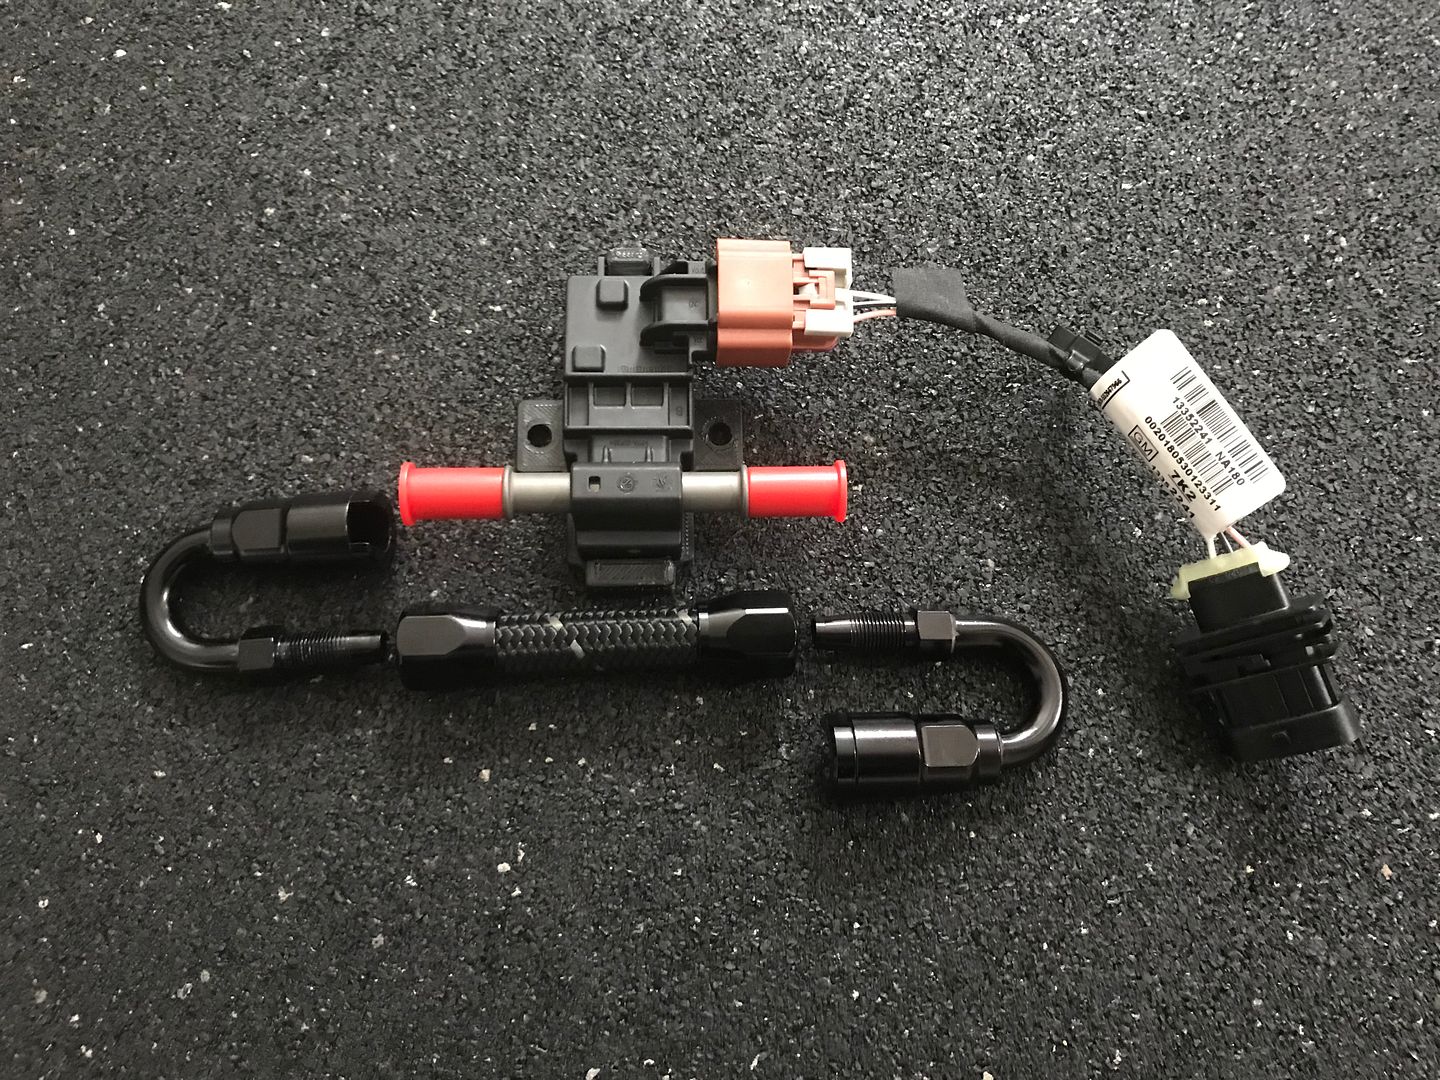
could have oriented the fittings like this also and it would have fit nicely as well, but i wanted the sensor to be tucked away as tight as i could get it...
The following users liked this post:
Smile_E_Face (10-08-2020)
01-06-2019 | 09:49 PM
#3
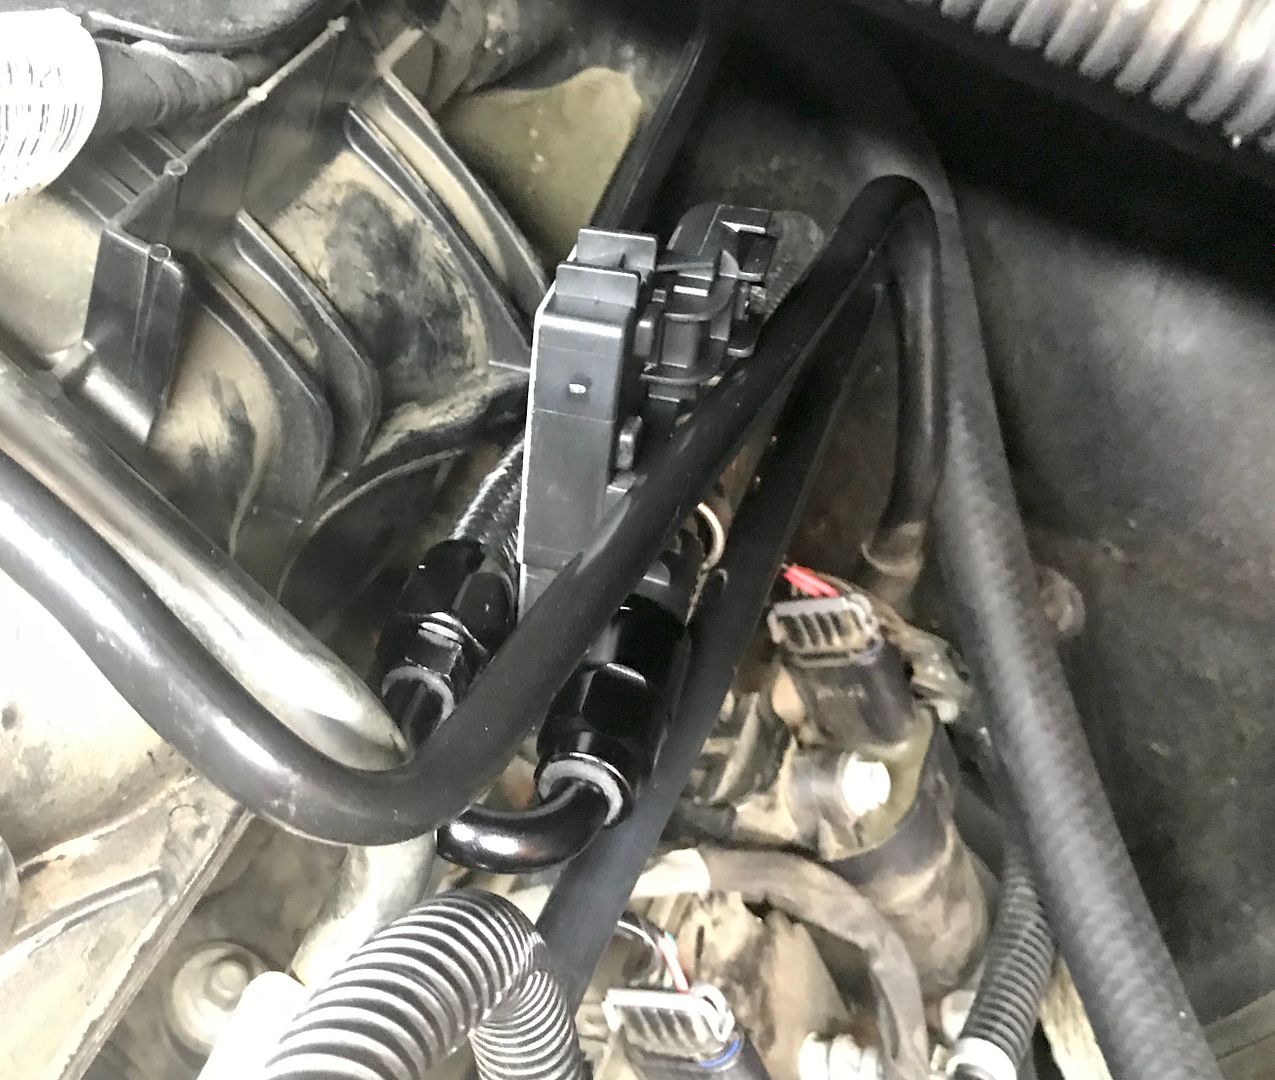
It fit right into place and was very secure, as installed, so I took the mount off of it (I had 3d printed for it, in case I needed to make a bracket to secure it to the intake)... I still need to wire it up etc., but I started the truck back up and made sure nothing leaked etc. I am happy with the ease of install, location, cost of upgrade, etc. so far. Excuse all the dust/dirt, will clean it up after im done (the rest of the truck stays pretty well cleaned up etc).

The following users liked this post:
Smile_E_Face (10-08-2020)
01-06-2019 | 09:49 PM
#4
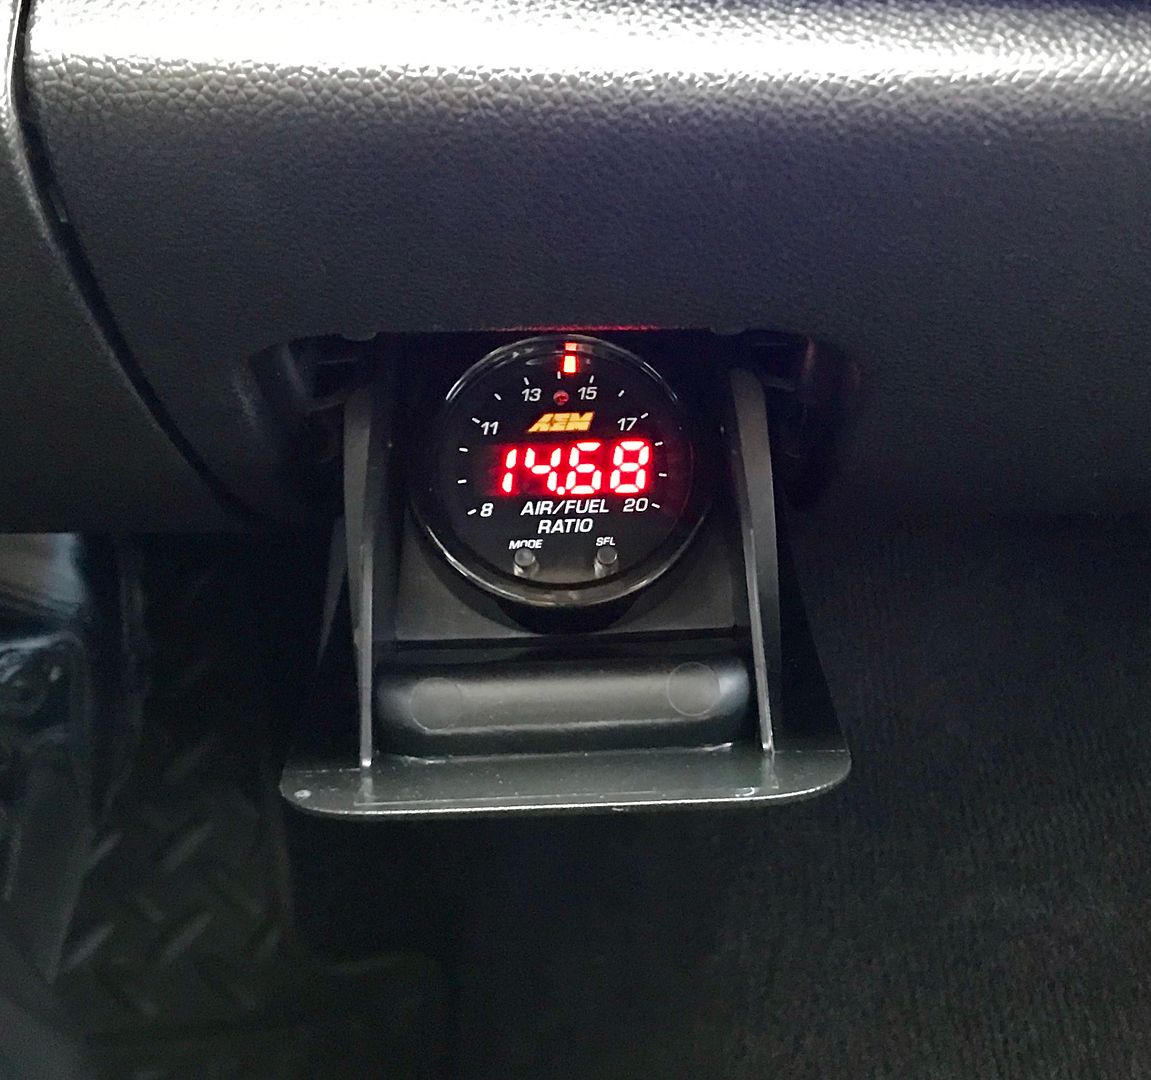
Installed the wideband gauge (AEM 30-0300) in the ashtray location, using a mount i 3dprinted for it and works really nice with the MVPI2Pro.
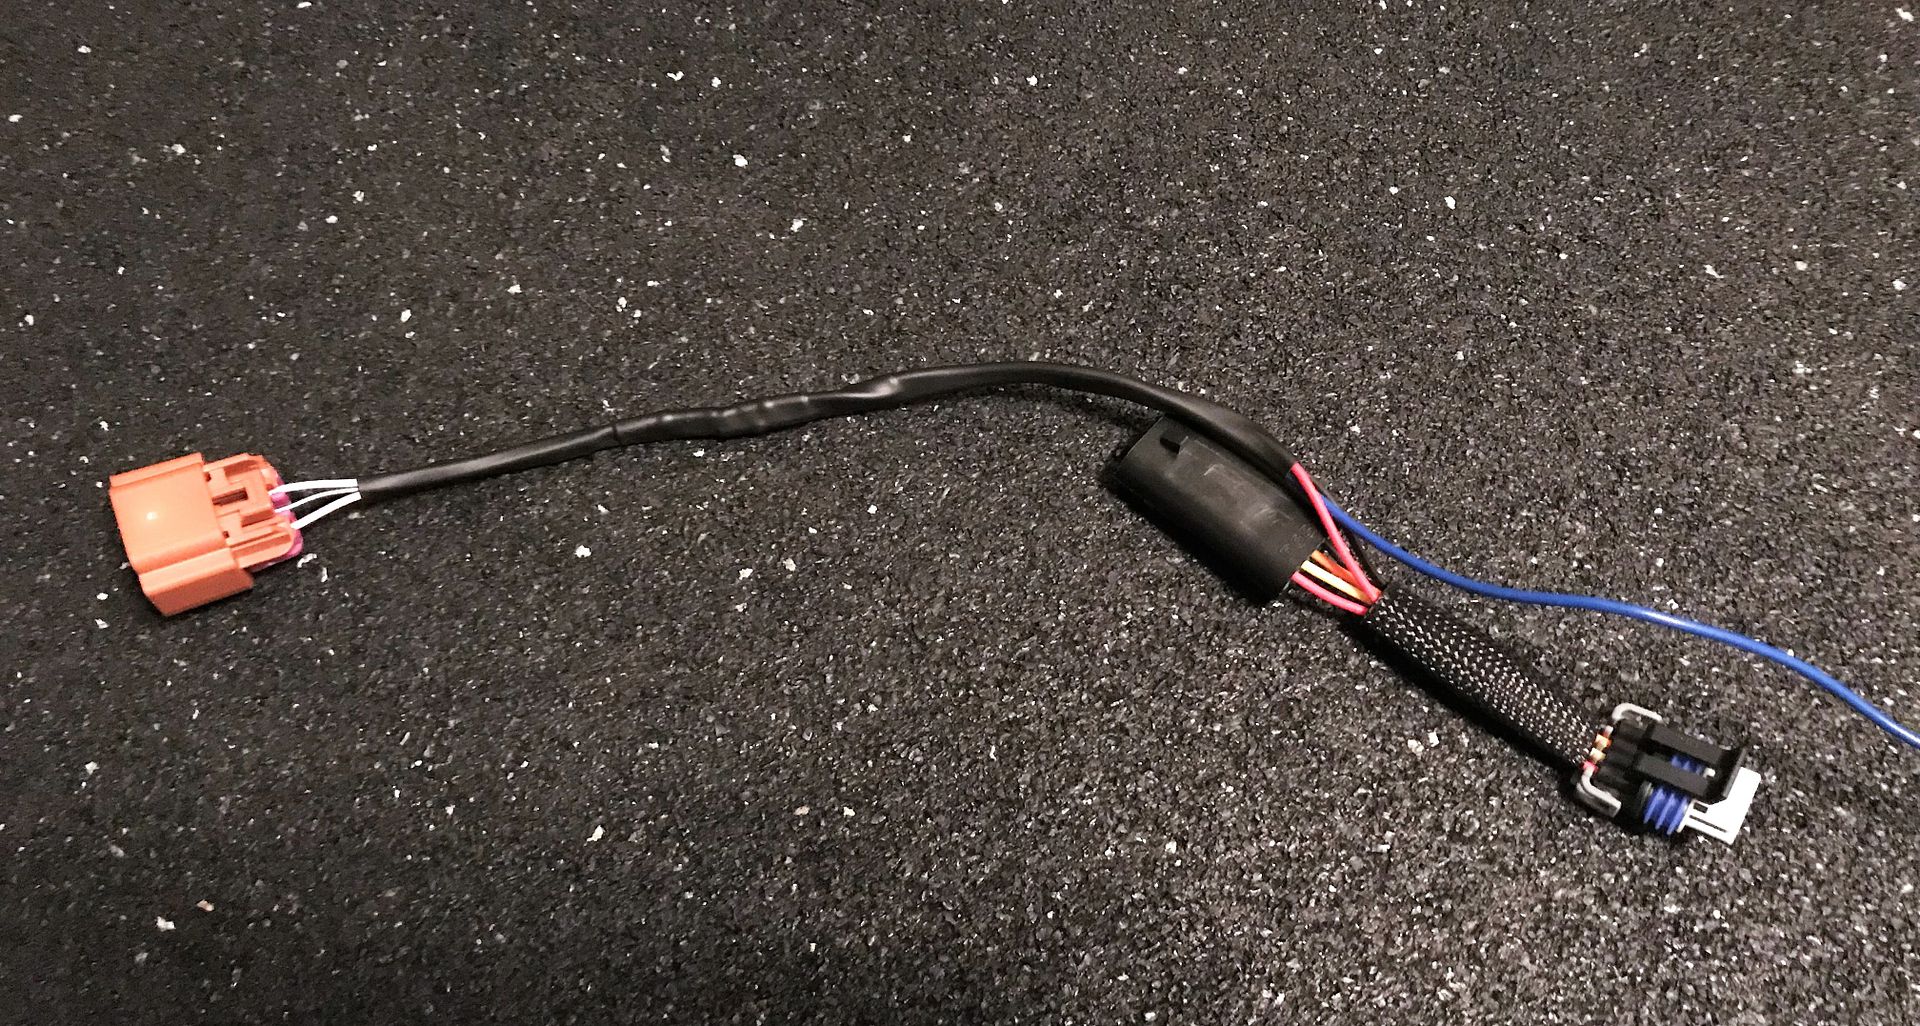
i found and was going to order a couple of connectors to make a breakout for one of the coils (for power and ground), but the same company had a pre-made breakout available for people adding an e85 sensor, it was nicely priced and perfect for what im doing (as opposed to splicing into the lines, without connectors, or running the power and ground further away)... i ordered that today... I will add the wire to the ecu and wrap this up, when the connector shows up...
i found and was going to order a couple of connectors to make a breakout for one of the coils (for power and ground), but the same company had a pre-made breakout available for people adding an e85 sensor, it was nicely priced and perfect for what im doing (as opposed to splicing into the lines, without connectors, or running the power and ground further away)... i ordered that today... I will add the wire to the ecu and wrap this up, when the connector shows up...
Last edited by LSCustoms; 01-07-2019 at 11:51 PM.
The following users liked this post:
Smile_E_Face (10-08-2020)
01-10-2019 | 11:16 PM
#5
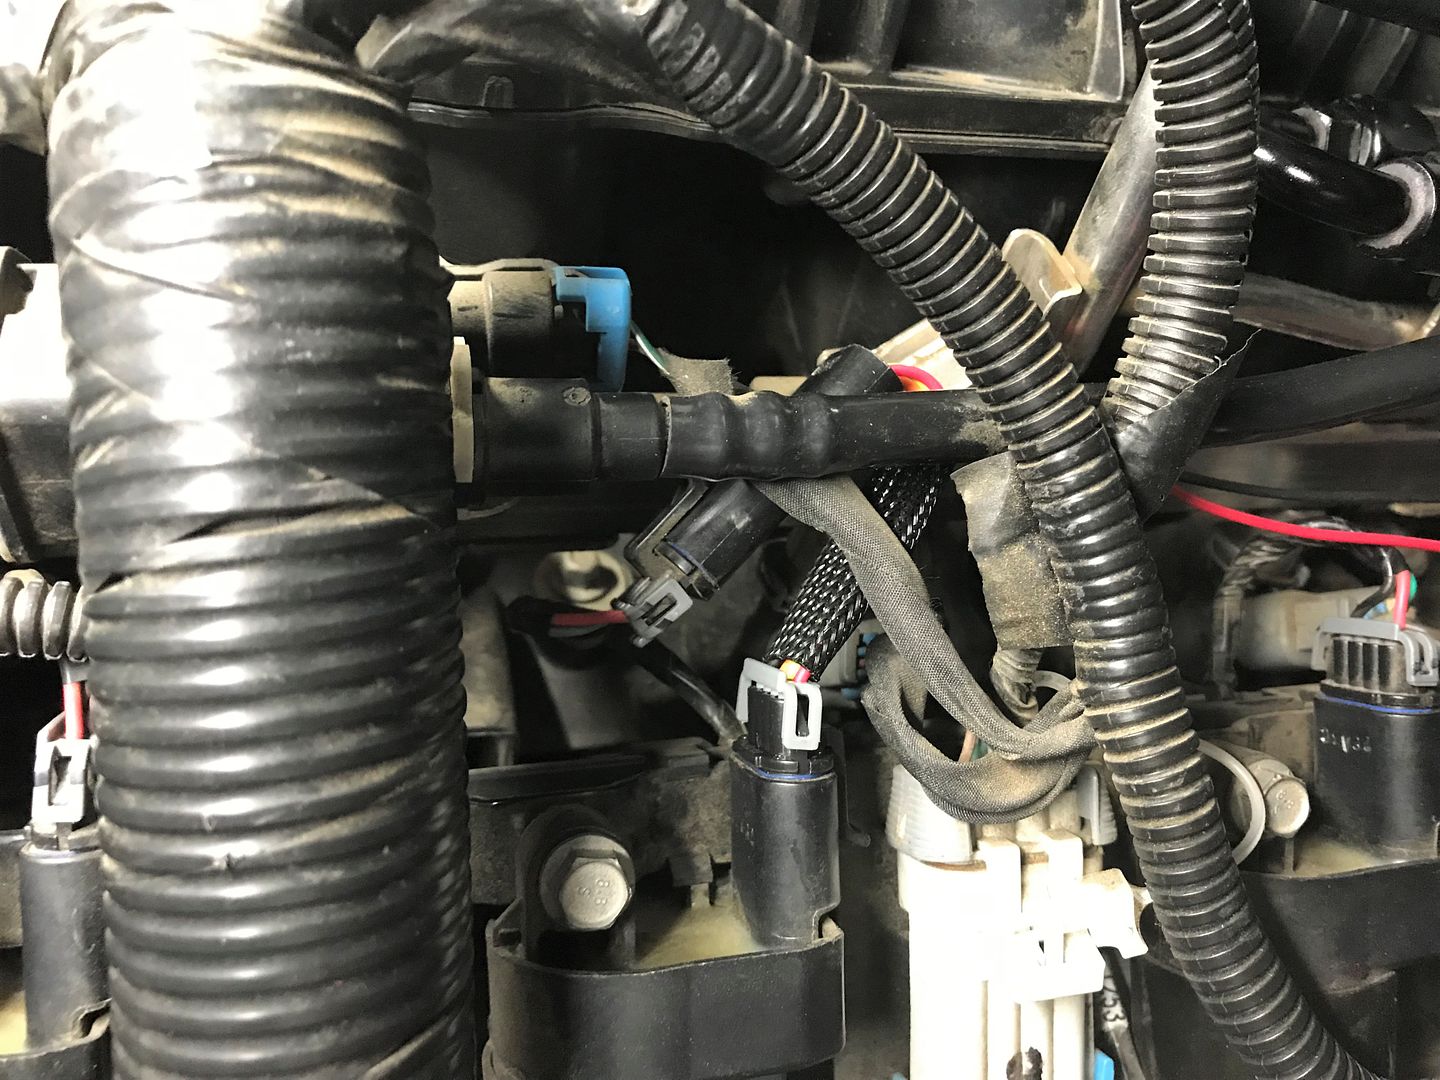
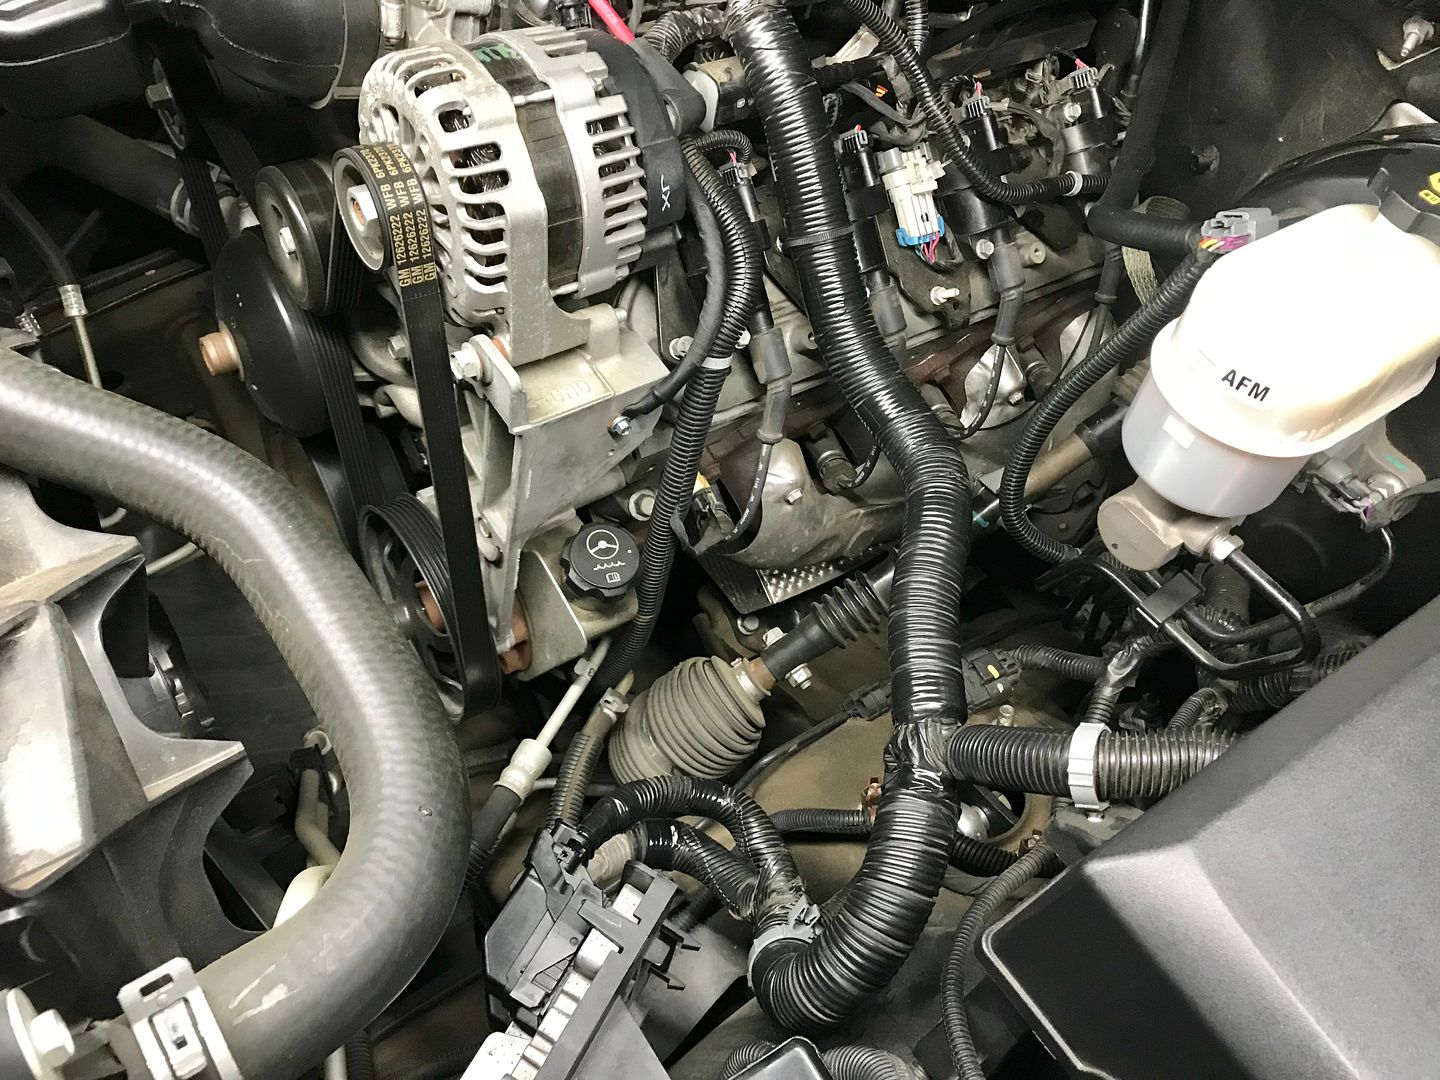
got the last connector today, didnt have much time, but spent a couple minutes on it. I put the power breakout harness on a coil next to the OEM main coil harness, so that it would blend in more, routed and cut the power and ground for the sensor to length...
after soldering it together, I took the flex fuel sensor connector apart, so that I could slip heat shrink over the wires and clean it all up...
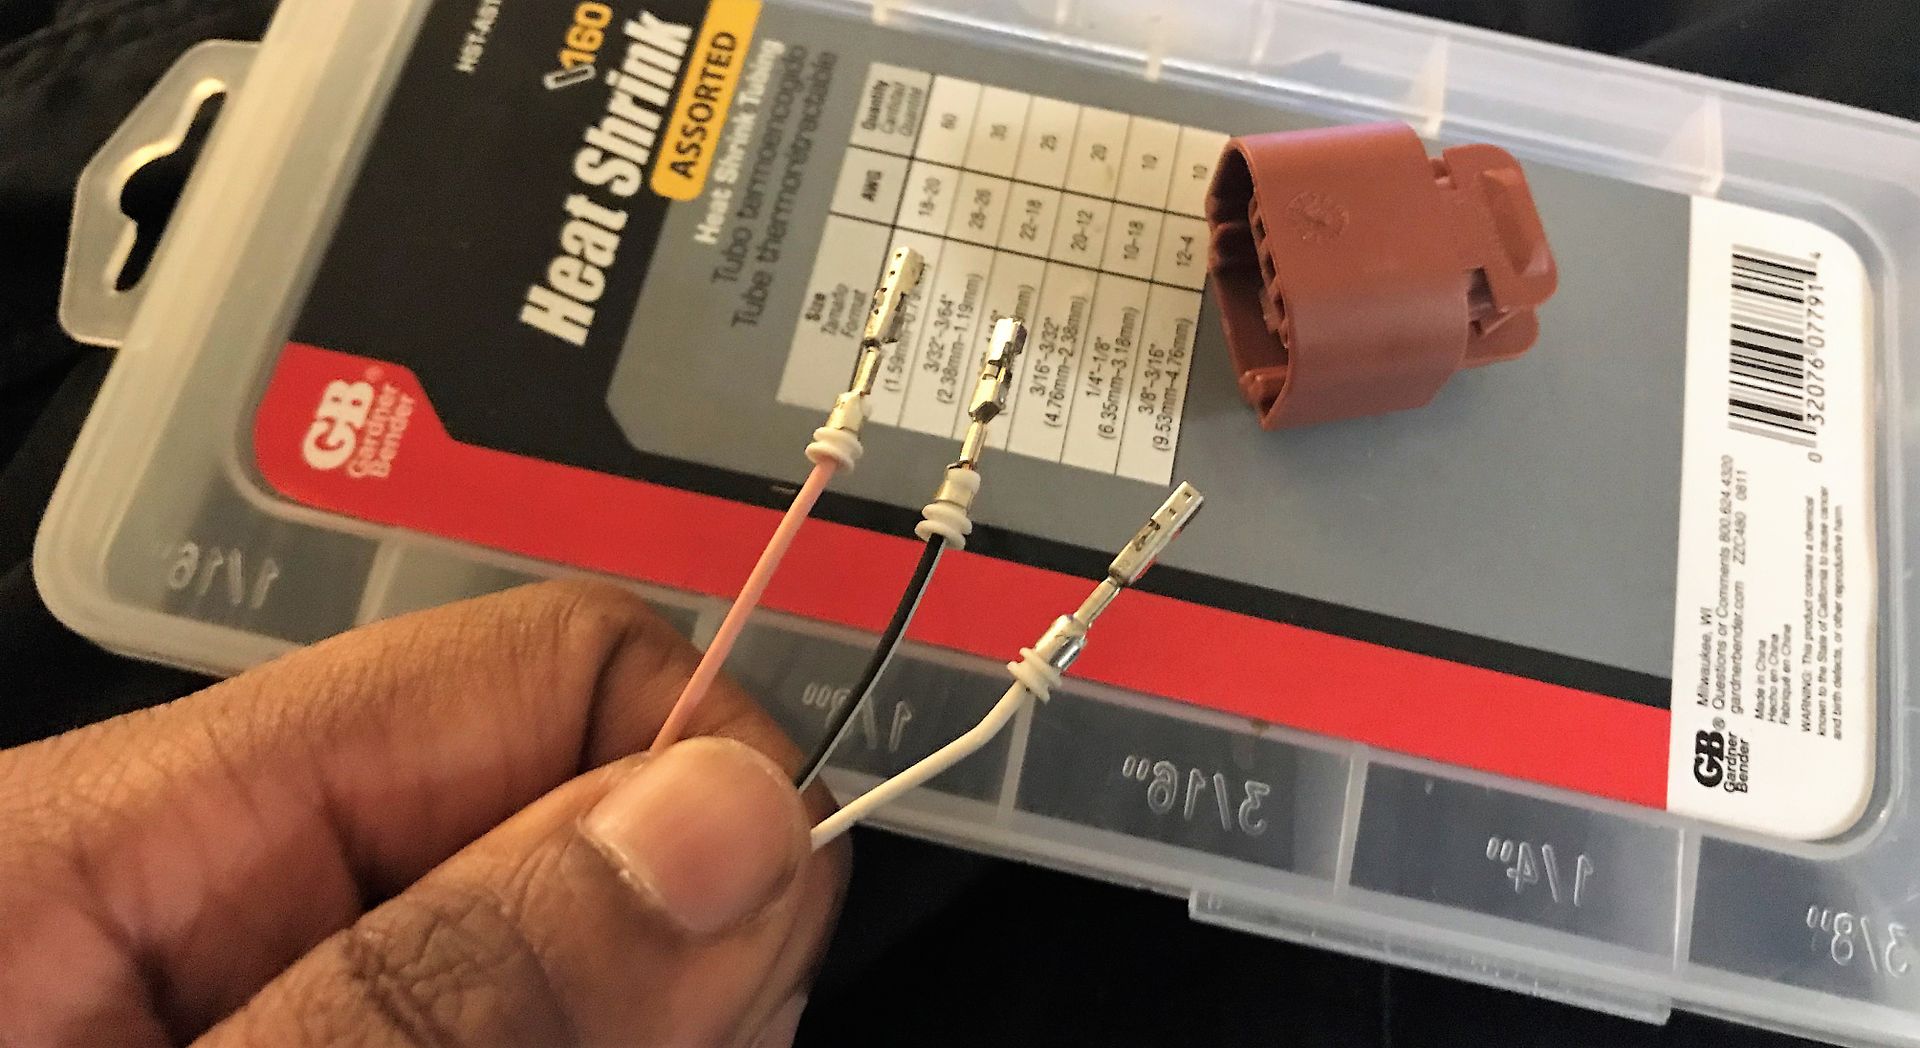
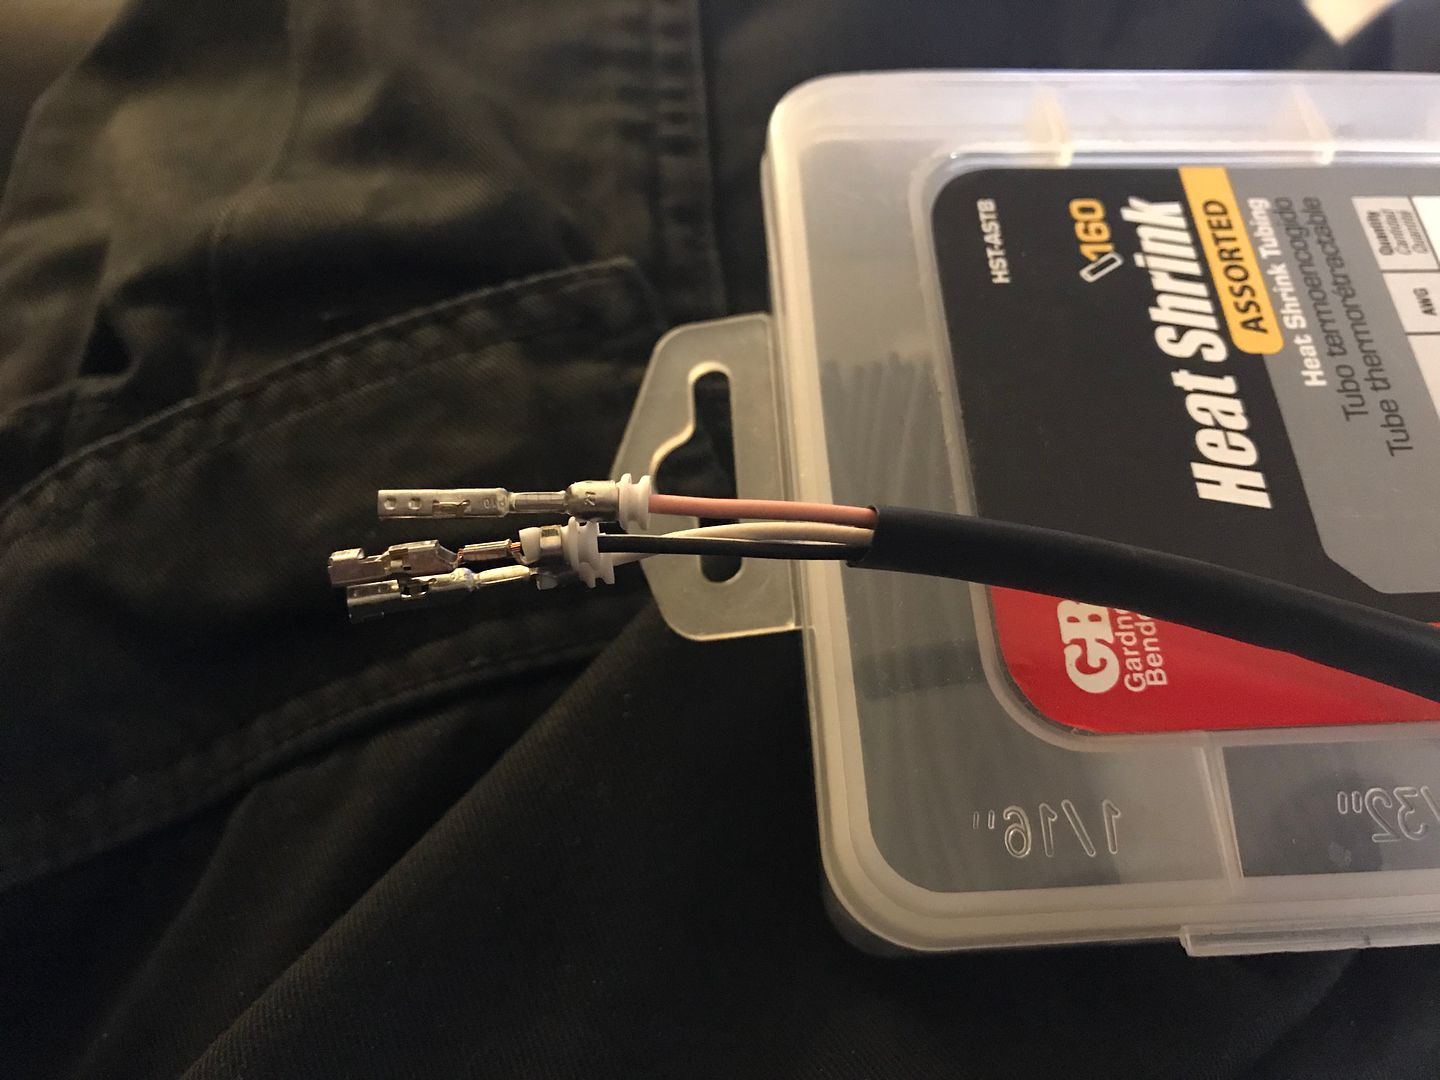
after soldering it together, I took the flex fuel sensor connector apart, so that I could slip heat shrink over the wires and clean it all up...
Last edited by LSCustoms; 01-10-2019 at 11:22 PM.
The following users liked this post:
Smile_E_Face (10-08-2020)
The following users liked this post:
Smile_E_Face (10-08-2020)
01-12-2019 | 12:15 AM
#7
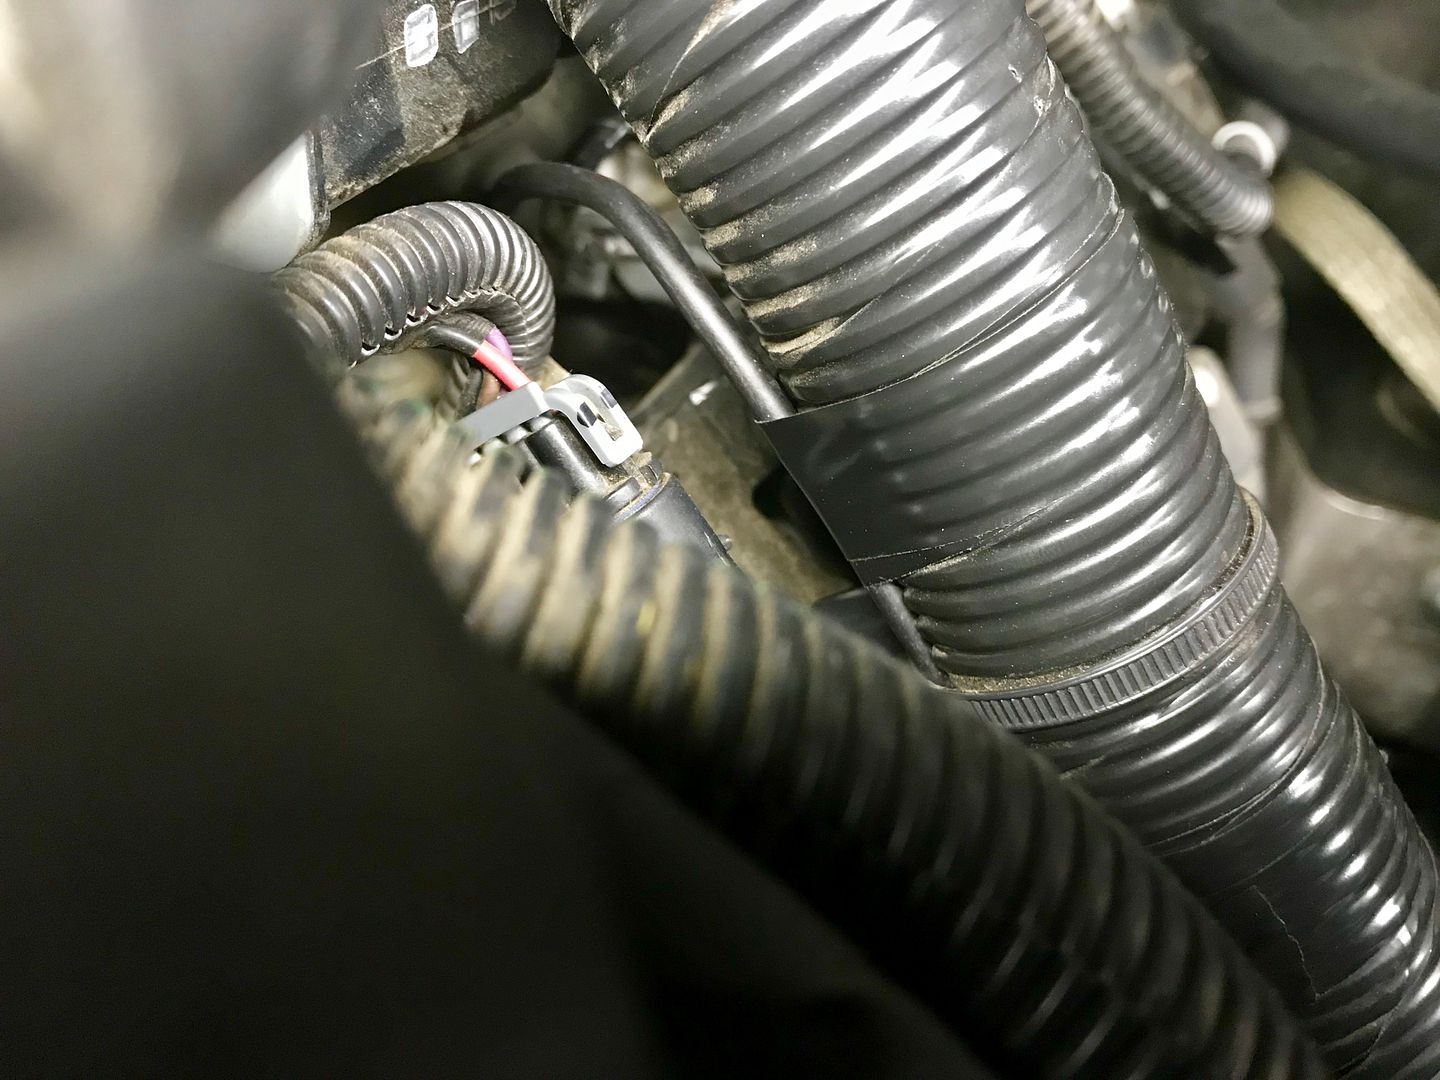
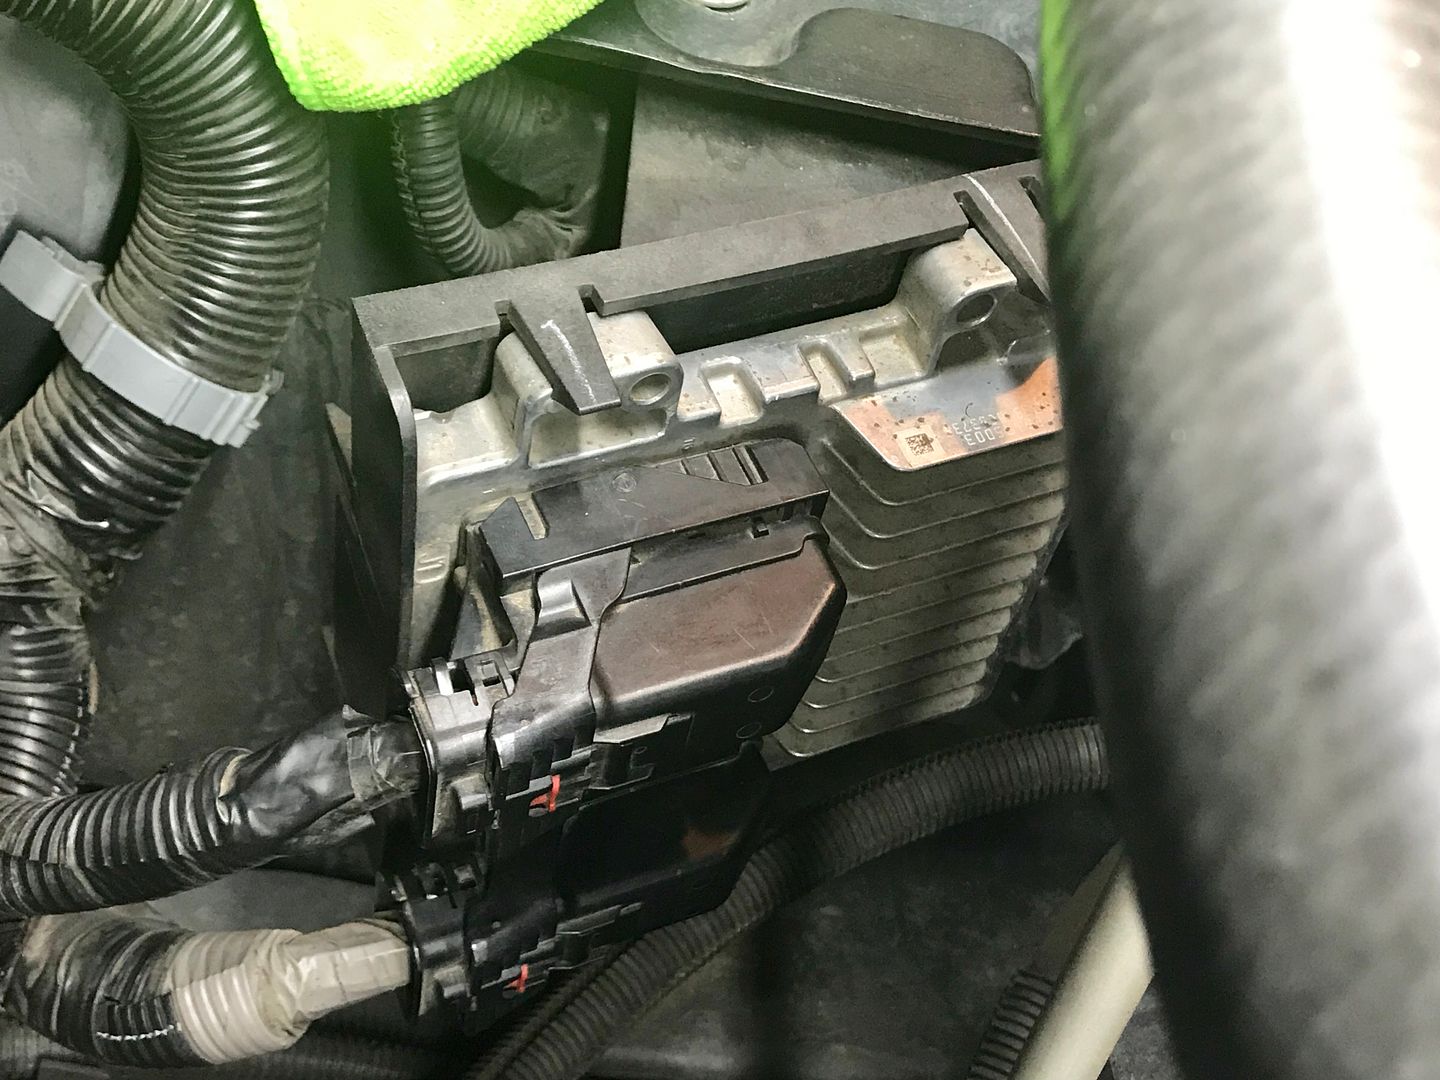
soldered the signal wire and ran it through heat shrink prior to routing it to the J1 plug on the ECM... J1 was stamped on the casing and happened to be the top plug, of the two... based on research, I trusted that the pin location I needed, was #40. routed the wire under the main harness going to the ECM from the engine and taped it similar to the way the loom is taped by the factory... ...

The following users liked this post:
Smile_E_Face (10-08-2020)
Trending Topics

The following users liked this post:
Smile_E_Face (10-08-2020)
01-12-2019 | 12:25 AM
#9
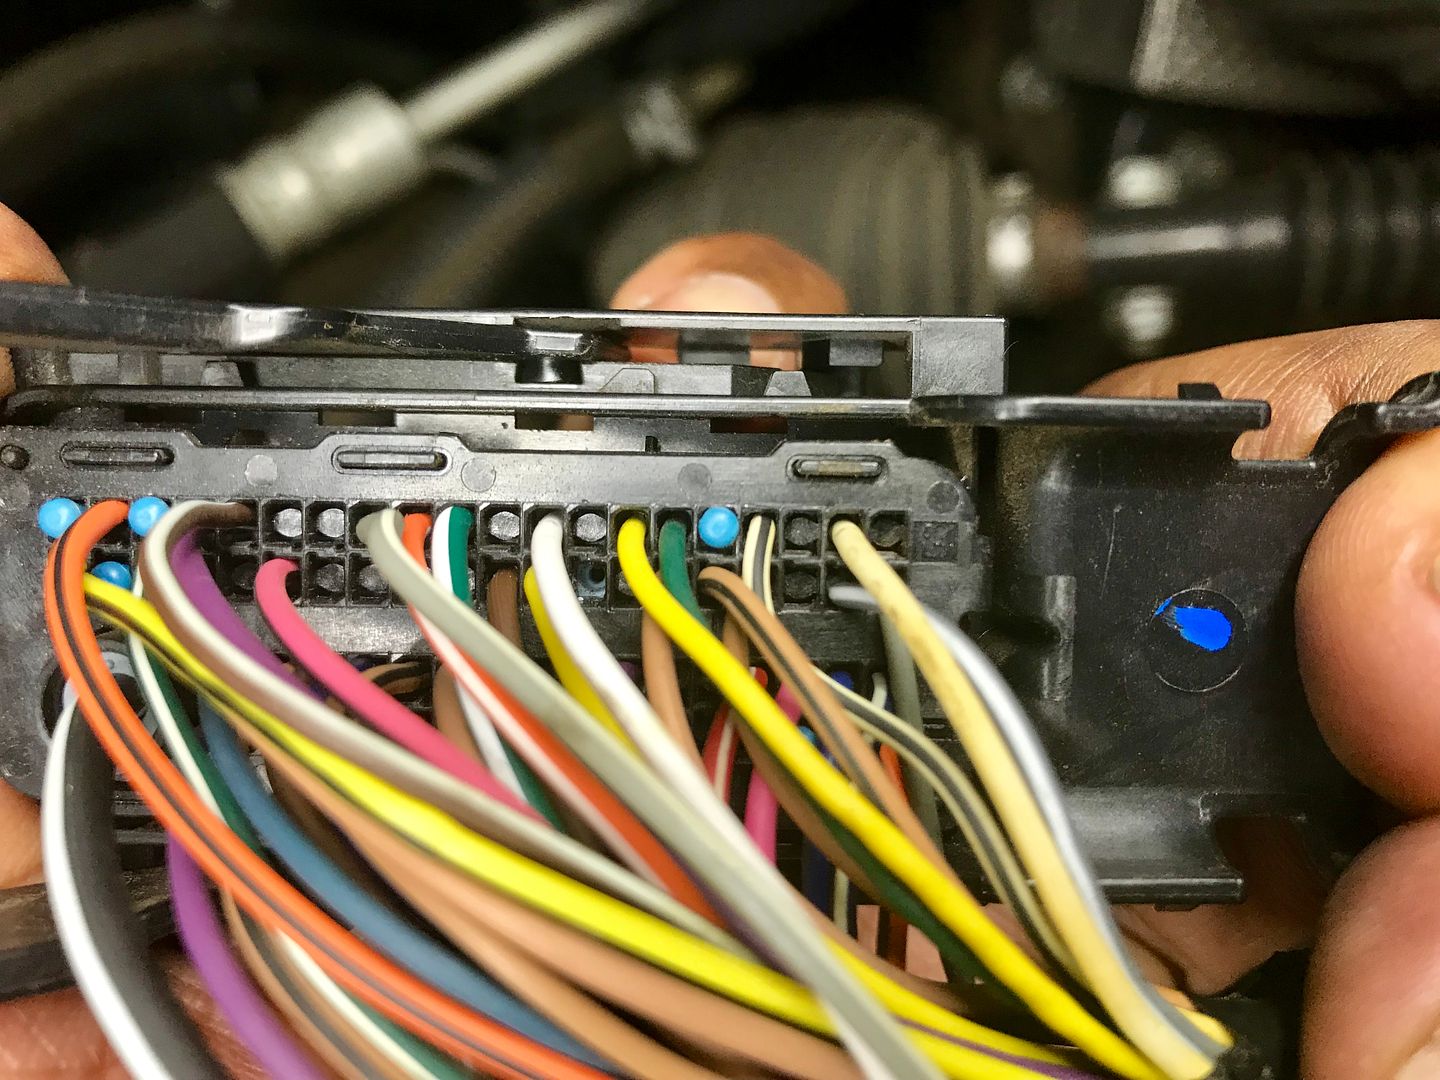
when looking at the back of the plug, with the pin marked #53 in the top right corner, of the plug (in this pic)... pin #40 was the 8th pin from the right, in the second row from the top... if you count 8 pins from the top row (starting from pin #53) and then down one, you can see the location in the pic... in this case there was a black plug in the location... i pushed it out and was able to push the new wire from the sensor into the correct position...
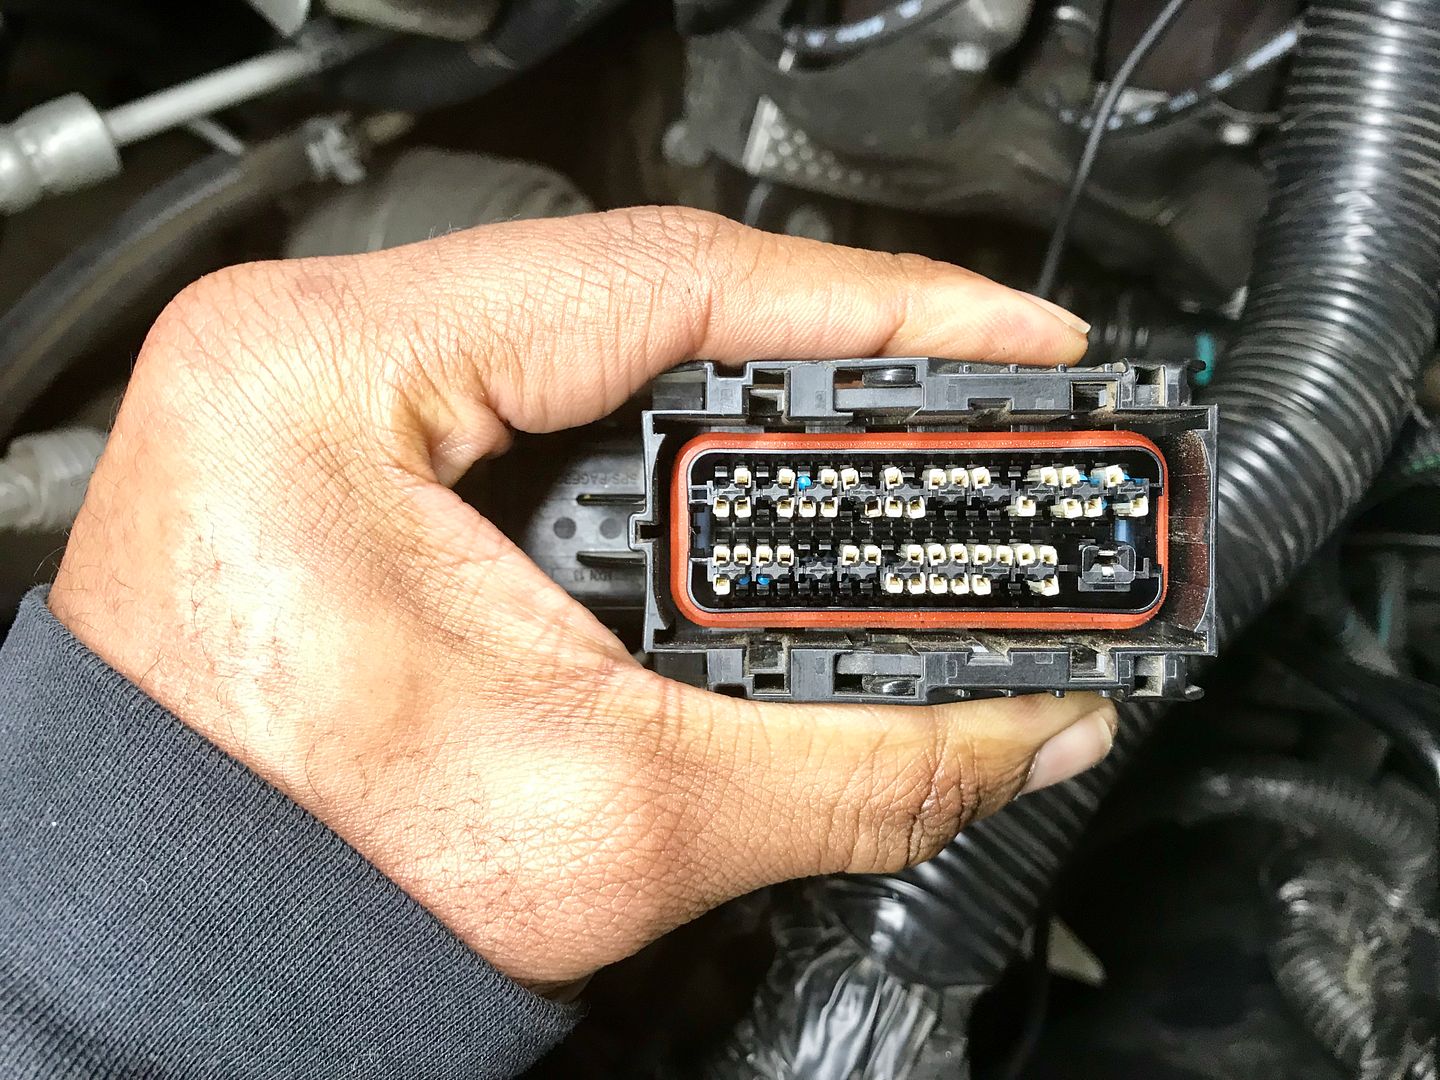
i put the plug back together... and began the tuning side of the install

i put the plug back together... and began the tuning side of the install
The following users liked this post:
Smile_E_Face (10-08-2020)
01-12-2019 | 12:33 AM
#10
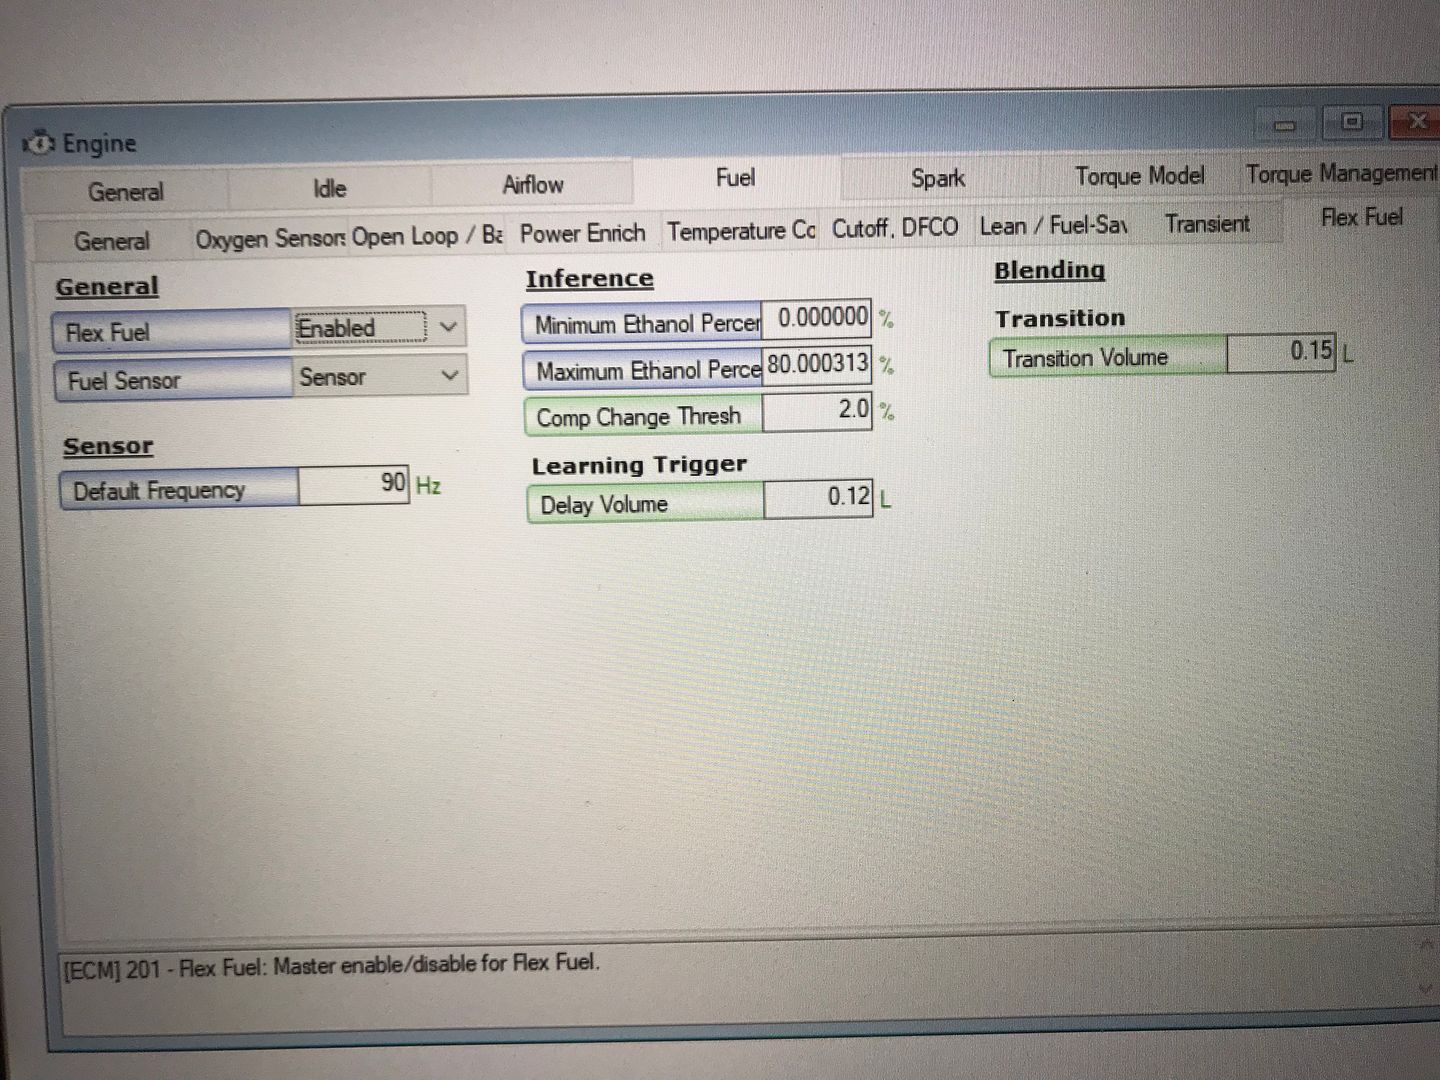
Using HPTuners, I made the following changes.. for the delay volume and transition volume (not saying this is correct, as im not sure), I estimated the amount of fuel between the engine and the sensor (came up with approx. .12-.17 L)... I used this value for the delay volume and added a little more for transition.. once i fill up with e85, i will try to log some information and adjust these numbers if needed, not sure if these numbers are good enough, they are much less than the numbers used for sensors that are mounted near the tank, so hopefully they are good enough. I also added in the appropriate DTC codes.(P0178 and P0179 to enable SES and MIL on second error).
Last edited by LSCustoms; 01-12-2019 at 12:46 AM.
The following users liked this post:
Smile_E_Face (10-08-2020)