
4l80E Rebuild Thread
 07-07-2007, 10:45 PM
#11
TECH Regular
Thread Starter

Join Date: Aug 2006
Location: Allen, TX
Posts: 458
Likes: 0
Received 0 Likes
on
0 Posts
Well here's the case all cleaned up. Looks much better than in the original post.

I've been replacing bushings in the gear train durring the weeek when I can find time to work on it what a PITA. Got alot of work done today I'll post more on the progress tomorrow.
I've been replacing bushings in the gear train durring the weeek when I can find time to work on it what a PITA. Got alot of work done today I'll post more on the progress tomorrow.

 07-09-2007, 04:50 PM
#13
TECH Regular
Thread Starter
Join Date: Aug 2006
Location: Allen, TX
Posts: 458
Likes: 0
Received 0 Likes
on
0 Posts
While doing some searching for tips and tricks last night I found this th400/4l80E write-up on another site. It has alot of good tips.
http://www.nastyz28.com/forum/showthread.php?t=58578
I'm working on finishing the install of the cluthes and drums so I should have some updates later tonight once I upload all the pics. It's almost as much work to update the thread as it is to rebuild the trans.
http://www.nastyz28.com/forum/showthread.php?t=58578
I'm working on finishing the install of the cluthes and drums so I should have some updates later tonight once I upload all the pics. It's almost as much work to update the thread as it is to rebuild the trans.

 07-11-2007, 08:43 AM
#15
TECH Regular
Thread Starter
Join Date: Aug 2006
Location: Allen, TX
Posts: 458
Likes: 0
Received 0 Likes
on
0 Posts
I'm almost finished w/ mine. I need to update the thread (maybe today). I did have to get the 4th clutch seal protector. it is the only other special tool I've needed so far. I tore one of the 4th clutch lip seals and had to buy a whole new overhaul kit. A lip seal installer is a good idea too. I am using a feeler gauge as a lip seal installer, but I will be buying a lip seal installer before the next one I build.
07-12-2007, 12:45 AM
#16
TECH Regular
Thread Starter
Join Date: Aug 2006
Location: Allen, TX
Posts: 458
Likes: 0
Received 0 Likes
on
0 Posts
I am replacing all the bushings as a part of my rebuild. Most seem to be in pretty good shape but a new bushing kit is about $30.That has been one of the bigger pita, just a little time consuming. I'm using a bearing/ race installer. They are available from most chain auto stores as loaner tools. When removing bushings from blind holes if you can get a small chisel or screwdriver behind the outer radius you can split it at the seam ( if you can find the seam).
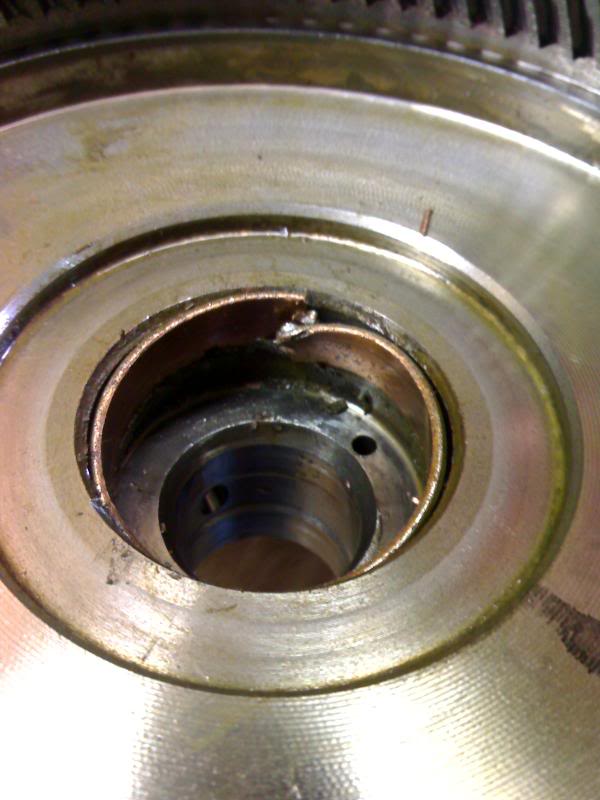
When I removed one bushing out of the rear sungear shaft I was able to slip this 11/16 impact socket inside and knock the other one out by shaking it up and down.


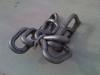
Here's the low roller clutch.

When I removed one bushing out of the rear sungear shaft I was able to slip this 11/16 impact socket inside and knock the other one out by shaking it up and down.
Here's the low roller clutch.
07-12-2007, 12:55 AM
#17
TECH Regular
Thread Starter
Join Date: Aug 2006
Location: Allen, TX
Posts: 458
Likes: 0
Received 0 Likes
on
0 Posts
Replacing the lip seals on the intermediate clutch piston.


Once they are installed lube them up with trans assembly lube and care fully seat the piston back in the center support. This is when a lip seal installer or feeler gauge is needed. carefully push on the edges of the lipseals as you turn the piston to seat it.
These are the two different types of teflon seals for the center support that came with the overhaul kit. I chose to use the split rings for ease of installation. The solid seals need to be stretched and then resized once installed. Be sure to lube them before you install the center support.
07-12-2007, 01:11 AM
#18
TECH Regular
Thread Starter
Join Date: Aug 2006
Location: Allen, TX
Posts: 458
Likes: 0
Received 0 Likes
on
0 Posts
Time to rebuild the direct drum!

here are the frictions and rear band soaking in ATF while I rebuild the direct drum.

Just remove the snap ring, then the bacing plate 5 frictions, 5 steel plates and one cushion plate

removing the return spring calls for a special spring compressor, but I was able to make due with my handy quick clamps.

Next you can remove the bonded direct clutch piston. Older models use a piston w/ replacable lip seals.

the intermediate srag is located on the underside of the direct drum. Here it is w/ the snap ring and retainer removed.

here are the frictions and rear band soaking in ATF while I rebuild the direct drum.
Just remove the snap ring, then the bacing plate 5 frictions, 5 steel plates and one cushion plate
removing the return spring calls for a special spring compressor, but I was able to make due with my handy quick clamps.
Next you can remove the bonded direct clutch piston. Older models use a piston w/ replacable lip seals.
the intermediate srag is located on the underside of the direct drum. Here it is w/ the snap ring and retainer removed.
07-12-2007, 01:25 AM
#19
TECH Regular
Thread Starter
Join Date: Aug 2006
Location: Allen, TX
Posts: 458
Likes: 0
Received 0 Likes
on
0 Posts
next install the lip seal in the center of the drum.

lube up the piston and inner lip seal. I lube the sealing surface as well. Twist the piston into place. You may need a little help from your lipseal installer.

The transgo HD2 shift kit also comes w/ heavier return springs for the direct clutch piston.new spring is on the right.

You simply pry off the bottom spring retainer. The pull off the springs one by one with pliers.

How much stiffer are the new springs? Well it took 2 clamps to compress the old ones and here I am installing the new ones.

lube up the piston and inner lip seal. I lube the sealing surface as well. Twist the piston into place. You may need a little help from your lipseal installer.
The transgo HD2 shift kit also comes w/ heavier return springs for the direct clutch piston.new spring is on the right.
You simply pry off the bottom spring retainer. The pull off the springs one by one with pliers.
How much stiffer are the new springs? Well it took 2 clamps to compress the old ones and here I am installing the new ones.
07-12-2007, 01:34 AM
#20
TECH Regular
Thread Starter
Join Date: Aug 2006
Location: Allen, TX
Posts: 458
Likes: 0
Received 0 Likes
on
0 Posts
Once the return spring assembly is installed you can install the clutch packs.The Alto Red Eagle power pack is a nice upgrade. It takes the Direct drum from 5 frictions and steels to 7.
Next you can put it on the center support and air check it.(lube the teflon seals)

Then you can check piston travel with a dial indicator (.121"-.236"). I just stuck it to the side with a magnetic base.

Next you can put it on the center support and air check it.(lube the teflon seals)
Then you can check piston travel with a dial indicator (.121"-.236"). I just stuck it to the side with a magnetic base.