
4l80E Rebuild Thread


 07-12-2007, 06:14 PM
#22
TECH Regular
Thread Starter

Join Date: Aug 2006
Location: Allen, TX
Posts: 458
Likes: 0
Received 0 Likes
on
0 Posts
overhauling the forward drum is not much different.

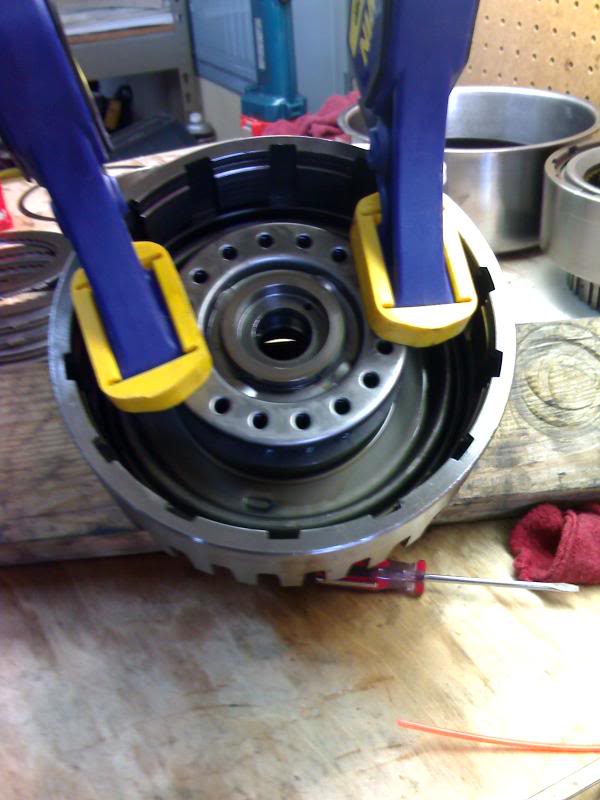
This time I had to use a trusty 2x4 to assist the qucik clamps in compressing the return springs.
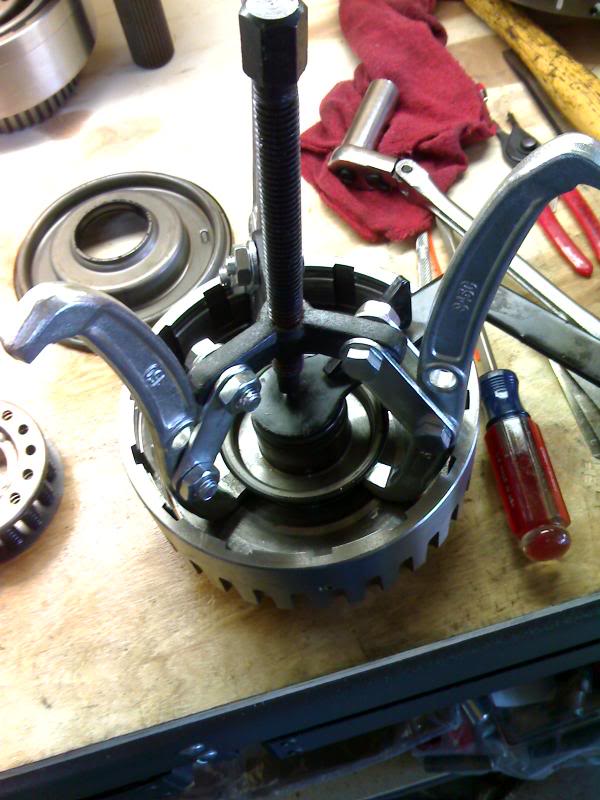
I used a 3 jaw puller to gemove the inner bonded seal from the drum. And I finally found a use for the bracket I removed from the back the engine when I dropped in the 408. I'm sure you radix guys have these laying around too.
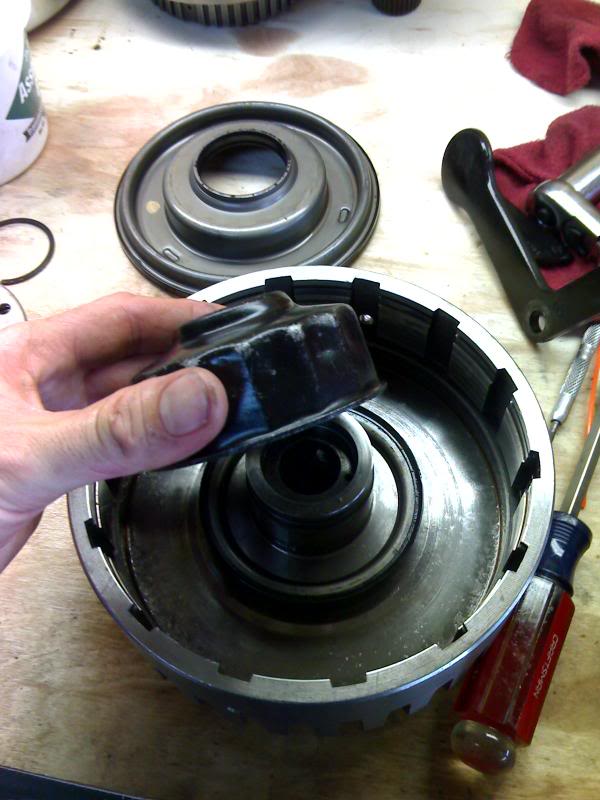
I used a cup style oil filter and a hemmer to drive it back on. It's a perfect fit and it also fits the truck oil filter (ACDelco PF46).
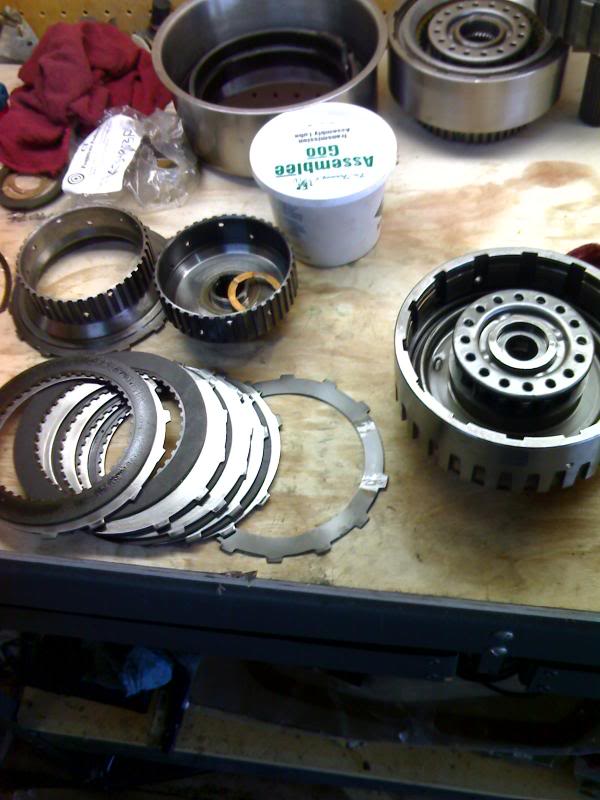
Installing the bonded piston and clutchpacks is pretty much the same. However, the Alto power pack calls for you to discard the bottom cushion plate. This will give the transmission a much firmer "garage shift", shift from P/N to the forward gears. The forward clutch is applied in all of the forward gears. The Alto power pack also takes the forward clutches from 5 frictions and steels to 7.
Clearance is checked w/ a feeler gauge between the top friction disc and pressure plate groove(.040"-.070").
This time I had to use a trusty 2x4 to assist the qucik clamps in compressing the return springs.
I used a 3 jaw puller to gemove the inner bonded seal from the drum. And I finally found a use for the bracket I removed from the back the engine when I dropped in the 408. I'm sure you radix guys have these laying around too.
I used a cup style oil filter and a hemmer to drive it back on. It's a perfect fit and it also fits the truck oil filter (ACDelco PF46).
Installing the bonded piston and clutchpacks is pretty much the same. However, the Alto power pack calls for you to discard the bottom cushion plate. This will give the transmission a much firmer "garage shift", shift from P/N to the forward gears. The forward clutch is applied in all of the forward gears. The Alto power pack also takes the forward clutches from 5 frictions and steels to 7.
Clearance is checked w/ a feeler gauge between the top friction disc and pressure plate groove(.040"-.070").
07-12-2007, 06:22 PM
#23
TECH Regular
Thread Starter
Join Date: Aug 2006
Location: Allen, TX
Posts: 458
Likes: 0
Received 0 Likes
on
0 Posts
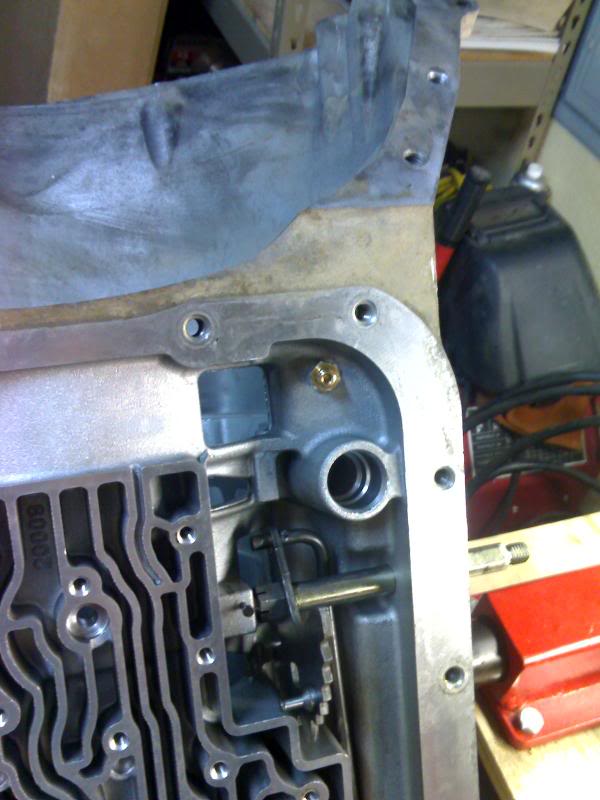
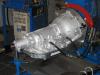
At this point I was ready to start assembly the drums in the case, but I decided to switch gears (get it?) and install the vacuum modulator fitting in the case. It requires drilling a hole in the case, and I figured it would be easier to clean any debris out while it is empty, although it was pretty clean anyway.
Just mark the hole. Then drill and tap for the fitting.

Fitting installed in case
View of fitting from outside of case
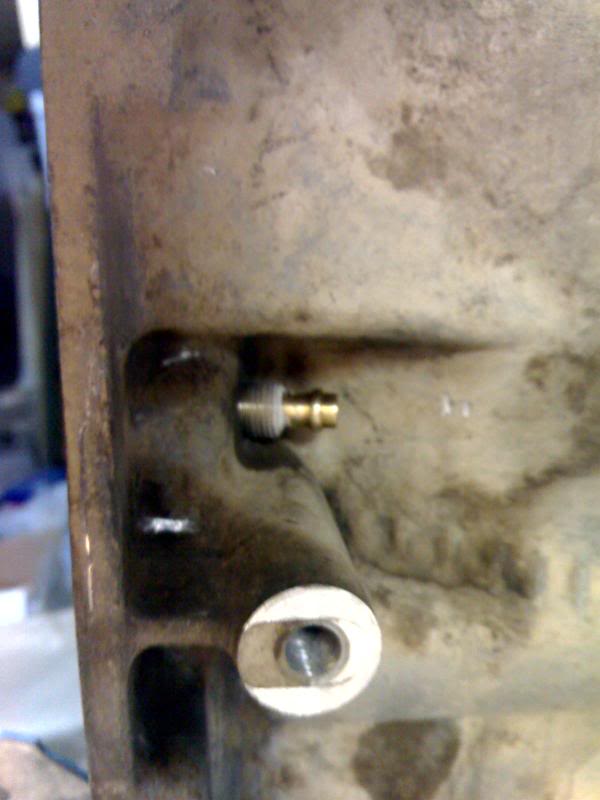
Just mark the hole. Then drill and tap for the fitting.
Fitting installed in case
View of fitting from outside of case
07-24-2007, 07:45 AM
#24
TECH Regular
Thread Starter
Join Date: Aug 2006
Location: Allen, TX
Posts: 458
Likes: 0
Received 0 Likes
on
0 Posts
Next it's time to start assembling parts in the case. First install the rear case bushing, selective thrust washer rear band and center support snap ring.
[IMG]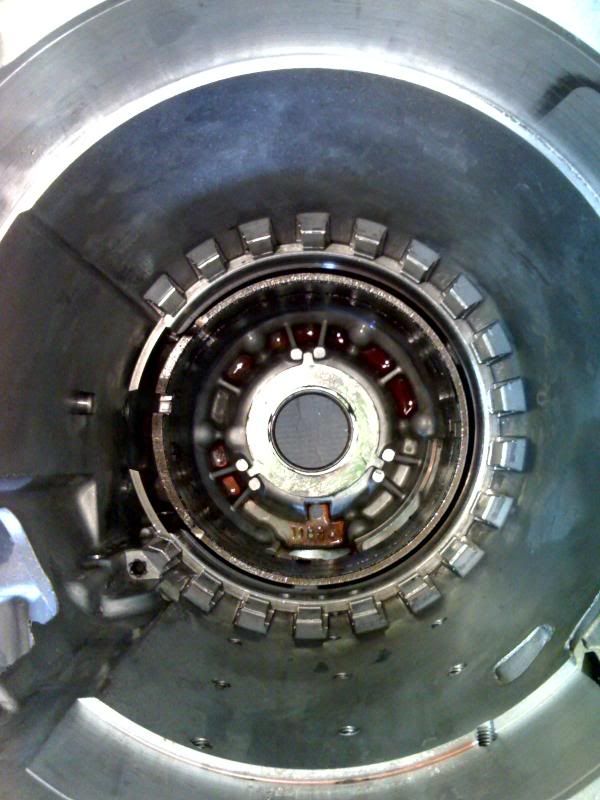 [/IMG]
Next comes the center support and geartrain. The only place you can hold this chunk of steal is at the very top of the shaft. Thats not quite large enough to get a good grip to lower it down so I rotated the tranny horizontally and carefully slid it in part way and then reached in to support it from the rear. Be careful not to knock the rear band loose. Then install the beveled snap ring flat side down.
[IMG]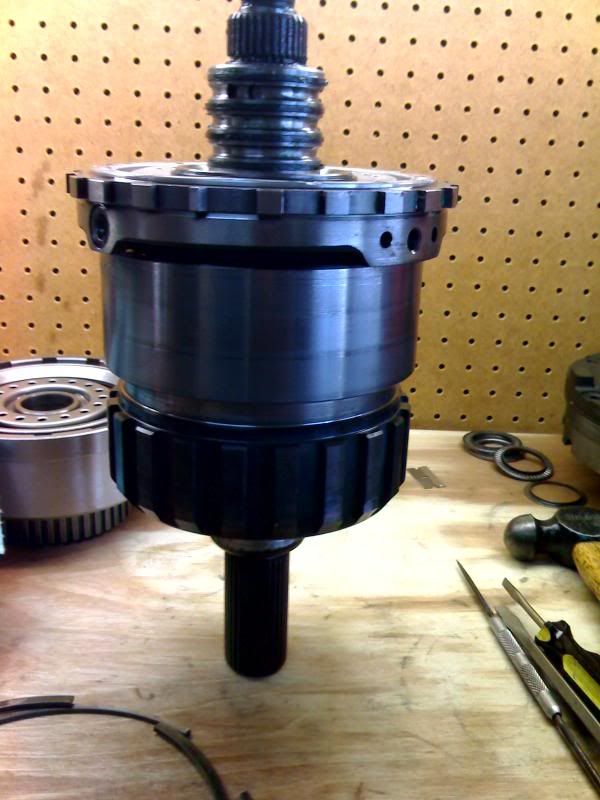 [/IMG]
Now to check rear endplay.(.005"-.025") You insert a pry bar through the lower hole in the case and pry up on the geartrain.
[IMG]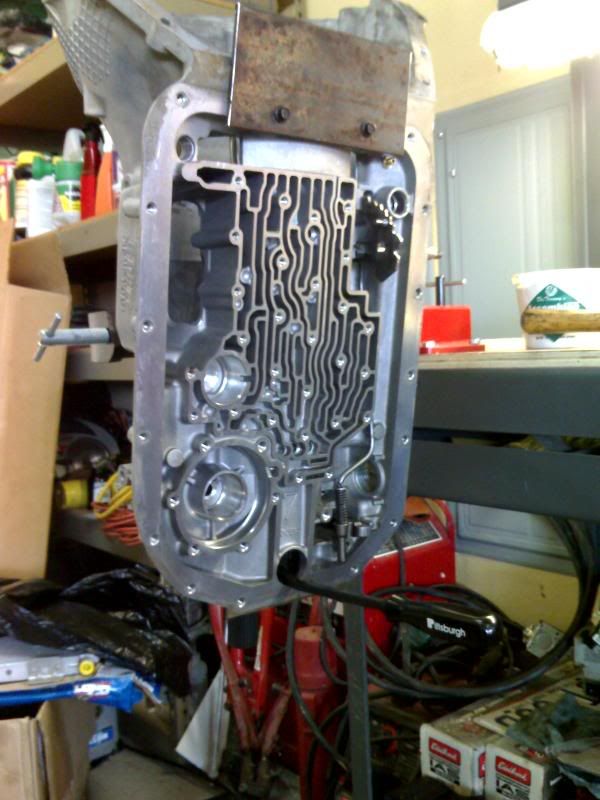 [/IMG]
I took a 4" wide piece of 1/4" steel and drilled two holes in it and bolted it to the transmission with the pan bolts to hold the magnetic base dial indicator.
[IMG]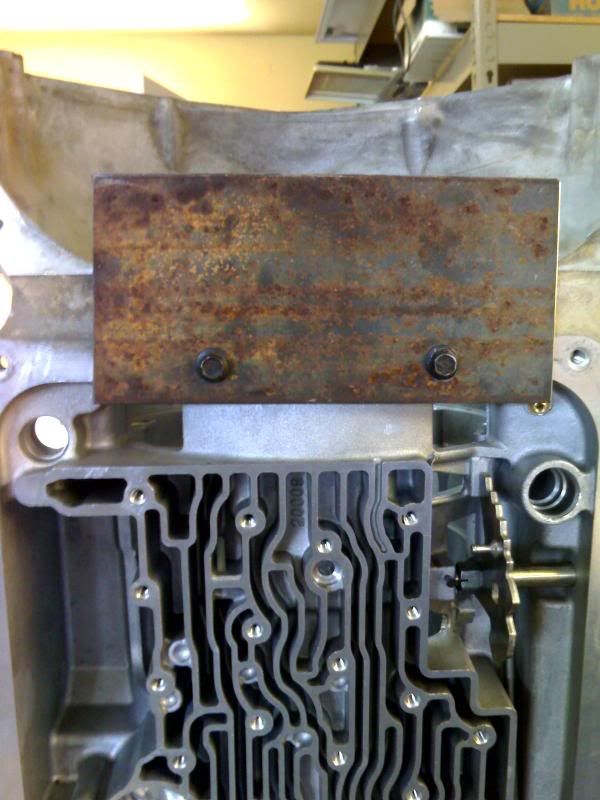 [/IMG]
[IMG] [/IMG]
[IMG]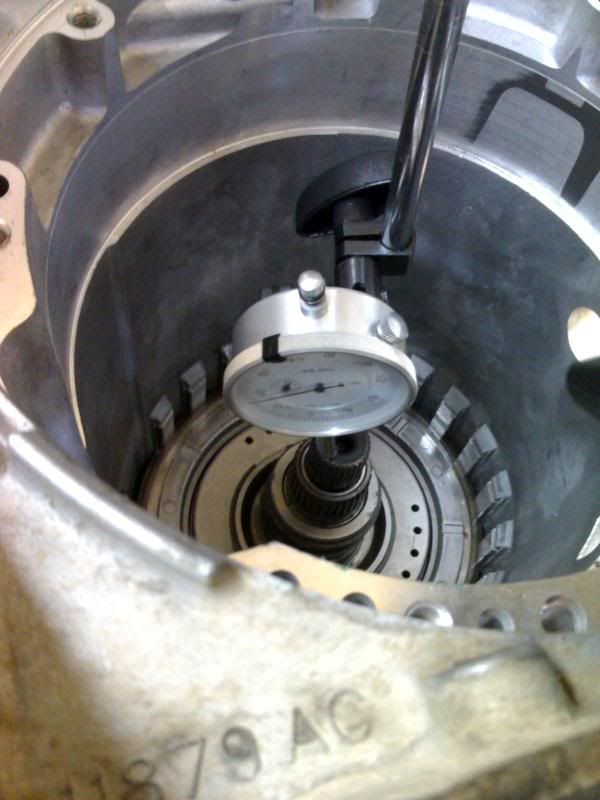 [/IMG]
Next install a new center support bolt and torque to 32 ft. lbs. with a 3/8" 12 pt. socket.
[IMG]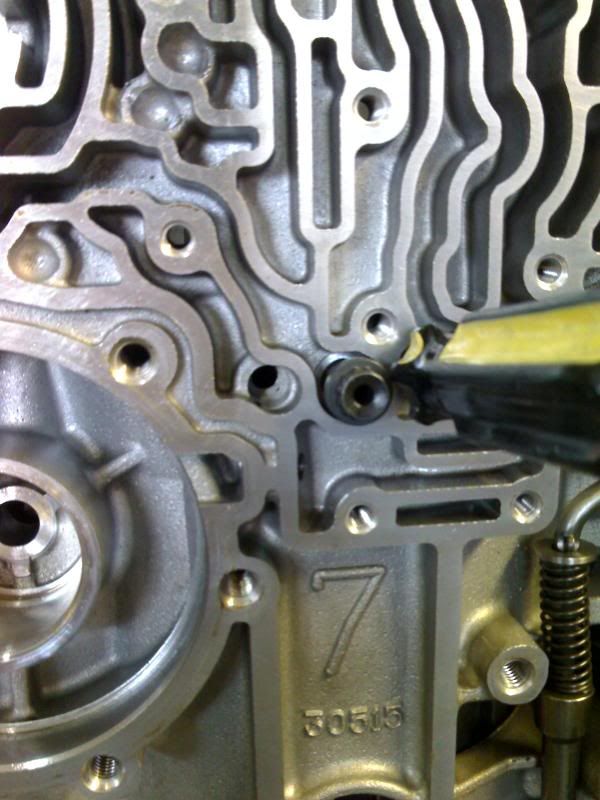 [/IMG]
[IMG]
[/IMG]Next comes the center support and geartrain. The only place you can hold this chunk of steal is at the very top of the shaft. Thats not quite large enough to get a good grip to lower it down so I rotated the tranny horizontally and carefully slid it in part way and then reached in to support it from the rear. Be careful not to knock the rear band loose. Then install the beveled snap ring flat side down.
[IMG]
[/IMG] Now to check rear endplay.(.005"-.025") You insert a pry bar through the lower hole in the case and pry up on the geartrain.
[IMG]
[/IMG]I took a 4" wide piece of 1/4" steel and drilled two holes in it and bolted it to the transmission with the pan bolts to hold the magnetic base dial indicator.
[IMG]
[/IMG] [IMG]
[/IMG] [IMG]
[/IMG]Next install a new center support bolt and torque to 32 ft. lbs. with a 3/8" 12 pt. socket.
[IMG]
[/IMG]
07-24-2007, 08:45 AM
#25
TECH Regular
Thread Starter
Join Date: Aug 2006
Location: Allen, TX
Posts: 458
Likes: 0
Received 0 Likes
on
0 Posts
Next comes the intermediate clutch pack. This clutch pack is installed directly into the case. The Red Eagle HP powerpack takes the intermediate clutch pack from 4 to 5 frictions and steels, and a thicker heavy duty snap ring (.106", about the same size as the transgo shift kit). Install the wave plate then the first steel and alternate friction/steel. Install the backing plate and new snapring and check clearance between the backing plate and snap ring (.040"-.070")
[IMG]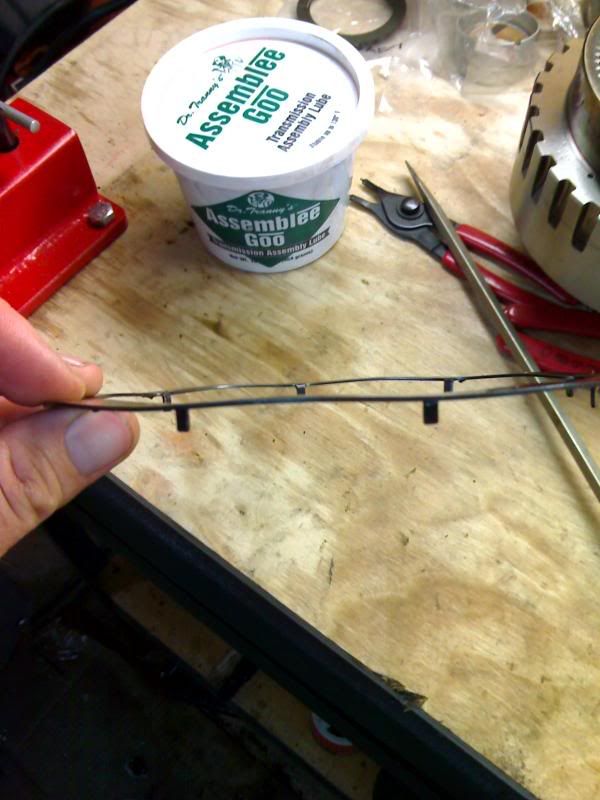 [/IMG]
[IMG]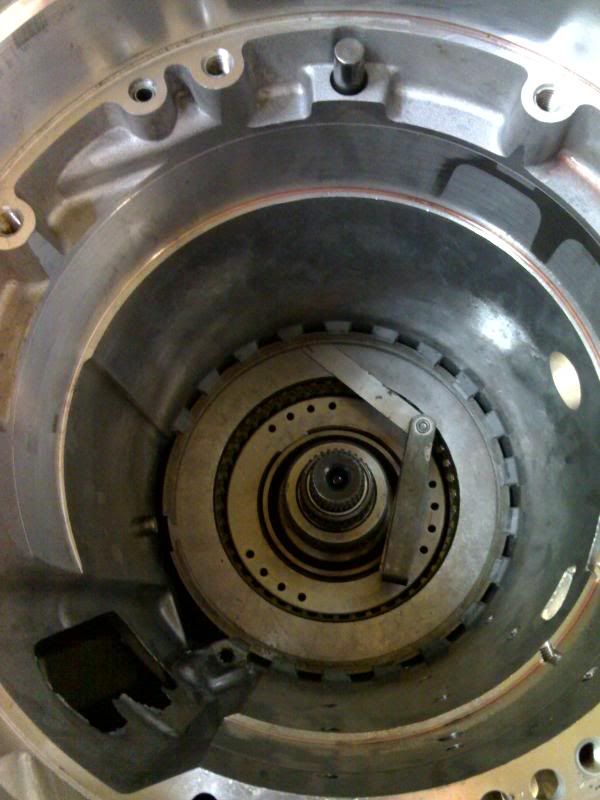 [/IMG]
Next install the intermediate band making sure it is seated on the anchor in the case. You can also look through the servo pin hole to ensure it is in the proper position.
[IMG] [/IMG]
Next insert the direct drum and rotate it into place to seat it in the intermediate clutch pack. double check the intermediate band to make sure it is still properly seated.
[IMG]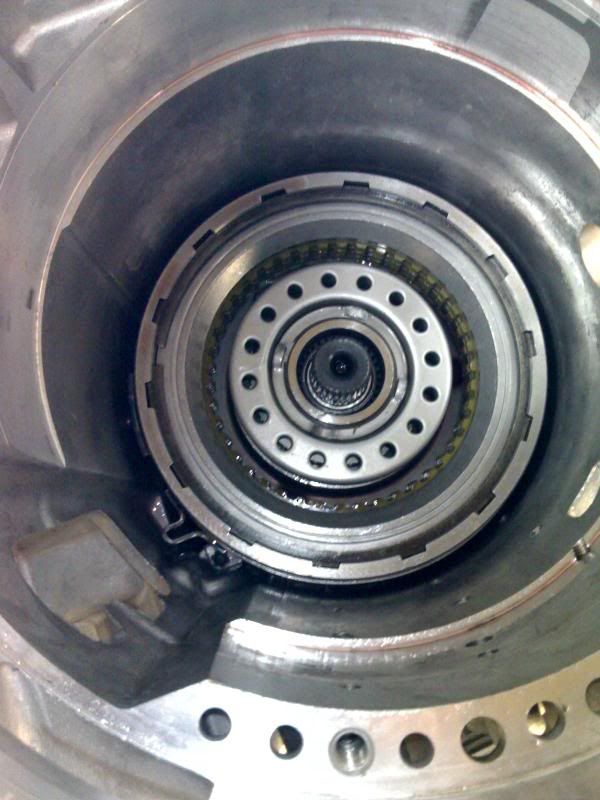 [/IMG]
Now install the forward drum. Again, rotating it to fully seat it in the direct clutch pack.
[IMG]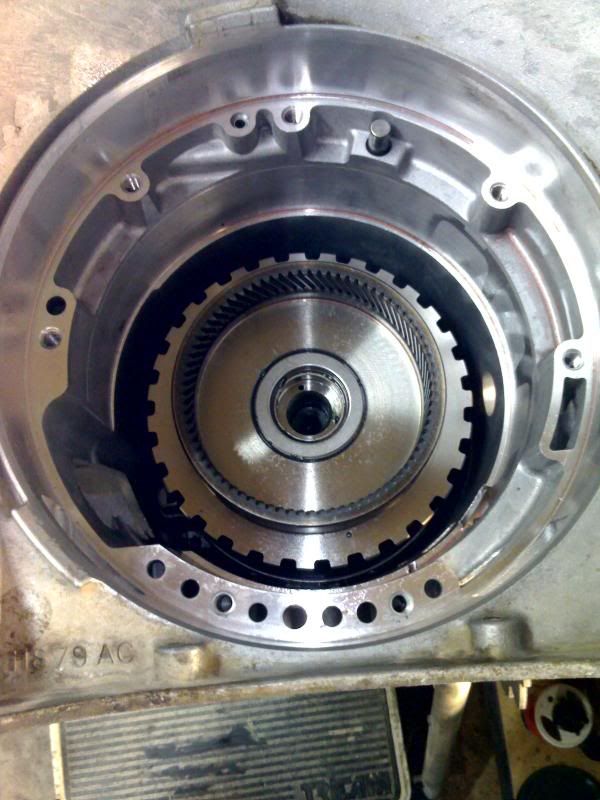 [/IMG]
[IMG]
[/IMG] [IMG]
[/IMG]Next install the intermediate band making sure it is seated on the anchor in the case. You can also look through the servo pin hole to ensure it is in the proper position.
[IMG]
[/IMG]Next insert the direct drum and rotate it into place to seat it in the intermediate clutch pack. double check the intermediate band to make sure it is still properly seated.
[IMG]
[/IMG] Now install the forward drum. Again, rotating it to fully seat it in the direct clutch pack.
[IMG]
[/IMG]
07-26-2007, 07:19 AM
#27
[IMG][/IMG]
I'm not sure if your book tells the proper location of this snap ring. Take it and put it at the 3 o'clock position. Basically a 180* from where you have it. The reason for this is with a wider snap ring it will rub the direct drum(high reverse drum). When the intermediate clutch is applied the pressure plate will flex that snap ring and it will rub with it in the position that you have it. Looks like you are having a lot fun. Enjoy!!! Vince
[/IMG]I'm not sure if your book tells the proper location of this snap ring. Take it and put it at the 3 o'clock position. Basically a 180* from where you have it. The reason for this is with a wider snap ring it will rub the direct drum(high reverse drum). When the intermediate clutch is applied the pressure plate will flex that snap ring and it will rub with it in the position that you have it. Looks like you are having a lot fun. Enjoy!!! Vince
07-26-2007, 09:54 PM
#28
TECH Regular
Thread Starter
Join Date: Aug 2006
Location: Allen, TX
Posts: 458
Likes: 0
Received 0 Likes
on
0 Posts
WOW, thanks alot!
Actually the book says to put it in the 9 o'clock position, but that is with a stock snap ring. The Alto instructions call for 9 o'clock also.
Looking at how it sits in the case what you are saying about it flexing makes sense. Plus you undoubtedly know your . It took me a long time to decide between an FLT or build my own. Guess I'll be pulling it apart again. Luckily I haven't bolted in the pump or valve body yet, although I thought I was ready.
Thanks again!
Actually the book says to put it in the 9 o'clock position, but that is with a stock snap ring. The Alto instructions call for 9 o'clock also.
Looking at how it sits in the case what you are saying about it flexing makes sense. Plus you undoubtedly know your
. It took me a long time to decide between an FLT or build my own. Guess I'll be pulling it apart again. Luckily I haven't bolted in the pump or valve body yet, although I thought I was ready.Thanks again!
07-30-2007, 08:22 AM
#30
TECH Regular
Thread Starter
Join Date: Aug 2006
Location: Allen, TX
Posts: 458
Likes: 0
Received 0 Likes
on
0 Posts
Well' I tore back into the tranny this weekend to turn the intermediate snap ring. I air checked the intermediate clutch pack and you could really see the snap ring flexing. Turning it 180* made a HUGE difference. It seems like the same thing would happen with a stock snap ring too.
I finished the build and hope to update the thread soon.
Thanks again for the advice Vince, and don't hesitate to let me know if you see anything else that needs attention.
I finished the build and hope to update the thread soon.
Thanks again for the advice Vince, and don't hesitate to let me know if you see anything else that needs attention.