
ECSB 4WD 4l60E to 4l80E
 09-26-2008, 05:30 PM
#41
Further to Step 3 above. The directions suck. Says "If end plug won't go in far enough grind this end of filter slightly." Problem is it doesn't indicate which end to grind.  Anyway I wound up grinding a little off both ends to get it to fit.

Anyway I wound up grinding a little off both ends to get it to fit.
 09-26-2008, 05:38 PM
#42
Step 4 and 5:
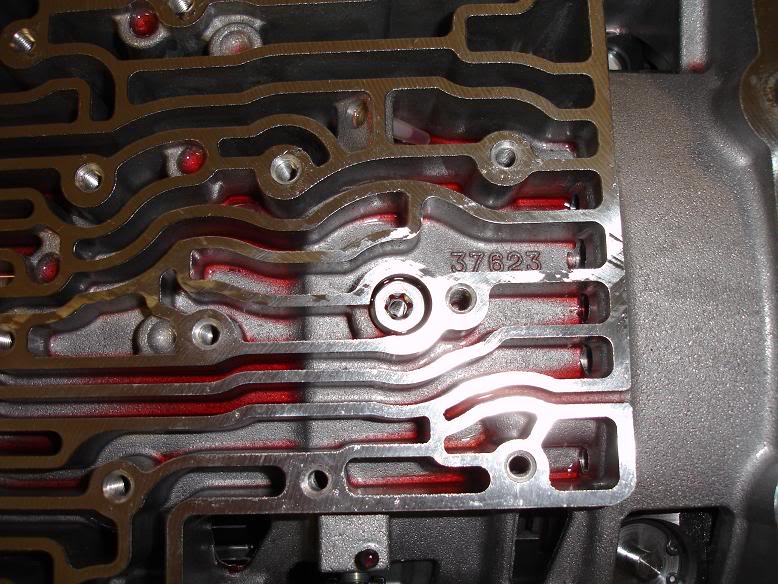
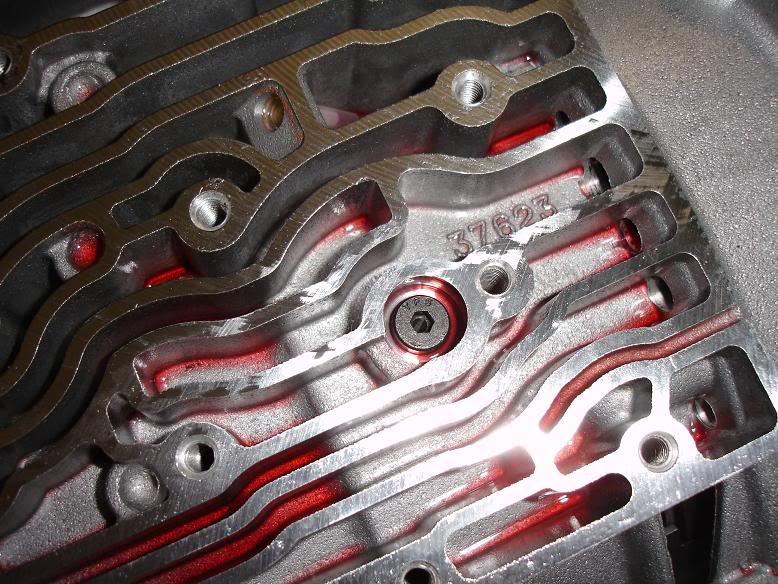
I hope whatever high pressure this relieves happens enough to "fix" it. This drilling my nice valve body scares me. Plus the hope that it seals.
Use this piece as a jig and drill a hole. Assemble the relief plunger and tap 2-3 times lightly with a hammer to seat it when done.
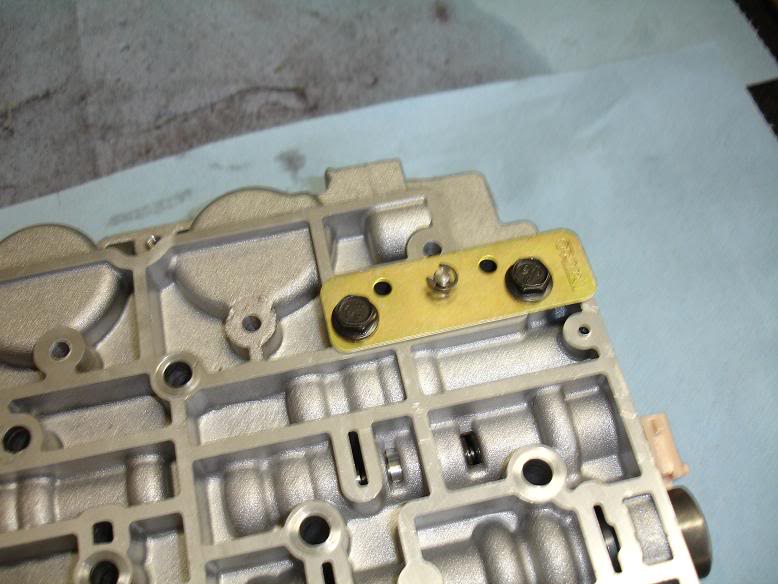
Shot of the hole both sides of VB when you are done.
I hope whatever high pressure this relieves happens enough to "fix" it. This drilling my nice valve body scares me. Plus the hope that it seals.
Use this piece as a jig and drill a hole. Assemble the relief plunger and tap 2-3 times lightly with a hammer to seat it when done.
Shot of the hole both sides of VB when you are done.
Last edited by KySilverado; 09-26-2008 at 06:49 PM.
09-26-2008, 07:07 PM
#43
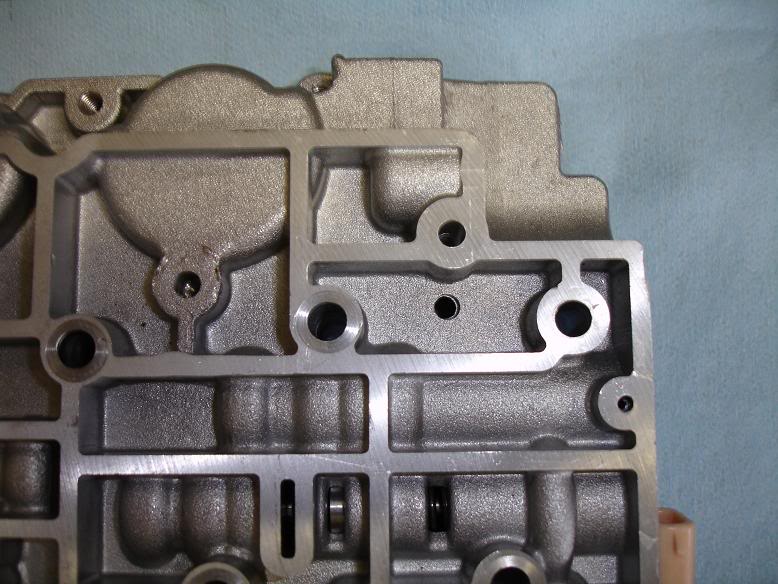
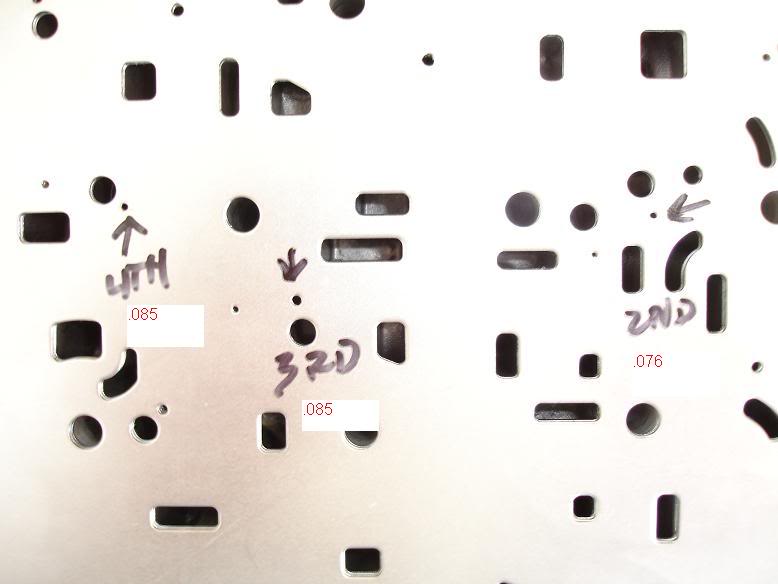
Step 6 is drilling the plate holes for firmness and putting a new spring under the 3rd Accum piston. Skipping this until I figure out what size holes I want.
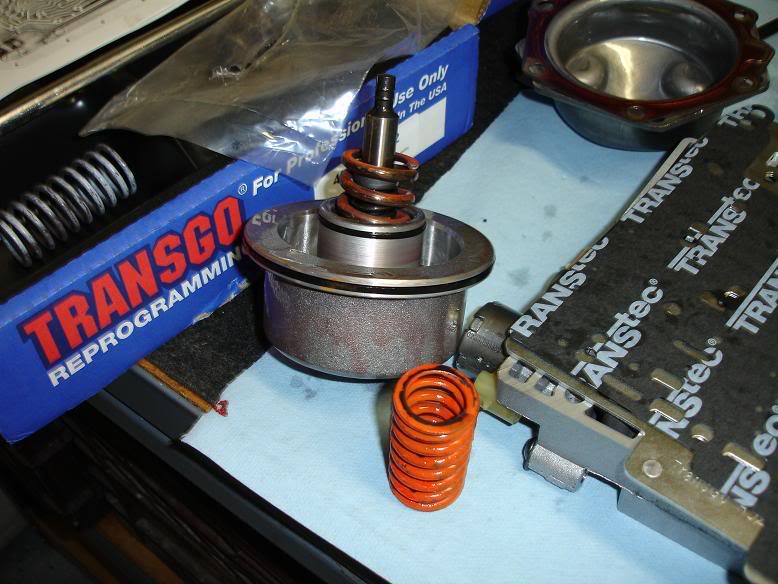
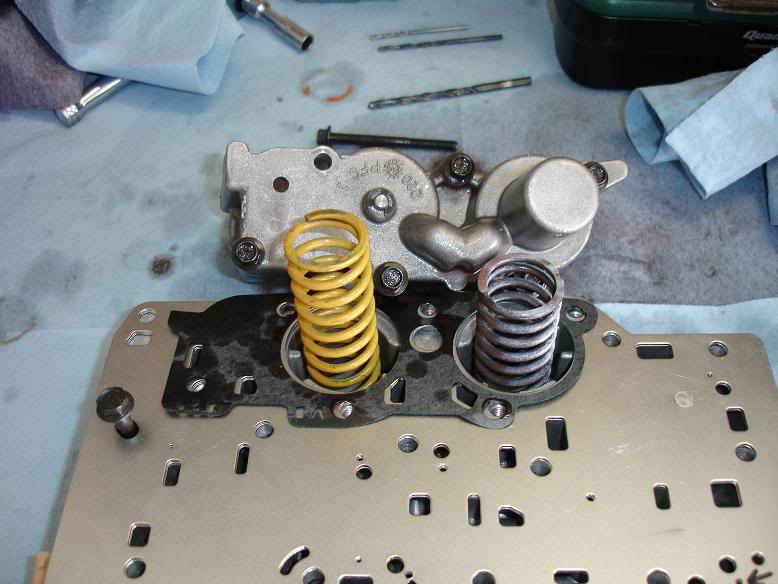
Step 7:
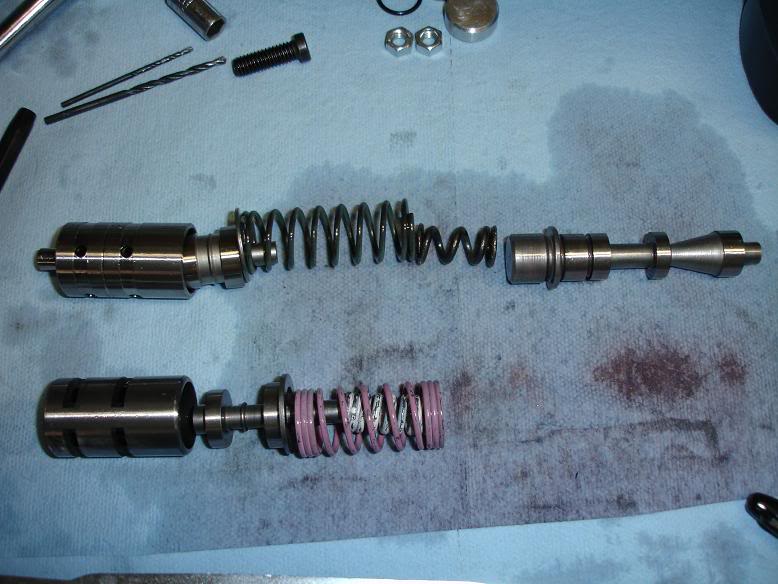
Installing the new boost valve and springs. Old below-new on top.
Step 8.
Replace old bolt with new stronger bolt.
Step 9:
Put a bushing here on 1-2 Servo pin.

Step 10.
Change orange spring in the 1-2 accum piston.
Tada Trango install in 10 easy steps. Only thing left is putting the valve body back on. Aligning plates and gaskets and such.
Step 7:
Installing the new boost valve and springs. Old below-new on top.
Step 8.
Replace old bolt with new stronger bolt.
Step 9:
Put a bushing here on 1-2 Servo pin.
Step 10.
Change orange spring in the 1-2 accum piston.
Tada Trango install in 10 easy steps. Only thing left is putting the valve body back on. Aligning plates and gaskets and such.
09-27-2008, 01:37 PM
#44
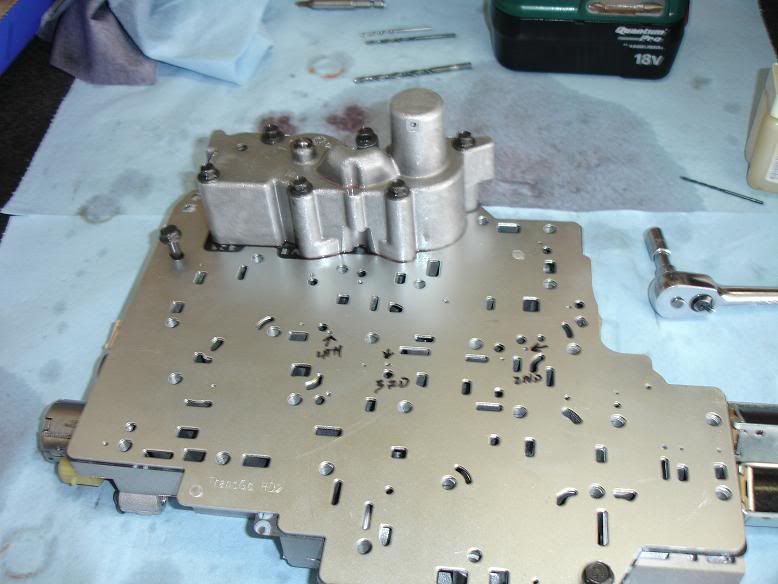
Finishing up the Transgo portion.
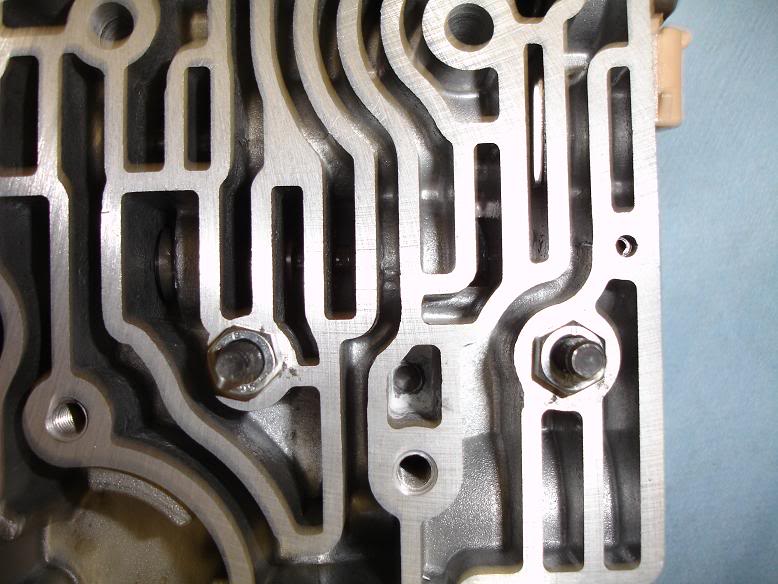
Drilled the seperator plate for shifts like this. Leaves room to go more aggressive if I like internal to the trans. There of course is also opportunity to tune via the PCM.
Shot of the new white spring for the 3rd Accum. EDIT: THIS IS WRONG CORRECTED LATER IN THREAD.
Acuum body all buttoned back up.
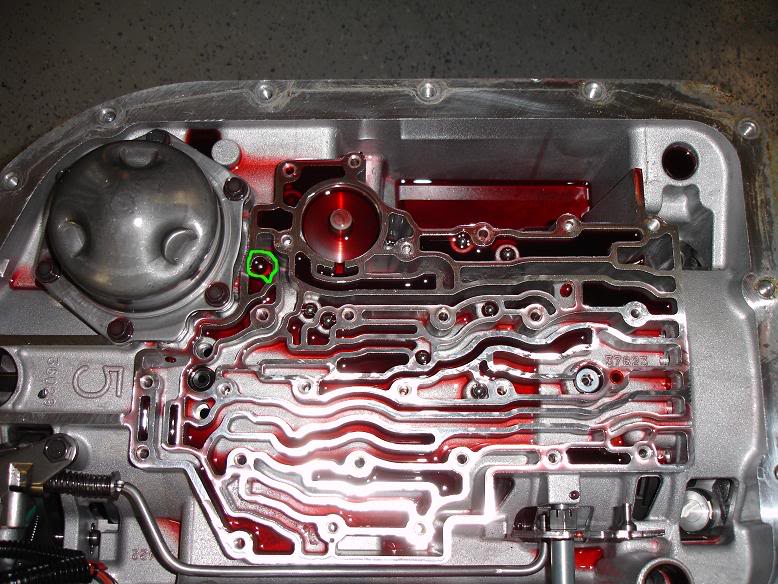
Per the trango instructions Don't use the check ball circled in the picture. Originally 8 go back with 7. You should be able to pick them out in the picture.
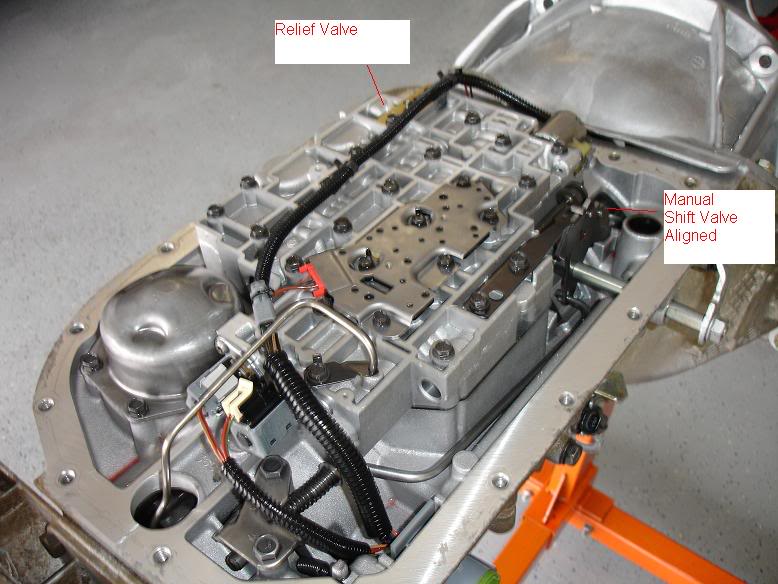
Valve body back on. Notes for the new relief valve on and align the manual shift valve.
All I like as far as the transmission is new filter and have a stock pan with drain pan lined up to go on.
Drilled the seperator plate for shifts like this. Leaves room to go more aggressive if I like internal to the trans. There of course is also opportunity to tune via the PCM.
Shot of the new white spring for the 3rd Accum. EDIT: THIS IS WRONG CORRECTED LATER IN THREAD.
Acuum body all buttoned back up.
Per the trango instructions Don't use the check ball circled in the picture. Originally 8 go back with 7. You should be able to pick them out in the picture.
Valve body back on. Notes for the new relief valve on and align the manual shift valve.
All I like as far as the transmission is new filter and have a stock pan with drain pan lined up to go on.
Last edited by KySilverado; 11-30-2008 at 08:08 PM.
 09-29-2008, 04:58 PM
#46
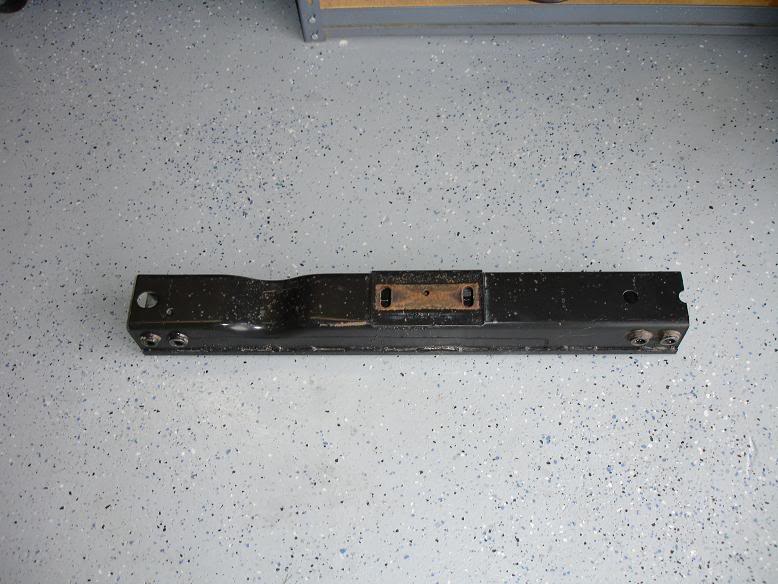
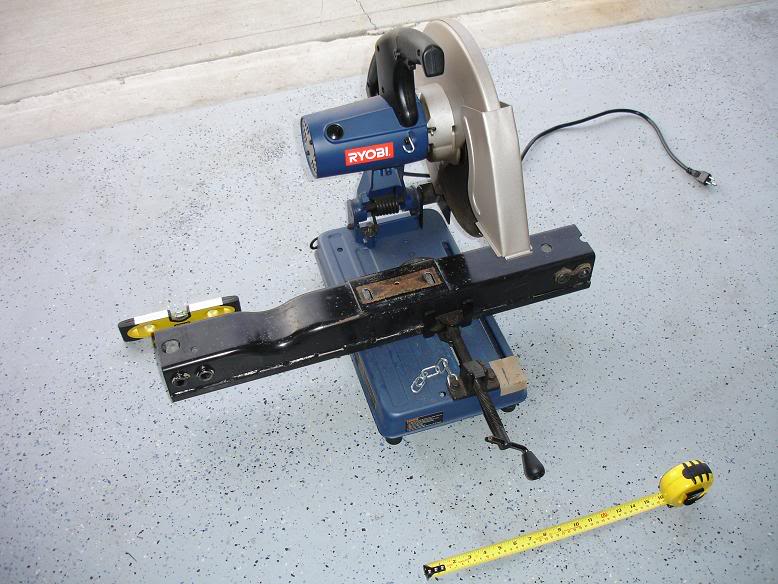
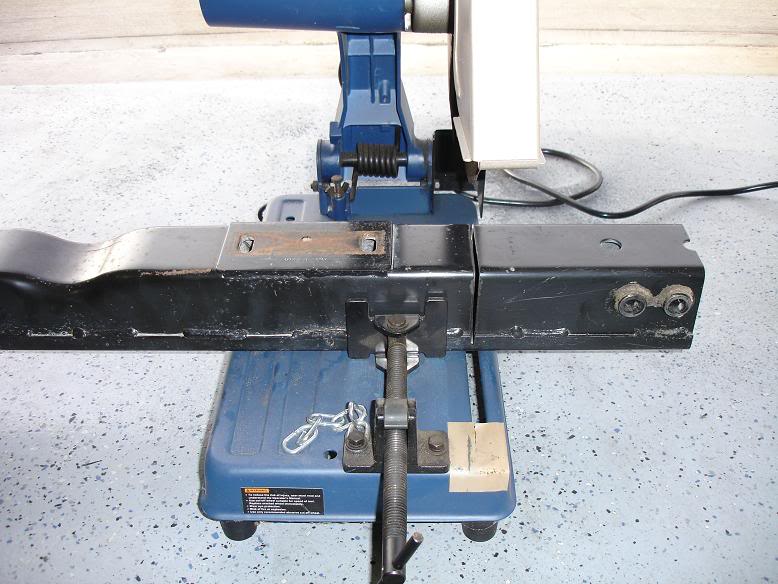
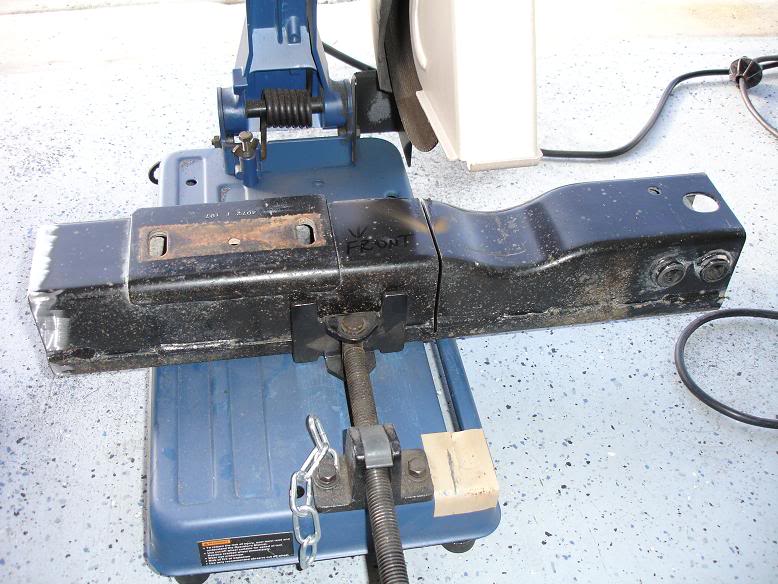
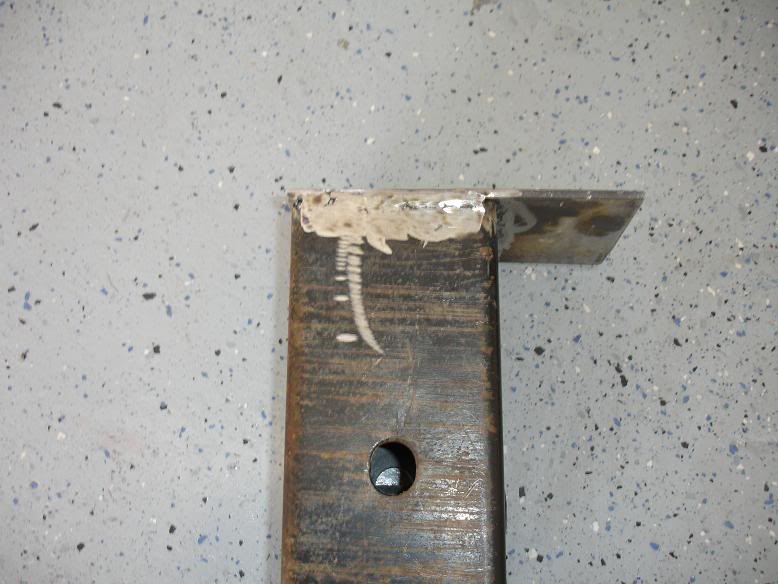
Spent a little time on the cross member yesterday.
Basically cutting about 6" each way from center line of the transmission mount. Then move that section about 2.5" rearward is the goal.
This is how it should look when I get it all welded back up.
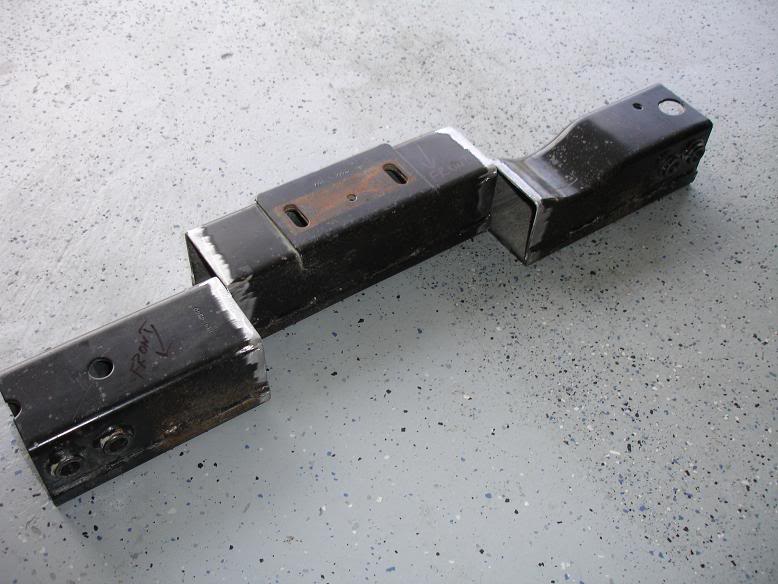
Couldn't find any flat bar here local so bought some 3" and 1" and welded them together.
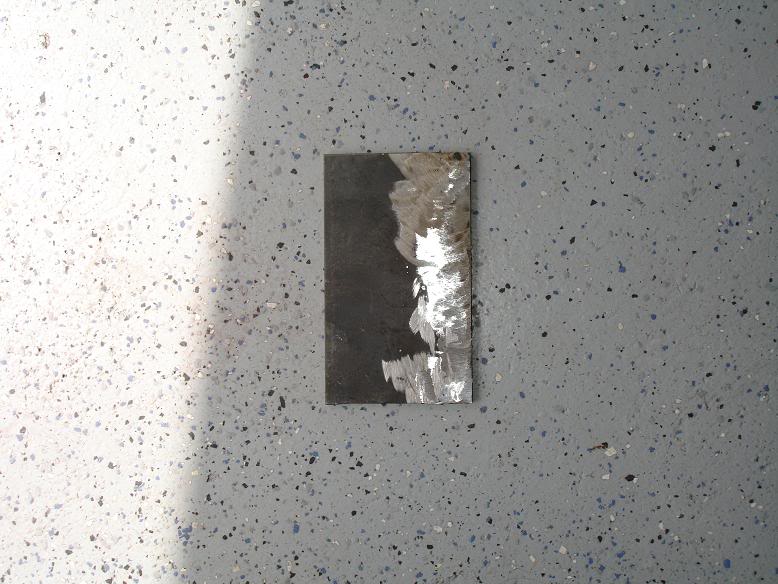
I don't claim to be a welder. Soooo..... comment if you like
Will comment that if you have to weld with a mig do it the right way and use gas. I tried the first few welds with flux core. Ran and filled the tank today and it welds mucccchhhh better.
Basically cutting about 6" each way from center line of the transmission mount. Then move that section about 2.5" rearward is the goal.
This is how it should look when I get it all welded back up.
Couldn't find any flat bar here local so bought some 3" and 1" and welded them together.
I don't claim to be a welder. Soooo..... comment if you like
Will comment that if you have to weld with a mig do it the right way and use gas. I tried the first few welds with flux core. Ran and filled the tank today and it welds mucccchhhh better.
Last edited by KySilverado; 09-29-2008 at 06:29 PM.
 09-30-2008, 10:30 AM
#48
Thanks for the comments guys. Hope this thread will be the best going for the conversion.
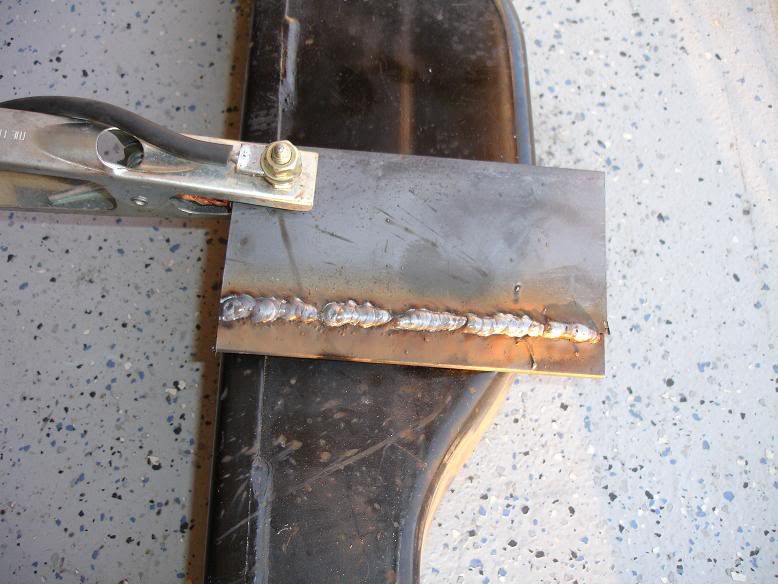
I want to add another comment regarding welding. Of course I knew this as will guys that weld a lot but I threw caution to the wind... I dawned the welding gloves and mask of course but short pants and short sleeves. All I did last night was weld the plate in the last picture. I have some very nice weld burns (sun burn) on my legs and arms today. OUCH!
I want to add another comment regarding welding. Of course I knew this as will guys that weld a lot but I threw caution to the wind... I dawned the welding gloves and mask of course but short pants and short sleeves. All I did last night was weld the plate in the last picture. I have some very nice weld burns (sun burn) on my legs and arms today. OUCH!
09-30-2008, 11:44 AM
#49
TECH Resident
iTrader: (36)
Join Date: Mar 2004
Location: somewhere in the sticks.
Posts: 869
Likes: 0
Received 1 Like
on
1 Post
I had to cut my cross member on the top cause the plate i welded in was hitting my y pipe and it wouldnt bolt up long story short i ended up in the e.r friday night with a piece of slag in my eye i was even wearing safety glasses so this was a expensive mistake for me I have no insurance.
The following users liked this post:
MurderYurFace (03-20-2020)
09-30-2008, 05:54 PM
#50
I had to cut my cross member on the top cause the plate i welded in was hitting my y pipe and it wouldnt bolt up long story short i ended up in the e.r friday night with a piece of slag in my eye i was even wearing safety glasses so this was a expensive mistake for me I have no insurance.