
PT.net Gear Install How-To
 06-25-2013, 06:43 PM
#51

For anyone who needs it, axisT6 also did a how-to for the IFS front diff over on GMFS. Here's the link:
The Official GMFS Front IFS Gear Install How-To - Chevy Truck Forum | GMC Truck Forum - GmFullsize.com
The Official GMFS Front IFS Gear Install How-To - Chevy Truck Forum | GMC Truck Forum - GmFullsize.com

 07-01-2013, 10:01 AM
#53

The front gears are kind of an exception. Typically you will not be getting the front gears hot enough to cause any damage. Unless you intend to participate in hours of full throttle runs through mud holes, if an initial break-in like you mentioned is all you do, I wouldn't worry too much about it.
07-01-2013, 10:04 AM
#54
A not on crush sleeves, they take some effort to crush. I use a 4' pipe wrench to brace the yoke along with a 3/4" drive ratchet and cheater pipe. I have yet to come across a crush sleeve I couldn't crush using these tools. It helps that I can lift heavy things, but the point is, leverage is your friend.
I always recommend using a new crush sleeve when installing gears as you can be sure to have a high preload on the pinion nut once the install is complete. You do not have as high of a preload with a used sleeve unless you add a shim to the used sleeve.
I always recommend using a new crush sleeve when installing gears as you can be sure to have a high preload on the pinion nut once the install is complete. You do not have as high of a preload with a used sleeve unless you add a shim to the used sleeve.
 02-23-2021, 02:39 AM
#57
Teching In

BREAK-IN PROCEDURES
1. NO hard acceleration.
2. NO heavy hauling.
3. NO heavy towing.
4. NO driving over 60 mph.
Once the gears are installed, drive the vehicle for about 30 minutes while keeping the "NO" list above in mind. After 30 minutes, park and let the differential cool completely. This initial break-in is very important. After the differential is cooled continue the break-in with the "NO" list in mind for 500 miles. After 500 miles, change the gear oil and have fun.
USED GEARS
Used gears do not require any break-in. If you knew what the original pinion depth and backlash was for said used gear set, try and duplicate those settings. If not, follow the specs written out in the Yukon Install Manual.
OEM/AAM GEARS
These gears are a little more difficult to install as they require a tighter backlash than other gears. The required backlash is 3-6 thousanths.
02-23-2021, 07:39 AM
#58

The carriers are largely the same size, within the tolerances that the shims are set up to. "Adjustment" is not usually required. The thing that has all the variance is the housing. Therefore, in general, shim thickness goes with the housing, not the moving parts.
Which is NOT NECESSARILY THE SAME AS, "you can re-use the old shims".
Factory carrier shims are cast-iron. They are TOTAL CRAP: more like "shim shaped objects" than shims. In fact one of the reasons rear ends go bad and make noise and need rebuilt sometimes, is those wearing out, because the bearing races can still spin against them a little bit, and they're too crappy to resist wear. SOMETIMES they're OK, but other times, not so much. The one that usually gets farkled is the driver's side one; that being the one that the force on the gears, tends to load the bearing more.
Replacement shims are STEEL. Altogether better in every way, even the cheeeepest and crappiest of them. Most of them, you get some thick ones (like .100" ea, usually 4 in a kit), and a handful of thin ones of various sizes. The usual thickness that you need ends up being somewhere between .230" and .270" or so. Take 2 of the thick ones and stack up thin ones in between to make up the thickness you need.
If your OE ones show ANY wear on the surfaces against the bearing races AT ALL, esp the driver's side one, replace them. There MIGHT be enough left undamaged to mic, and see what thickness they were, but not always. If so, you can usually put the same thickness back in, UNDAMAGED, and it'll be OK.
Note also that there is supposed to be preload on the carrier bearings, much like on the pinion bearings. The destructions up there don't say just exactly that, but they hint at it. That's what makes the carrier reluctant to come out, and why some effort is required to put it back in. IMO there should be AT LEAST .010" of preload (the shims are .005" too big on each side to fit the space) and ideally closer to .020" (.010" each side). That's HARD to do. The "right" way to get it is with a tool called a case spreader, that bends and pries the case apart: you use that, then put the carrier w/ bearings & shims in, then when you take the tool, off the case relaxes to its original width. You can also use 2 big C-clamps on the bearing outer races, put the shims into the housing first, press the bearing races together with the clamps, drop it in, take off the clamps, then tap the races in the rest of the way. I don't have a case spreader so that's how I do it.
The notion of a "case spreader" should give you a further hint as to why a girdle type of cover is so much better than a tin one: the forces on the parts in normal operation tend to spread and otherwise distort the housing, which takes the preload off of the bearings, which ultimately adds backlash, which allows the gears to misalign. For that matter, the force of the wheels accelerating the vehicle, tends to try to move the tubes forward since that's how the axles & wheels push the vehicle, which pries the case apart the exact same way. A cover with structural strength keeps the pumpkin in the right shape and at least partially prevents all this from happening.
Last edited by RB04Av; 02-23-2021 at 07:45 AM.
02-23-2021, 12:06 PM
#59
Teching In
The carriers are largely the same size, within the tolerances that the shims are set up to. "Adjustment" is not usually required. The thing that has all the variance is the housing. Therefore, in general, shim thickness goes with the housing, not the moving parts.
Which is NOT NECESSARILY THE SAME AS, "you can re-use the old shims".
Factory carrier shims are cast-iron. They are TOTAL CRAP: more like "shim shaped objects" than shims. In fact one of the reasons rear ends go bad and make noise and need rebuilt sometimes, is those wearing out, because the bearing races can still spin against them a little bit, and they're too crappy to resist wear. SOMETIMES they're OK, but other times, not so much. The one that usually gets farkled is the driver's side one; that being the one that the force on the gears, tends to load the bearing more.
Replacement shims are STEEL. Altogether better in every way, even the cheeeepest and crappiest of them. Most of them, you get some thick ones (like .100" ea, usually 4 in a kit), and a handful of thin ones of various sizes. The usual thickness that you need ends up being somewhere between .230" and .270" or so. Take 2 of the thick ones and stack up thin ones in between to make up the thickness you need.
If your OE ones show ANY wear on the surfaces against the bearing races AT ALL, esp the driver's side one, replace them. There MIGHT be enough left undamaged to mic, and see what thickness they were, but not always. If so, you can usually put the same thickness back in, UNDAMAGED, and it'll be OK.
Note also that there is supposed to be preload on the carrier bearings, much like on the pinion bearings. The destructions up there don't say just exactly that, but they hint at it. That's what makes the carrier reluctant to come out, and why some effort is required to put it back in. IMO there should be AT LEAST .010" of preload (the shims are .005" too big on each side to fit the space) and ideally closer to .020" (.010" each side). That's HARD to do. The "right" way to get it is with a tool called a case spreader, that bends and pries the case apart: you use that, then put the carrier w/ bearings & shims in, then when you take the tool, off the case relaxes to its original width. You can also use 2 big C-clamps on the bearing outer races, put the shims into the housing first, press the bearing races together with the clamps, drop it in, take off the clamps, then tap the races in the rest of the way. I don't have a case spreader so that's how I do it.
The notion of a "case spreader" should give you a further hint as to why a girdle type of cover is so much better than a tin one: the forces on the parts in normal operation tend to spread and otherwise distort the housing, which takes the preload off of the bearings, which ultimately adds backlash, which allows the gears to misalign. For that matter, the force of the wheels accelerating the vehicle, tends to try to move the tubes forward since that's how the axles & wheels push the vehicle, which pries the case apart the exact same way. A cover with structural strength keeps the pumpkin in the right shape and at least partially prevents all this from happening.
Which is NOT NECESSARILY THE SAME AS, "you can re-use the old shims".
Factory carrier shims are cast-iron. They are TOTAL CRAP: more like "shim shaped objects" than shims. In fact one of the reasons rear ends go bad and make noise and need rebuilt sometimes, is those wearing out, because the bearing races can still spin against them a little bit, and they're too crappy to resist wear. SOMETIMES they're OK, but other times, not so much. The one that usually gets farkled is the driver's side one; that being the one that the force on the gears, tends to load the bearing more.
Replacement shims are STEEL. Altogether better in every way, even the cheeeepest and crappiest of them. Most of them, you get some thick ones (like .100" ea, usually 4 in a kit), and a handful of thin ones of various sizes. The usual thickness that you need ends up being somewhere between .230" and .270" or so. Take 2 of the thick ones and stack up thin ones in between to make up the thickness you need.
If your OE ones show ANY wear on the surfaces against the bearing races AT ALL, esp the driver's side one, replace them. There MIGHT be enough left undamaged to mic, and see what thickness they were, but not always. If so, you can usually put the same thickness back in, UNDAMAGED, and it'll be OK.
Note also that there is supposed to be preload on the carrier bearings, much like on the pinion bearings. The destructions up there don't say just exactly that, but they hint at it. That's what makes the carrier reluctant to come out, and why some effort is required to put it back in. IMO there should be AT LEAST .010" of preload (the shims are .005" too big on each side to fit the space) and ideally closer to .020" (.010" each side). That's HARD to do. The "right" way to get it is with a tool called a case spreader, that bends and pries the case apart: you use that, then put the carrier w/ bearings & shims in, then when you take the tool, off the case relaxes to its original width. You can also use 2 big C-clamps on the bearing outer races, put the shims into the housing first, press the bearing races together with the clamps, drop it in, take off the clamps, then tap the races in the rest of the way. I don't have a case spreader so that's how I do it.
The notion of a "case spreader" should give you a further hint as to why a girdle type of cover is so much better than a tin one: the forces on the parts in normal operation tend to spread and otherwise distort the housing, which takes the preload off of the bearings, which ultimately adds backlash, which allows the gears to misalign. For that matter, the force of the wheels accelerating the vehicle, tends to try to move the tubes forward since that's how the axles & wheels push the vehicle, which pries the case apart the exact same way. A cover with structural strength keeps the pumpkin in the right shape and at least partially prevents all this from happening.
02-23-2021, 01:30 PM
#60
100% Redneck

The most important thing is to get the rear of the vehicle high enough to work comfortable under... a lift makes the job so much easier. Using a crush sleeve eliminator kit is much easier than crushing those dammed sleeves lol. If using a crush sleeve you'll need to buy or fabricate a tool to hold the pinion during the crush. It helps to have a helper holding the pinion tool while you crush the sleeve especially if you're small in stature. With the eliminator kit you won't need a helping hand on the crush. Another plus using the solid bushing and shims (eliminator kit) is you can remove the pinion yoke and replace the seal without having to re-crush a new sleeve. Are you replacing the carrier and pinion bearings too?
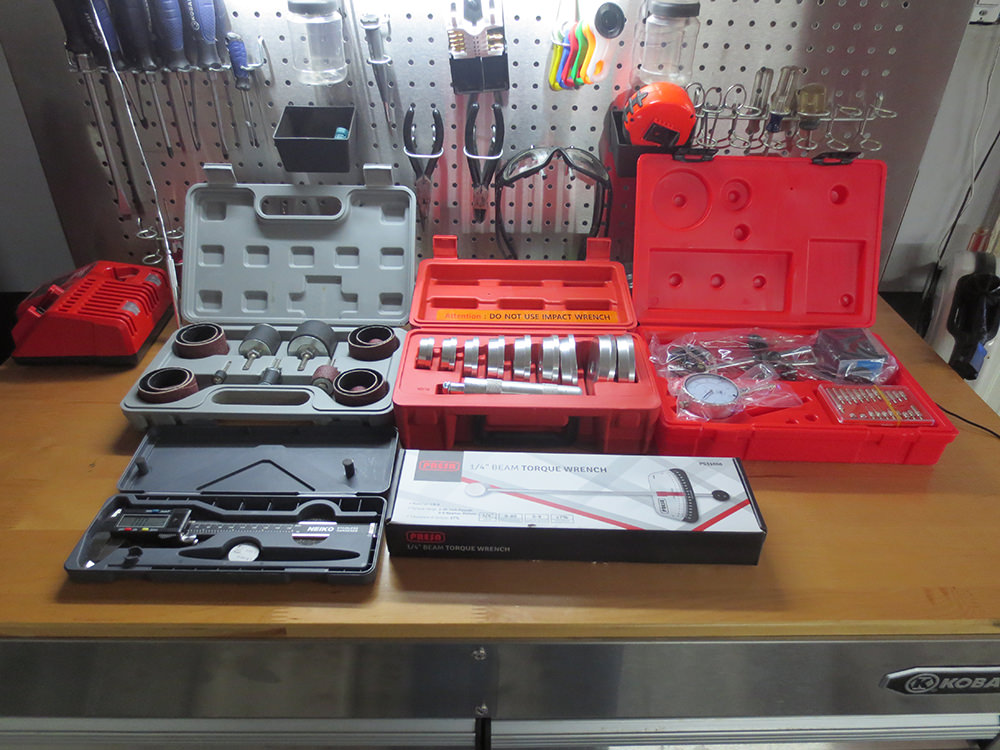
Stuff I used:
Harbor Freight 6 Ton Stands

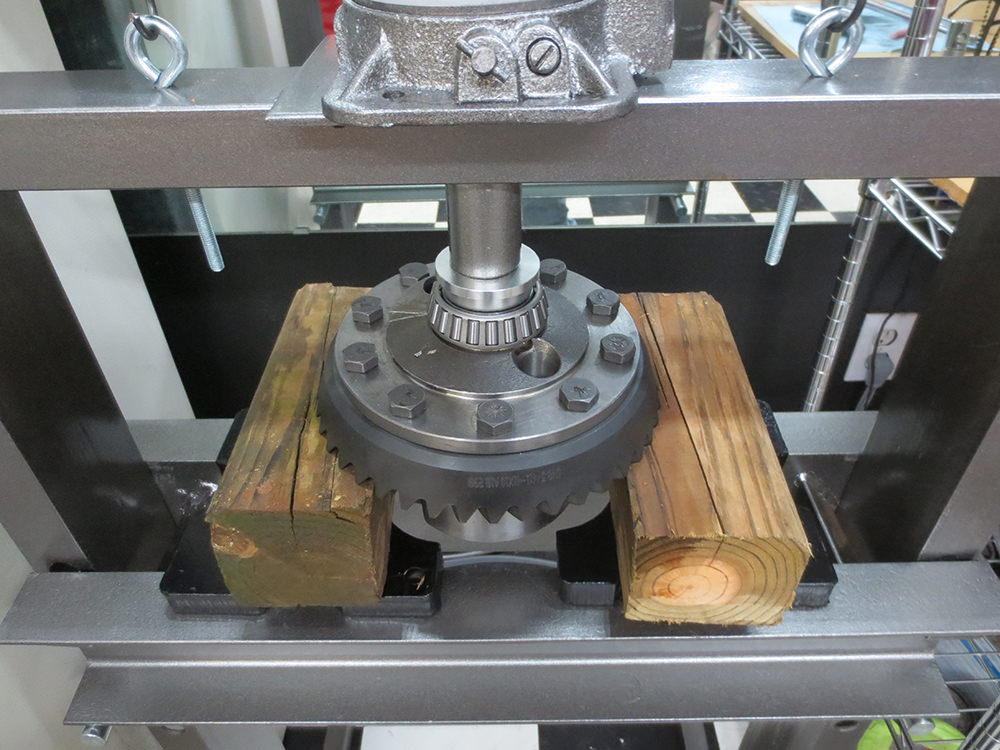
Harbor Freight 20 Ton Press

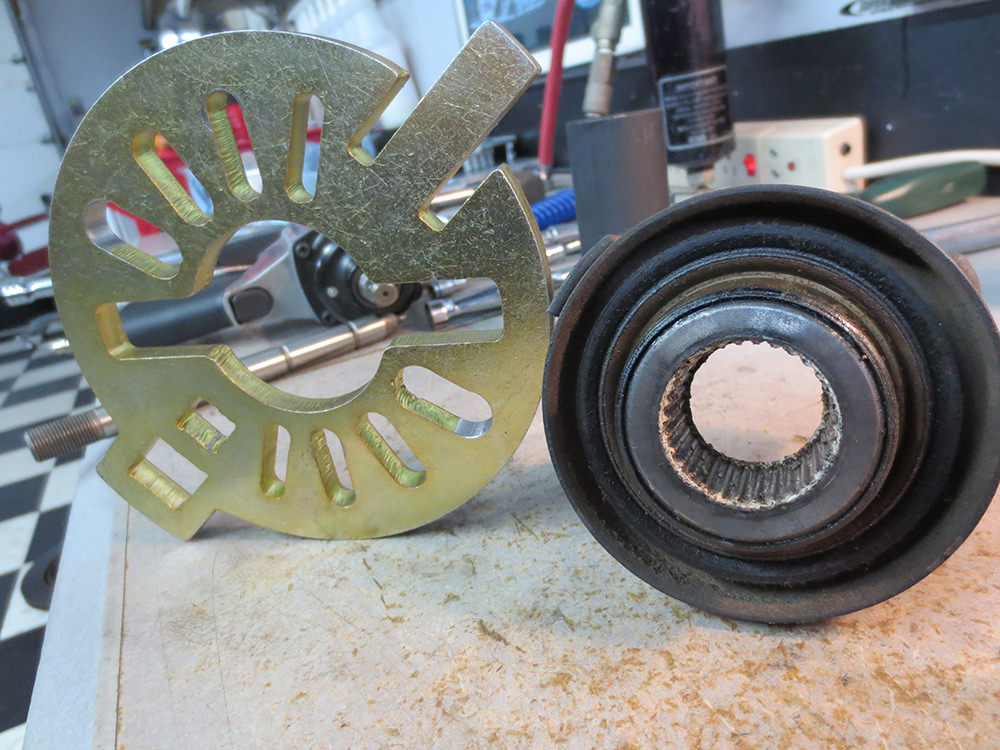
Cheap Pinion Holding Tool (ok for eliminator kit, needs a handle welded on for crush sleeve)

Assorted tools

This video explains the crush sleeve eliminator (helped me doing it the first time)
Stuff I used:
Harbor Freight 6 Ton Stands

Harbor Freight 20 Ton Press
Cheap Pinion Holding Tool (ok for eliminator kit, needs a handle welded on for crush sleeve)
Assorted tools
This video explains the crush sleeve eliminator (helped me doing it the first time)