
TECH: Gearing GCSD3742's Truck
 06-14-2008, 09:10 PM
#21

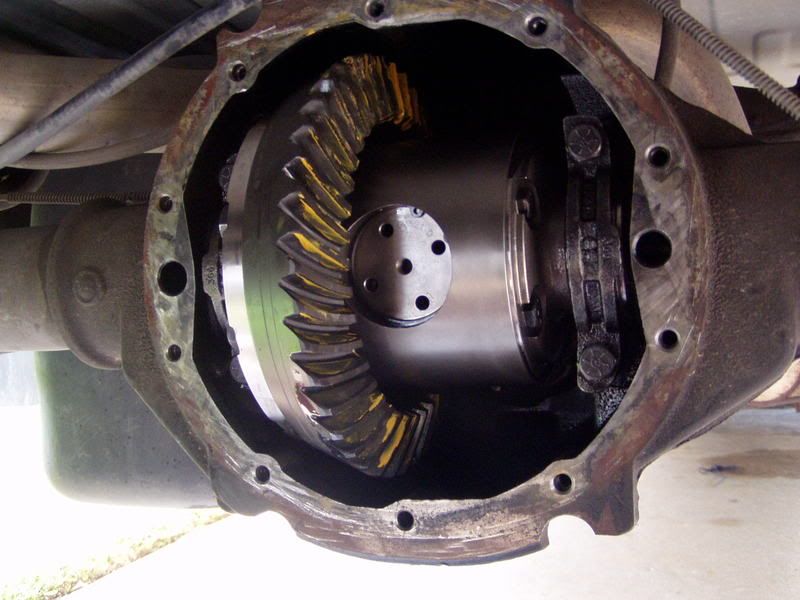
When you install the shims to adjust backlash, I find it is easier to set the differential into place, place the ring-gear side shims in first, and then install the shims on the other side using a hammer and a fat punch. You want the differential to fit tight. You SHOULD NOT be able to install the shims by hand, or grab the differential and pull it out with your bare hands.
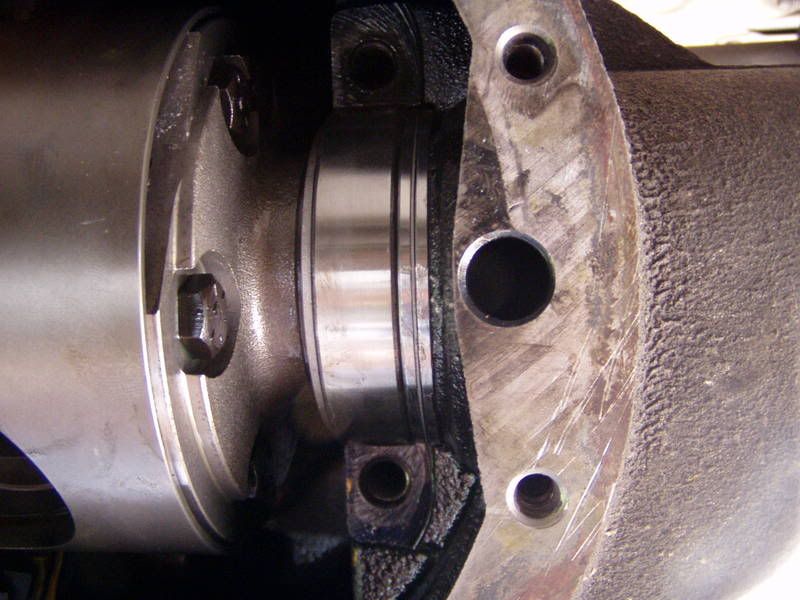
This one worked with a .240" shim on the ring-gear side, and .235" shim on the other side. Of course, you should use dial calipers to measure this.
This one worked with a .240" shim on the ring-gear side, and .235" shim on the other side. Of course, you should use dial calipers to measure this.
Last edited by axisT6; 06-14-2008 at 10:52 PM.
 06-14-2008, 09:15 PM
#22
Next you would install the caps, snug them down, paint 3-5 teeth on the ring gear, and run a pattern. This one came out perfectly.
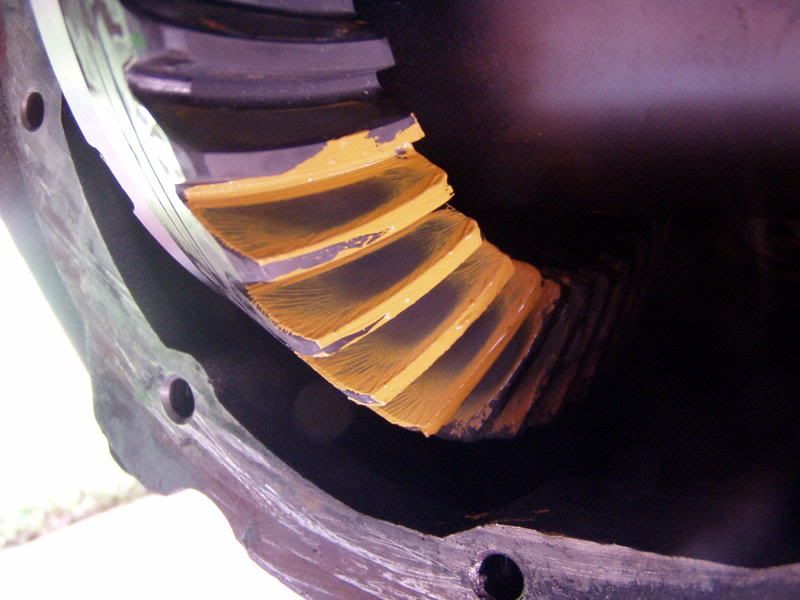
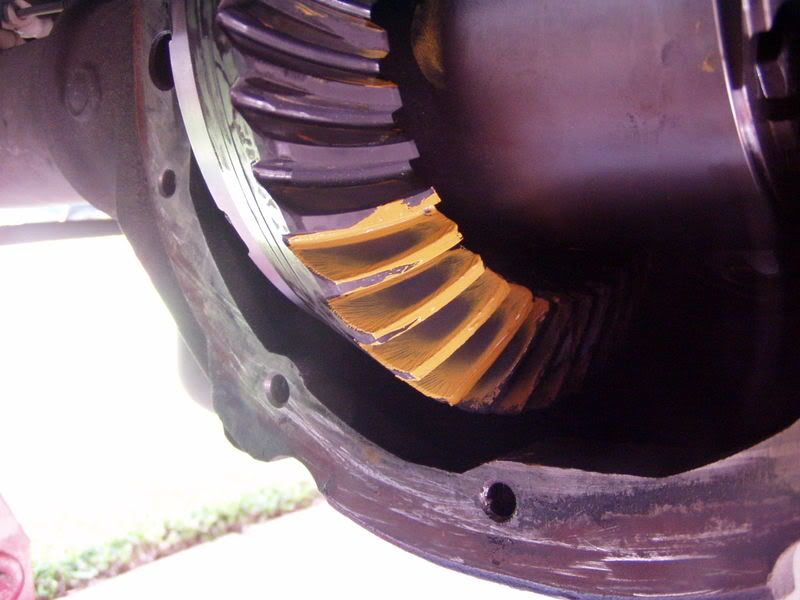
If you notice, the pattern is centered between the top and bottom of the gear teeth. This is how you know you have the correct pinion depth (or pinion shim thickness). It makes no difference if the pattern is not centered between the inside or outside of the teeth.
Also note that this is the coast side of the gear tooth. I choose to run a pattern on that side of the tooth mainly because on used gear sets, only the coast side will give you a readable pattern.
This pattern tells me that this gear set up will run quiet and problem free granted the break-in is done correctly.
Last edited by axisT6; 06-14-2008 at 10:51 PM.
06-14-2008, 09:26 PM
#23
So now that we have a good backlash and perfect pinion depth, all the stuff must be removed once again. I use set-up bearings on the pinion until I get the correct pinion depth setting and then I install the new bearings for the final assembly. After the inner pinion bearing is pressed on the pinion, I also slide on a new crush sleeve. I also install the outer pinion bearing and pinion seal into the housing. It is a good idea to lube the seal and outer bearing at this time with gear oil. I also put gear lube on the inner pinion bearing as well before installing it. I then install the pinion into the housing as far as it will go, and then place the yoke on the end with the old pinion nut.
As the nut is tightened, the outer bearing gets pressed onto the pinion until it contacts the crush sleeve. Then, you have to continue tightening the crush sleeve until the bearings are seated in their races. It takes about 400 ft. lbs. of torque to crush the sleeve.
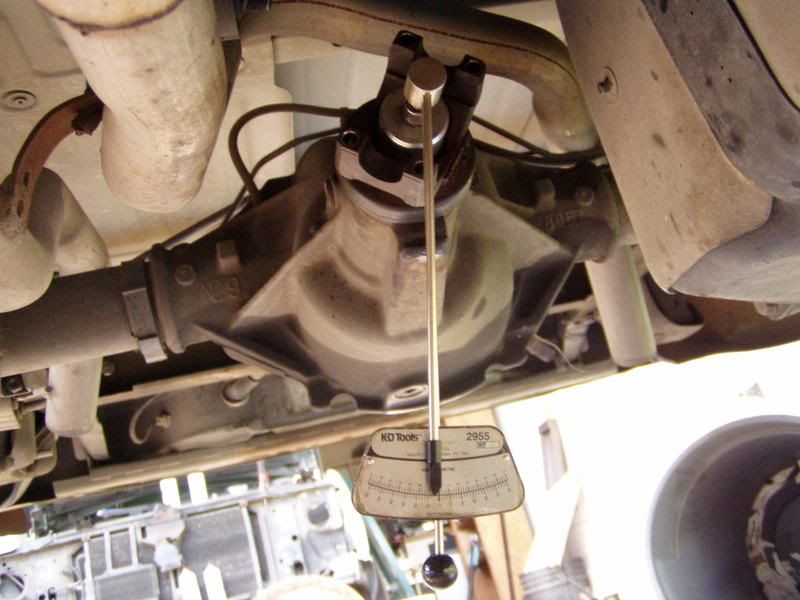
Once the pinion bearings are seated and there is no longer any play in the pinion. I remove the old pinion nut, and install the new one after a I apply a large of amount of RED thread locker to it. I tighten the nut in VERY SMALL increments until the correct amount of drag is placed on the pinion bearings. The "drag" is called pinion bearing preload. The spec is 14-19 in. lbs. of drag, but I shoot for 20 in. lbs. to compensate for the extra drag cause by the pinion seal. You must use an inch-pound bar type, or a dial torque wrench for this. A click style wrench will not work.
As the nut is tightened, the outer bearing gets pressed onto the pinion until it contacts the crush sleeve. Then, you have to continue tightening the crush sleeve until the bearings are seated in their races. It takes about 400 ft. lbs. of torque to crush the sleeve.
Once the pinion bearings are seated and there is no longer any play in the pinion. I remove the old pinion nut, and install the new one after a I apply a large of amount of RED thread locker to it. I tighten the nut in VERY SMALL increments until the correct amount of drag is placed on the pinion bearings. The "drag" is called pinion bearing preload. The spec is 14-19 in. lbs. of drag, but I shoot for 20 in. lbs. to compensate for the extra drag cause by the pinion seal. You must use an inch-pound bar type, or a dial torque wrench for this. A click style wrench will not work.
06-14-2008, 09:28 PM
#24
After you achieve the correct preload, begin the final assembly. Here is the "all done" shot.
I forgot to mention that the beauty of Yukon Gears, besides the quality, is that it comes with an install manual that contains the torque specs for the axle you are working on.
I forgot to mention that the beauty of Yukon Gears, besides the quality, is that it comes with an install manual that contains the torque specs for the axle you are working on.
06-14-2008, 09:30 PM
#25
After the break-in is done, and the gear lube changed, I am positive Lady3bglover will thoroughly enjoy the night and day difference that this swap will provide.
BTW, that goldish stuff was marking compound from when the gears were manufactured.
BTW, that goldish stuff was marking compound from when the gears were manufactured.
06-14-2008, 09:58 PM
#26
TECH Apprentice
iTrader: (5)

Join Date: Jun 2007
Location: South side Houston,Texas
Posts: 348
Likes: 0
Received 0 Likes
on
0 Posts
Wow great write up there axisT6...I will be sure to pass this on to her and we will do the gear lube change it just sucked driving on the freeway no faster than 500 miles..THANKS ALOT I APPRECIATE IT. Also thanks for the 12 pack of beer..Great guy did a great job and as I was leaving he gave me a `12 pack of bud light nice huh?
06-14-2008, 10:10 PM
#27
SPAM HUNTER
iTrader: (19)

Join Date: Jan 2004
Location: NM
Posts: 4,099
Likes: 0
Received 0 Likes
on
0 Posts
 , but just wondering!
Dustin
