
TECH: Installing Gears in a 2014 Silverado
 12-28-2015, 10:48 AM
#1

I was contacted to swap gears on a 2014 Silverado that had been lifted with 37" Tires. Needless to say, 3.08 gears with this set up is no fun to drive. This thread is to show the specifics of gearing the newer 9.5" axle WITH THE 5.3 ENGINE.
Differences between the new 12 bolt 9.5" axle the old 14 bolt 9.5" axle:
1. 12 bolt cover.
2. Machined diff cover surface on the housing is closer to centerline (spacer or special aftermarket cover needed because of this).
3. Newer axle uses uses shim packs on both of sides of the carrier whereas the older version used an adjuster and one shim pack.
4. OE yoke will not work on after market gears (new yoke and pinion seal required with aftermarket gear swap).
5. ABS tone rings make axle removal a little tricky.
6. Pinion bearings are KOYO (oem) and the inner pinion bearing is different however the older 14 bolt inner pinion bearing will still work.
7. Pinion nut is a flanged locknut compared to the locknut/washer combo on the older axle.
8. OEM yoke size is 1415 vs. 1350.
9. THERE IS A CARRIER BREAK - if you have a 3.08 or 3.23 gears and want to go to a 3.42 - 5.38, you will have to change carriers or use a ring gear spacer.
I don't know if an aftermarket carrier is available for the 3.08/3.23 gears.
As of now (according to their site) East Coast Gear Supply (ECGS) sells a kit for this axle that includes everything you need to gear this axle. NOTE: The ECGS yoke requires you to use an adapter u-joint.
I used Randy's Ring and Pinion. They supply a conversion yoke that does not require you to use a conversion U-joint. An ECGS cover spacer is still needed.
The axle tears down similar to a 10 bolt, and the principles mentioned in my gear install how-to still apply.
Last edited by axisT6; 11-11-2016 at 11:15 AM.

 12-28-2015, 10:53 AM
#3
Shaft Removal:
This axle has ABS Tone Rings which have a tight enough fit that you won't be able to slide the axles in by hand to remove the C-Clips. After the center pin is removed from the diff, use a C-clamp to GENTLY push the axle in just enough to remove the C-clip.
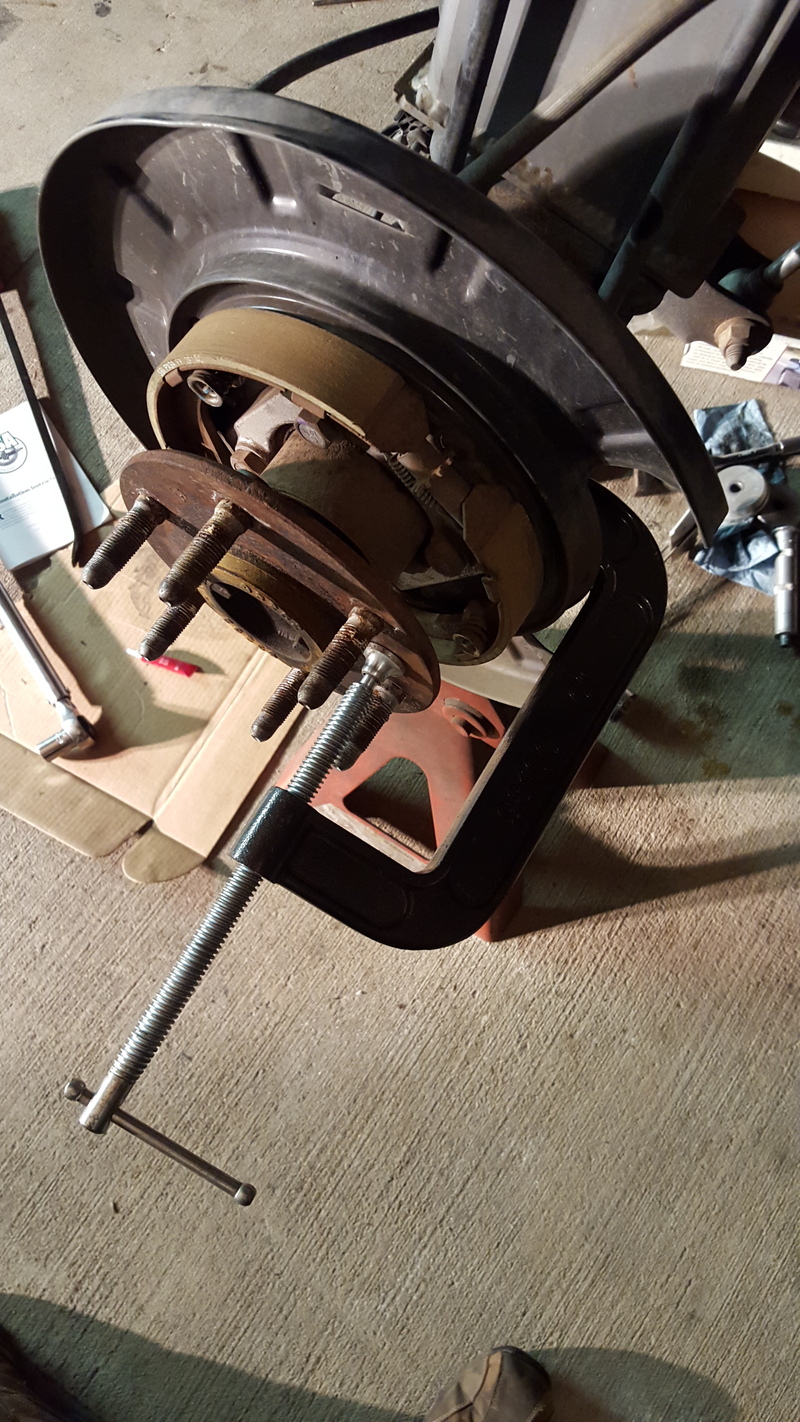
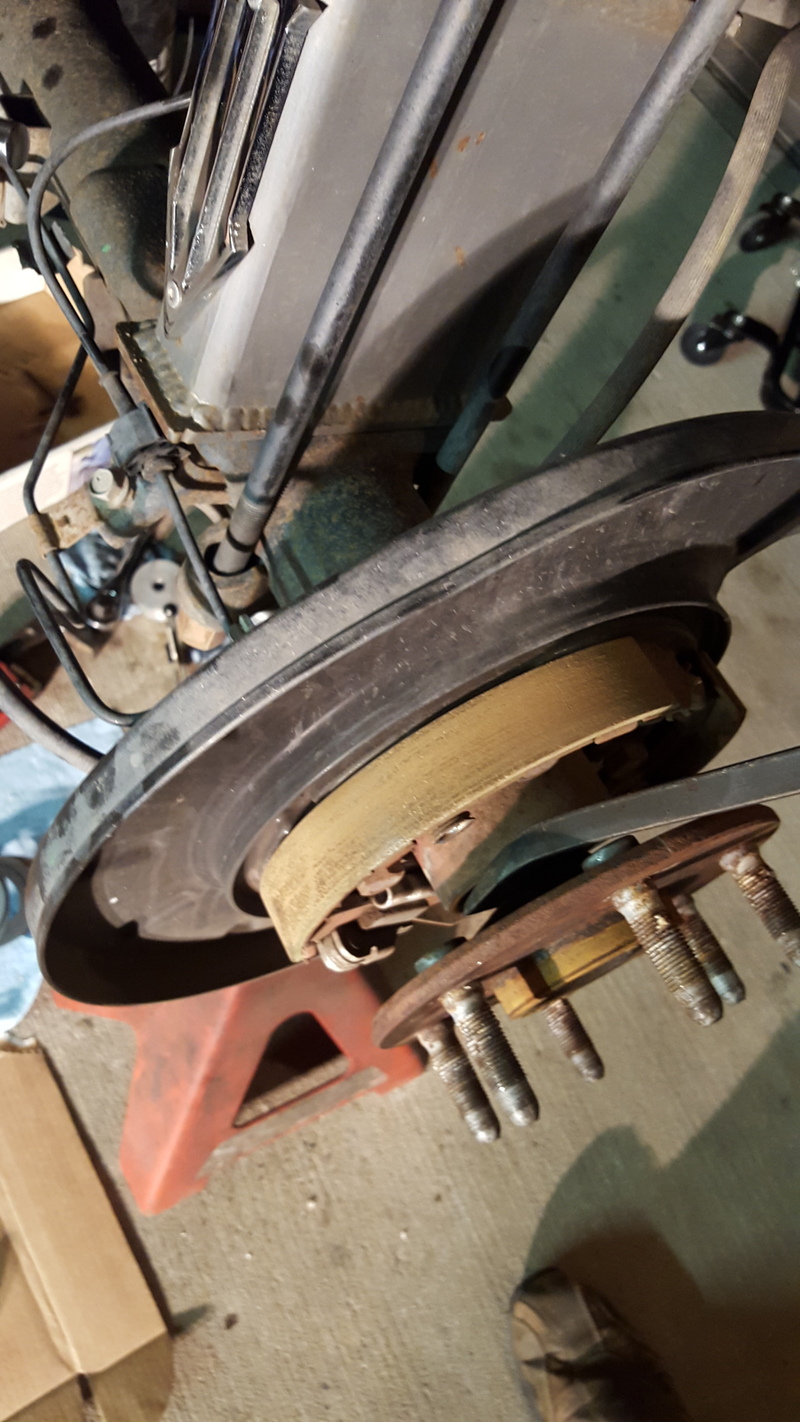
After removing the C-Clips, I used a pry bar to gently pull the shafts free of the fit in the tone rings. In the picture below, I positioned the prybar as shown, catching the end of the axle tube, and then pulled the prybar to move the shaft out.
This axle has ABS Tone Rings which have a tight enough fit that you won't be able to slide the axles in by hand to remove the C-Clips. After the center pin is removed from the diff, use a C-clamp to GENTLY push the axle in just enough to remove the C-clip.

After removing the C-Clips, I used a pry bar to gently pull the shafts free of the fit in the tone rings. In the picture below, I positioned the prybar as shown, catching the end of the axle tube, and then pulled the prybar to move the shaft out.


 12-28-2015, 10:58 AM
#6
Final Pattern:
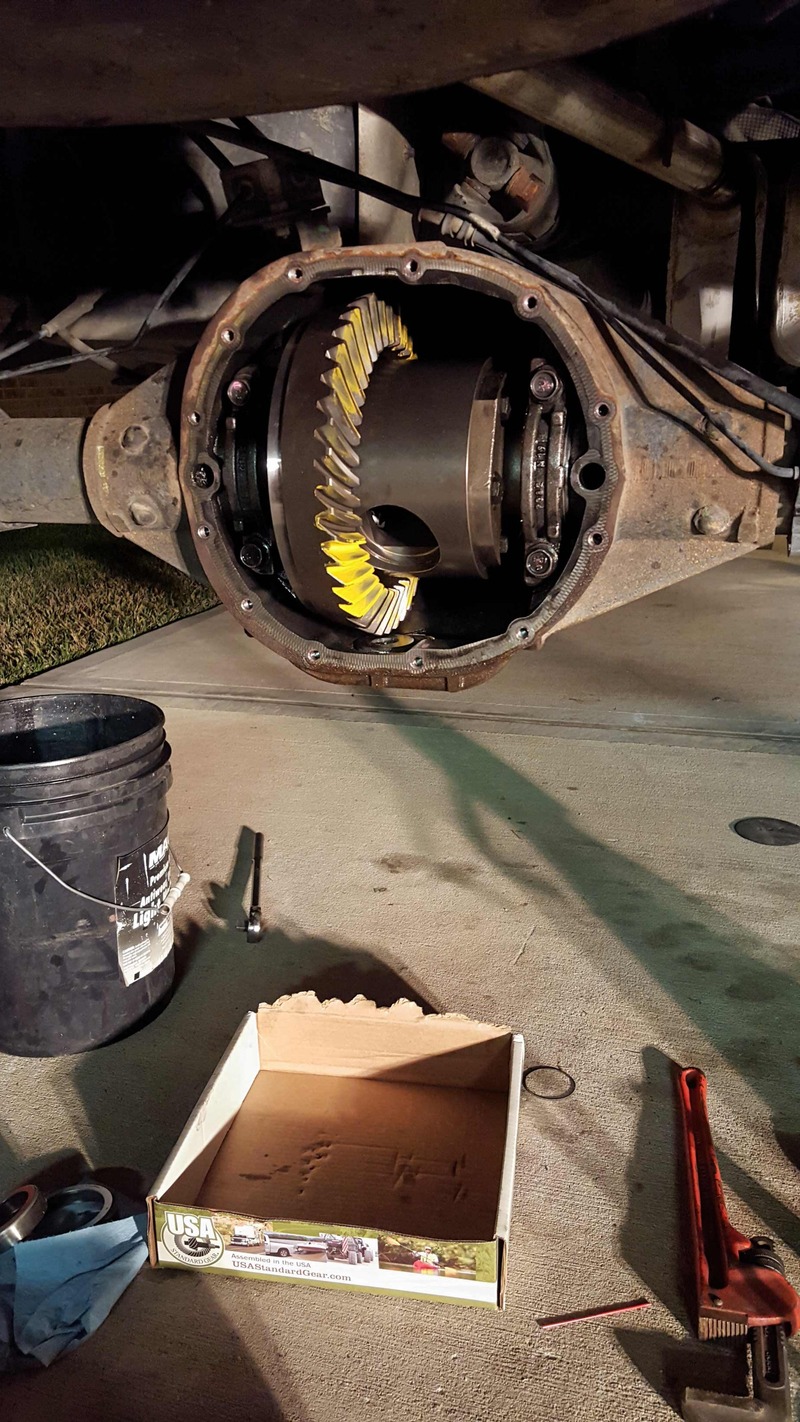
NOTE: The pattern here looks like I have shallow pinion depth, however there is more than meets the eye. I noticed that the lapped in pattern from when the gears were manufactured looked shallow as well. To run the pattern I made sure the gear paint was of a near-runny consistency, tightened the pinion nut to where I got about 1/2-1 free turns, and forcefully ran the pattern using the wrench method. This produced a pattern that was dark at the lap mark, but lightly fanned out from there to show an overall acceptable pattern.
Pinion Seal Installation - The seal used does not have the metal flange that bottoms against the pinion snout when fully installed. When this seal is properly installed, it will be RECESSED ABOUT 1/4" INTO THE PINION SNOUT. You have to hammer the seal in until it stops. If you don't, you will ruin the seal when you install the yoke.
Afterwards, I buttoned it all up and took it for a nice QUIET spin.
NOTE: The pattern here looks like I have shallow pinion depth, however there is more than meets the eye. I noticed that the lapped in pattern from when the gears were manufactured looked shallow as well. To run the pattern I made sure the gear paint was of a near-runny consistency, tightened the pinion nut to where I got about 1/2-1 free turns, and forcefully ran the pattern using the wrench method. This produced a pattern that was dark at the lap mark, but lightly fanned out from there to show an overall acceptable pattern.
Pinion Seal Installation - The seal used does not have the metal flange that bottoms against the pinion snout when fully installed. When this seal is properly installed, it will be RECESSED ABOUT 1/4" INTO THE PINION SNOUT. You have to hammer the seal in until it stops. If you don't, you will ruin the seal when you install the yoke.

Afterwards, I buttoned it all up and took it for a nice QUIET spin.
Last edited by axisT6; 12-28-2015 at 11:32 AM.


Trending Topics

 12-28-2015, 11:40 AM
#9
Final Note - This axle is still new and the after market does not fully support it yet. That said, use this information as a basis to ensure you have all the needed parts for the install. The install kit I received was for the old 14 bolt 9.5" and did not have the extra carrier shim pack or the correct style pinion nut. Fortunately I was able to correctly set backlash using one of the factory ships along with the shim pack.