
Finally got to Install!!!


 good call man
 05-03-2009, 10:52 PM
#13

 05-04-2009, 06:15 AM
#15
TECH Regular
 05-04-2009, 10:31 AM
#16
On The Tree
Thread Starter

Join Date: Mar 2008
Location: Santa Fe, NM
Posts: 159
Likes: 0
Received 0 Likes
on
0 Posts
Yes they are the ceramic coated pacesetters. Today I am going to take the bolts out clean them up and put anti-seize on them plus I am going to paint the muffler with VHT flat black header paint. I'll post pics of that also.
05-04-2009, 04:01 PM
#17
On The Tree
Thread Starter
Join Date: Mar 2008
Location: Santa Fe, NM
Posts: 159
Likes: 0
Received 0 Likes
on
0 Posts
Alright so I went and got some anti-seize and removed the header bolts one-by-one and coated them with it. I also figure why I was at might as well do the spark plugs also. So is all done and good to go.
Now I am in the process of painting my muffler. I'm waiting on the primer to dry. Pics are soon to come.
Now I am in the process of painting my muffler. I'm waiting on the primer to dry. Pics are soon to come.
05-04-2009, 06:00 PM
#18
Staging Lane
iTrader: (6)
Join Date: Apr 2008
Location: Chattanooga, TN
Posts: 91
Likes: 0
Received 0 Likes
on
0 Posts
Are those the clamps that come with the headers or did you get them somewhere else? The reason I ask is I just ordered the same headers and y pipe. Also what did you put on the slip joint before you clamped them, it looks like hight temp permatex and aluminum foil.
05-04-2009, 10:10 PM
#19
On The Tree
Thread Starter
Join Date: Mar 2008
Location: Santa Fe, NM
Posts: 159
Likes: 0
Received 0 Likes
on
0 Posts
Those are clamps that I order not the one that come with it. I order the stepped band clamps but they wont work on the passenger side b/c of the O2 sensor. So what I suggest and did was on the passenger side slip joint I used a flat band clamp. It molds to the pipes and seals up rather well. I would grab you a couple 3" flat band clamps and go to town. For the other slip joints I just used what they sent until today when I took it to the muffler shop and had them weld it up for a good seal. But band clamps will work there also. The piece with the flange that slips onto the part where the y-pipe merges I would get welded, I don't think a band clamp will work there.
To get a good seal I just squirted some hi-temp copper based RTV before I slid the pipes together and wrapped a piece of foil around the joint and clamped it down snug. I haven't had any leaks yet at those joints. I am very happy with the results of the install and performance. You will be also.
BTW I got all my ideas from people on here. I have another thread that talks about installing them also: https://www.performancetrucks.net/fo...d.php?t=437752
05-04-2009, 10:17 PM
#20
On The Tree
Thread Starter
Join Date: Mar 2008
Location: Santa Fe, NM
Posts: 159
Likes: 0
Received 0 Likes
on
0 Posts
Alright here are the pics of my muffler paint job. I just sanded all the rust off, first hit it with a coat of cheap rattle can primer, then I did three coats of VHT High-Temp Flame Proof Flat Black Paint (it is in a rattle can also).
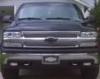
Muffler Before:

Primed:


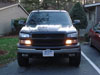
Painted:


Muffler Before:
Primed:
Painted: