
Wideband + Custom Gauge Mount...lots of pics
 11-23-2008, 08:49 PM
#1
Launching!
Thread Starter
iTrader: (5)

Join Date: Nov 2004
Location: Melrose NY
Posts: 286
Likes: 0
Received 0 Likes
on
0 Posts
Finshed up my wideband install today...its an innovative XB-16 guage with LC-1 wideband controller. I like the XB-16 as it looks really nice and comes with two bezels and several guage faces. My only negative is that it mounts way out...like half-an-inch. I decided to make a guage mount where the passenger airbag switch was. I relocated it to the glove-box and used the factory mount as a base for my new gauge pod. Lots of fiberglass, metal mesh, angle rings from autometer, pantyhose , sanding, primer, more sanding, and then some more sanding I had a gauge mount that was easy to see and my own. At night I can even see the gauge perfectly centered in my rear view...makes it even easier to check. I've yet to hook it up to my HPT interface, anyone know of some good links to tuning with a wideband? I was suprised to find that my tune was pretty close-14.7 cruising, and 12.8-13.1 at WOT. Many thanks to Kyle at KBRacing for an easy sale, fast shipping, and all the answers to my many questions. Here ya go...
Installed:

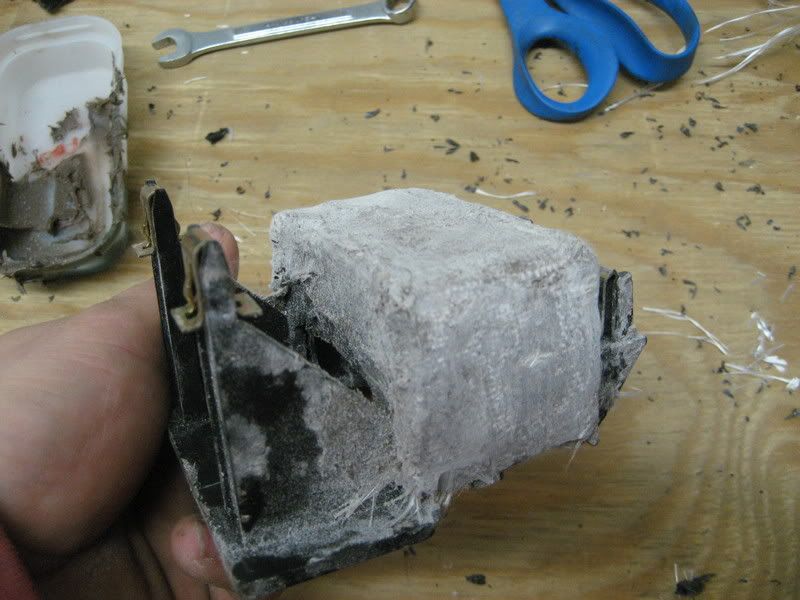
All centered and ready to hack up:

Roughly cut-out and re-enforced:
Ready to glass up my base, I shaved off half of the surface on the factory box to make room for the fiberglass build-up:
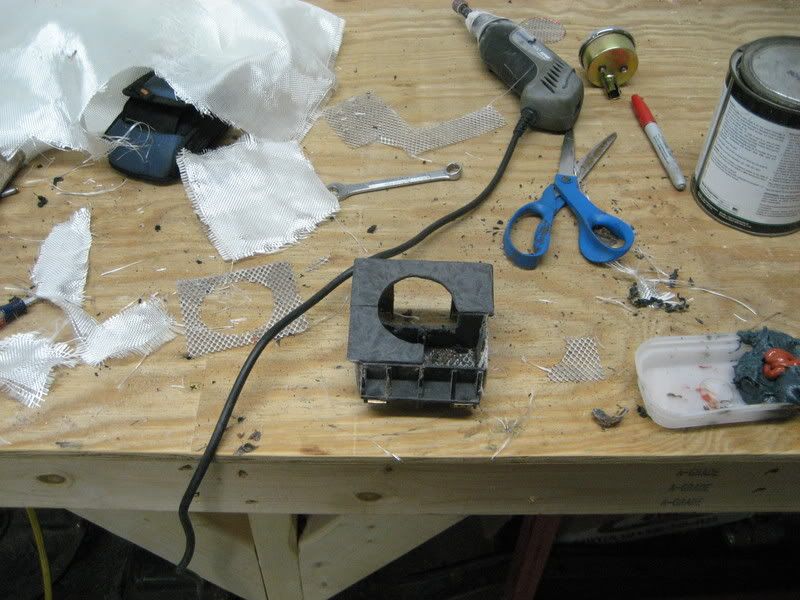
After test fit, installed angle ring, and pantyhose installation:
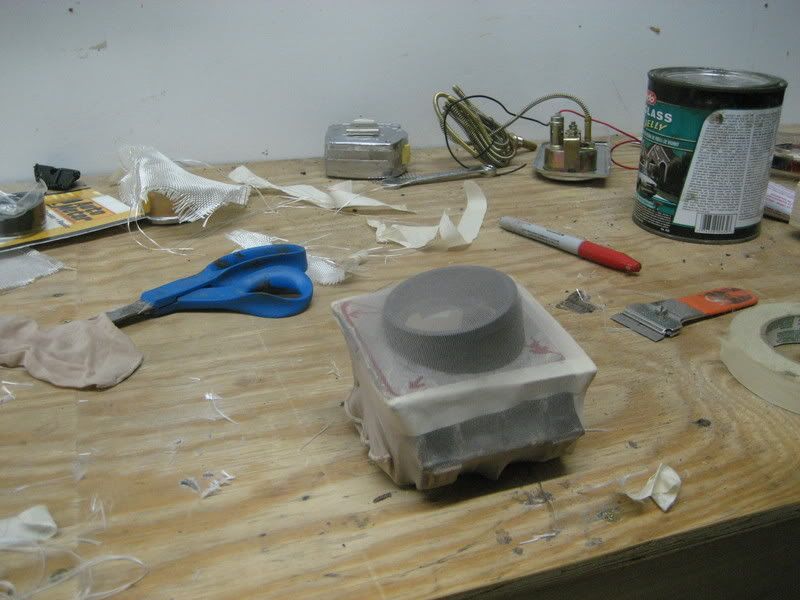
After much fiberglassing, 80 grit sanding, primered, 160 grit sanding, primered again, and 320 grit sanding. The primer helps to see the highs and lows:
All set ready for paint:
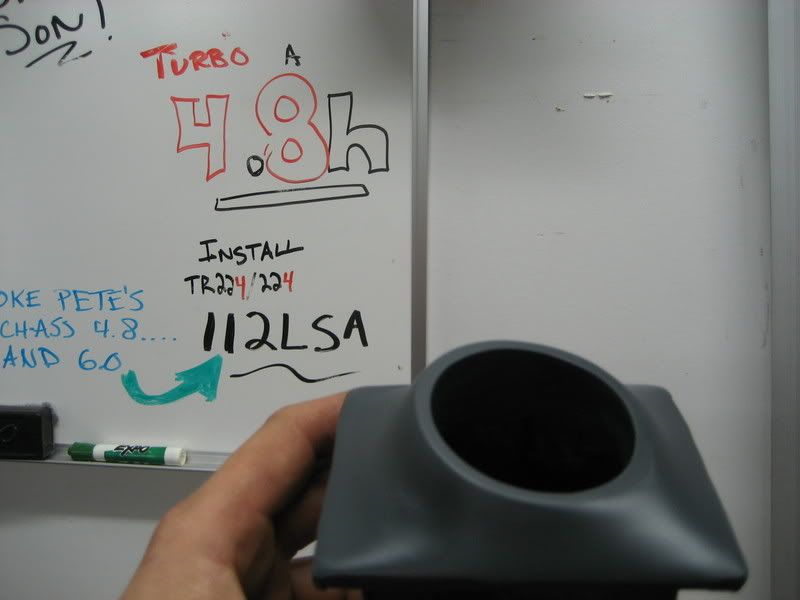
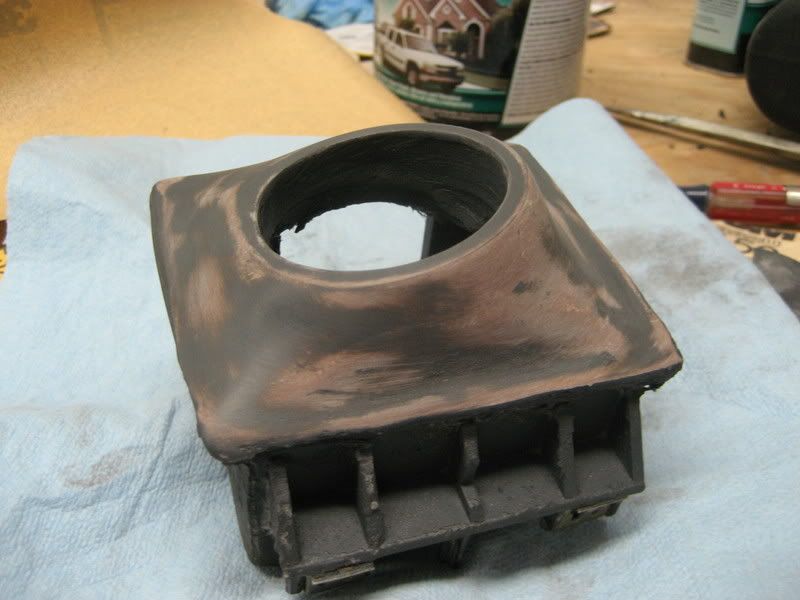
Test fit before gauge install:

XB-16 kit:

Wideband O2 ran up, comes through under the seat which is where the LC-1 is hidden, the wires then run under the drivers sill plate and up from there:

All installed, decide on a silver bezel and white face, comes with a black bezel and a black face as well:

At night:

, sanding, primer, more sanding, and then some more sanding I had a gauge mount that was easy to see and my own. At night I can even see the gauge perfectly centered in my rear view...makes it even easier to check. I've yet to hook it up to my HPT interface, anyone know of some good links to tuning with a wideband? I was suprised to find that my tune was pretty close-14.7 cruising, and 12.8-13.1 at WOT. Many thanks to Kyle at KBRacing for an easy sale, fast shipping, and all the answers to my many questions. Here ya go...Installed:
All centered and ready to hack up:
Roughly cut-out and re-enforced:
Ready to glass up my base, I shaved off half of the surface on the factory box to make room for the fiberglass build-up:
After test fit, installed angle ring, and pantyhose installation:
After much fiberglassing, 80 grit sanding, primered, 160 grit sanding, primered again, and 320 grit sanding. The primer helps to see the highs and lows:
All set ready for paint:
Test fit before gauge install:
XB-16 kit:
Wideband O2 ran up, comes through under the seat which is where the LC-1 is hidden, the wires then run under the drivers sill plate and up from there:
All installed, decide on a silver bezel and white face, comes with a black bezel and a black face as well:
At night:


 11-23-2008, 09:17 PM
#7
Launching!
Thread Starter
iTrader: (5)
Join Date: Nov 2004
Location: Melrose NY
Posts: 286
Likes: 0
Received 0 Likes
on
0 Posts
Thanks for all the comments...it helps to forget the hours of sanding and adjusting.
That was why i did this, i really like the socal pods but they are to hard to just glance at...with it right there i can just glance over, also the perimeter leds catch your eye as they change color. And it helps too every time i look in my rear view i see the Digital Display, its so coincidentally perfect that it made me laugh the first time i saw it.
That was why i did this, i really like the socal pods but they are to hard to just glance at...with it right there i can just glance over, also the perimeter leds catch your eye as they change color. And it helps too every time i look in my rear view i see the Digital Display, its so coincidentally perfect that it made me laugh the first time i saw it.


 The rear view mirror option is a nice coincidence