Battery relocate without a fuel cell
 07-22-2012, 08:48 PM
#11
13 Second Truck Club
iTrader: (13)

Join Date: Mar 2008
Location: Arlington (DFW), Texas
Posts: 2,663
Likes: 0
Received 0 Likes
on
0 Posts
I had a hide a hitch on my S10 at one point, but removed it a used the space for my battery cut off switch. All I had to do was pull the plate off.


 07-22-2012, 08:49 PM
#12
I just don't want it to be tampered with. When I had Spoolins truck I always had to keep an eye on it, or put the key in the cab. For some reason, I was paranoid someone was going to steal it just to **** with me  I know they make the pushbutton type...I wouldn't be opposed to running one of those. Least there's no key to steal
07-22-2012, 08:59 PM
#13

That Sonoma is really cool, I might do that. NHRA reg says you have to have a battery cut off switch accessible from the rearmost exterior of the vehicle. Does anyone know if that means visible from the outside, or can it be obscured, out of sight? Still easy to get to, but not easy to see..
You might also check into the Dmax van battery mount. It mounts the battery down on the framerail below the front door.
07-22-2012, 09:50 PM
#15
Believe its made by flaming river, its what a few of the quick street cars are running around here. Search in the projects section for 04Denali's twin turbo denali build. He had his installed in an extra spare tire lock cap. I'm on my phone otherwise I'd look for it.
07-23-2012, 03:07 AM
#16

Like this. The Big Switch with Lever Kit - FR1003-2 - 584 - 5466 It's an on/off kit with a lever. You can un-screw the handle from the threaded rod so it barely noticeable.
09-11-2012, 12:18 AM
#17
Update...got the tray in. Just need to get it wired up now. What are you guys doing for wire gauge? I am seeing people use 1, 2, 0... I am going to run the biggest piece up the frame rail and branch off at a little box near the starter. 0 gauge to the box, stock starter cable from the box to starter, and then 2 gauge to the alt/fuse box.
Shitty power at the house I'm working at, so the welder has a hard time putting a nice bead on anything

Shitty power at the house I'm working at, so the welder has a hard time putting a nice bead on anything
09-11-2012, 02:04 AM
#18


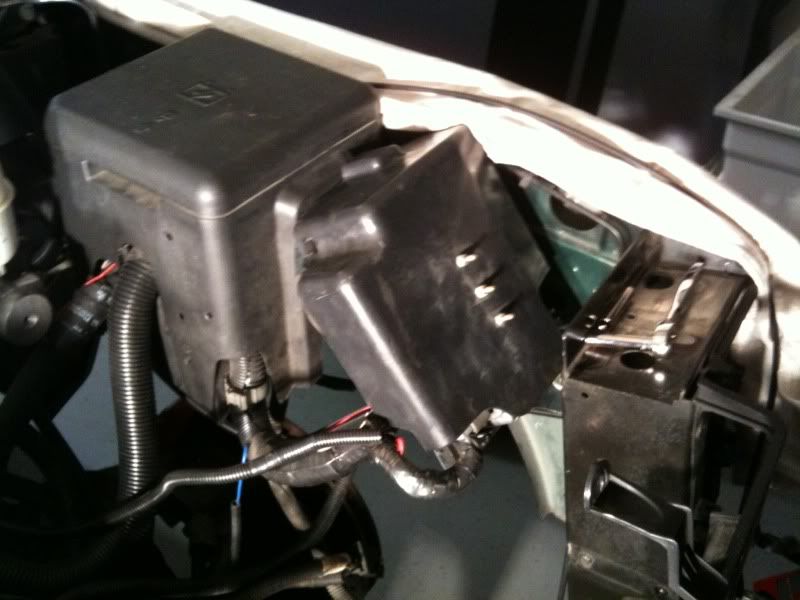
Here's how I built my PCM tray. You can copy my design and I won't sue you for over copyright infringement or Proprietary innovation. That is unless your too lazy to actually take the time any build a badass tray like that!!

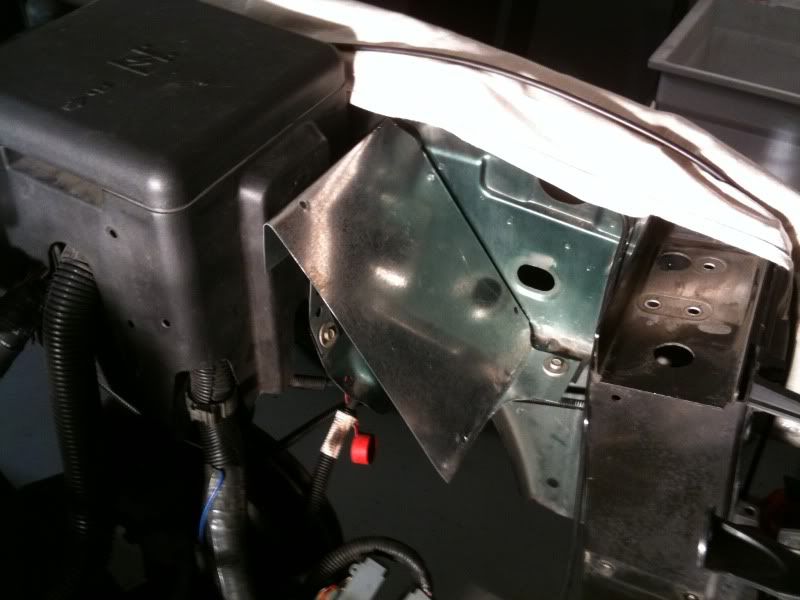
Bought some sheet metal and fabbed myself a PCM tray so that I can re-locate the PCM to where the battery used to be.
I started with a flat piece, started cutting and bending it...
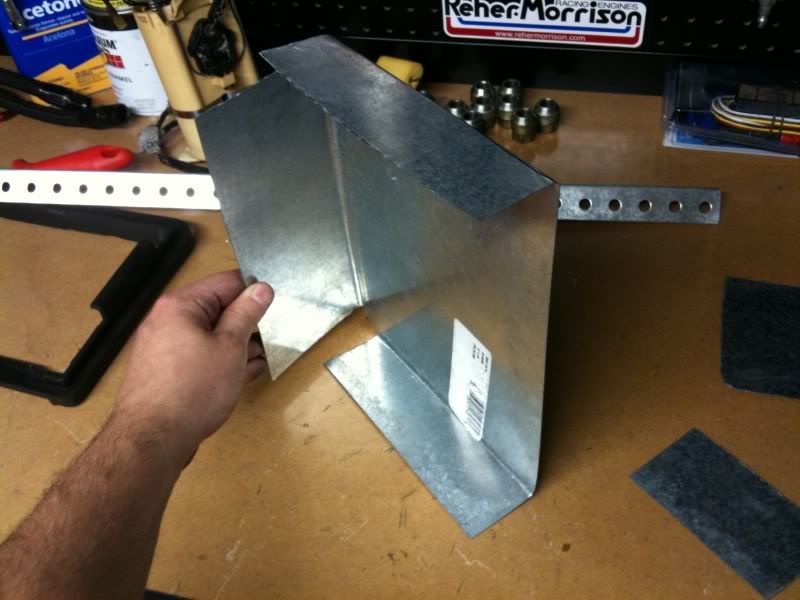
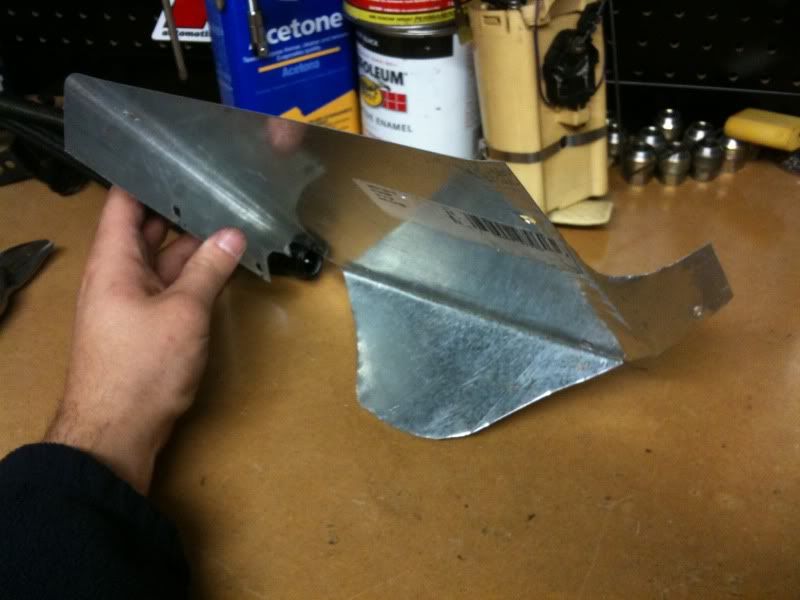
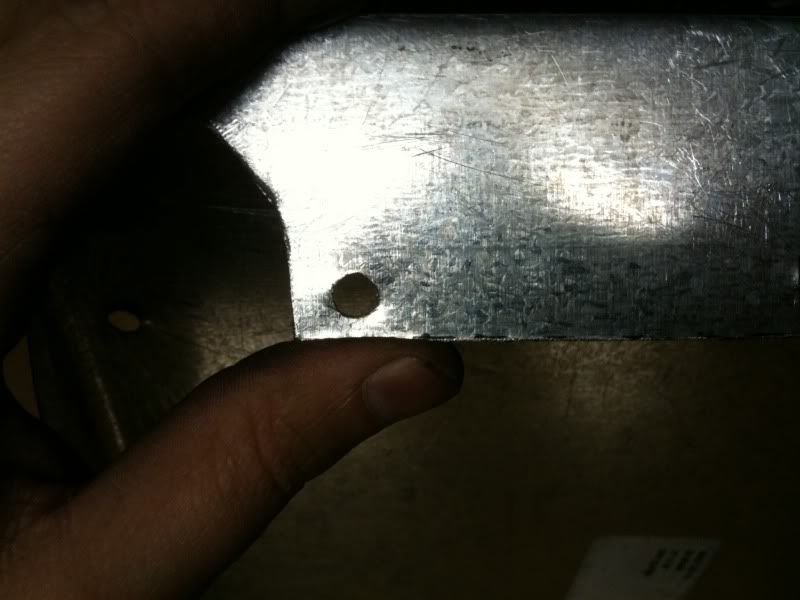
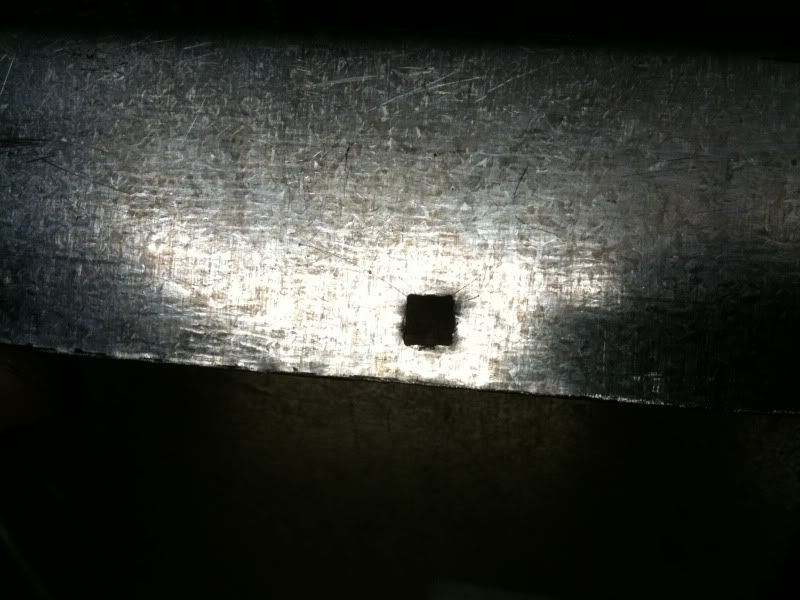
I was trying to use carriage bolts that I had but they had a square shaft so I had to do the same with the holes...
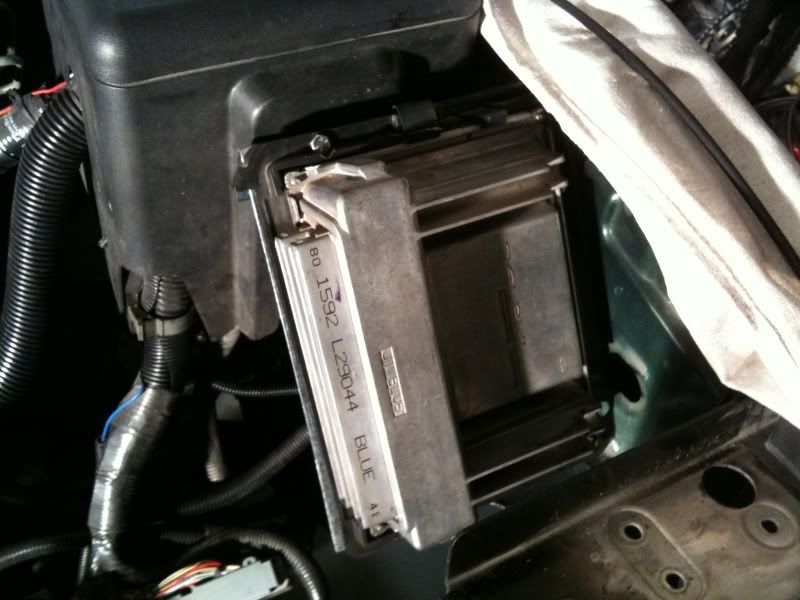
Here it is mounted in place...
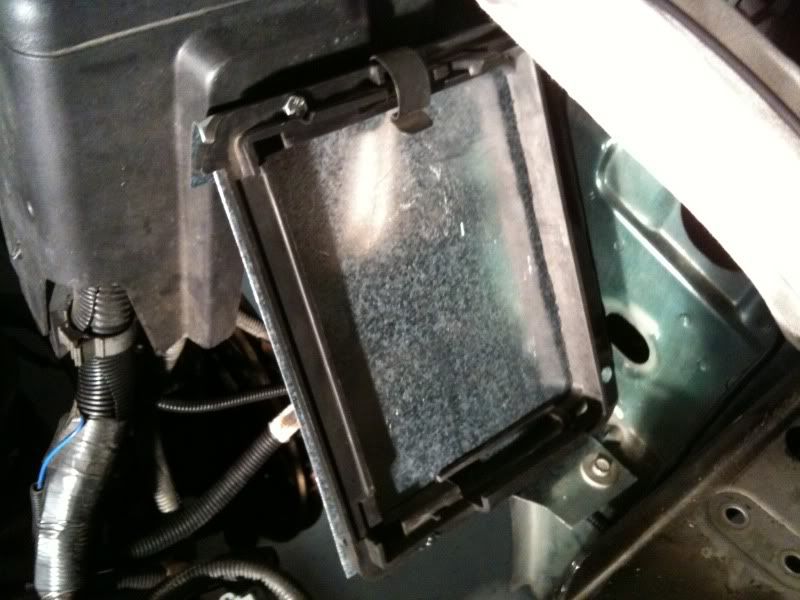
With the plastic PCM tray that I hacked to pieces...
PCM installed...
And I'm still able to re-use the stock plastic shield.
I started with a flat piece, started cutting and bending it...
I was trying to use carriage bolts that I had but they had a square shaft so I had to do the same with the holes...
Here it is mounted in place...
With the plastic PCM tray that I hacked to pieces...
PCM installed...
And I'm still able to re-use the stock plastic shield.
09-11-2012, 02:23 AM
#19
And here's where I put my battery, and in case your wondering...
1) Makes it real easy to do the battery disconnect switch!
2) Doesn't get in the way of the spare tire because it replaces one of the factory cross-members. (on second thought it might not...but you can probably figure out a way to place it in relation to the spare tire where it can work back there, and if you can't ask me because I could find a spot for it back there with the spare tire back there)
3) It's fantastic for weight distribution!
Soooo...I got a new battery tray...
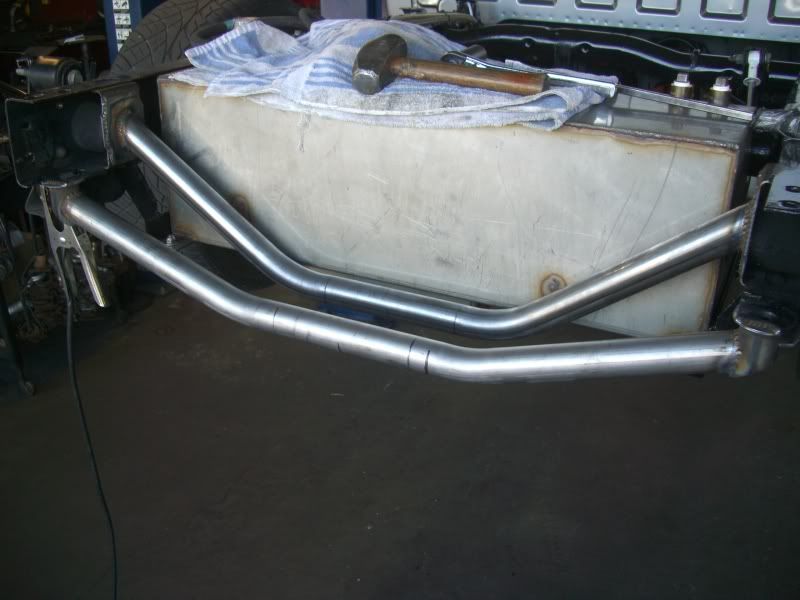
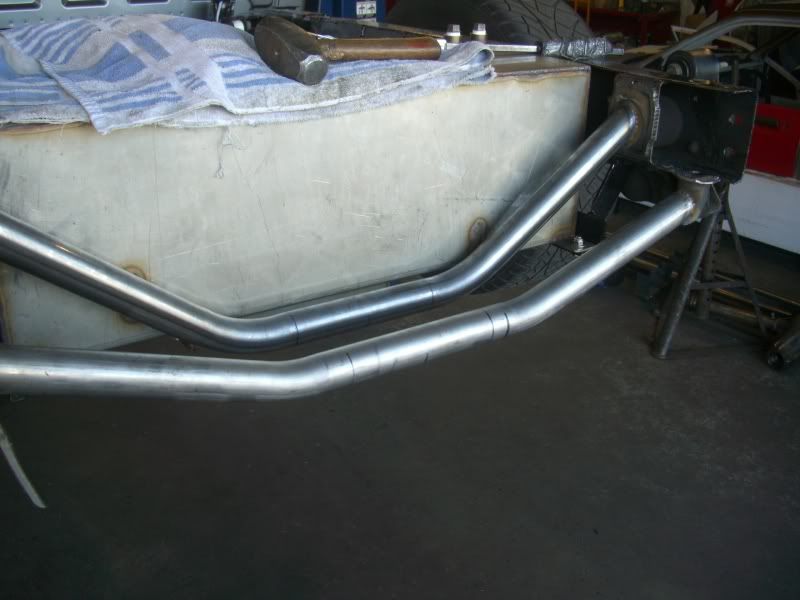
Got my truck towed to a buddy's shop. He builds cages and road racing cars, so he's pretty good with a mandrel bender! Anyways, we tried to figure something out that would stiffen up the rear frame between the hangers as well as provide me with a place to locate the battery. So this is how it came to be...
Started off by boxing in the location where the previous crossmember used to be...
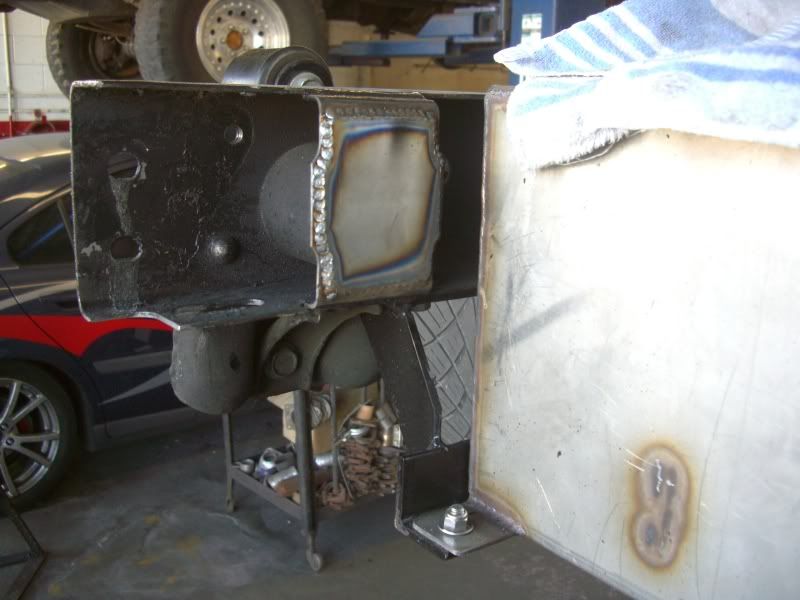
Installed the first crossmember...
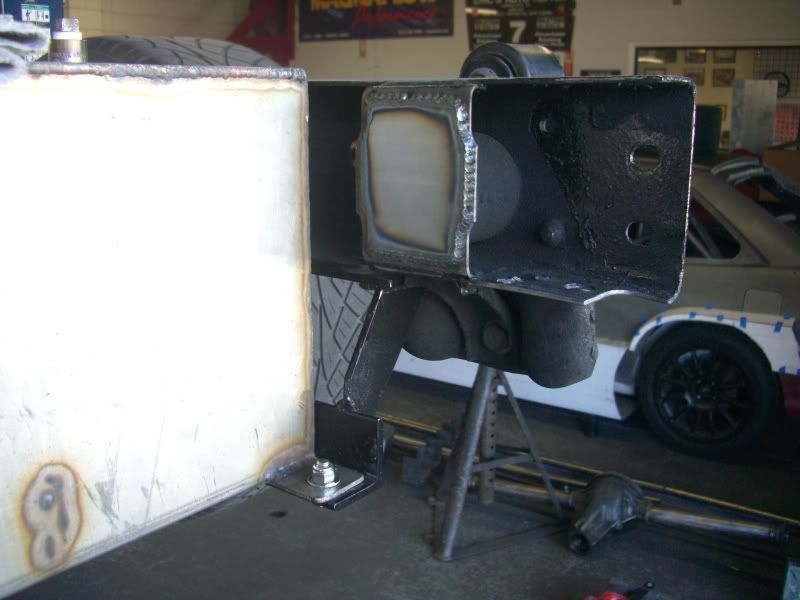
Followed by the second, you'll notice he welded cups onto the bottom of the frame rails, and welded the crossmember there. The cups are hollow so as to allow access to the bolts that secure the bumper in place...
And finished up by building a small battery tray...
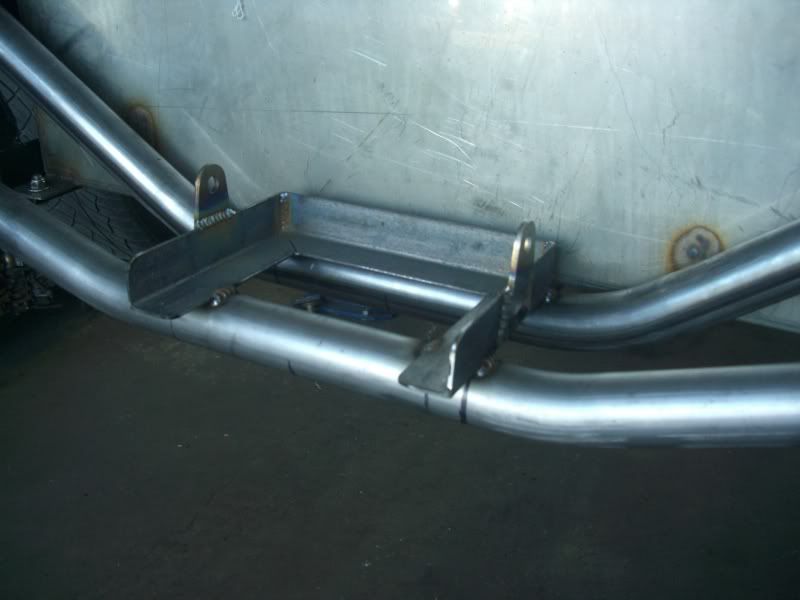
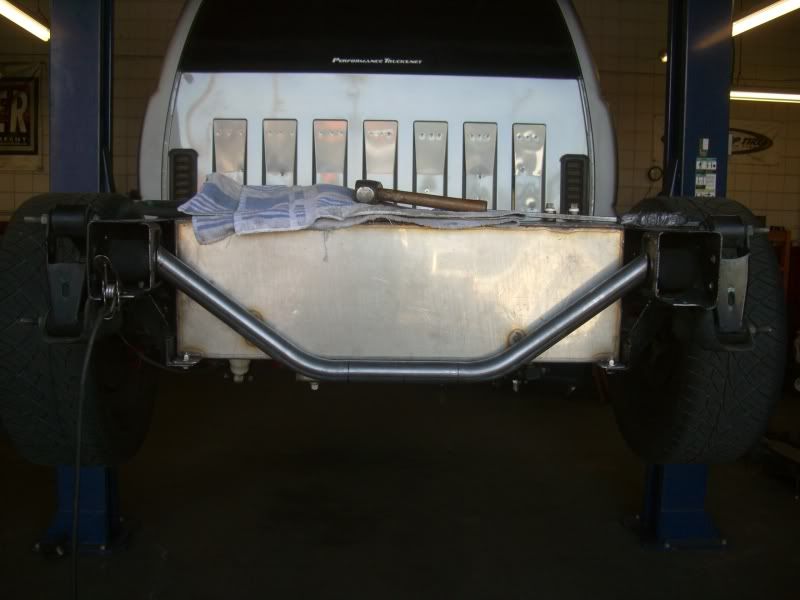
Here's what it looks like with the bumper in place and a battery sitting in the tray...
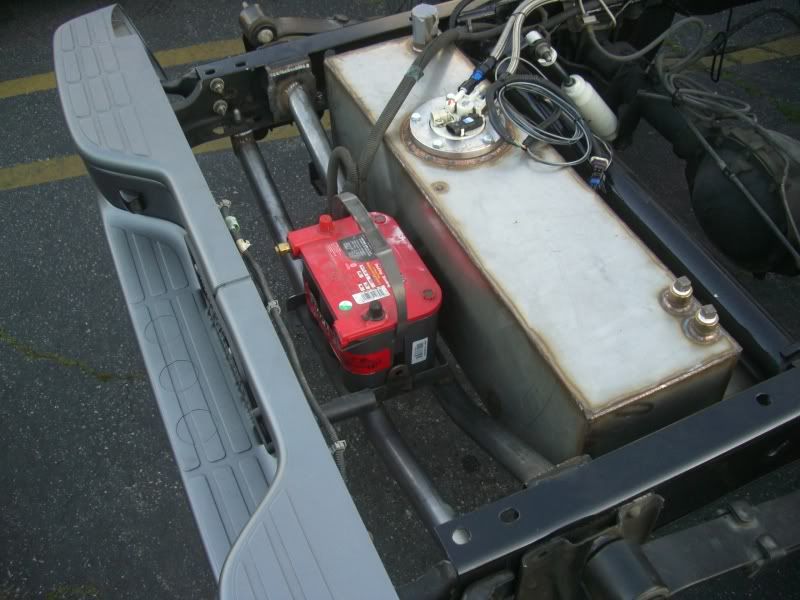
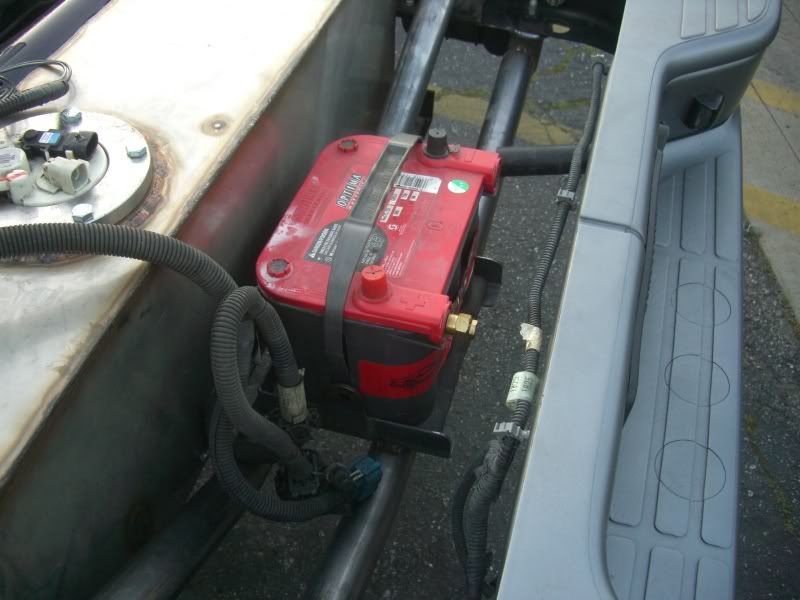
I plan on running remote leads into the bumper so as to do an easy jump start if need be. Only drawback to this is that I'll have to pull the bumper off to swap out batteries. Ahh well...
Got my truck towed to a buddy's shop. He builds cages and road racing cars, so he's pretty good with a mandrel bender! Anyways, we tried to figure something out that would stiffen up the rear frame between the hangers as well as provide me with a place to locate the battery. So this is how it came to be...
Started off by boxing in the location where the previous crossmember used to be...
Installed the first crossmember...
Followed by the second, you'll notice he welded cups onto the bottom of the frame rails, and welded the crossmember there. The cups are hollow so as to allow access to the bolts that secure the bumper in place...
And finished up by building a small battery tray...
Here's what it looks like with the bumper in place and a battery sitting in the tray...
I plan on running remote leads into the bumper so as to do an easy jump start if need be. Only drawback to this is that I'll have to pull the bumper off to swap out batteries. Ahh well...