Finished Nano/Nitrous Rack
#1
We got the Nano/Nitrous Rack back from powdercoat and finished the installation.
We had the bottoms of the bottles done in Line-X to prevent chipping.
We sanded and then covered the aluminum panels in clear acrylic enamel.
The lines (-6 Nitrous and -8 Blow Off) have bulkhead fittings in the floor of the compartment. This is so we can pull the lines and cap the bulkhead fittings when not in use. Once the lines are pulled the compartment cover can be reinstalled.


#4
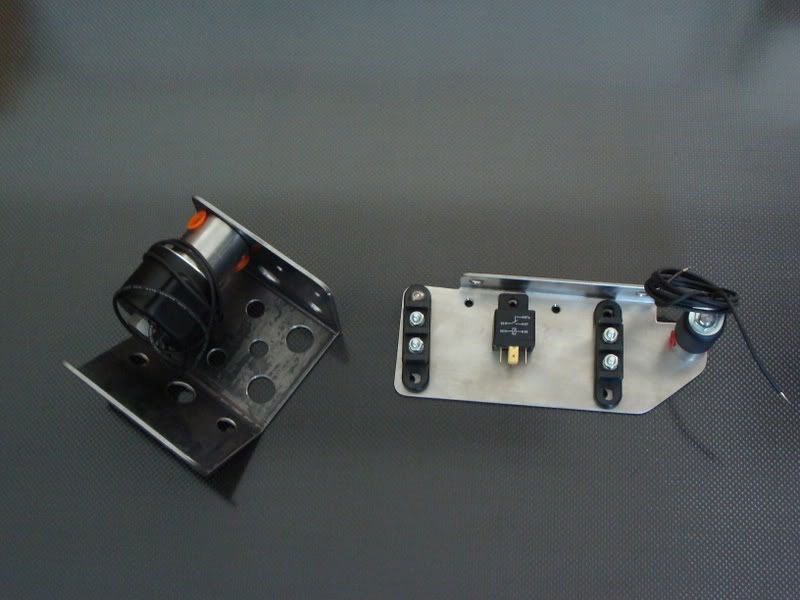
Here are some pictures of the Nitrous Solenoid/Relay Brackets. Everything mounts up behind the headlights for easy service. The Switch Panel will be mounted inside the center consol out of site. We need to finish up the lines, wiring and NOS Launcher with 3.5 LCD Touch Screen then off for some testing. The Purg blows out the brake cooling duct on the passenger side of the front bumper.
Before Powdercoat:

After Powdercoat:

Nitrous/Fuel Solenoid Bracket

Purg/Relay Bracket

Before Powdercoat:

After Powdercoat:

Nitrous/Fuel Solenoid Bracket

Purg/Relay Bracket

Last edited by leftcoast32; 03-07-2009 at 11:15 AM.
Trending Topics
#8
Thanks for all the great comments!!
Thanks, here is a link to almost all of the build to date.
https://www.performancetrucks.net/fo...d.php?t=400482
https://www.performancetrucks.net/fo...d.php?t=400482
#9
I still have alot of wiring to do but here are some progress pictures.
Nitrous Hi Flow Filter and 1/8 NPT Port for Nitrous Pressure Sending Unit


Relay Bracket with Purg Finished (Sprays out the Brake Duct on Passenger Side)

Nitrous and Fuel Solenoids (Lines Finished)

Nitrous Spray Bar Inlet with Lines Attached


Stand Alone Fuel System with Pressure Regulator and Fuel Pressure Gauge (1/8 NPT Port for Fuel Pressure Sending Unit)

Nitrous Hi Flow Filter and 1/8 NPT Port for Nitrous Pressure Sending Unit


Relay Bracket with Purg Finished (Sprays out the Brake Duct on Passenger Side)

Nitrous and Fuel Solenoids (Lines Finished)

Nitrous Spray Bar Inlet with Lines Attached


Stand Alone Fuel System with Pressure Regulator and Fuel Pressure Gauge (1/8 NPT Port for Fuel Pressure Sending Unit)


