
2000 Chevy Silverado project "Charlie Murphy"
 10-26-2012, 11:41 PM
#111

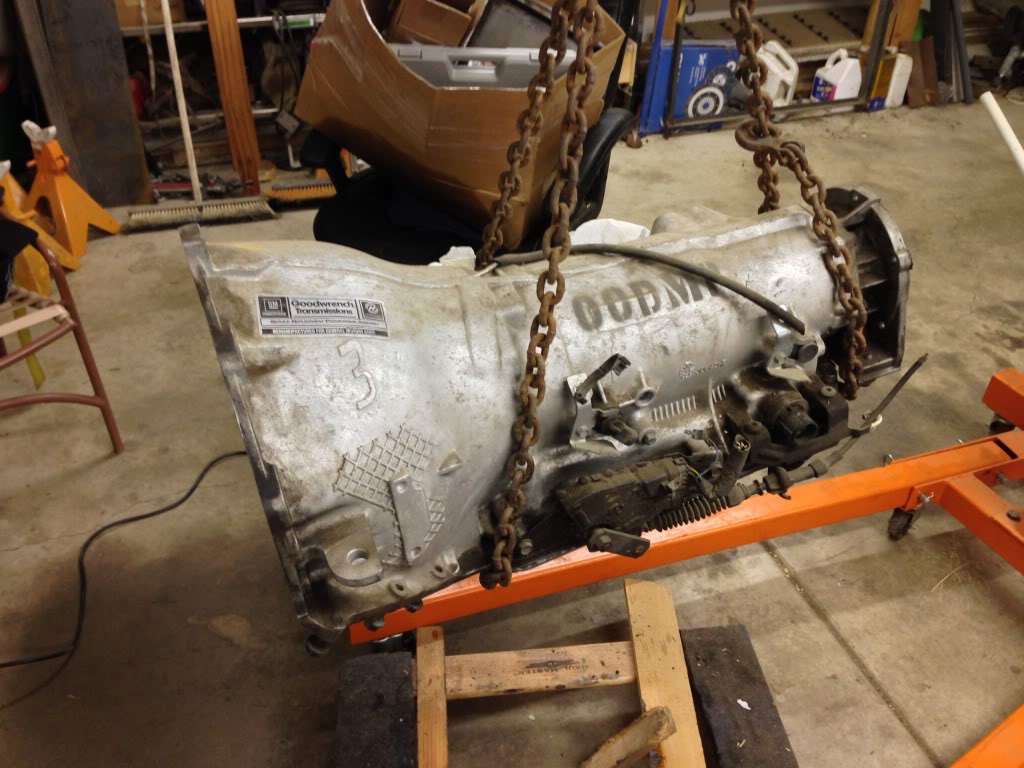
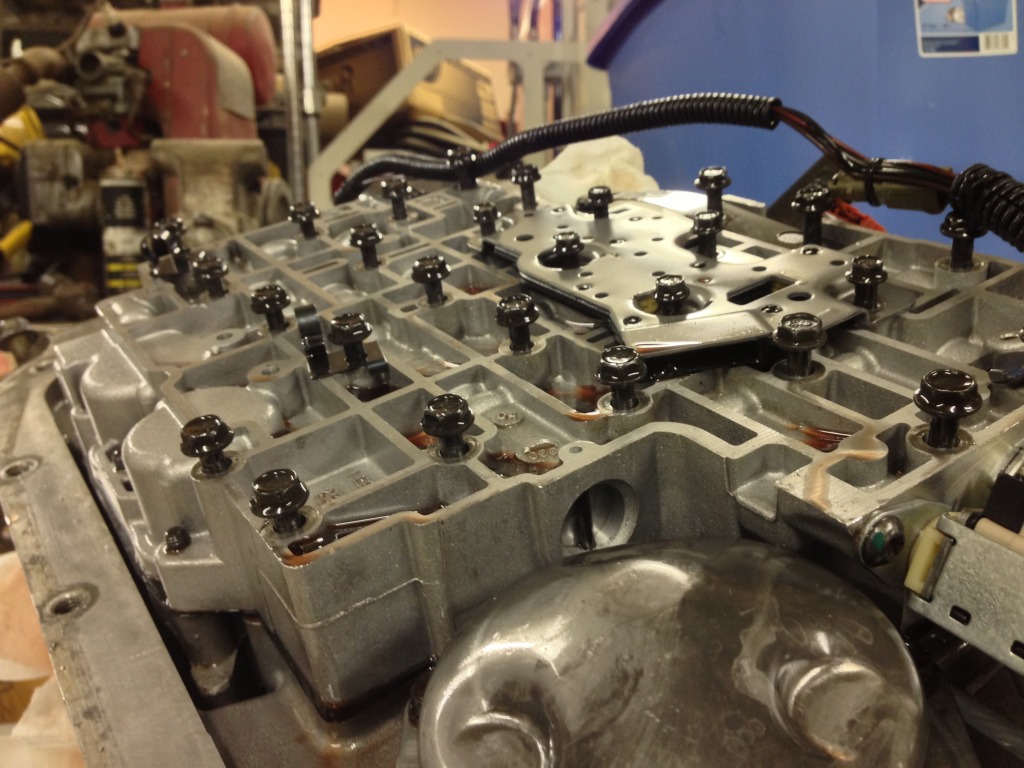
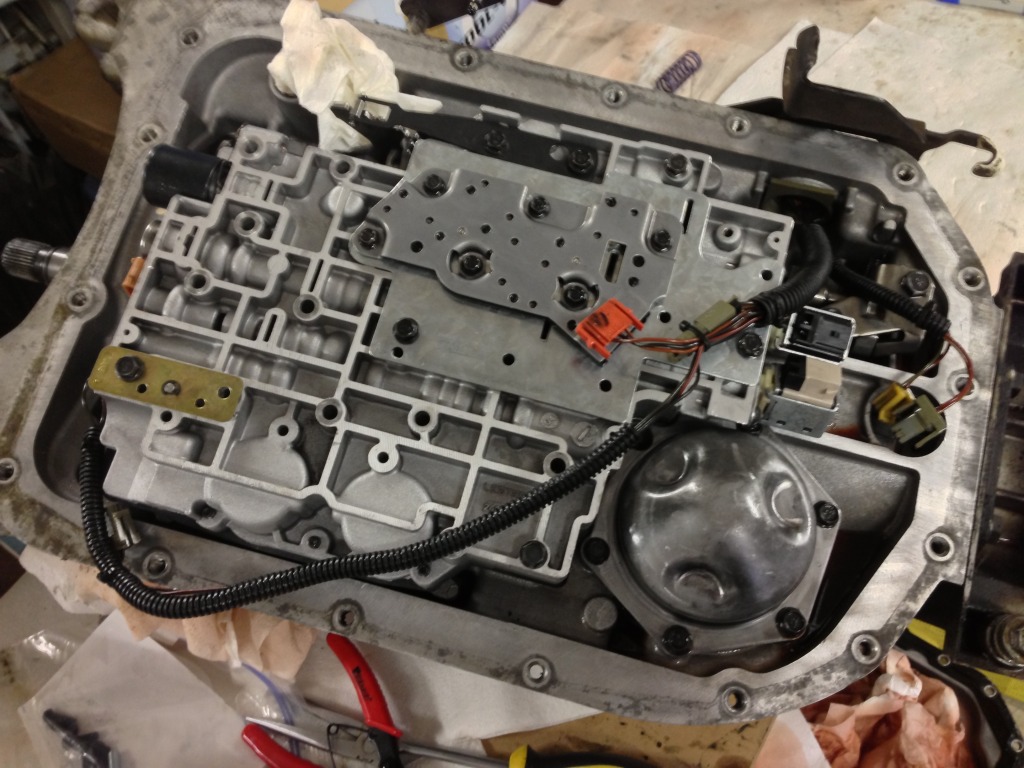
So I started messing around with the 4L80E today. Supposedly it's a GM Goodmark rebuilt transmission.
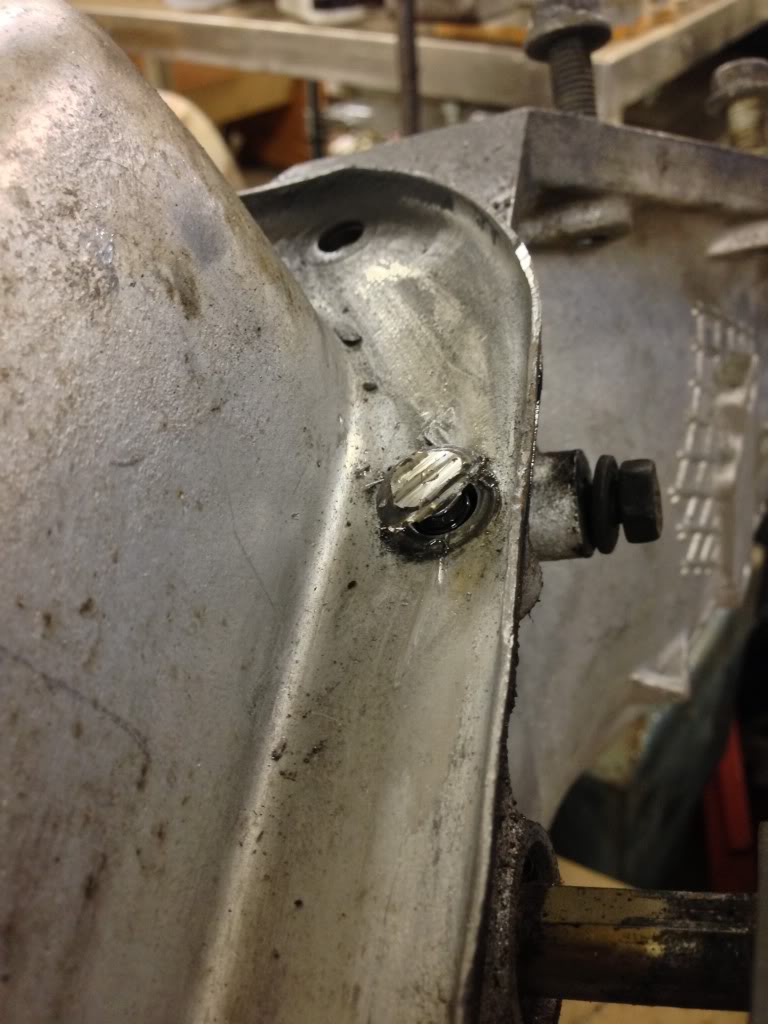
There always has to be that one stubborn bolt.
It's amazing how simple these are. Oh wait, that's not true at all.
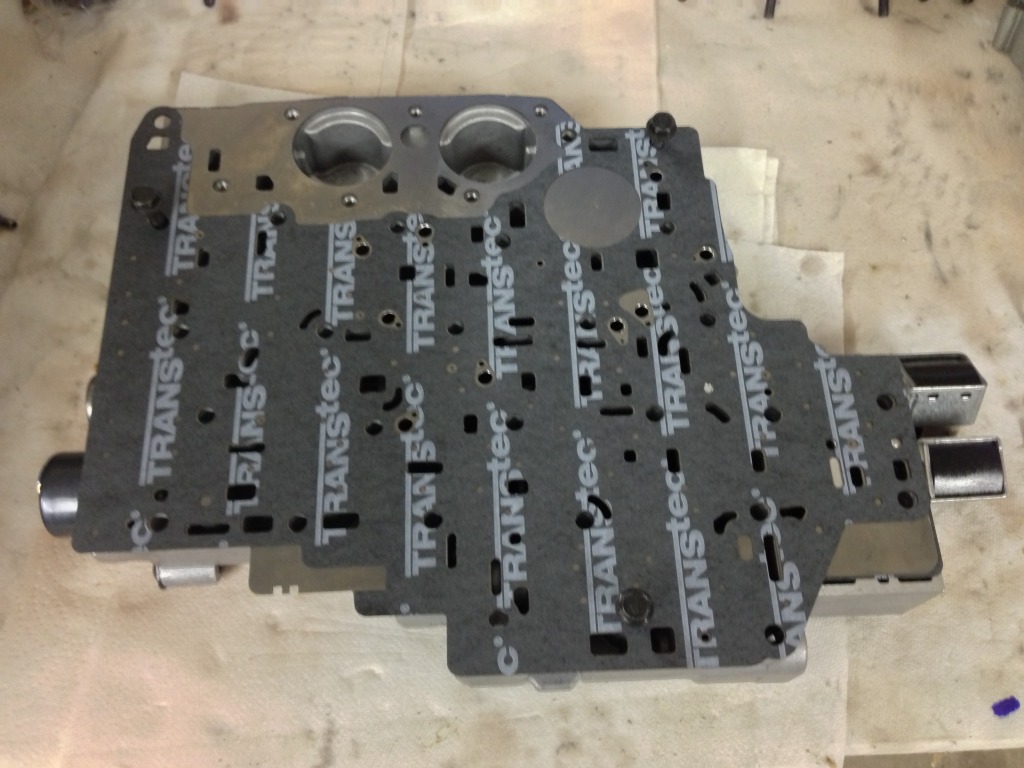
Everything in here looks nice and clean to me.
There always has to be that one stubborn bolt.
It's amazing how simple these are. Oh wait, that's not true at all.
Everything in here looks nice and clean to me.
 10-28-2012, 04:00 AM
#112
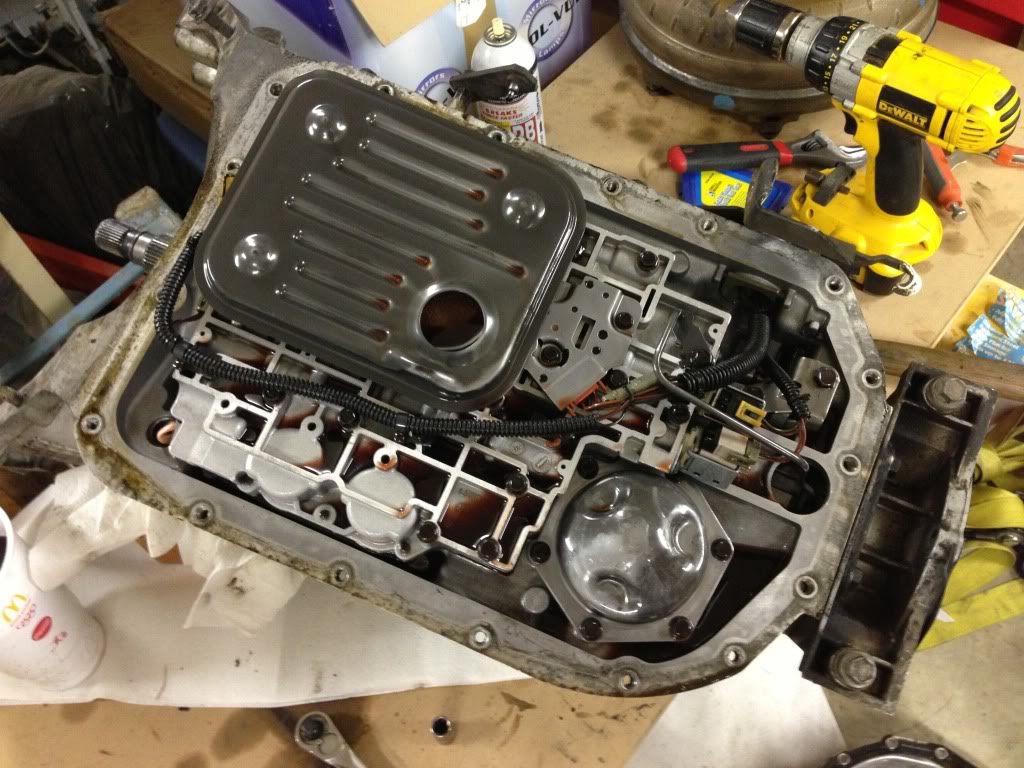
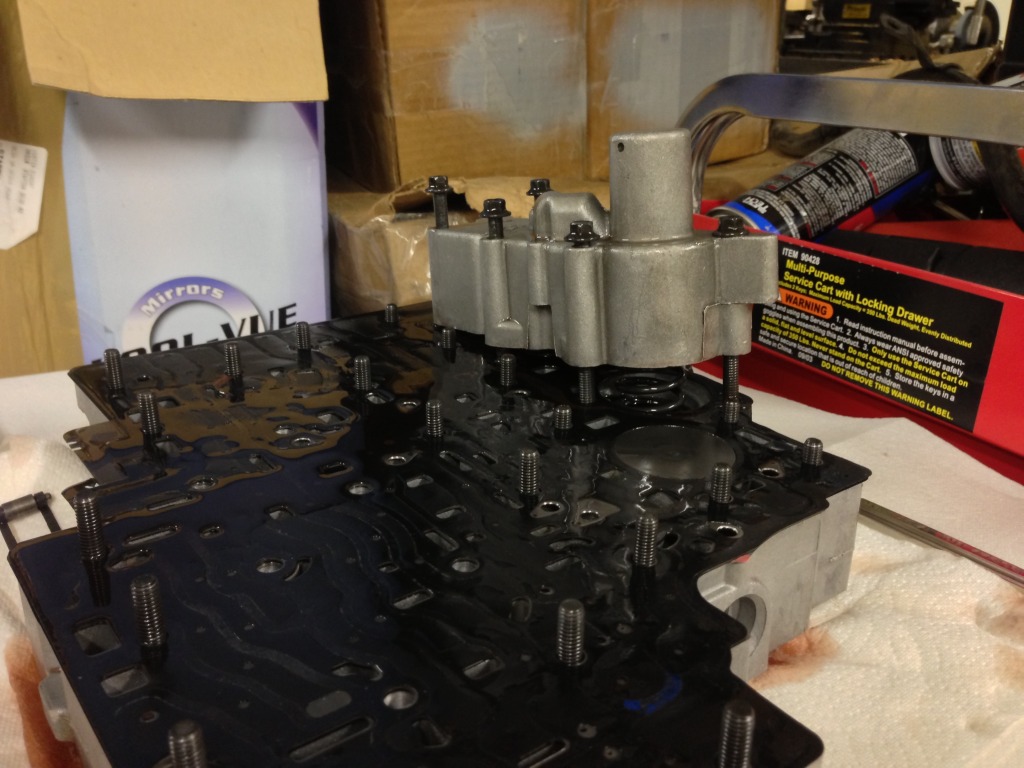
Loosen all 28 bolts here. 10mm Then there 7 8mm (I think) to remove as well.
Remove these 6 bolts from the underside. Then remove the divider plate and gaskets.
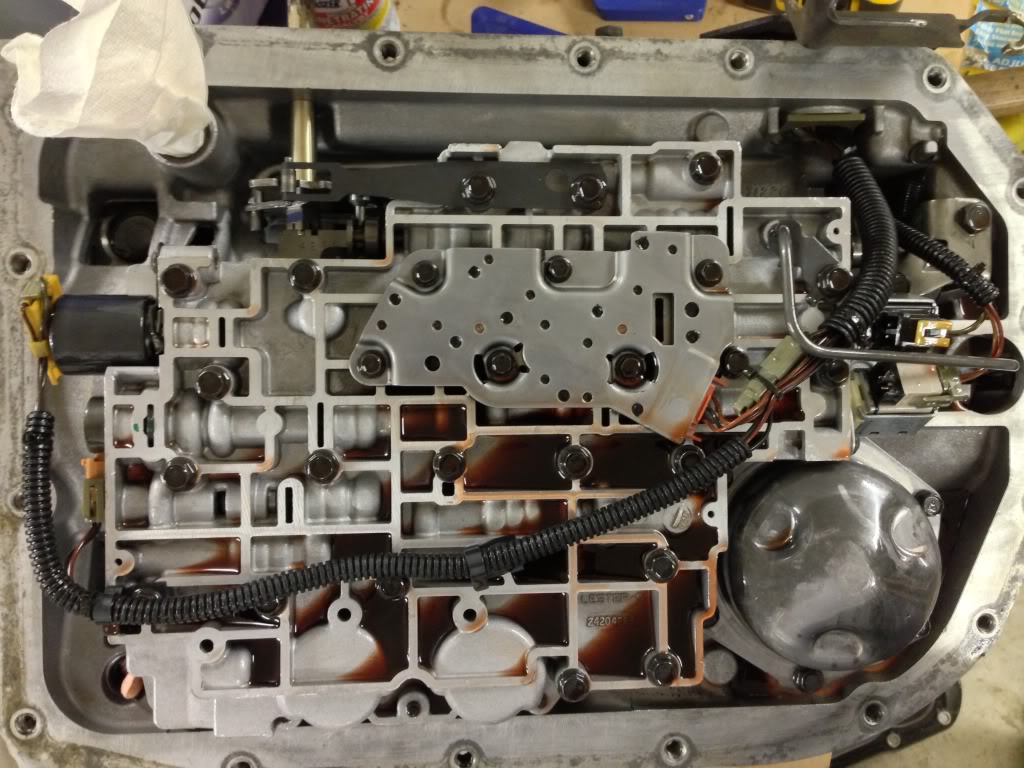
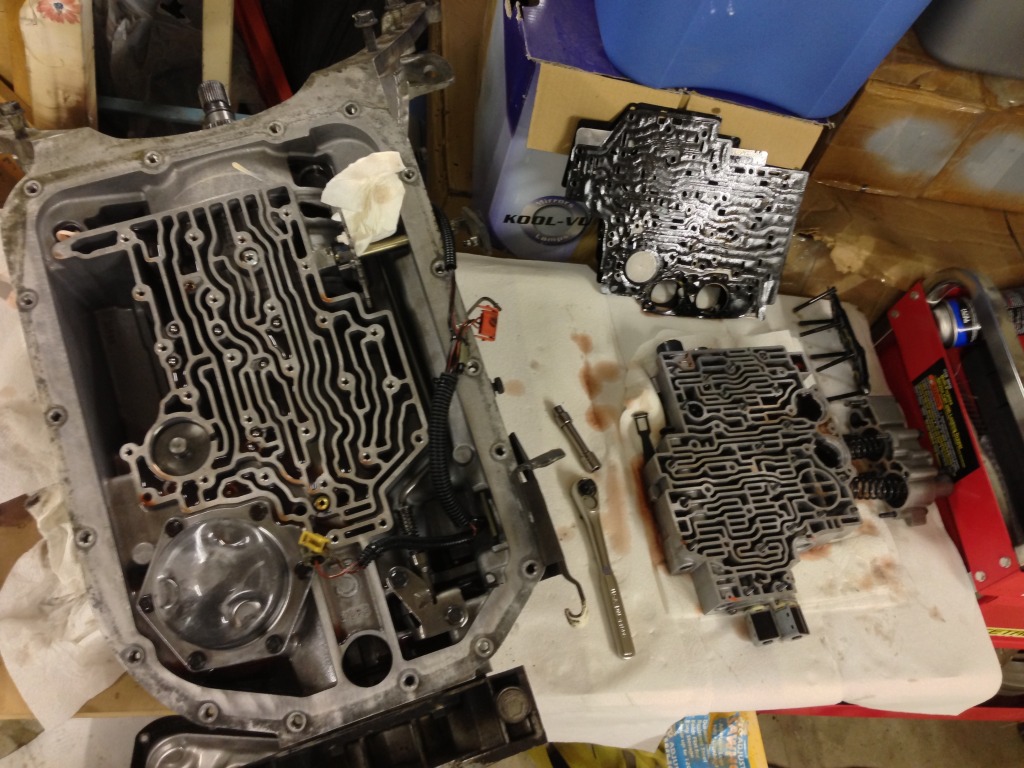
Here's everything so far.
I'm in over my head! I'm in over my head! LOL.
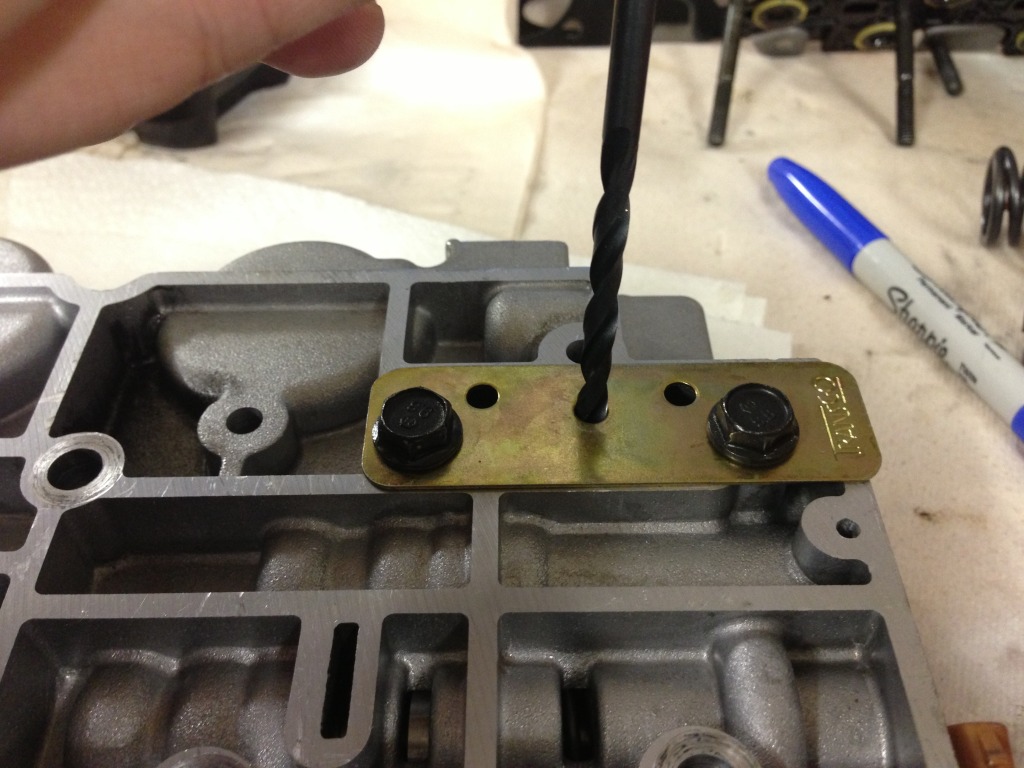
Drill a hole here...
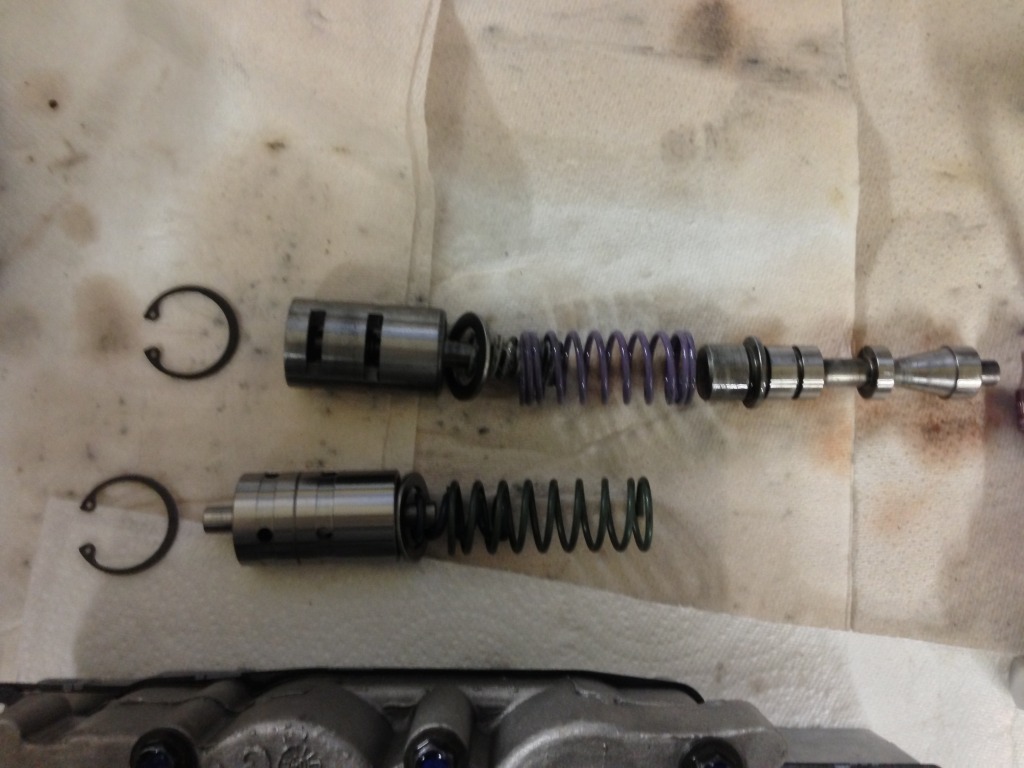
Change out some springs....
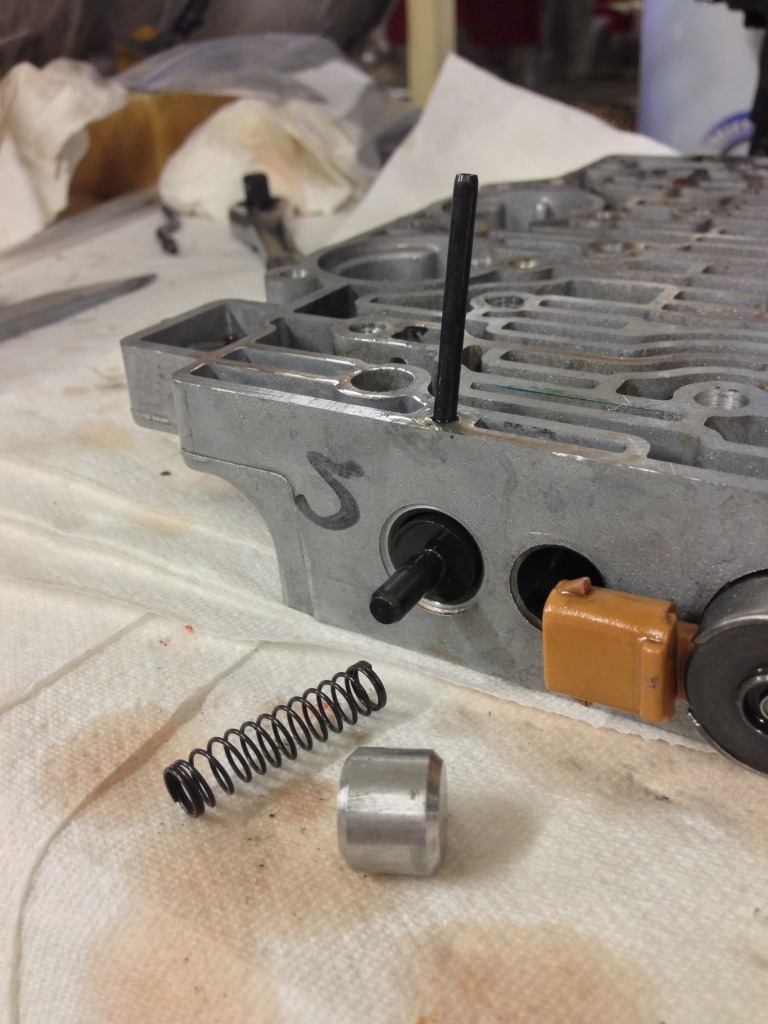
You drill a hole here and then shove a cotter pin through it. The only reason I could think of us a drill bit for .010 would be to small.
There's a step in here tat I didn't photograph. I'm sure if any one buys a shift kit they'll be able to figure it out.
So I assembled this piece. You remove the o-ring and change out the end part.
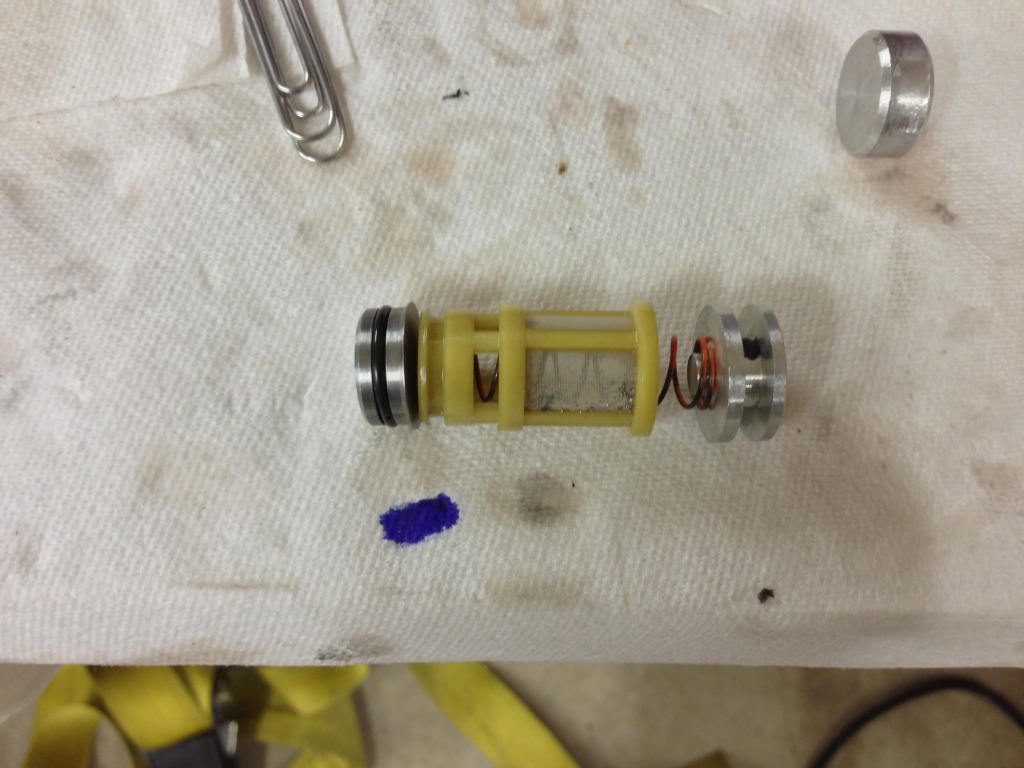
Only problem is, it's too tall to seat properly when reassembled. This wasn't addressed in the instructions at all.
So I ended up grinding off a little bit at a time until I could seat the new assembly.
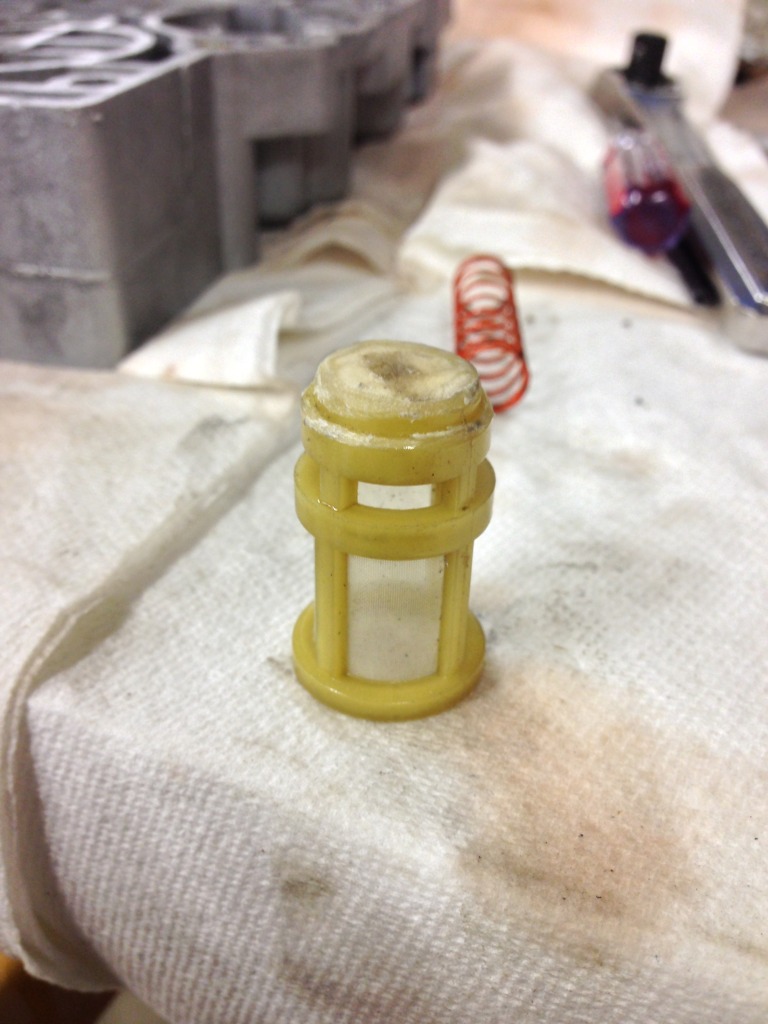
I had to grind on it quite a bit.
I wasn't planning on finishing today, but I'm sure I could have if I didn't have to waste an hour grinding and fitting that piece. I also had to sand a little bit off of the new aluminum piece from the kit for it to fit right.
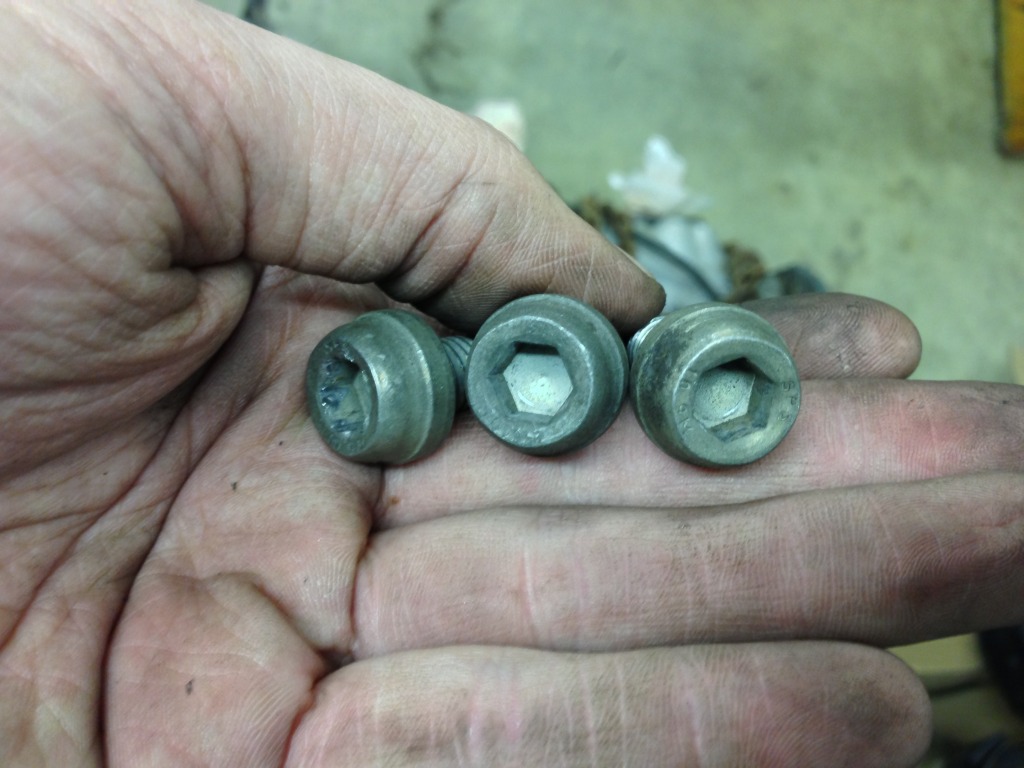
The next step involves removing the two solenoids. My tool kit has a set of star bits. Only problem, I didn't have the correct size.
The correct size us a T-27. My step father ended up having one. Still, I couldn't break them free.
I ended up grinding the heads off and removing them with a punch. So I'll have to get some replacement bolts here too.
Sheesh.
That's all I got done today. When I have a chance to get back to it, it'll be ready to drill and hopefully won't take me too long.
Remove these 6 bolts from the underside. Then remove the divider plate and gaskets.
Here's everything so far.
I'm in over my head! I'm in over my head! LOL.
Drill a hole here...
Change out some springs....
You drill a hole here and then shove a cotter pin through it. The only reason I could think of us a drill bit for .010 would be to small.
There's a step in here tat I didn't photograph. I'm sure if any one buys a shift kit they'll be able to figure it out.
So I assembled this piece. You remove the o-ring and change out the end part.
Only problem is, it's too tall to seat properly when reassembled. This wasn't addressed in the instructions at all.
So I ended up grinding off a little bit at a time until I could seat the new assembly.
I had to grind on it quite a bit.
I wasn't planning on finishing today, but I'm sure I could have if I didn't have to waste an hour grinding and fitting that piece. I also had to sand a little bit off of the new aluminum piece from the kit for it to fit right.
The next step involves removing the two solenoids. My tool kit has a set of star bits. Only problem, I didn't have the correct size.
The correct size us a T-27. My step father ended up having one. Still, I couldn't break them free.
I ended up grinding the heads off and removing them with a punch. So I'll have to get some replacement bolts here too.
Sheesh.
That's all I got done today. When I have a chance to get back to it, it'll be ready to drill and hopefully won't take me too long.
10-30-2012, 06:48 PM
#113
So I finished up the shift kit install.
Here are a few random pictures. Now, keep in mind, this is an older shift kit so your mileage may vary.
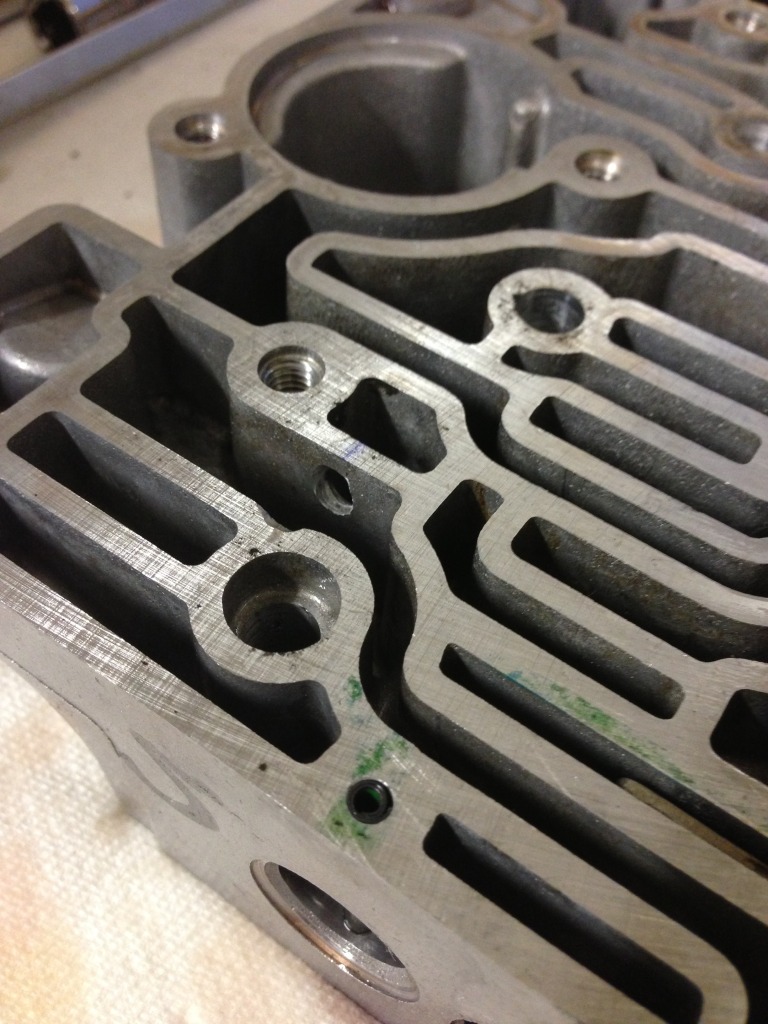
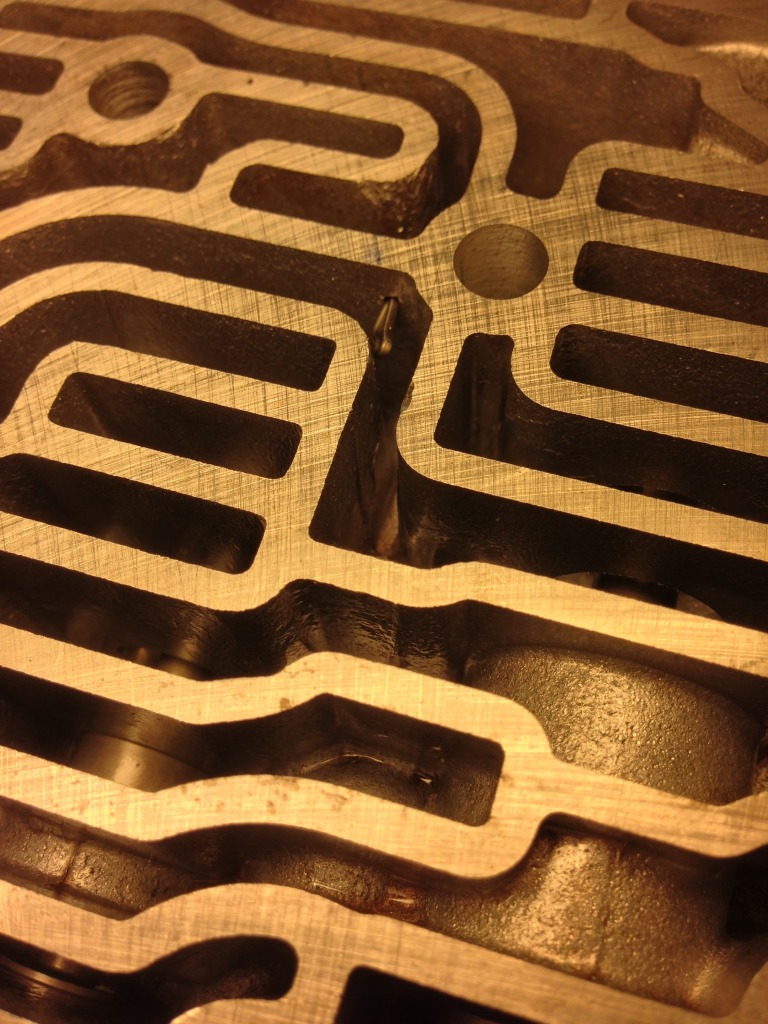
I ended up drilling 8 holes. If you look closely, you can spot them.

Then, I mocked up where this piece goes and used it as a template to drill a hole. It's a pressure relief valve.
I didn't take any pictures but the next thing I did was modify the separator plate. I ended up drilling a few holes bigger and blocking off a few others.
Next, I put the gasket down, followed by the separator plate, followed by the last gasket.
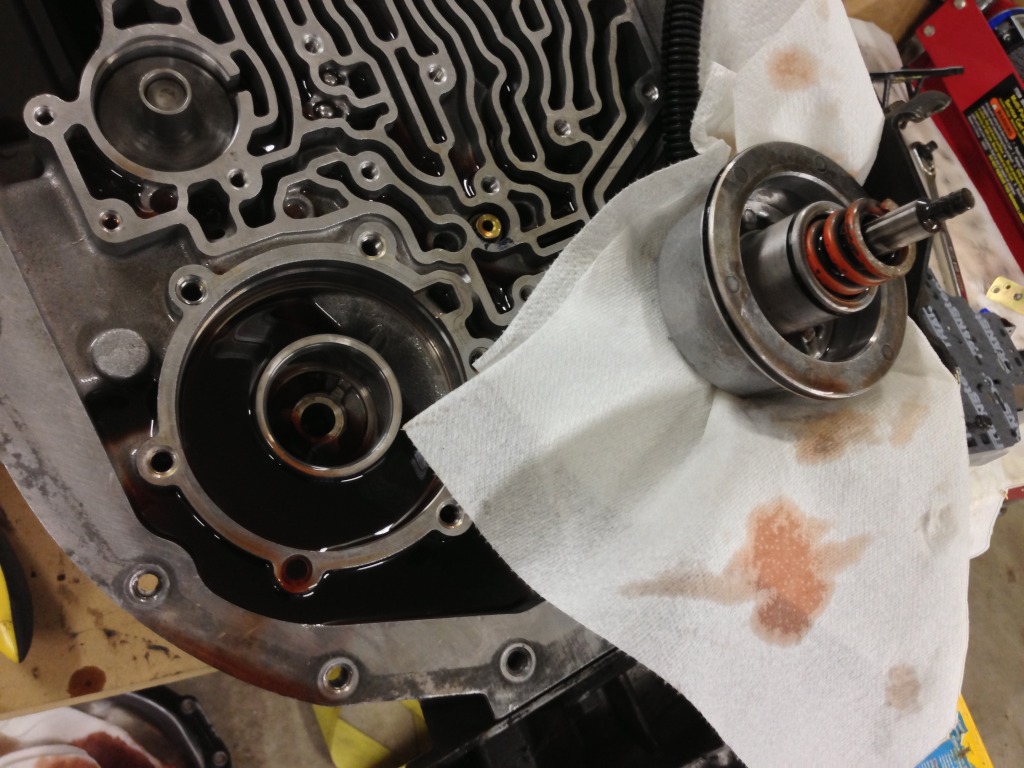
That finished up the modifications on the valve body. After that, I moved back over to the transmission. I ended up removing one of the detent *****, and this assembly.
I replaced the spring in this assembly. (Orange)
Starting reassembly.
All done.

Now I have to read up on 60E to 80E swaps, rewiring and tuning.
Here are a few random pictures. Now, keep in mind, this is an older shift kit so your mileage may vary.
I ended up drilling 8 holes. If you look closely, you can spot them.
Then, I mocked up where this piece goes and used it as a template to drill a hole. It's a pressure relief valve.
I didn't take any pictures but the next thing I did was modify the separator plate. I ended up drilling a few holes bigger and blocking off a few others.
Next, I put the gasket down, followed by the separator plate, followed by the last gasket.
That finished up the modifications on the valve body. After that, I moved back over to the transmission. I ended up removing one of the detent *****, and this assembly.
I replaced the spring in this assembly. (Orange)
Starting reassembly.
All done.
Now I have to read up on 60E to 80E swaps, rewiring and tuning.
11-02-2012, 03:35 AM
#114
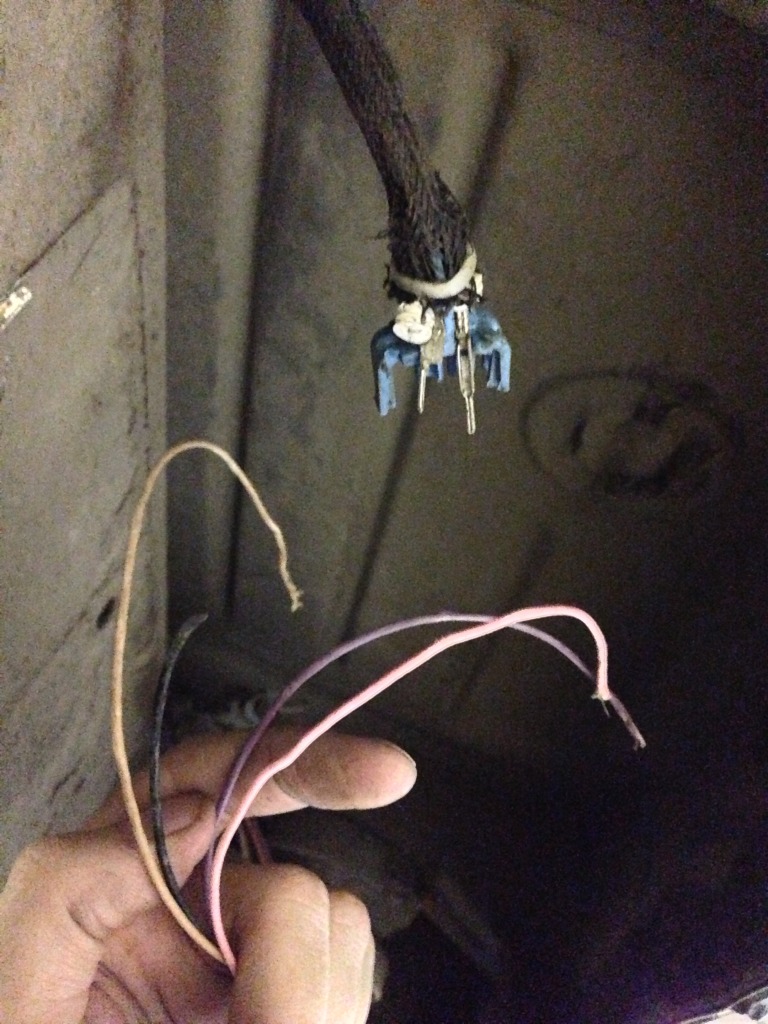
I discovered that my rear O2 wiring had been ripped apart. I suspect it was a certain German Shepard or Rottweiler.
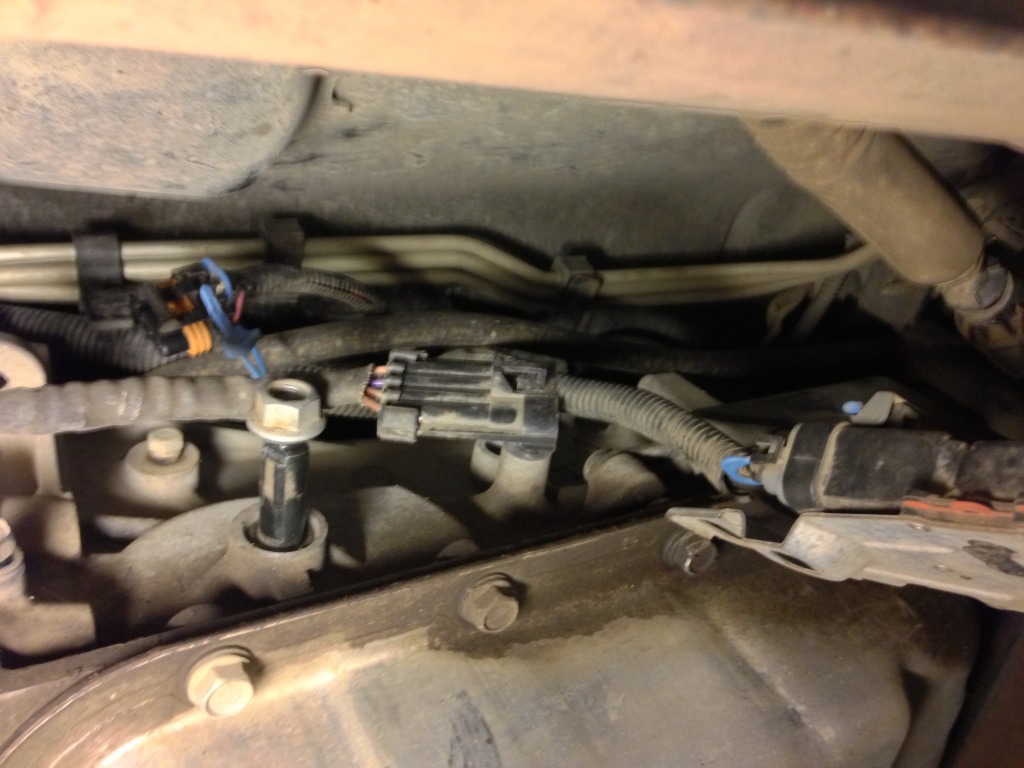
Disconnect all this stuff.
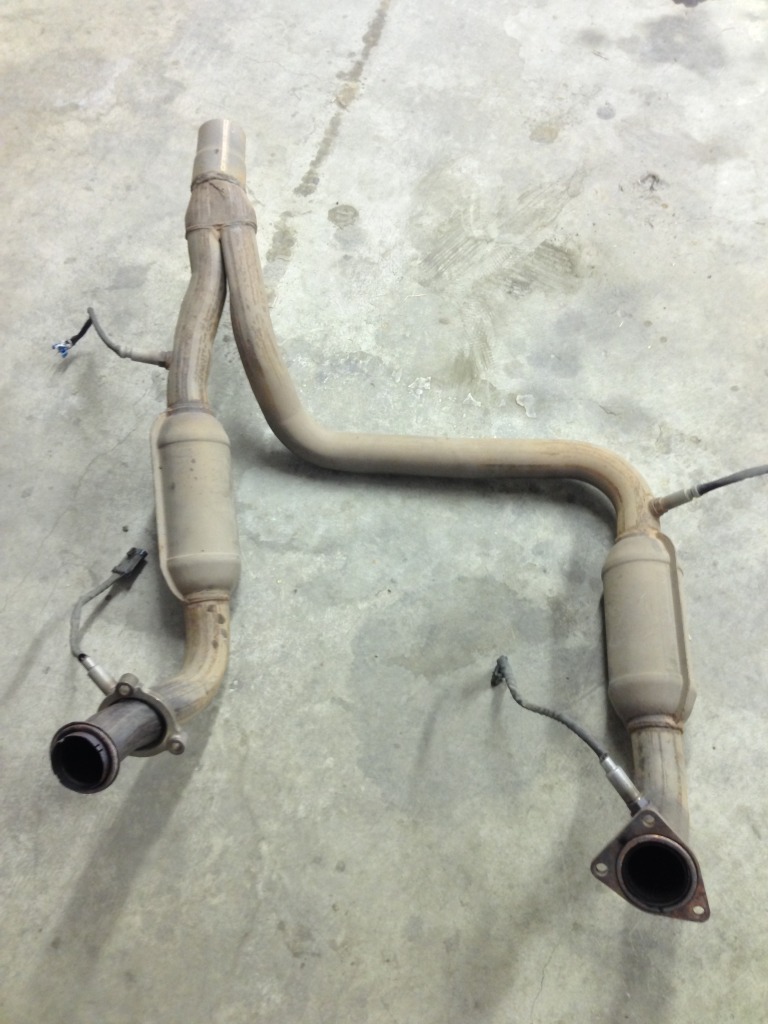
I had to cut my exhaust to get to the transmission and transfercase.
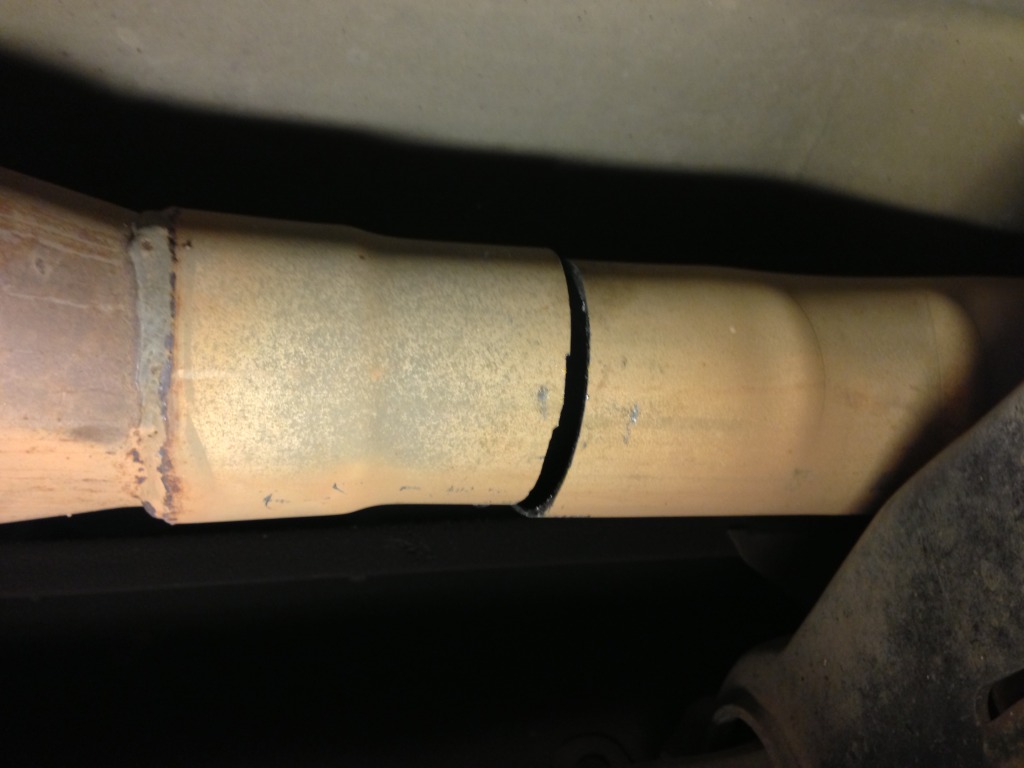
With some finagling I finally got the exhaust to come free. What I thought was odd was how there are two different style connectors on the header flanges.
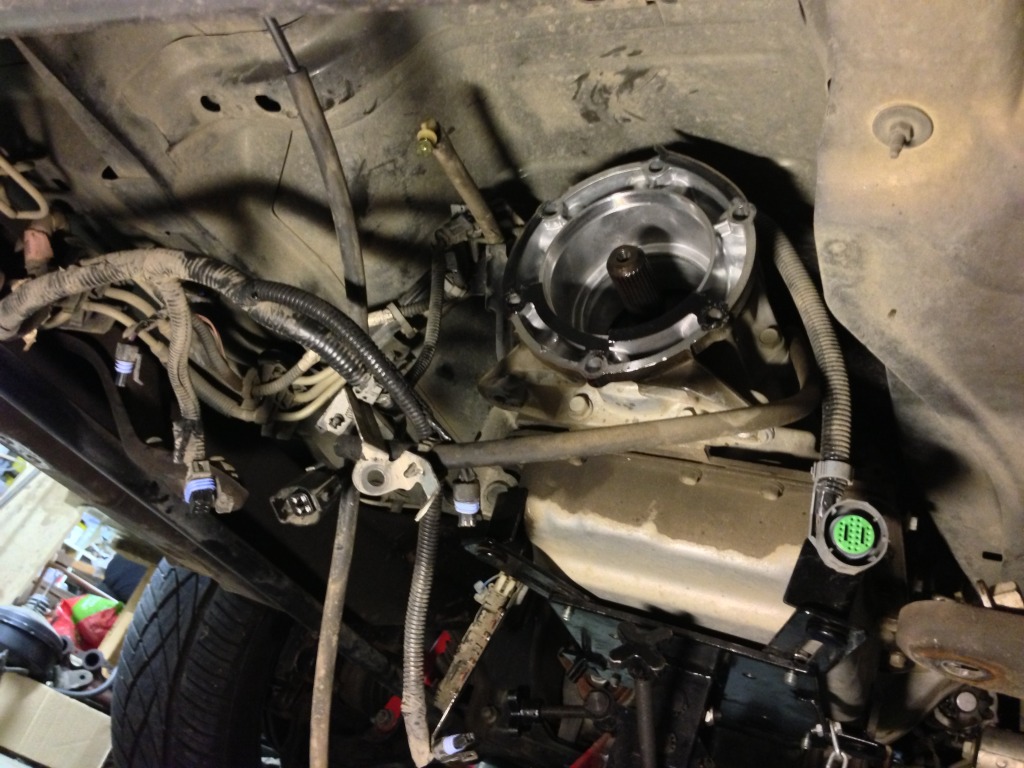
I removed the oil dipstick and tube. Then unbolted the starter and moved it up out if the way. Also, there is a connector on the top side of the starter that should be disconnected.
Then, using a screw driver, I turned the flywheel one tooth at a time until I could see the torque converter bolts.
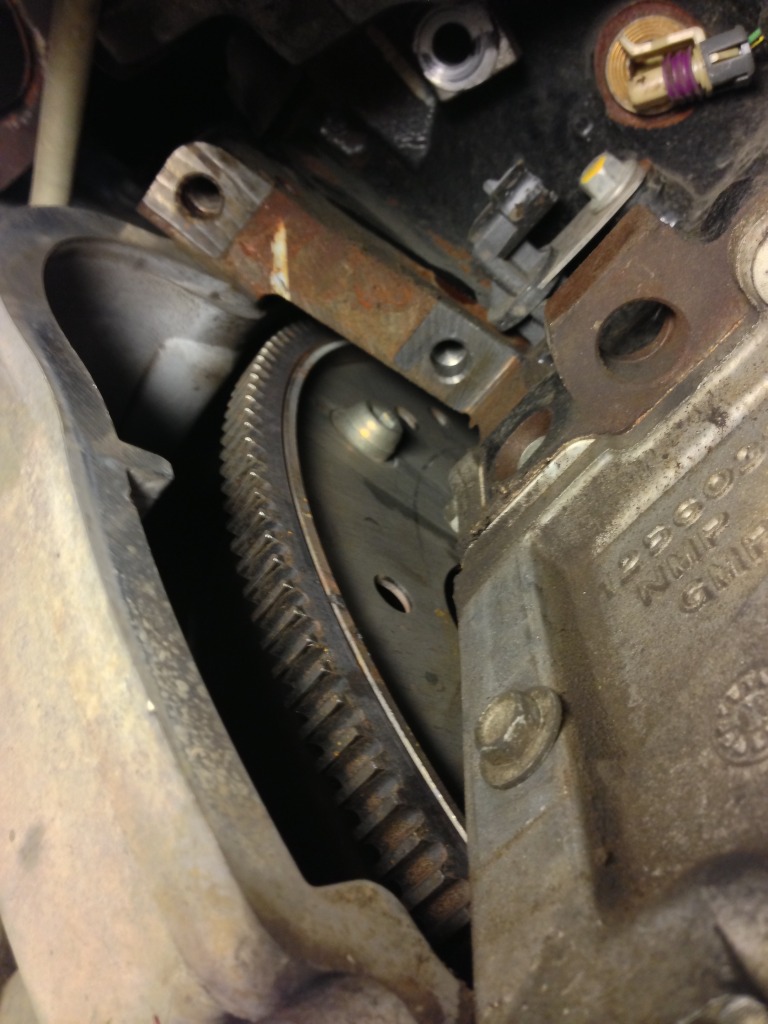
What the heck GM? Allen headed torque converter bolts. Really?
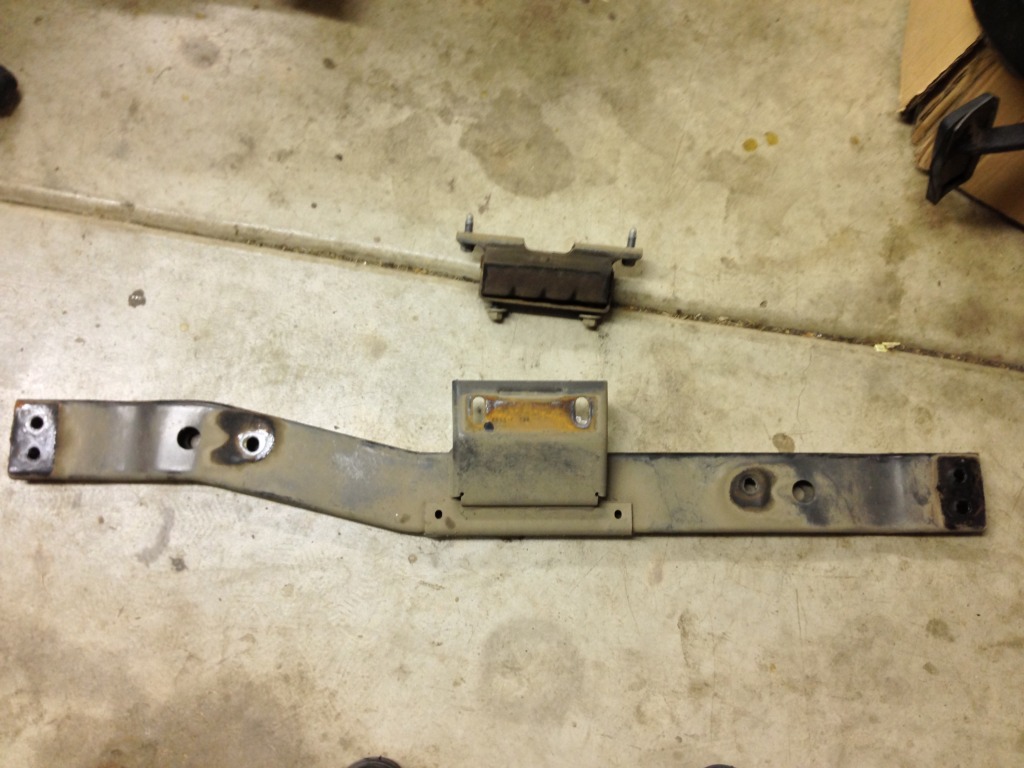
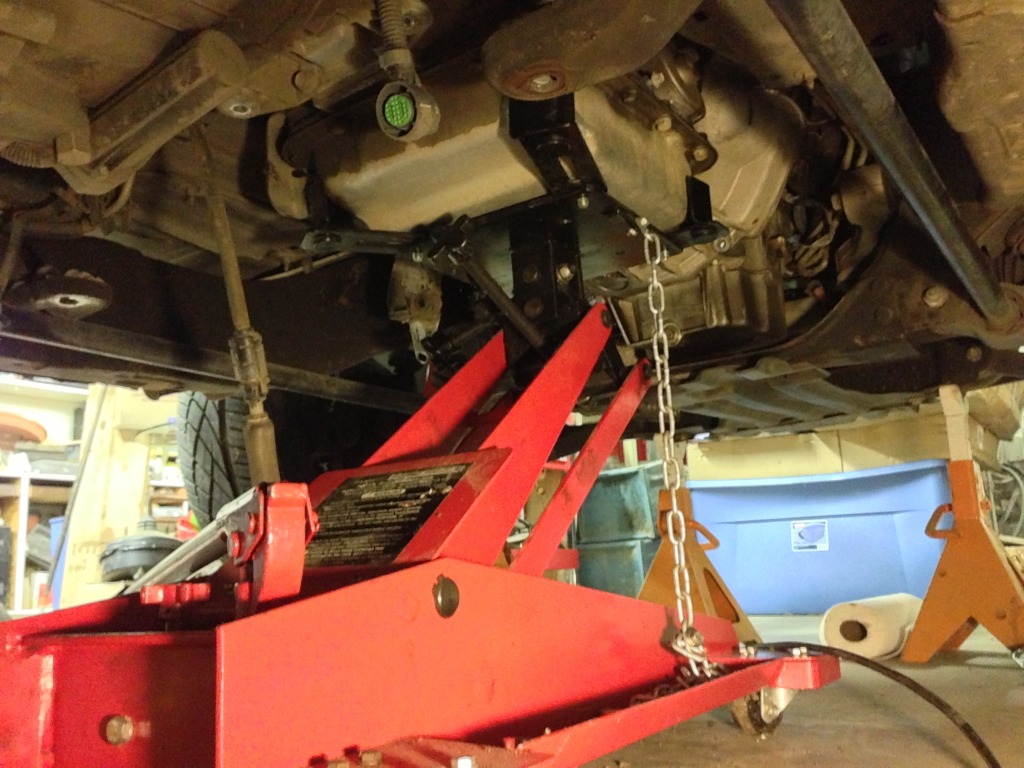
Removed the crossmember and transmission mount. My crossmember is different than all the others I've seen on this site. It must be an early model thing?
My stepfather asked his buddy to bring over his transmission jack for me to use.
I was planning on removing the torsion bars so I could drop the transmission and transfercase as one unit. I marked the bolt with tape so I would know where to put it back to.
But then this happened.
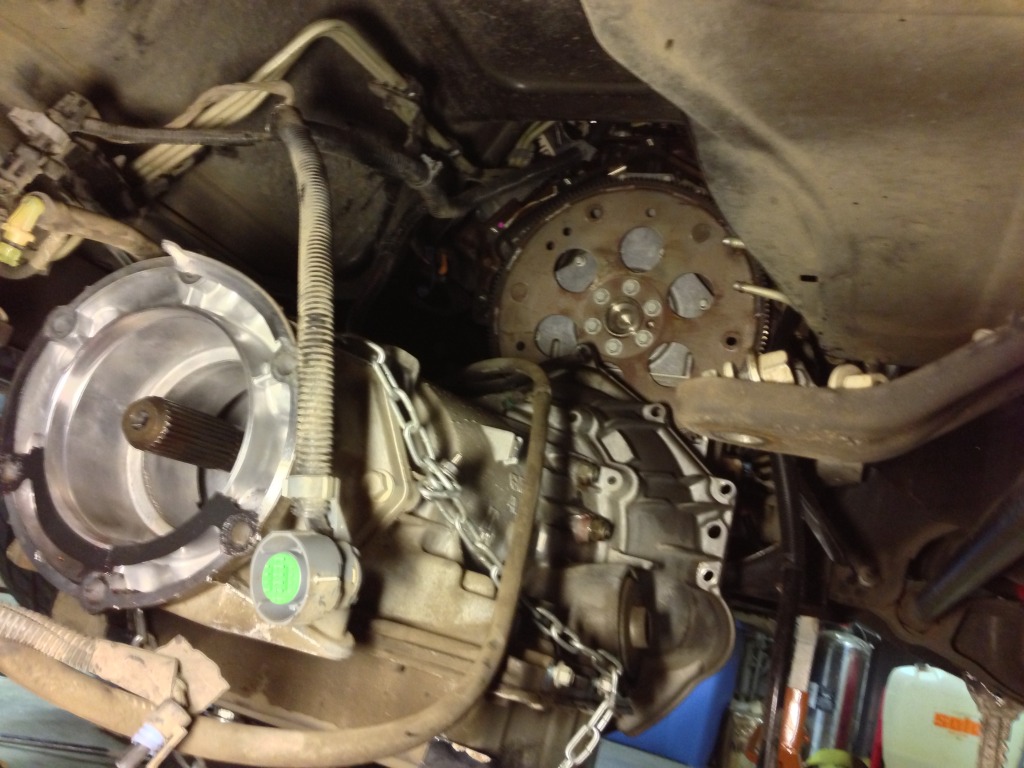
So I unbolted the transfercase and pulled it out by itself.
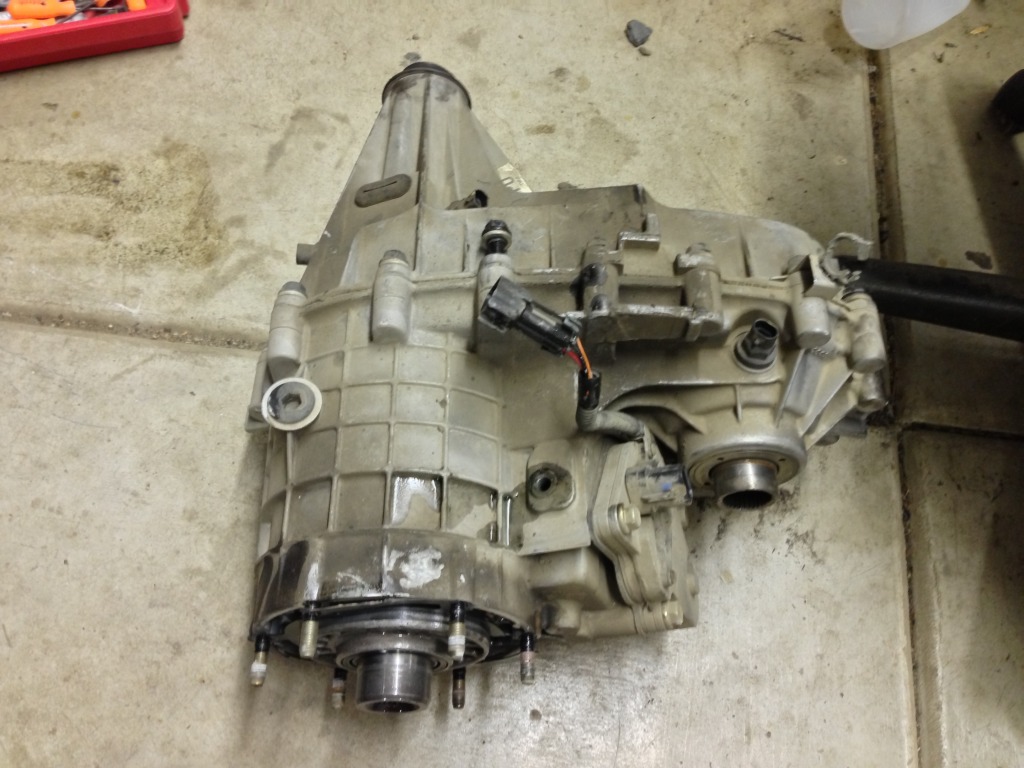
It may take a small miracle to get this back together correctly. LOL.
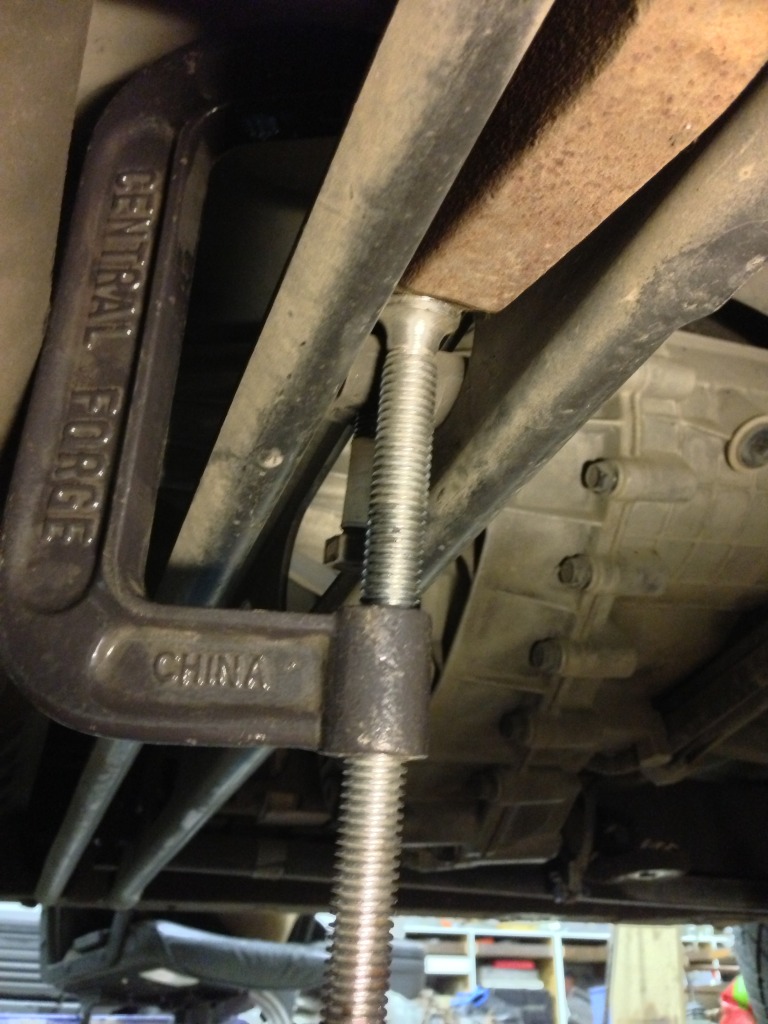
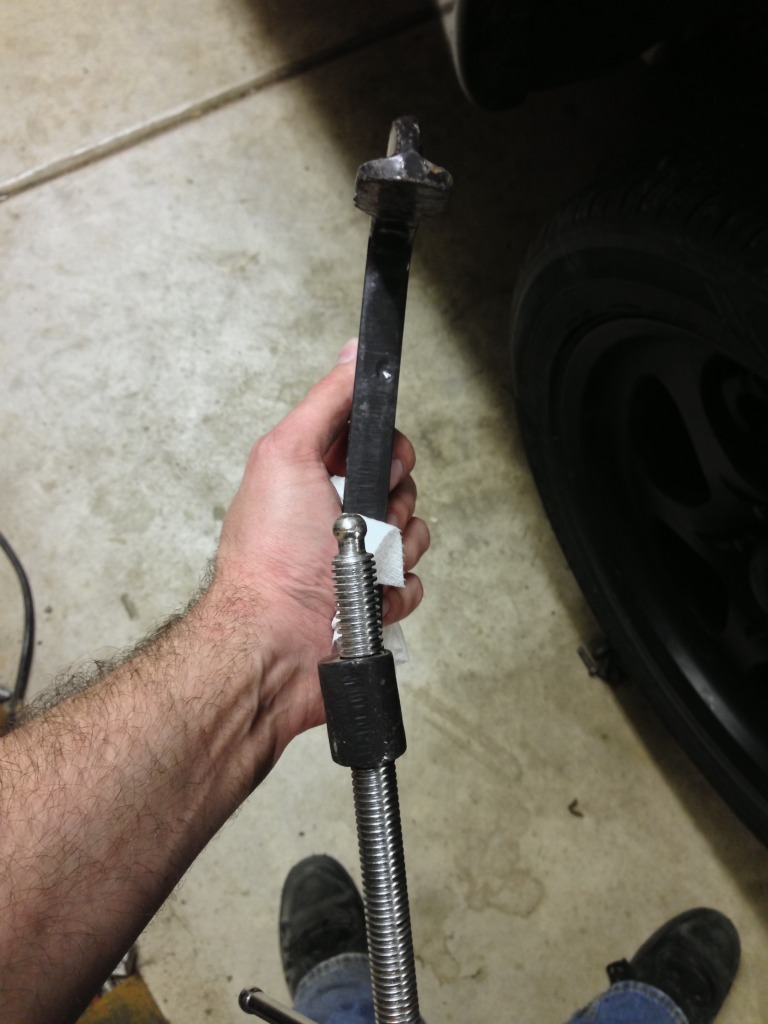
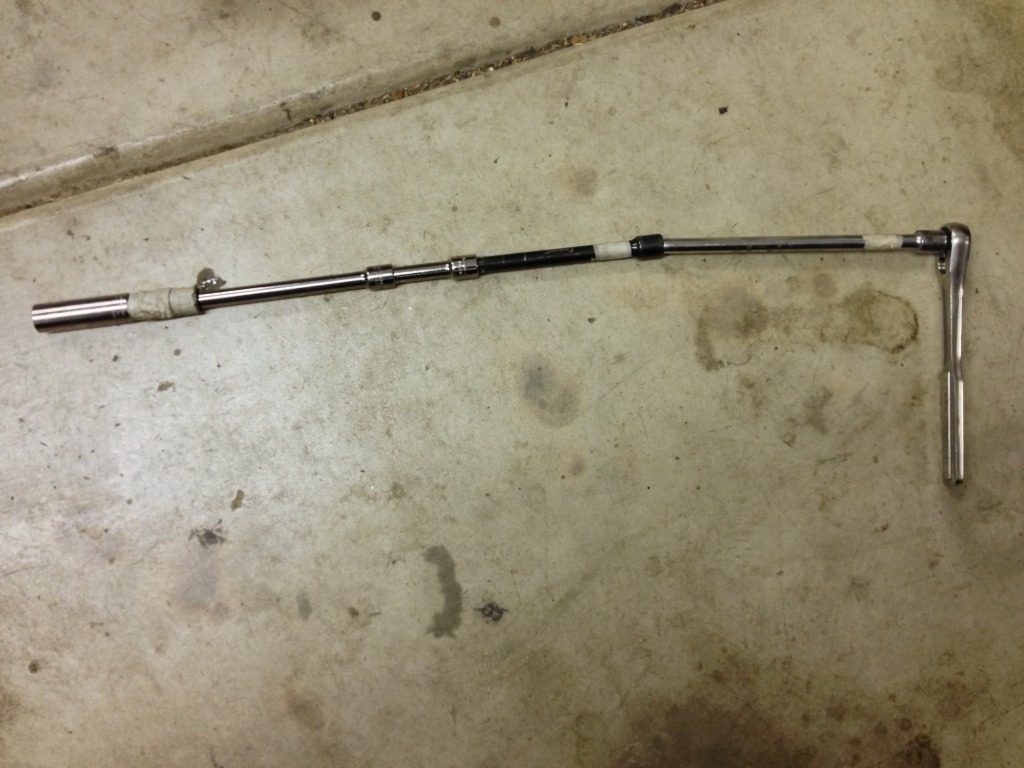
Here is the special collection of extensions it took to get to the top bell housing bolt.
Finally, it's free!
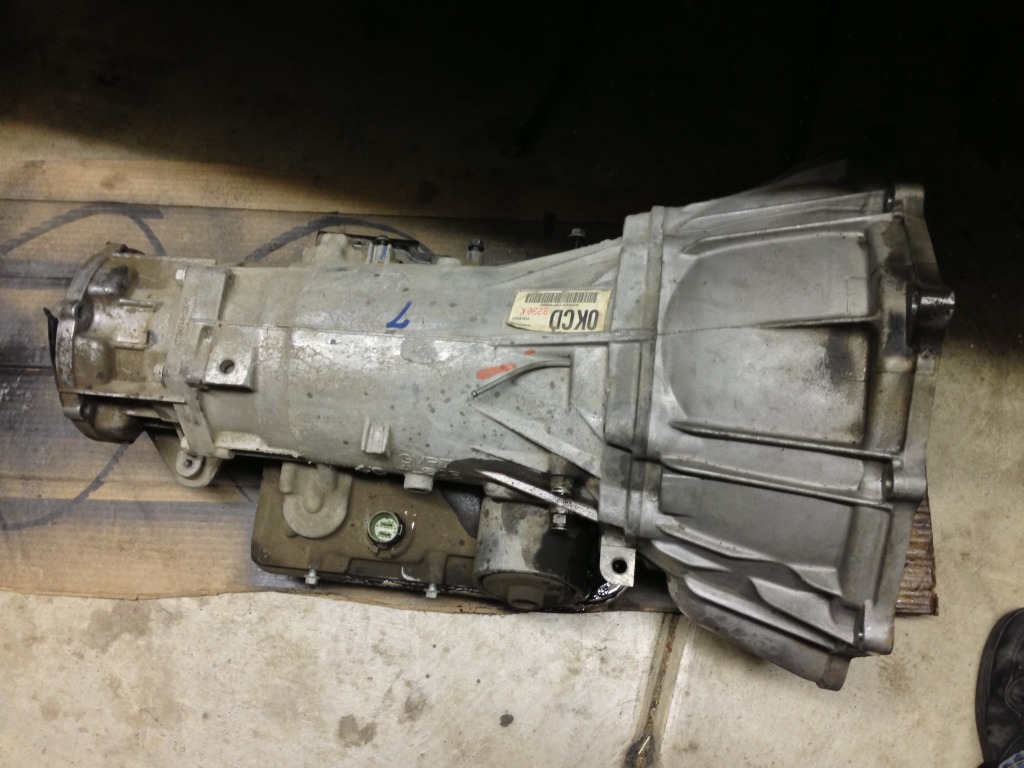
Bye, bye 4L60E.
That only took me 9 short hours. LOL! To be honest, I'm not looking forward to repeating some of these steps when it comes time for the 6.0L swap.
I guess I'm an old man now, because crawling around on the floor all day has made me sore!
Disconnect all this stuff.
I had to cut my exhaust to get to the transmission and transfercase.
With some finagling I finally got the exhaust to come free. What I thought was odd was how there are two different style connectors on the header flanges.
I removed the oil dipstick and tube. Then unbolted the starter and moved it up out if the way. Also, there is a connector on the top side of the starter that should be disconnected.
Then, using a screw driver, I turned the flywheel one tooth at a time until I could see the torque converter bolts.
What the heck GM? Allen headed torque converter bolts. Really?
Removed the crossmember and transmission mount. My crossmember is different than all the others I've seen on this site. It must be an early model thing?
My stepfather asked his buddy to bring over his transmission jack for me to use.
I was planning on removing the torsion bars so I could drop the transmission and transfercase as one unit. I marked the bolt with tape so I would know where to put it back to.
But then this happened.
So I unbolted the transfercase and pulled it out by itself.
It may take a small miracle to get this back together correctly. LOL.
Here is the special collection of extensions it took to get to the top bell housing bolt.
Finally, it's free!
Bye, bye 4L60E.
That only took me 9 short hours. LOL! To be honest, I'm not looking forward to repeating some of these steps when it comes time for the 6.0L swap.
I guess I'm an old man now, because crawling around on the floor all day has made me sore!
11-02-2012, 09:19 AM
#115

I hate swapping transmissions too....what really pisses you off is when you completely take one out and put it back in, and start filling it up with fluid and realize you forgot the front seal around the pump  So now you get to do it all over again. Not a fun day.
Thats the same type of crossmember on my 99.
So now you get to do it all over again. Not a fun day.Thats the same type of crossmember on my 99.
11-03-2012, 12:39 AM
#116
Oh man, that would suck!! I feel your pain. This took a lot longer to drop the transmission than I thought it would.
I thought the crossmember was unusual. It must be a 99-2000 thing. I'll have to take a close look at it and see how I'm going to modify it. I'm thinking I might just be able to remove the mount off of the crossmember and extend rearward. We'll see how it works out when I get there.
I thought the crossmember was unusual. It must be a 99-2000 thing. I'll have to take a close look at it and see how I'm going to modify it. I'm thinking I might just be able to remove the mount off of the crossmember and extend rearward. We'll see how it works out when I get there.


 11-03-2012, 01:00 AM
#120
It just takes really good glue. My trans has been in & out wayyy too many times. Got it down to a science now. Can have it out in about an hour & half. Can have it back in & driving around in about three & half hours.
But a lift and trans jack help alot.
But a lift and trans jack help alot.