
2000 Chevy Silverado project "Charlie Murphy"
 09-23-2015, 11:41 AM
#381

Ive had more troubles finding straps for this rear end than I should have. The poor guy at Autozone has exchanged about 4 different ones. What the computer says is all wrong.
In the end, I went to the dealer. Should have done that first because the damn straps cost $2.40. LOL. Here is the correct part number for the AXN rear axle straps. GM calls them retainers. 3920486
Other than that adventure, I've been waiting on a brake fluid proof hose to show up in the mail, but I'll explain that one when it gets here.
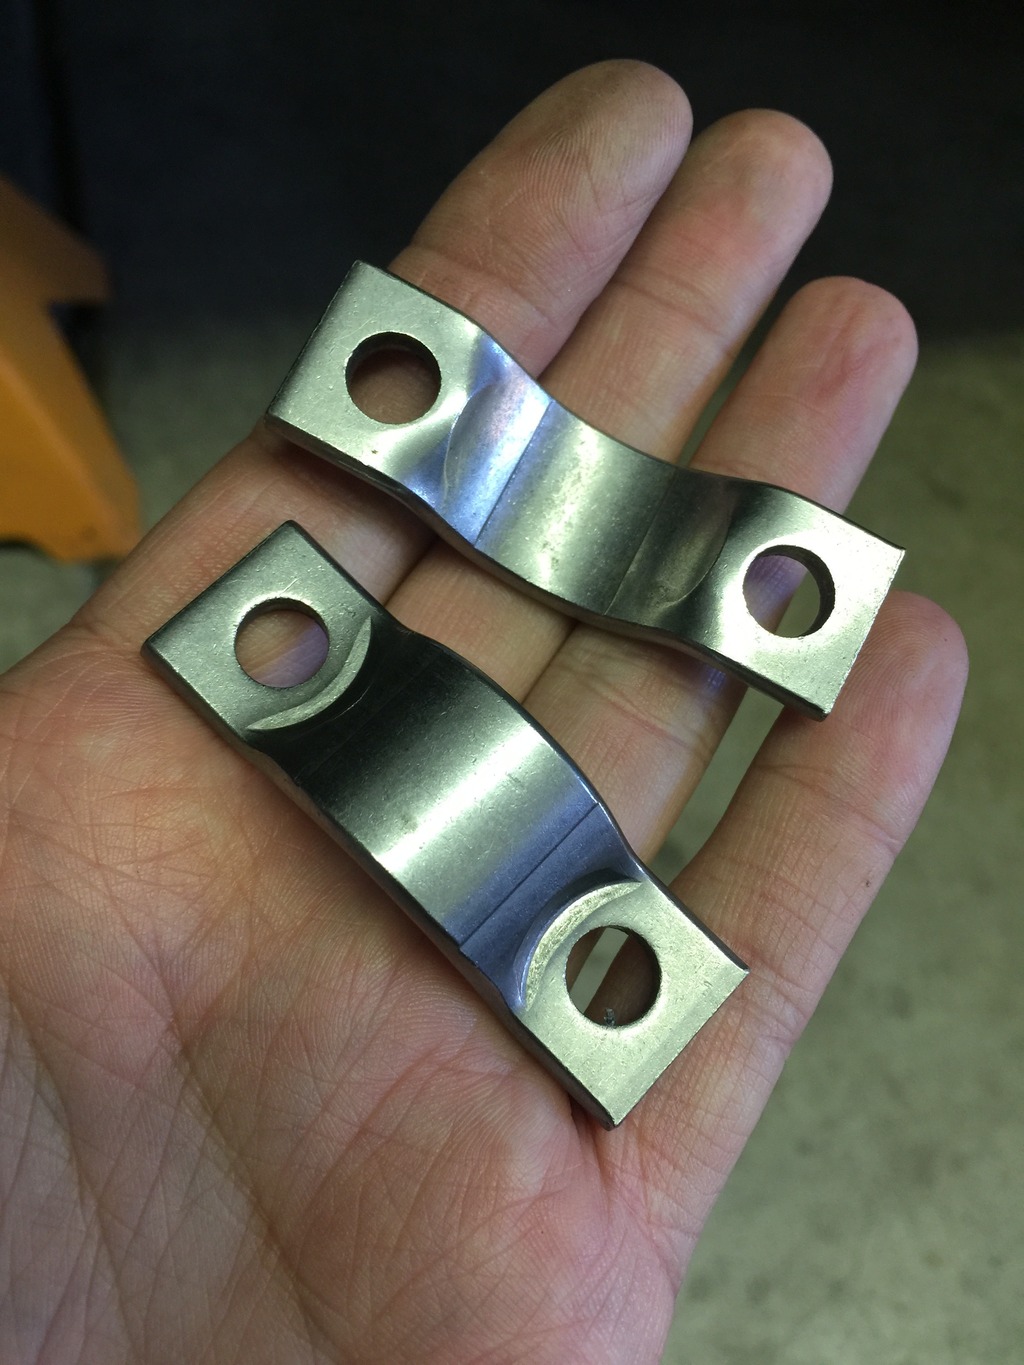
Also, my Hellwig rear swaybar won't fit the larger 9.5" 14 bolt, so I had to make spacers. Not a big deal, just 1/4" steel with holes in them. Just FYI for anyone tat wants to know.
In the end, I went to the dealer. Should have done that first because the damn straps cost $2.40. LOL. Here is the correct part number for the AXN rear axle straps. GM calls them retainers. 3920486

Other than that adventure, I've been waiting on a brake fluid proof hose to show up in the mail, but I'll explain that one when it gets here.
Also, my Hellwig rear swaybar won't fit the larger 9.5" 14 bolt, so I had to make spacers. Not a big deal, just 1/4" steel with holes in them. Just FYI for anyone tat wants to know.
 09-23-2015, 08:25 PM
#382

Well, Suck to hear about your fiasco... Why not use the stock plastic housing line retainers that are normally on the AXN housing? did you not receive it with the original brake lines?
FYI, In case you need more part numbers for the 14 bolt 9.5... 14 bolt 9.5 part numbers.
Cant wait to see this finished up.
FYI, In case you need more part numbers for the 14 bolt 9.5... 14 bolt 9.5 part numbers.
Cant wait to see this finished up.
09-24-2015, 01:17 PM
#383
Well, Suck to hear about your fiasco... Why not use the stock plastic housing line retainers that are normally on the AXN housing? did you not receive it with the original brake lines?
FYI, In case you need more part numbers for the 14 bolt 9.5... 14 bolt 9.5 part numbers.
Cant wait to see this finished up.
FYI, In case you need more part numbers for the 14 bolt 9.5... 14 bolt 9.5 part numbers.
Cant wait to see this finished up.
Ya know I considered the plastic straps on the donor 14 bolt. I decided against using them because there still wouldn't be a place to mount the T too. . I'll take a look again and maybe I'll utilize them.
Well today I worked on my brakes a bit. Ever since I swapped to hydroboost I've had a problem. The donor vehicle was a 2003 Escalade that had active brake control. What this meant was I have a master cylinder that has a barbed output on the front of it.
What I did was put a rubber vacuum cap. Well, it's been a few years and I've went through 2 of them. Obviously they can't stand up to brake fluid and when they break down I start leaking brake fluid. If it totally failed, it would dump the entire reservoir. Not good.
So I ordered a replacement reservoir. I had thought that I ordered one that didn't have a barb in the front. Unfortunately I did not. Rather than deal with returning it and whatnot I decided to solve the problem by finding something that can withstand brake fluid. Harder than I thought it would be.
You can see in this chart that brake fluid is really only resistant to CPE and PTFE.

I ended up ordering a foot of PTFE off of eBay. At least now I have a way to drain the master cylinder in the future. lol
First off, I cut off the threaded part of a bolt.

Then I crammed it in the end of the brake resistant tubing.

Installed everything on the replacement reservoir. I ended up tucking it under the master cylinder.

I bled the brakes so that should be good to go now.
I have a question for you guys. I filled up the transfer case with AutoTrak II fluid. I remember this was supposed to be the correct fluid and that's what I've been using. Well, I was looking back through my notes and I found where it said that the AWD transfercases use DEX VI transmission fluid. At this point, I'm wondering what the exact differences are anyway. I have a little bit more reading to do but I'm thinking I'll be draining it out and using the correct fluid, if that's what I'm supposed to be using.
Also while I'm under here I'm going to replace the fuel filer.
09-24-2015, 11:33 PM
#385
Got the fuel filter installed. Tightened up the rear swaybar and tightened up the front driveline. I noticed that the transfercase front output feels a little loose. I can wiggle the front driveline slightly. No way I'm dropping it anytime soon though. LOL.
Another thing I took care of while I was under there was to install bumpstops in the front. Ideally I think you'd want to remove the old bumpstop bracket. I got lazy. I didn't want to remove the tire and then try to grind stuff off.


Remember this picture is a full droop. The bumpstops are really only there incase of some jarring emergency. LOL.

I forgot to take a picture with the weight on the coilovers again. I might have to trim the bumpstops even more. I'll put some miles on it and see how they look.
Also, I really don't like the coilovers bearing the weight of the suspension when the tires are off of the ground. In the future, when I do get the turbo setup together I'm probably going to have to look into some limiting straps up front anyway. I've put them off because I wasn't really sure exactly what height the truck would end up at. I didn't want to order straps that would end up being too long.
Tomorrow I've got to go deal with exchanging the battery. It won't hold a charge anymore.
09-27-2015, 01:38 PM
#386
Everything is put back together and the truck is back on the ground. Also, I installed 2003+ taillight housings. Something I've been meaning to do for quite a while and I figured I'd go ahead and get it taken care of.
After getting the truck back on the ground I realized that I didn't trim the bumpstops enough. They do fit inside the existing bracket but I'd only have about a half an inch of travel.
So I got less lazy and trimmed the bumpstops and removed the brackets. I ended up using a combination of saws-all and air chisel. It isn't pretty but there's really no way to get a grinder in there. Maybe in the future if I have the truck off of the ground I can clean it up.
The picture makes it look worse than it actually is.

The truck currently isn't insured so I couldn't take it for much of a drive. I did let it get up to temperature and everything seemed to be all right. For as much transmission fluid as I dumped out I was concerned if it would even shift but it seemed to shift like normal. I checked the transmission fluid level and added about half a gallon.
I start fall term tomorrow so I won't be able to work on this as much. (Yay multi variable calculus...) I think the next thing I'd like to tackle is painting my roll pan to match the truck. It will give me something to research in my downtime.
One thing is for certain though, I forgot how much I love this truck. Even that short little drive I just like how it feels, how it steers, everything. I currently daily drive a 1997 2 door Tahoe. I'm going to be selling it in the next few months and daily drive the black truck. I just like it better and they get similiar gas mileage. (Tahoe 17mpg, Silverado 15mpg, but requires premium.)
Thanks for the help everyone.
09-28-2015, 03:54 PM
#387

Geeze man it looks like you chewed on that bumpstop pretty good 
The best way to trim them is to first use a sawzall to remove the old mount so its flush, then remove the coil spring and reinstall the shock. Slowly lower the truck so the shock collapses then add about 1/4" to that and thats where you want the bumpstop to be, make sense? You want the stop to engage just before the shock bottoms out.
The best way to trim them is to first use a sawzall to remove the old mount so its flush, then remove the coil spring and reinstall the shock. Slowly lower the truck so the shock collapses then add about 1/4" to that and thats where you want the bumpstop to be, make sense? You want the stop to engage just before the shock bottoms out.
12-14-2015, 04:44 AM
#388
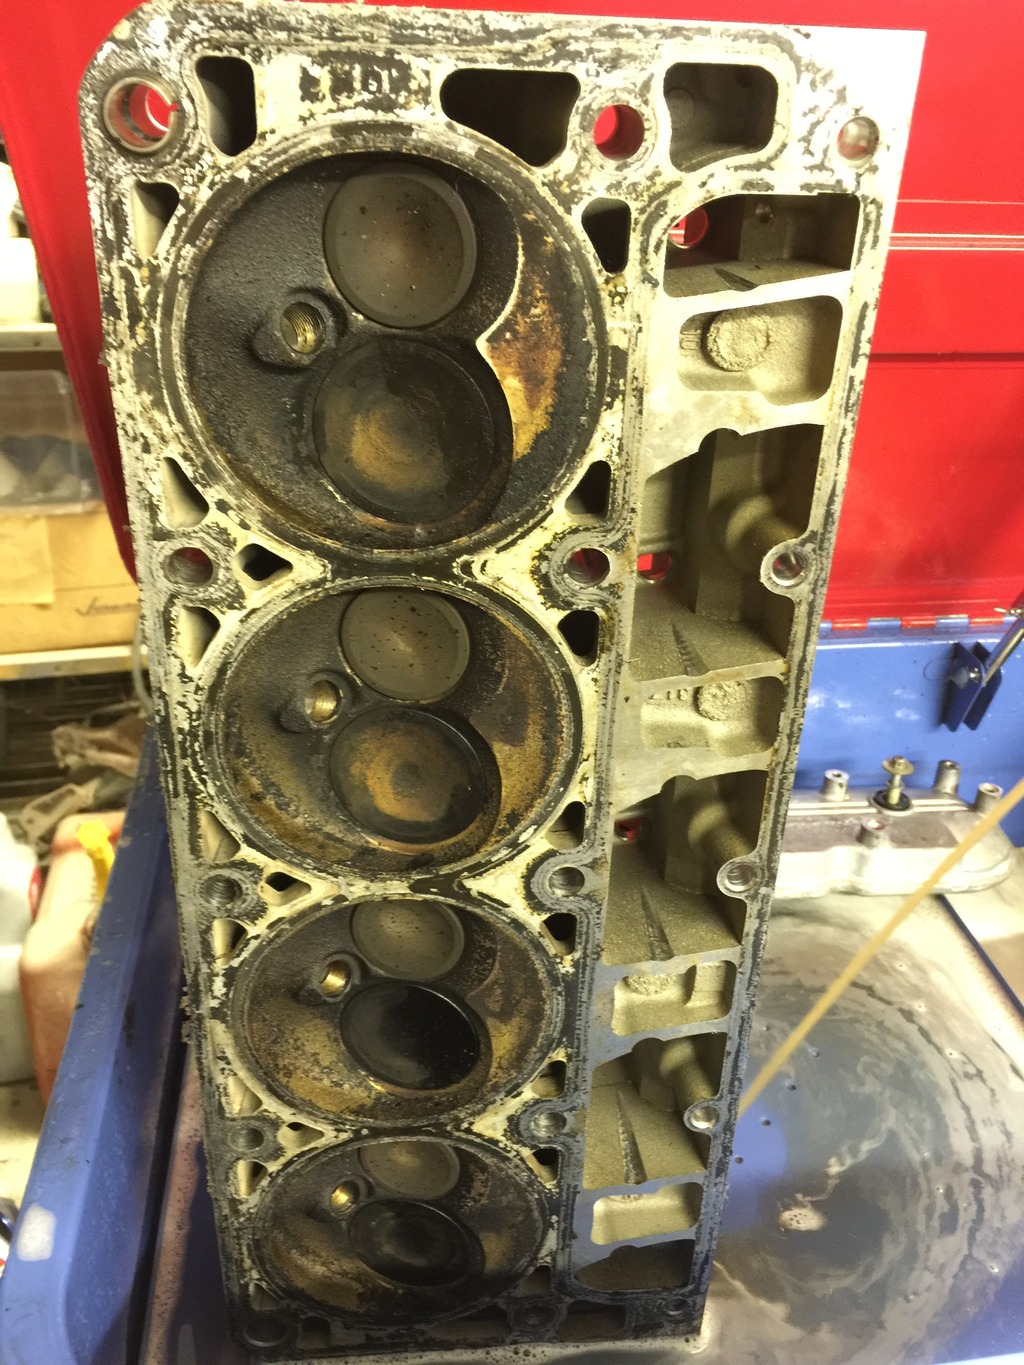
Decided to pick up a parts washer so I could clean up my heads.
Went to the dollar store and picked up a few bottles of cleaner. I wasn't sure exactly what to use for solvent.
Before, seems real bad. Not sure if this is normal or not.
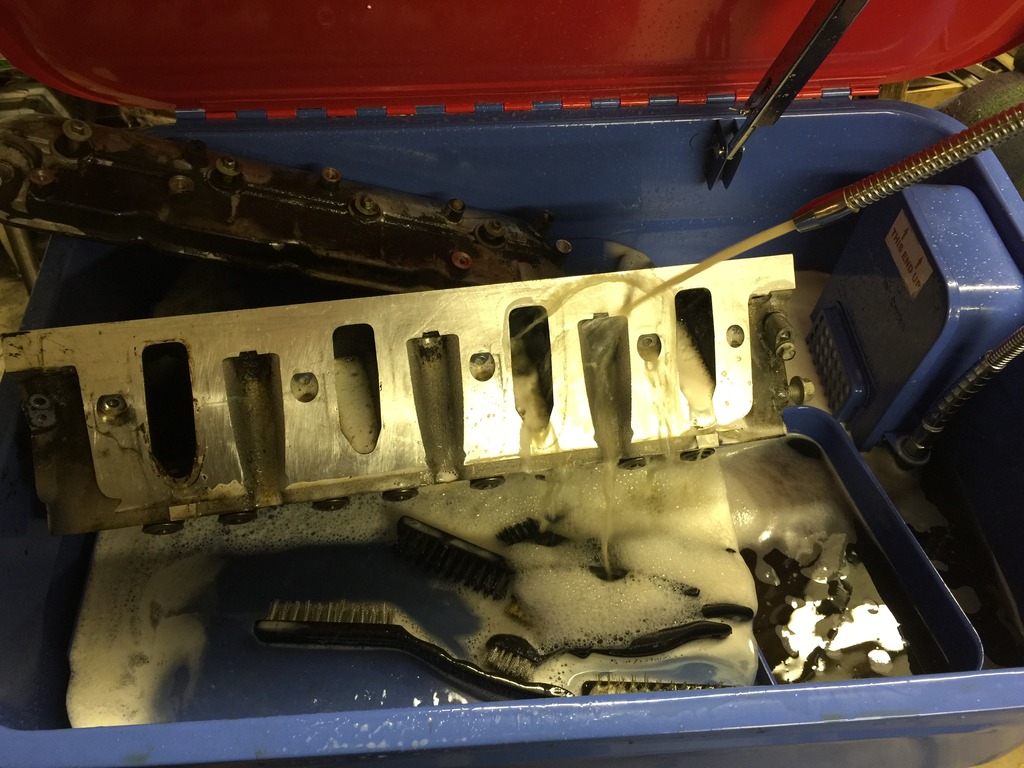
So I started scrubbing...
The intake runners are especially nasty.
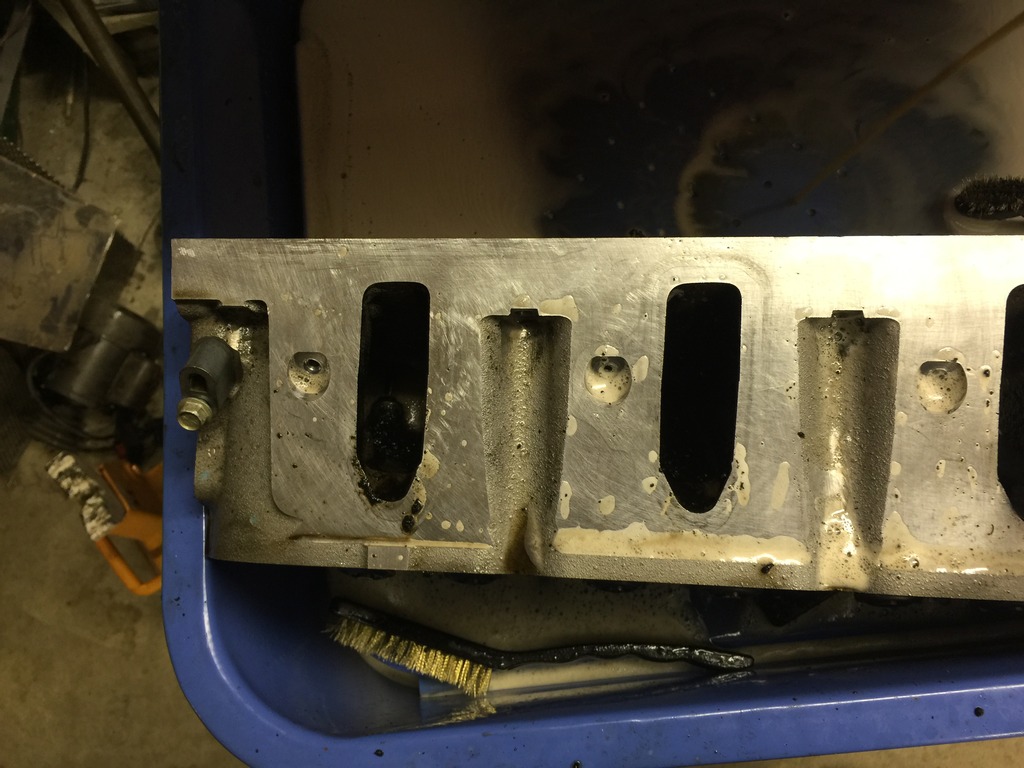
Eeewwwwww.

Much cleaner!
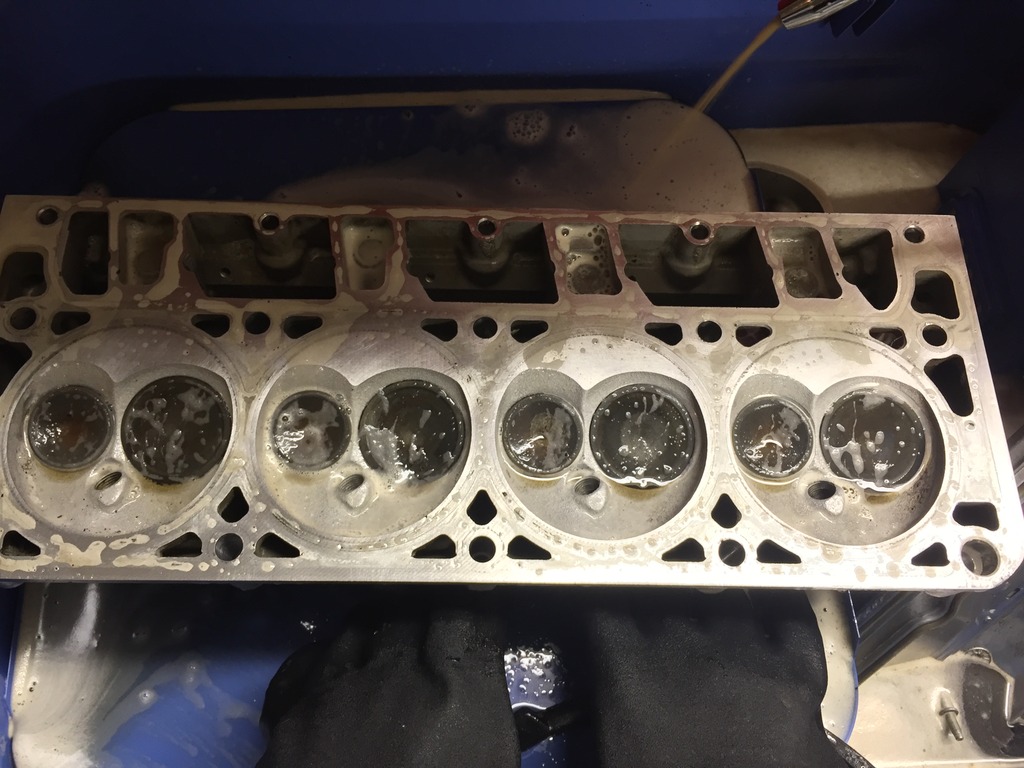
The intake runners were still pretty gross so I decided to let them soak.

Went to the dollar store and picked up a few bottles of cleaner. I wasn't sure exactly what to use for solvent.

Before, seems real bad. Not sure if this is normal or not.

So I started scrubbing...

The intake runners are especially nasty.

Eeewwwwww.

Much cleaner!

The intake runners were still pretty gross so I decided to let them soak.
 12-14-2015, 06:36 AM
#389

Not throwing stones or anything, it appears your selection of degreasers was good as the after pics appear that its pretty clean, but I've always used Purple Power, its cheap and available just about anywhere, auto parts stores/Lowes etc.

Heads look good, let us know how the intake runners look *after*
Heads look good, let us know how the intake runners look *after*
12-14-2015, 01:27 PM
#390
Not throwing stones or anything, it appears your selection of degreasers was good as the after pics appear that its pretty clean, but I've always used Purple Power, its cheap and available just about anywhere, auto parts stores/Lowes etc.
Heads look good, let us know how the intake runners look *after*
Heads look good, let us know how the intake runners look *after*
I've read that the purple stuff is bad on aluminum. Have you had any issues with it?
I'm open to any suggestions as what to use for solvent. I just don't want anything that's too stinky. I've heard the diesel works really well, but you know flammability. LOL
Originally I was thinking I would use mineral spirits, but that would be expensive and after reading through the instructions from Harbor freight it specifically says to use only water-based solvents. Also, the pump in the kit is plastic so I'm sure that mineral spirits would destroy the paint and everything.
I'm going to pick up a few more gallons of this stuff from the dollar store today. It's a 20 gallon tank and I put 12 gallons in. Also, I need to find some round brushes too.
Has anyone modded a solvent tank like this to add heat somehow? I think that's really help.
Here's what I used:
https://www.dollartree.com/Xtreme-Va...?method=search
Last edited by iregret; 12-14-2015 at 01:33 PM.