
2000 Chevy Silverado project "Charlie Murphy"
 12-14-2015, 05:22 PM
#391

I'm more than happy to give that a try next time. I honestly had no idea what to use. I went with that stuff because it was cheap, essentially $2 a gallon.
I've read that the purple stuff is bad on aluminum. Have you had any issues with it?
I'm open to any suggestions as what to use for solvent. I just don't want anything that's too stinky. I've heard the diesel works really well, but you know flammability. LOL
Originally I was thinking I would use mineral spirits, but that would be expensive and after reading through the instructions from Harbor freight it specifically says to use only water-based solvents. Also, the pump in the kit is plastic so I'm sure that mineral spirits would destroy the paint and everything.
I'm going to pick up a few more gallons of this stuff from the dollar store today. It's a 20 gallon tank and I put 12 gallons in. Also, I need to find some round brushes too.
Has anyone modded a solvent tank like this to add heat somehow? I think that's really help.
Here's what I used:
https://www.dollartree.com/Xtreme-Va...?method=search
http://www.garagejournal.com/forum/showthread.php?t=200871
 12-14-2015, 05:34 PM
#392

I got to be honest, I discarded my Harbor Freight parts washer a few years back. It was BEFORE I found Purple Power.
In my harbor freight parts washer I ran Kerosene (similar to Diesel), and I regretted every minute of it. I was rather unhappy with the results that I had with it, the cleaning power was pathetic. The flammability is a concern because I'm 110% certain that the HF parts washer isnt designed to be explosion proof, so in hind sight, if thats what you're using I'd recommend highly against anything flammable.
To be honest, I haven't let the Purple Power sit a long time on ANY surface, it works that well.. I've had very good results with it, and usually follow it up with some water (if possible) to neutralize anything left over from the PP. I'm not certain what the active ingredient is in it, but its not nearly offensive in odor as a lot of cleaners I've used. IMO, its 10x better than Simple Green.
If you goto a place that sells professional grade parts washers, they want to sell you $25/gallon fluid that I am certain is NOT that much better, IMO they are just insane.
As far as adding heat, there's a way to do it, but safety-wise unless you're good with electrical stuff I don't want to really get into this on an open forum.
I really REALLY want to build a D-I-Y ultrasonic cleaner in with a heater.. If you've ever seen the results from an ultrasonic cleaner you'd be amazed.
12-14-2015, 05:37 PM
#393
Check this out. I use this site a lot for ideas about shop organization and HF tool mods lol hope its ok to link another forum
HF 20 Gallon Parts Washer Mods - The Garage Journal Board
HF 20 Gallon Parts Washer Mods - The Garage Journal Board
12-14-2015, 06:23 PM
#394

That's funny because I was just imagining putting a remote oil filter like that on it. The one other problem with this is the base where the bendable neck attaches to the pump is actually plastic so I have to make sure I brace it with one hand while I move it around because eventually it's just gonna break off.
I hadn't considered adding a 5 gallon bucket to act as a trap. I don't know if I would go that far actually. But I'll probably do the remote oil filter thing.
What I'm imagining in my head is removing the chrome opposable neck part. Then where it was attached to the pump, run a hose to the remote filter. From the filter, return back into the side of the tank. Then, attach the bendable chrome part to the side of the tank.
When I end up building it'll make more sense. It's really just a minor modification I just have to figure out what threads it uses and what not. I'll probably order the parts and install it in the coming weeks.
Thanks for the tips guys!
12-17-2015, 05:15 AM
#396
After cleaning up the heads some more, I'm thinking that a remote oil filter would get clogged in about 30 seconds. A trap type setup would be much better. I'll have to think about this.
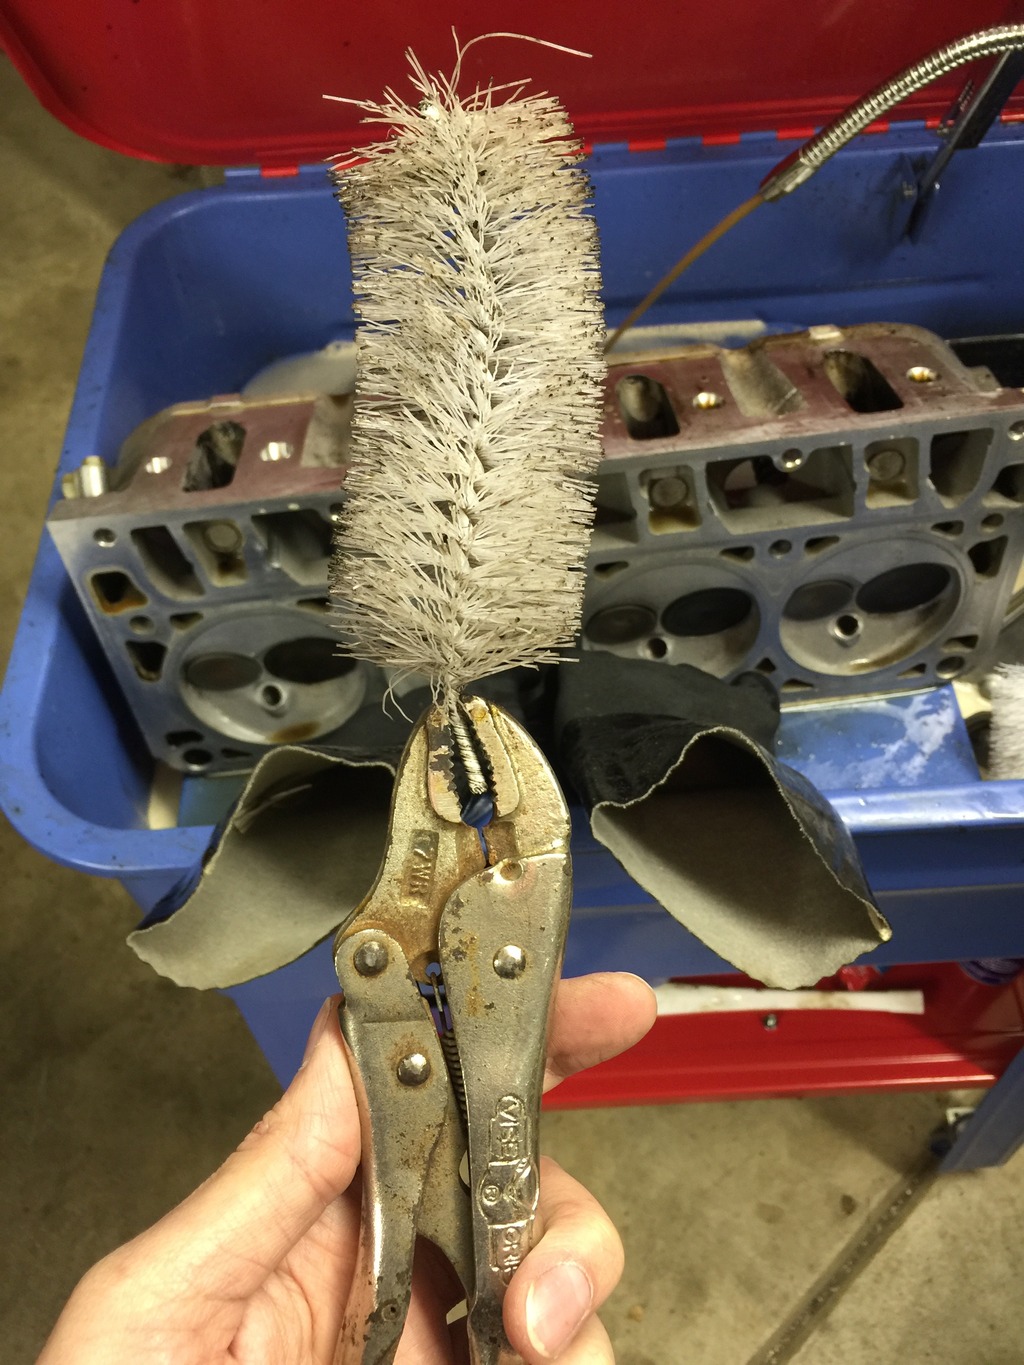
I went to the dollar store and got a toilet bowl cleaner. I cut it in half thinking I could bend half out of the way and clean the intake runners. It broke immediately.

So I used some vice grips.
Rinsed off.
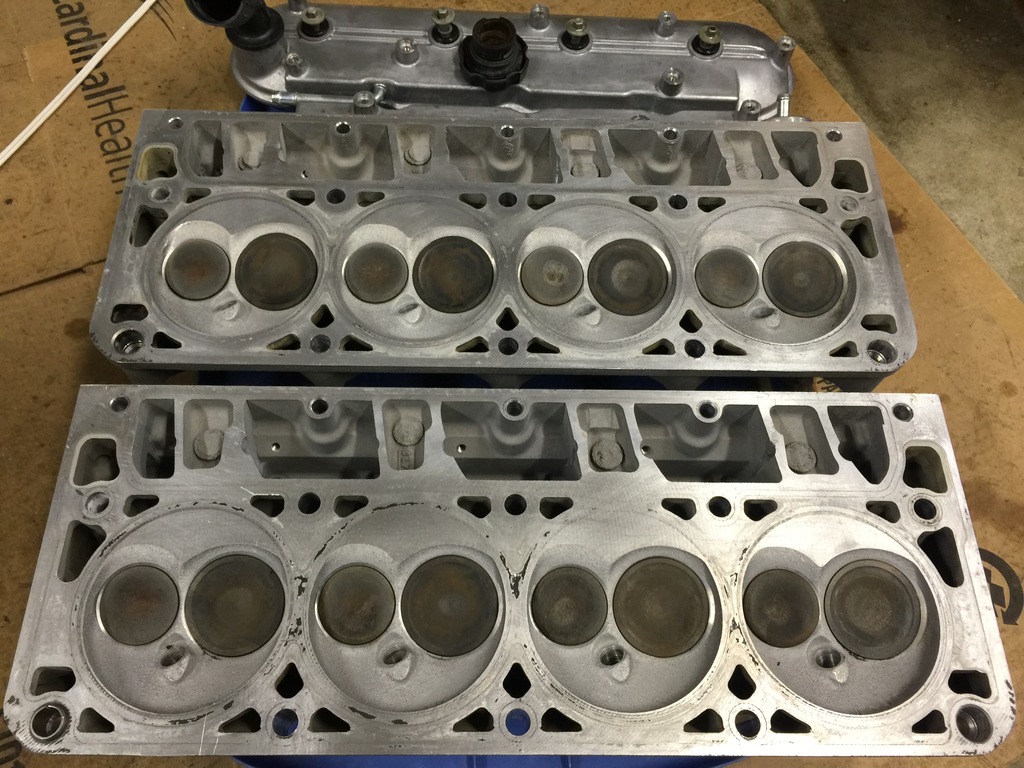
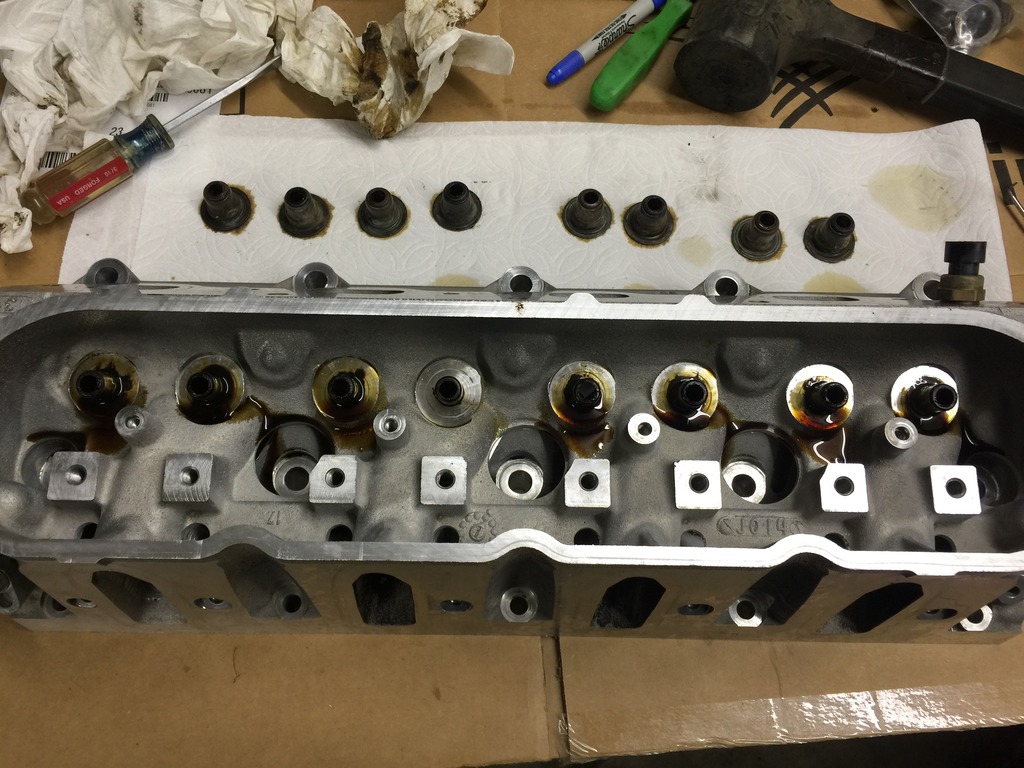
This is as clean as I could get the intake runners. So I decided to remove the valves.

I bought this high tech tool a while back.

Repeat 16 times.
So much **** built up in there.

Even after soaking for days there's still oil under there. Not complaining, just surprised.
I scraped this out of one intake runner.
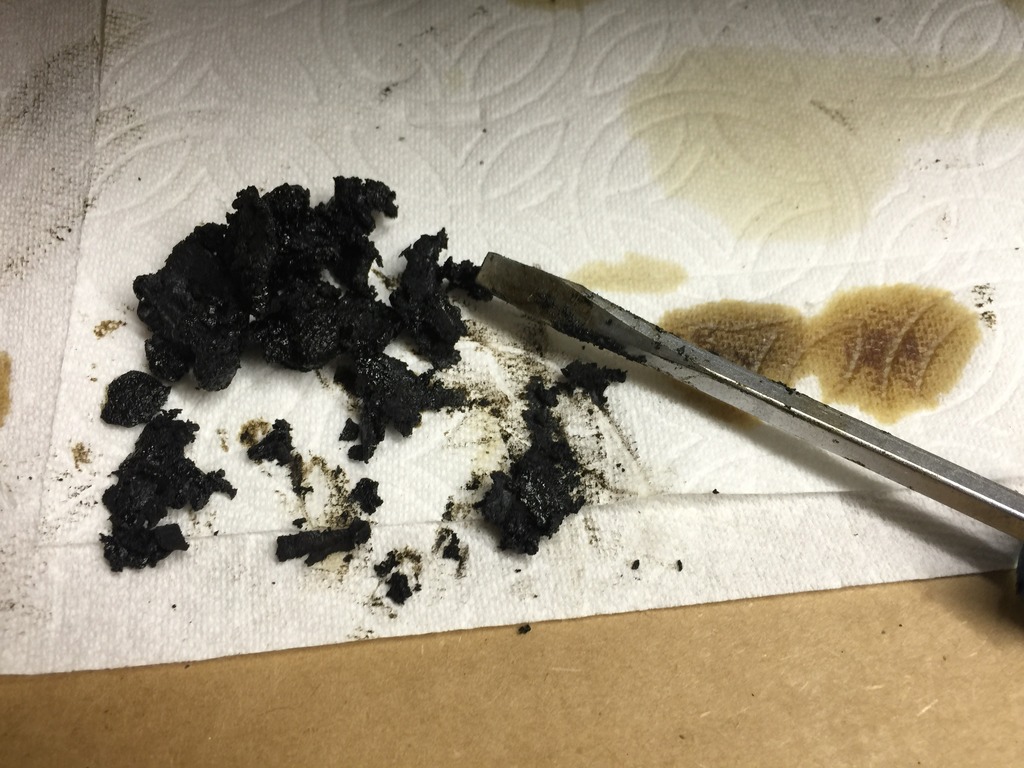

So I scraped out all the runners.
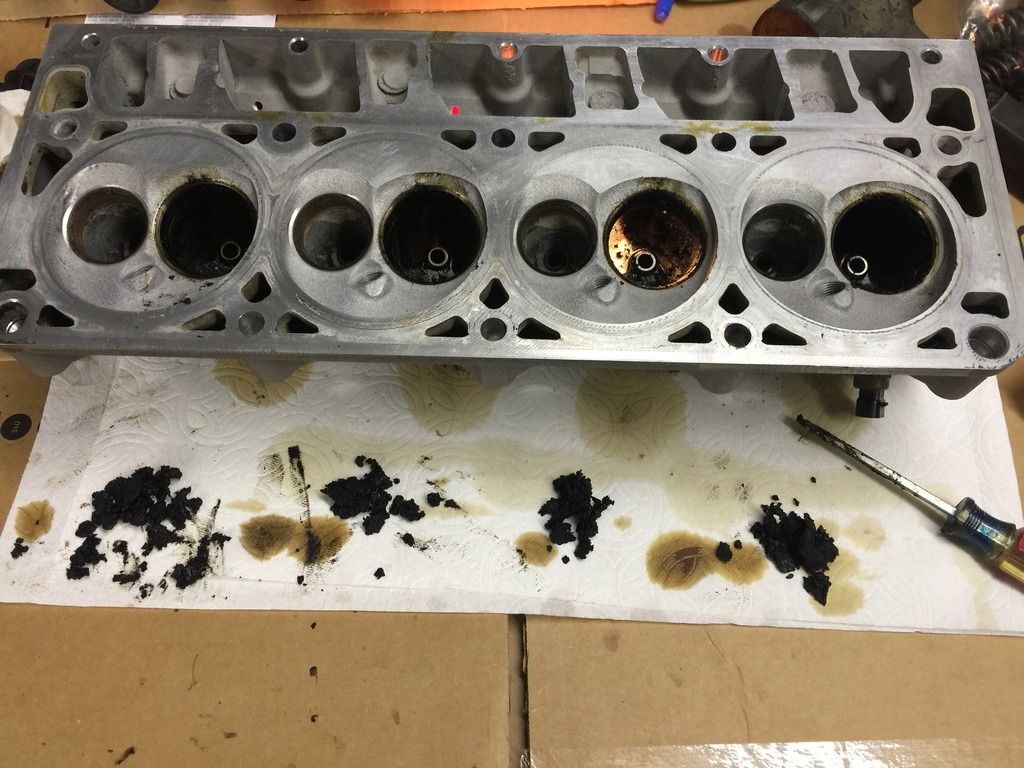
So back into the tank they go.
I went to the dollar store and got a toilet bowl cleaner. I cut it in half thinking I could bend half out of the way and clean the intake runners. It broke immediately.

So I used some vice grips.

Rinsed off.

This is as clean as I could get the intake runners. So I decided to remove the valves.

I bought this high tech tool a while back.


Repeat 16 times.

So much **** built up in there.

Even after soaking for days there's still oil under there. Not complaining, just surprised.

I scraped this out of one intake runner.


So I scraped out all the runners.

So back into the tank they go.
 12-17-2015, 05:34 AM
#397
Meanwhile...
I went and got my LQ4 out of storage.

Started tearing into the LQ4. I sprayed it down with WD40 and let it sit over night
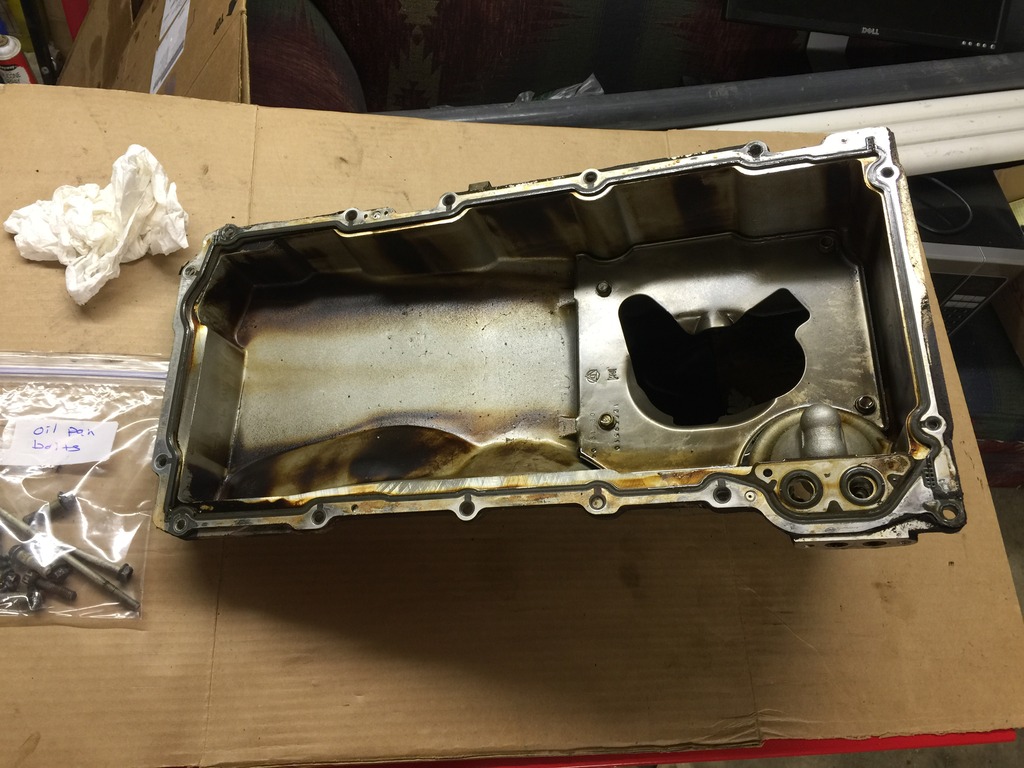
Took the oil pan off.
Turned it over.
Back to the heads...
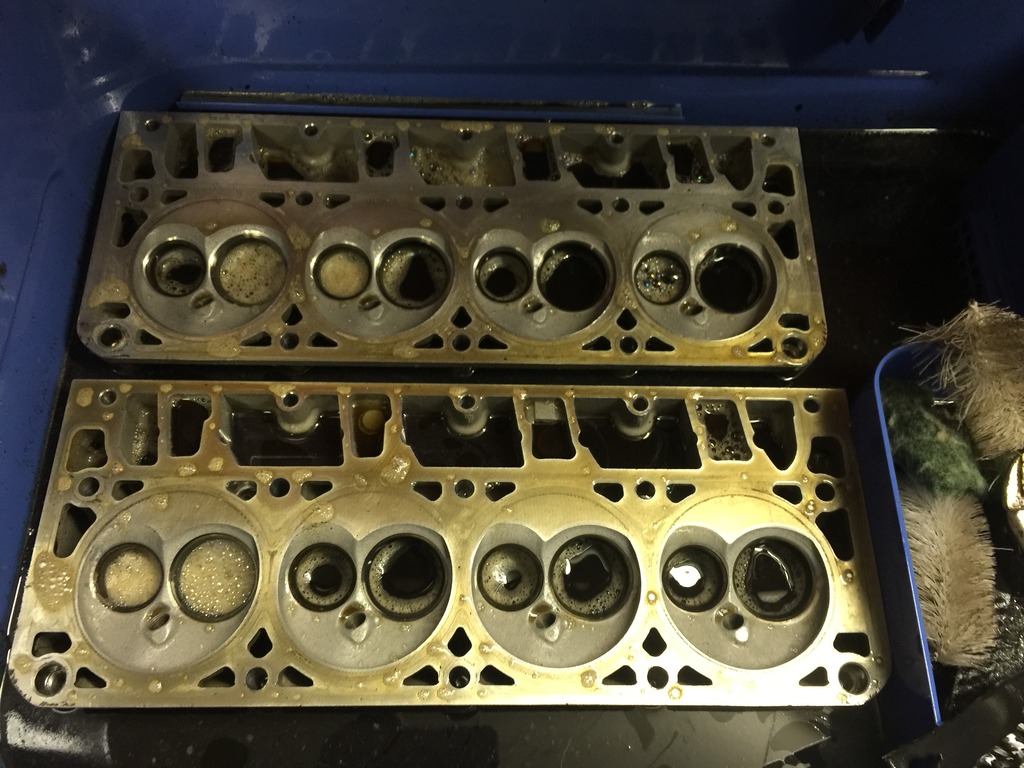
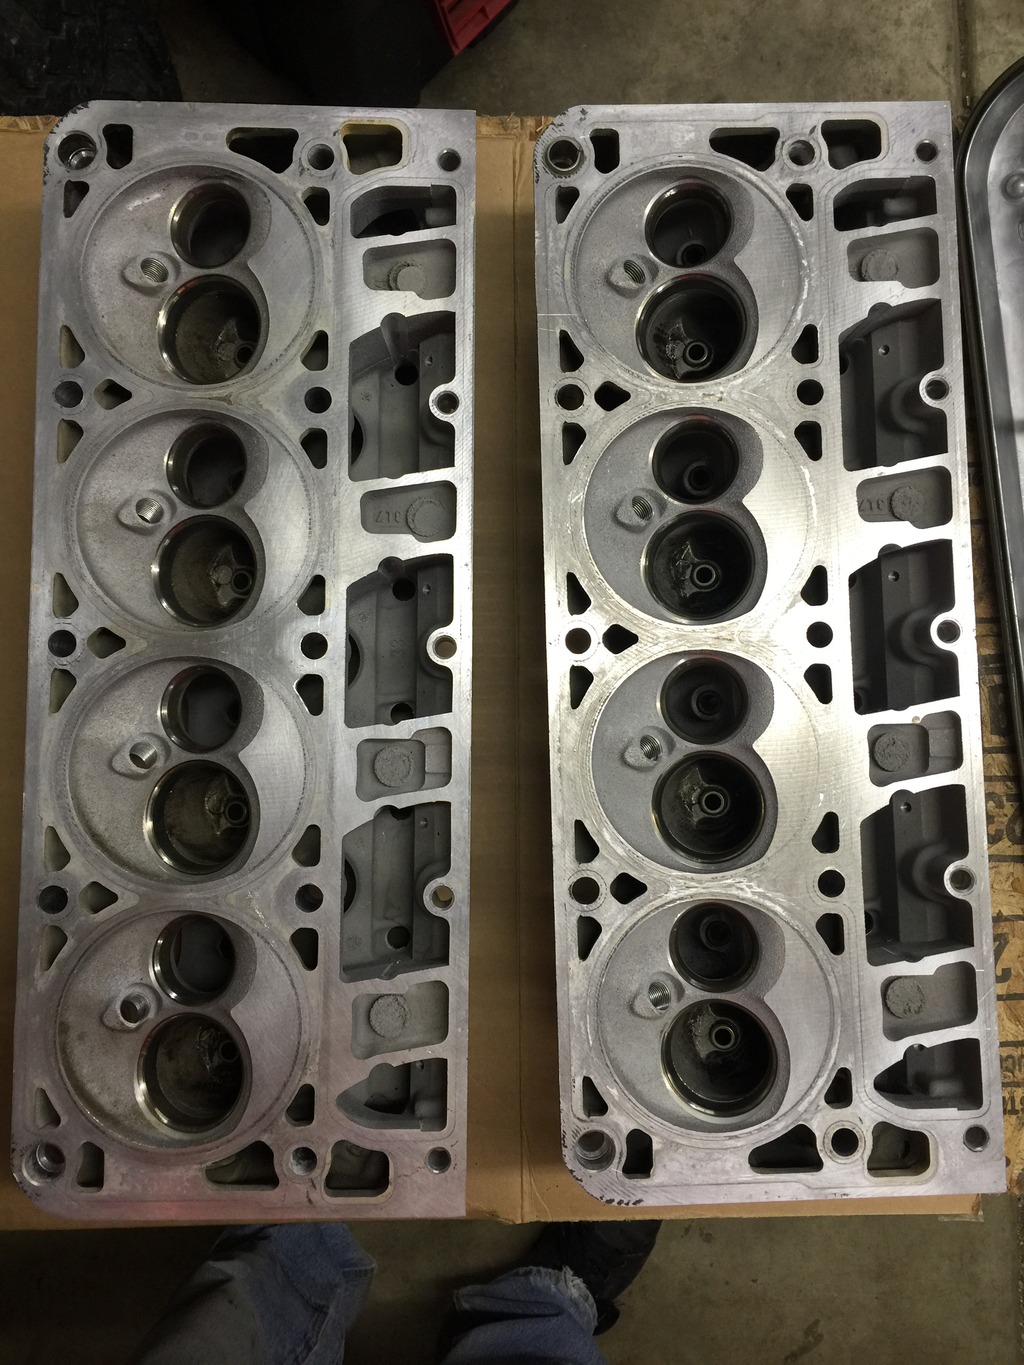
There as clean as they're going to get. I had considered porting them, or at least cleaning them up a bit but then decided I didn't want to spend 30 hours on the heads. Well, at least they're clean.
I went and got my LQ4 out of storage.

Started tearing into the LQ4. I sprayed it down with WD40 and let it sit over night

Took the oil pan off.

Turned it over.

Back to the heads...
There as clean as they're going to get. I had considered porting them, or at least cleaning them up a bit but then decided I didn't want to spend 30 hours on the heads. Well, at least they're clean.
 12-17-2015, 05:49 AM
#398
Which brings us to today.
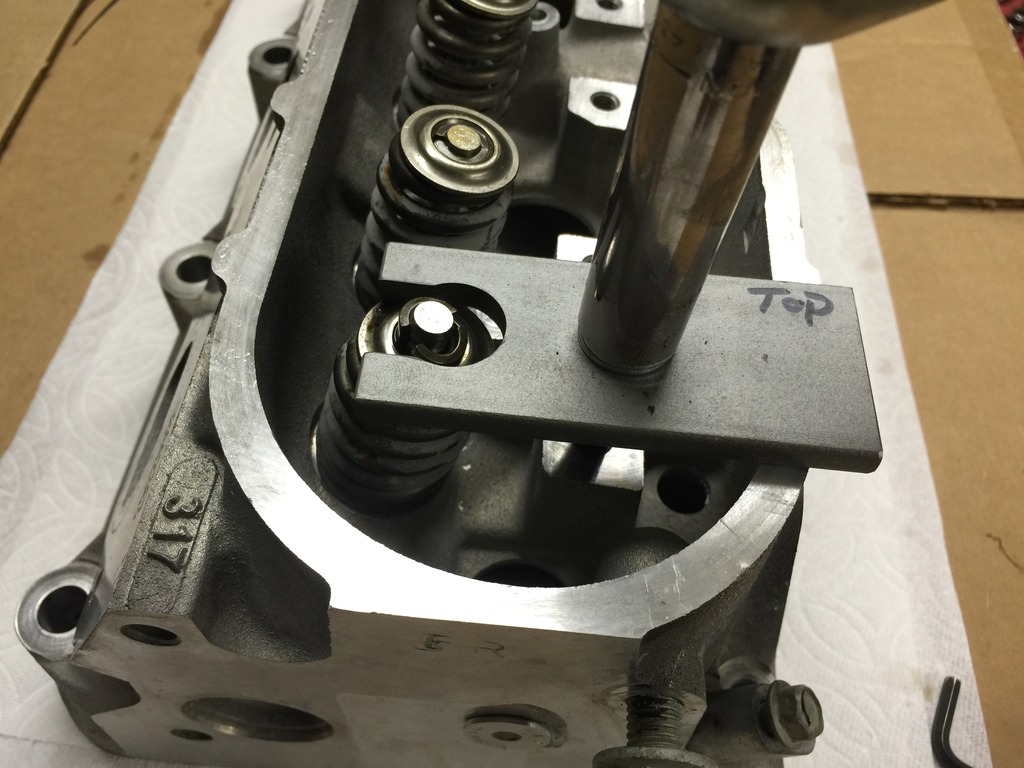
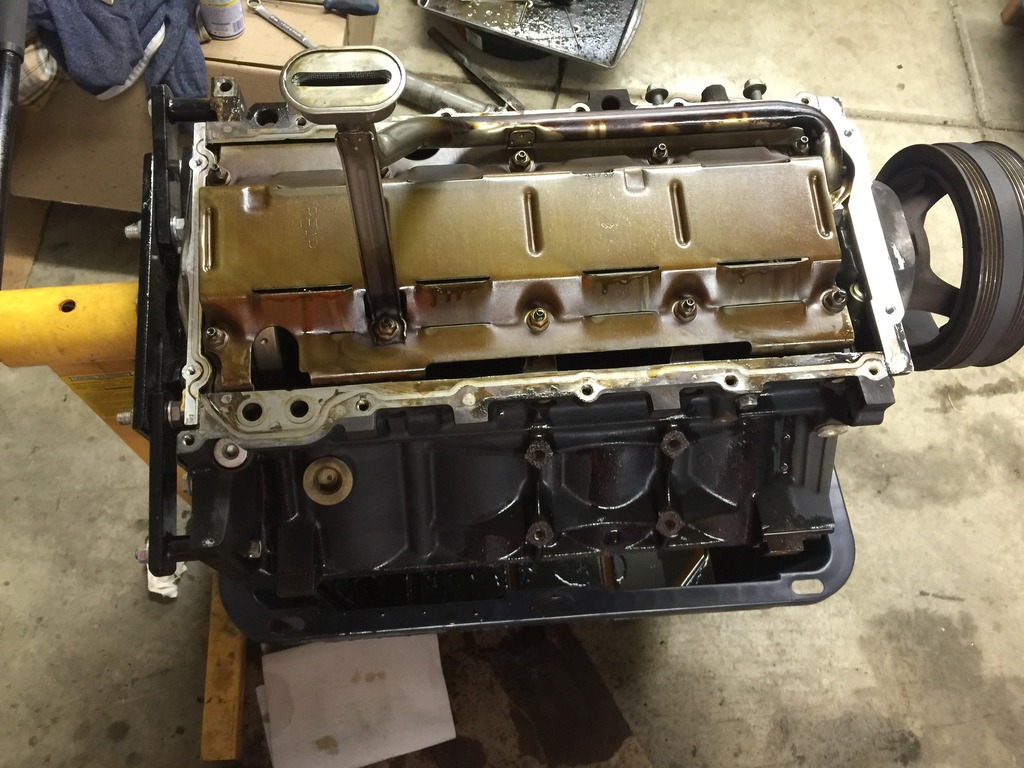
I pulled the balancer off and removed the front cover.
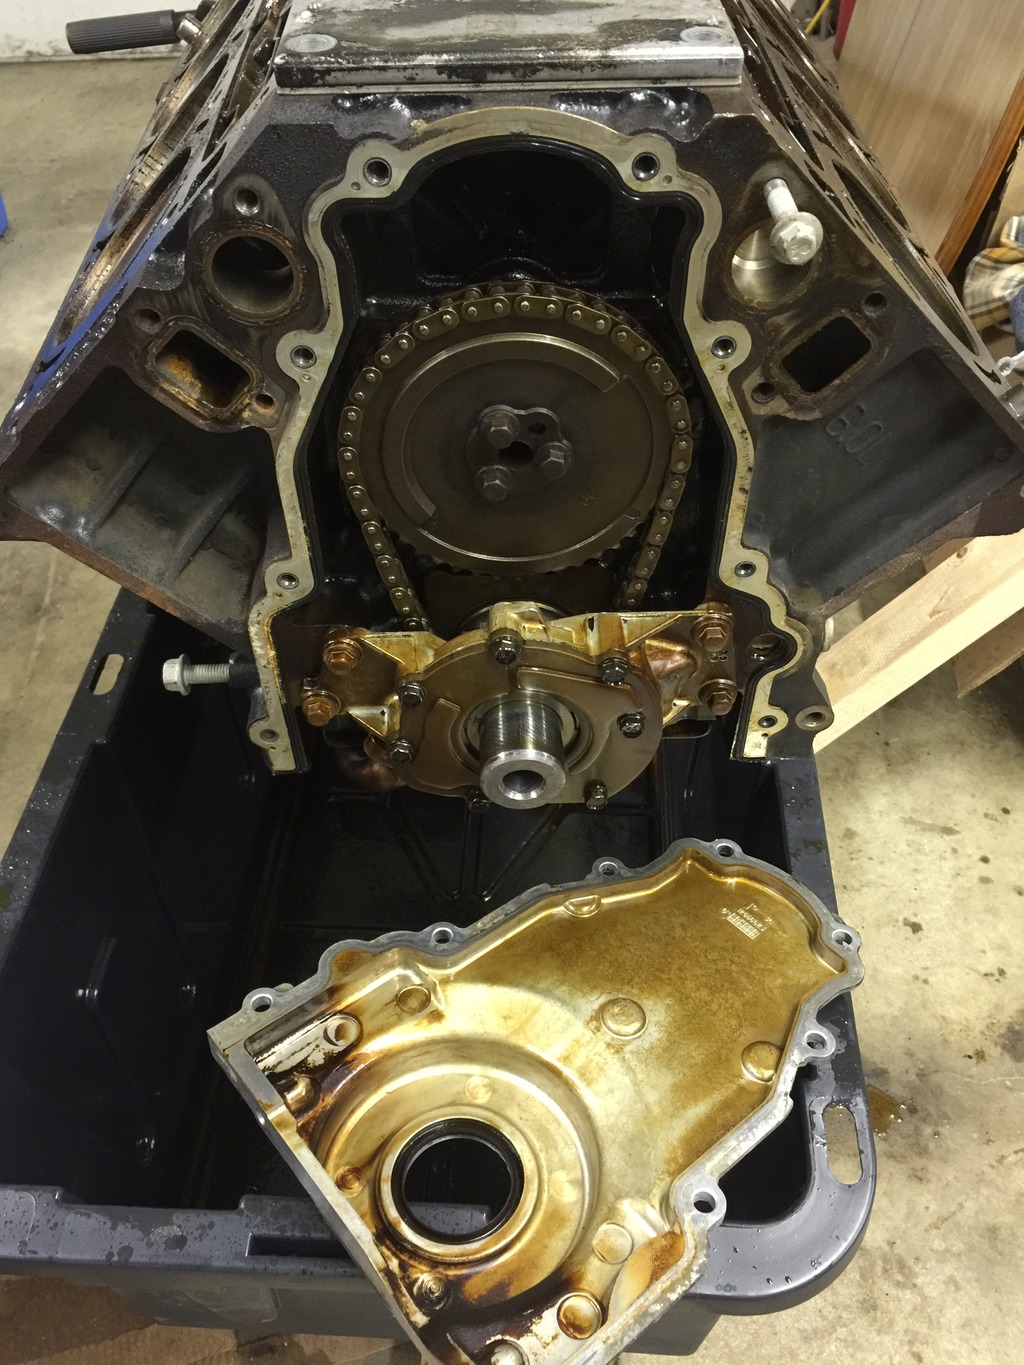
Removed the oil pump and pick up tube and proceeded to spend a few hours removing the crank sprocket. It took a while to get the correct combo of linkages on my puller set.

I was surprised by how much slack was in the timing chain. I bought a replacement timing chain years ago. I'm not sure if the one I removed is all that bad.
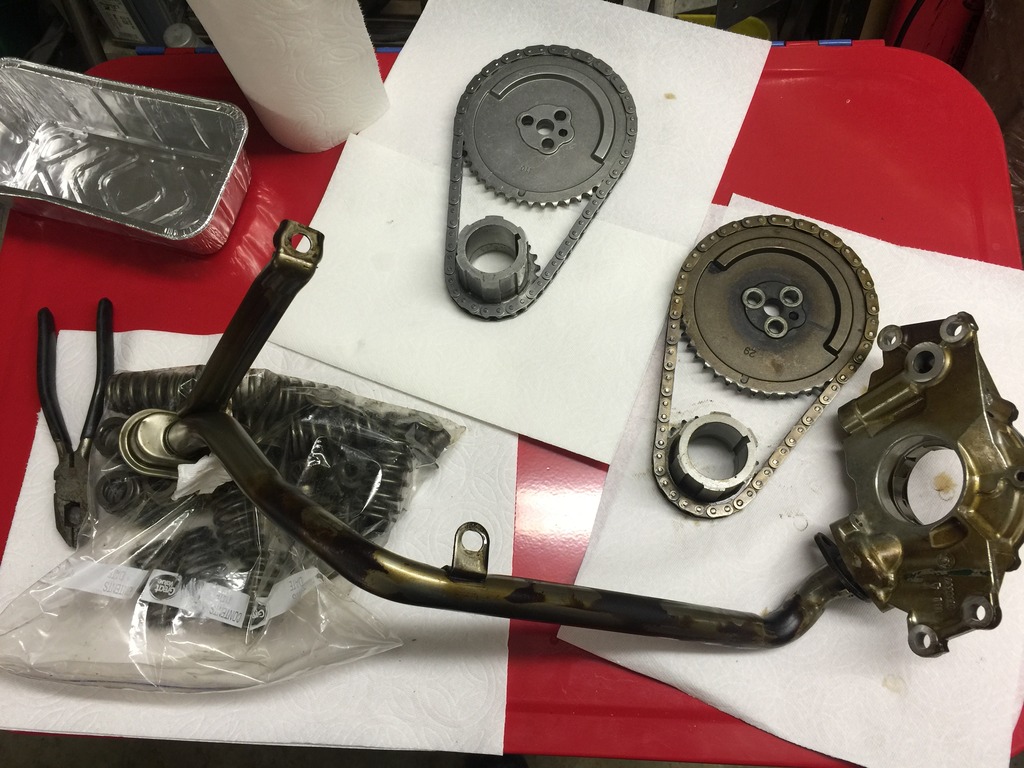
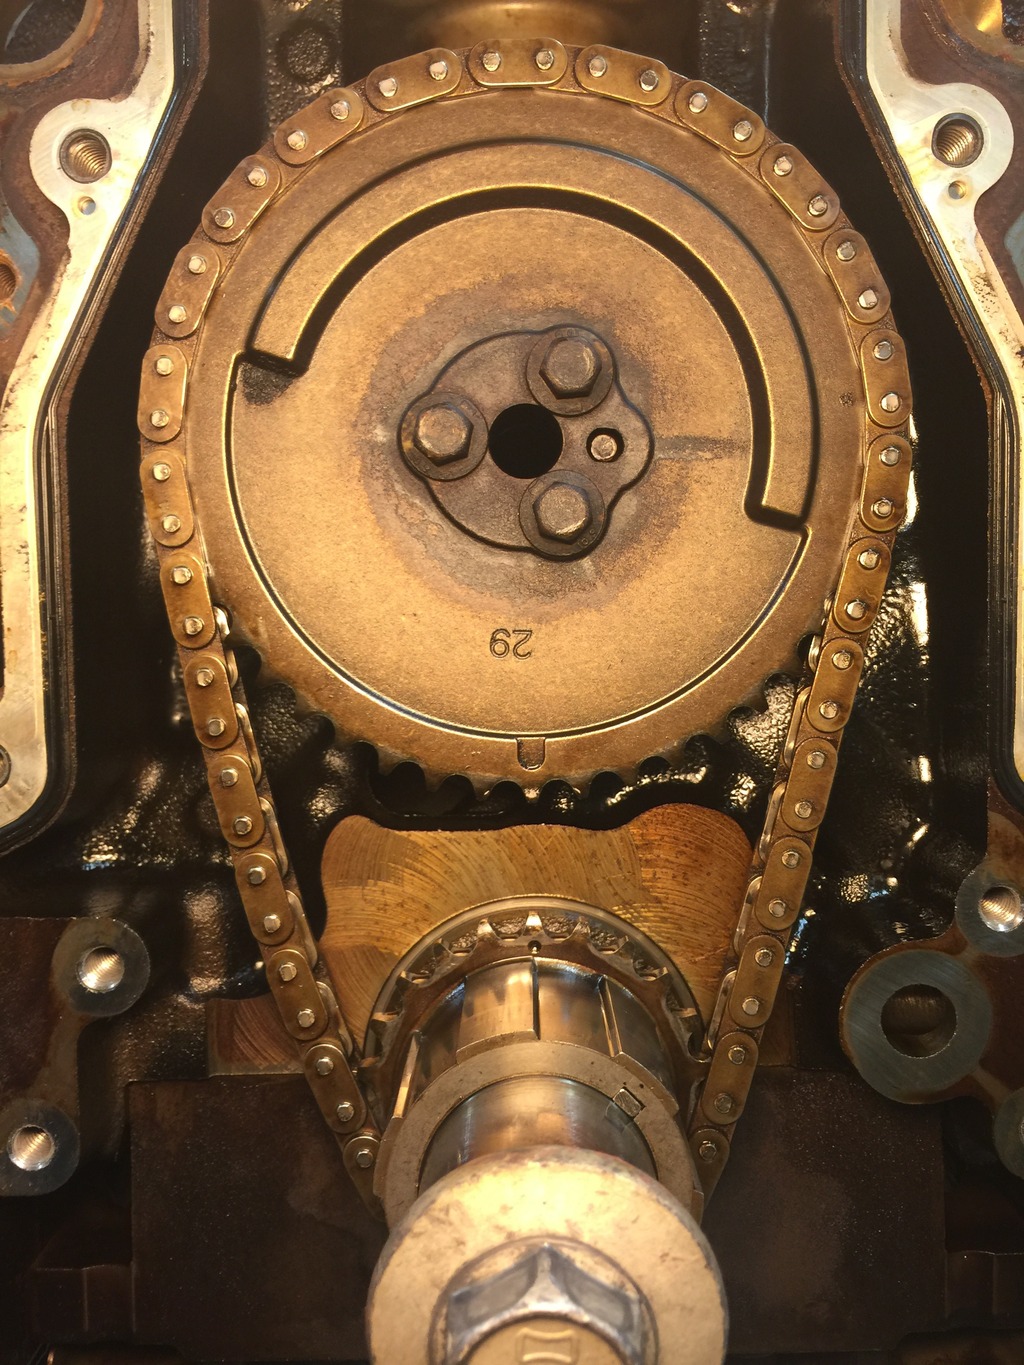
Next I removed the camshaft retainer plate and then the camshaft.
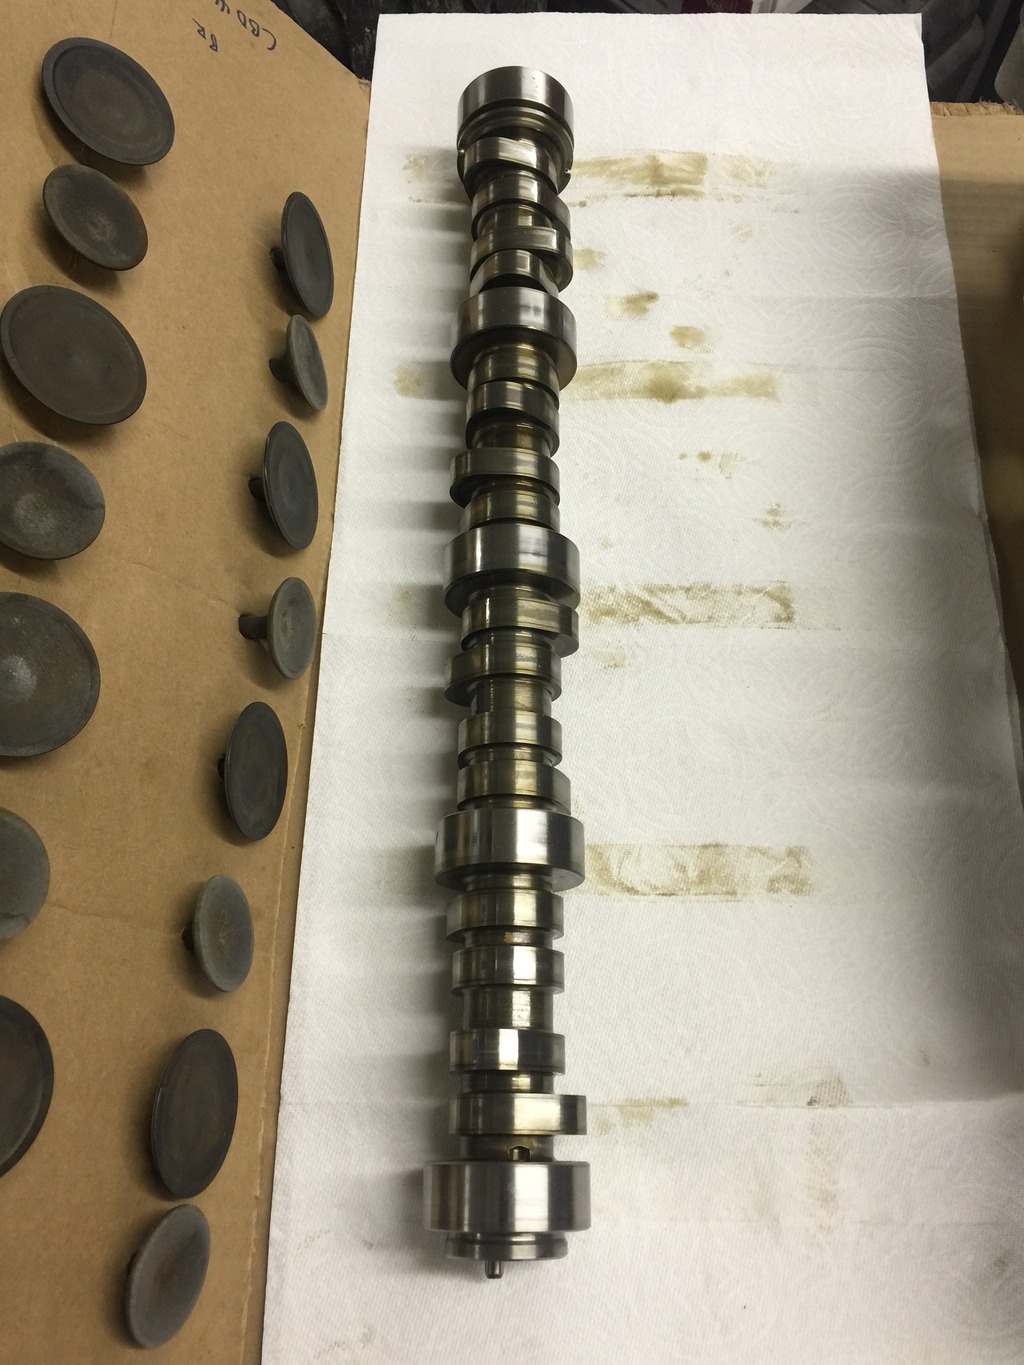
I lined up both camshafts but the picture somehow was screwed up. Here's a shot of their production numbers though.
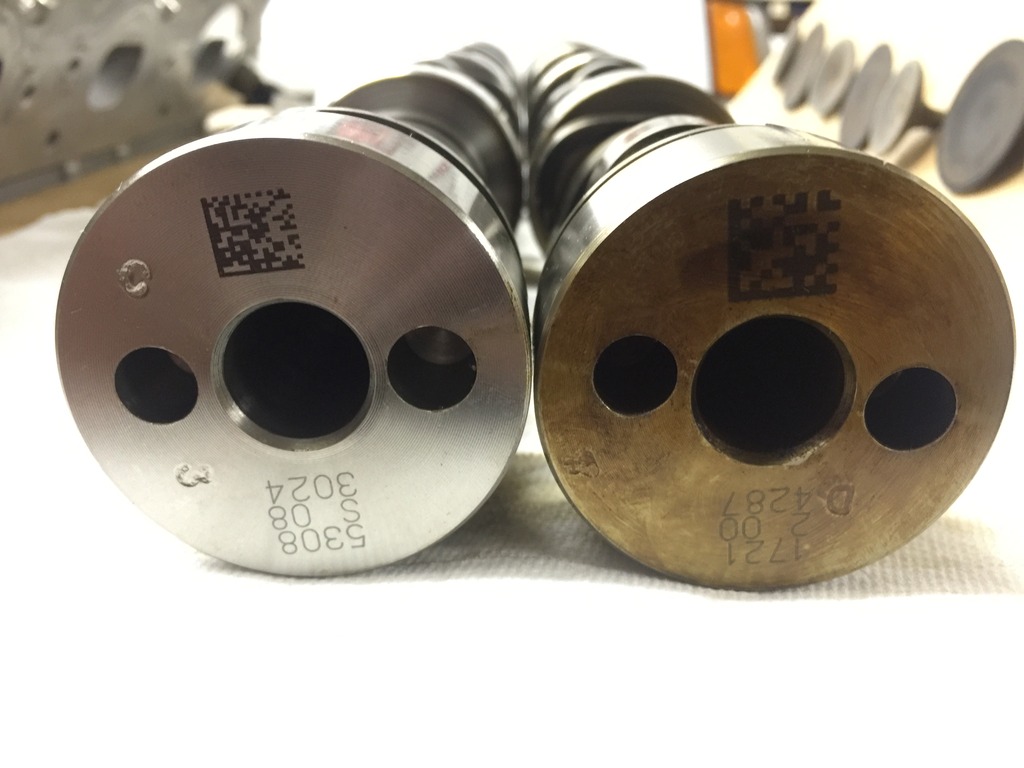
Tomorrow I'm hoping to get the heads out back together and get the block cleaned up. I should be able to get the camshaft installed too. Hell, I might get the entire thing buttoned up. We'll see.
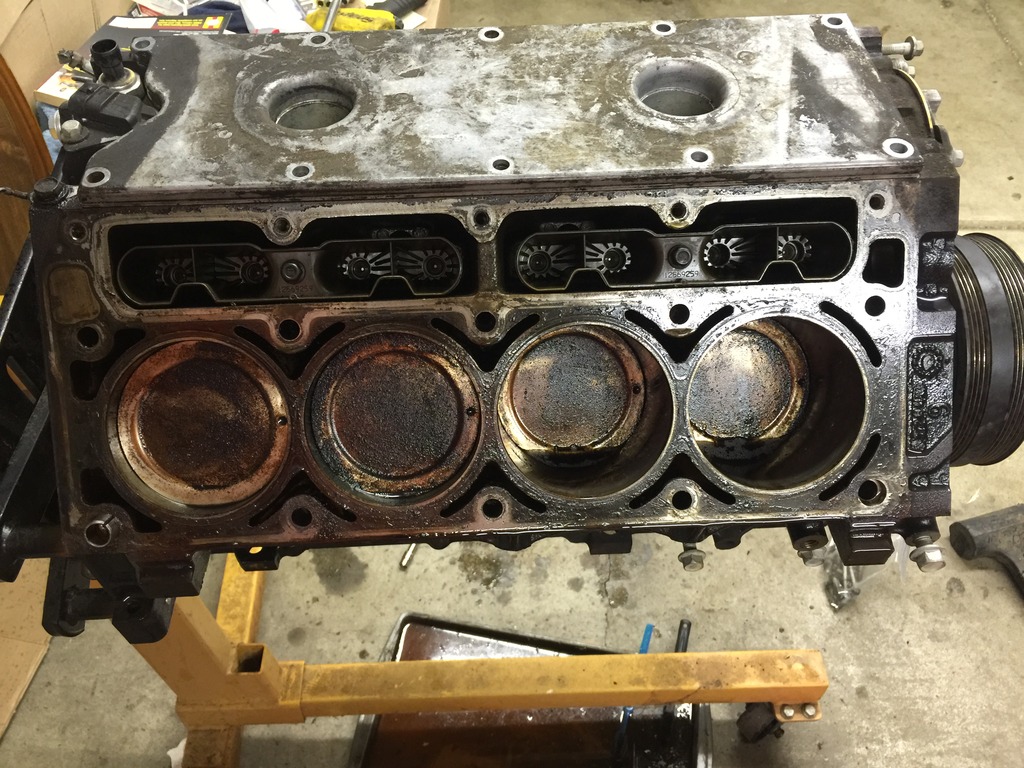
Any tips on cleaning the surface around the pistons? Scotch bright and transmission fluid?
Photobucket kinda screwed me the last few days. I'm glad it's working now, but I wish I could have posted as I was getting stuff done.
I pulled the balancer off and removed the front cover.

Removed the oil pump and pick up tube and proceeded to spend a few hours removing the crank sprocket. It took a while to get the correct combo of linkages on my puller set.


I was surprised by how much slack was in the timing chain. I bought a replacement timing chain years ago. I'm not sure if the one I removed is all that bad.

Next I removed the camshaft retainer plate and then the camshaft.

I lined up both camshafts but the picture somehow was screwed up. Here's a shot of their production numbers though.

Tomorrow I'm hoping to get the heads out back together and get the block cleaned up. I should be able to get the camshaft installed too. Hell, I might get the entire thing buttoned up. We'll see.
Any tips on cleaning the surface around the pistons? Scotch bright and transmission fluid?
Photobucket kinda screwed me the last few days. I'm glad it's working now, but I wish I could have posted as I was getting stuff done.
 12-18-2015, 05:54 AM
#400
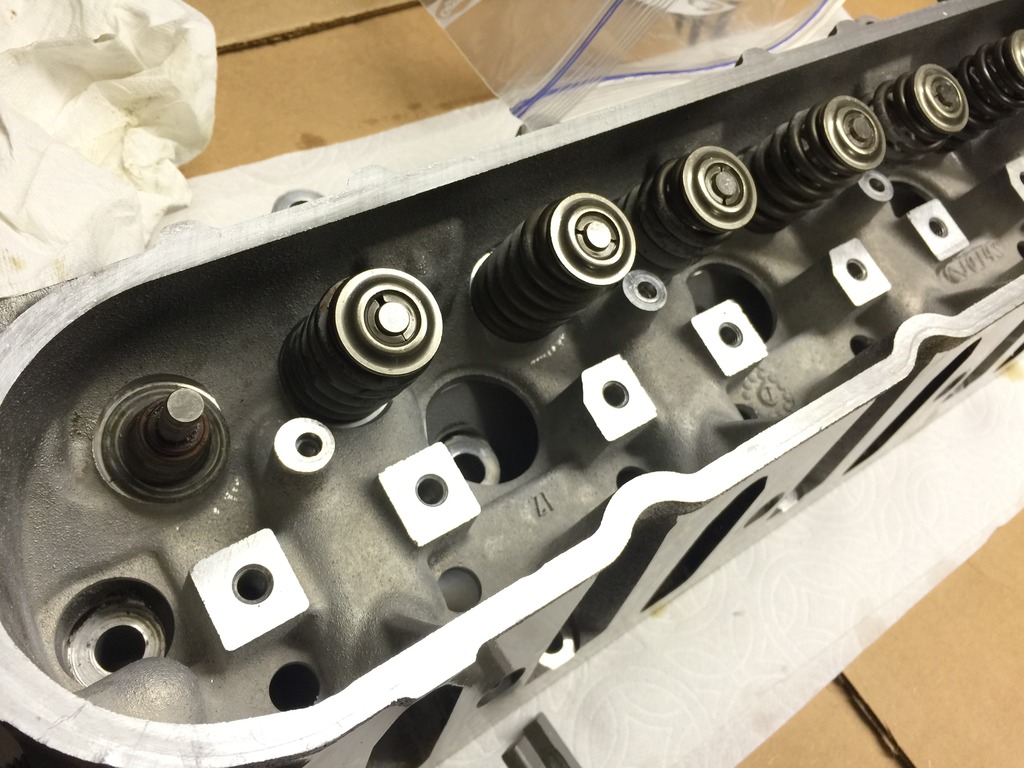
I ported my oil pump a while back so I made sure I cleaned it real well before installing it.


I added two washers, put the spring in, used some blue locktite and tightened it down. I'm sure there's a reason why I chose these washers, I don't remember what it was though. I guess we'll find out what I oil pressure is.

I put assembly lube in all the moving parts then put it back together.

I used this on the engine and got it quite a bit cleaner.

I still need to scrape off the rest of the head gasket material with a razor blade.

Put the oil pan and front cover in to soak overnight.
