
2000 Chevy Silverado project "Charlie Murphy"
 12-22-2015, 03:09 AM
#411

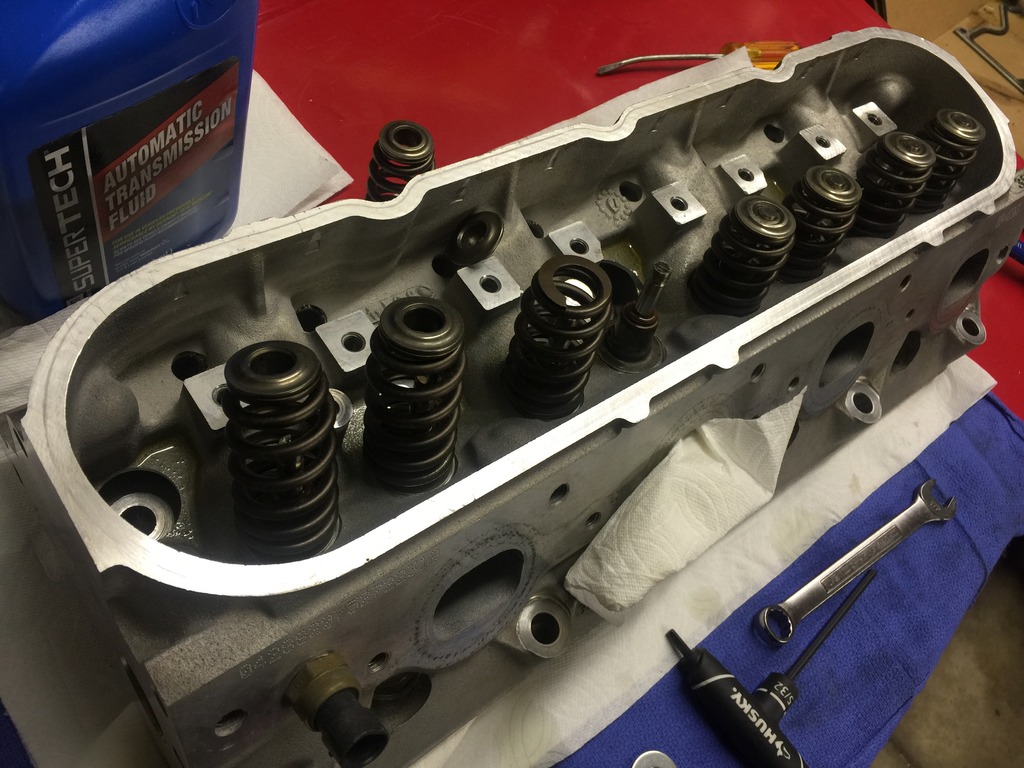
I finished cleaning up the block today and started assembling the heads
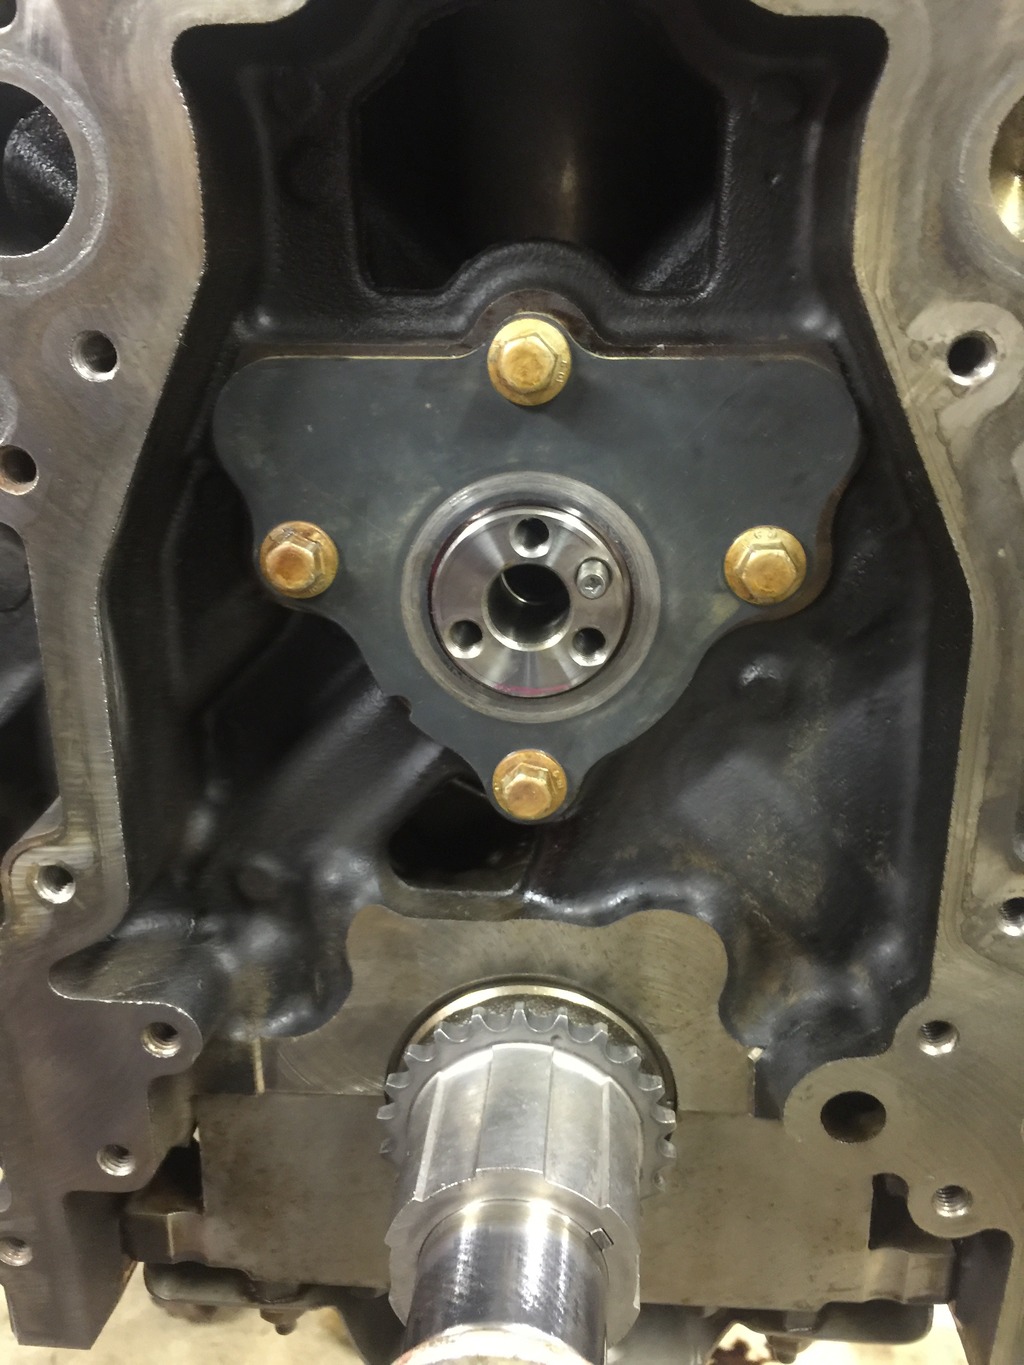
I put assembly lube on the camshaft and slowly put it in using water pump bolts as a handle.
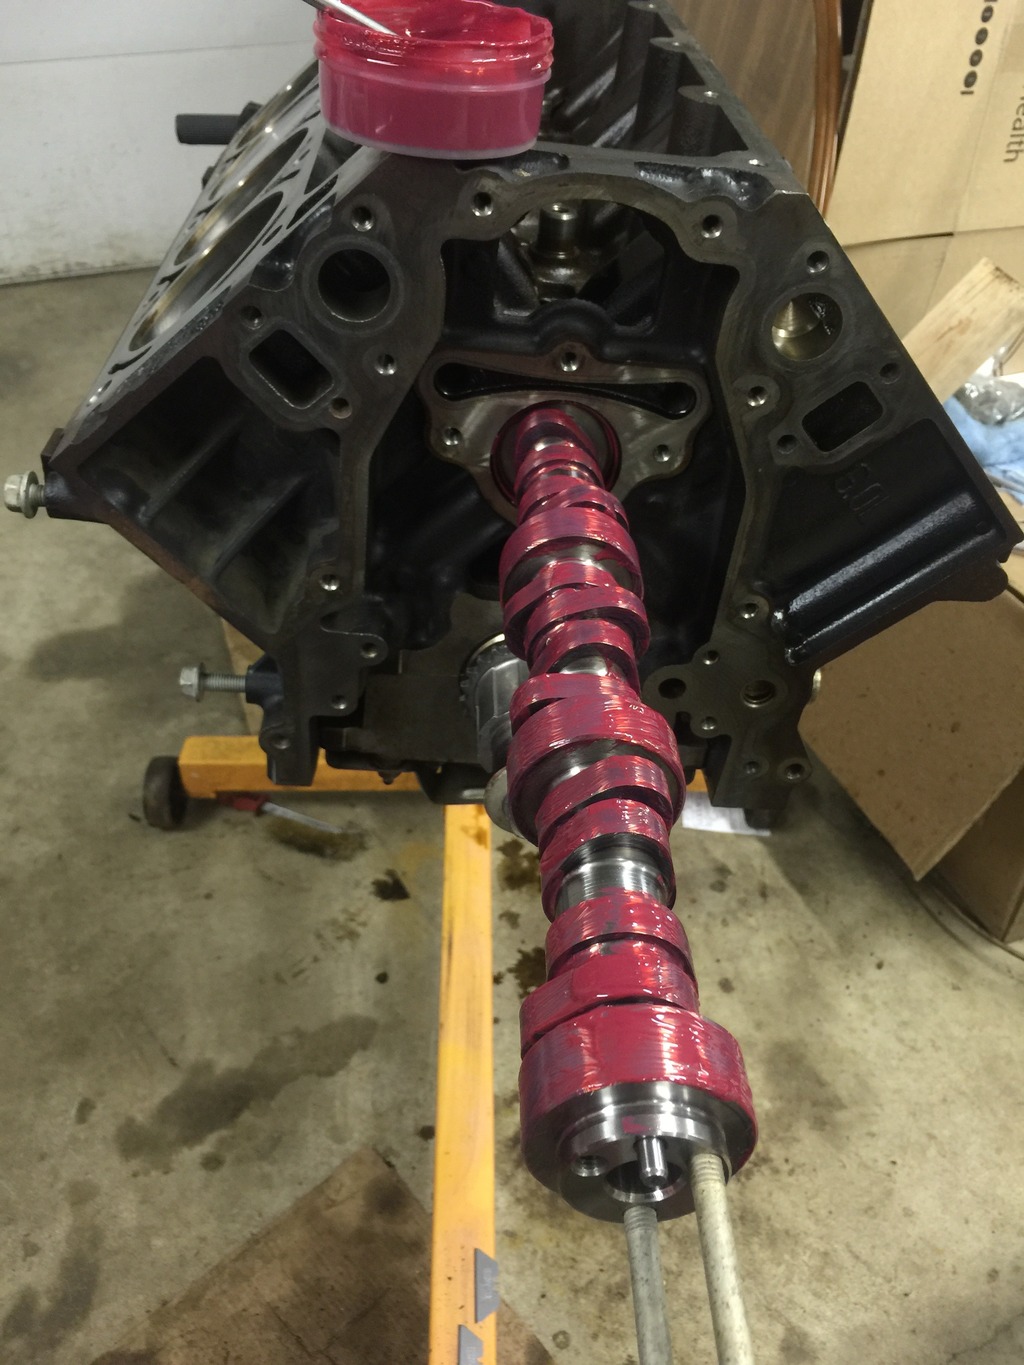
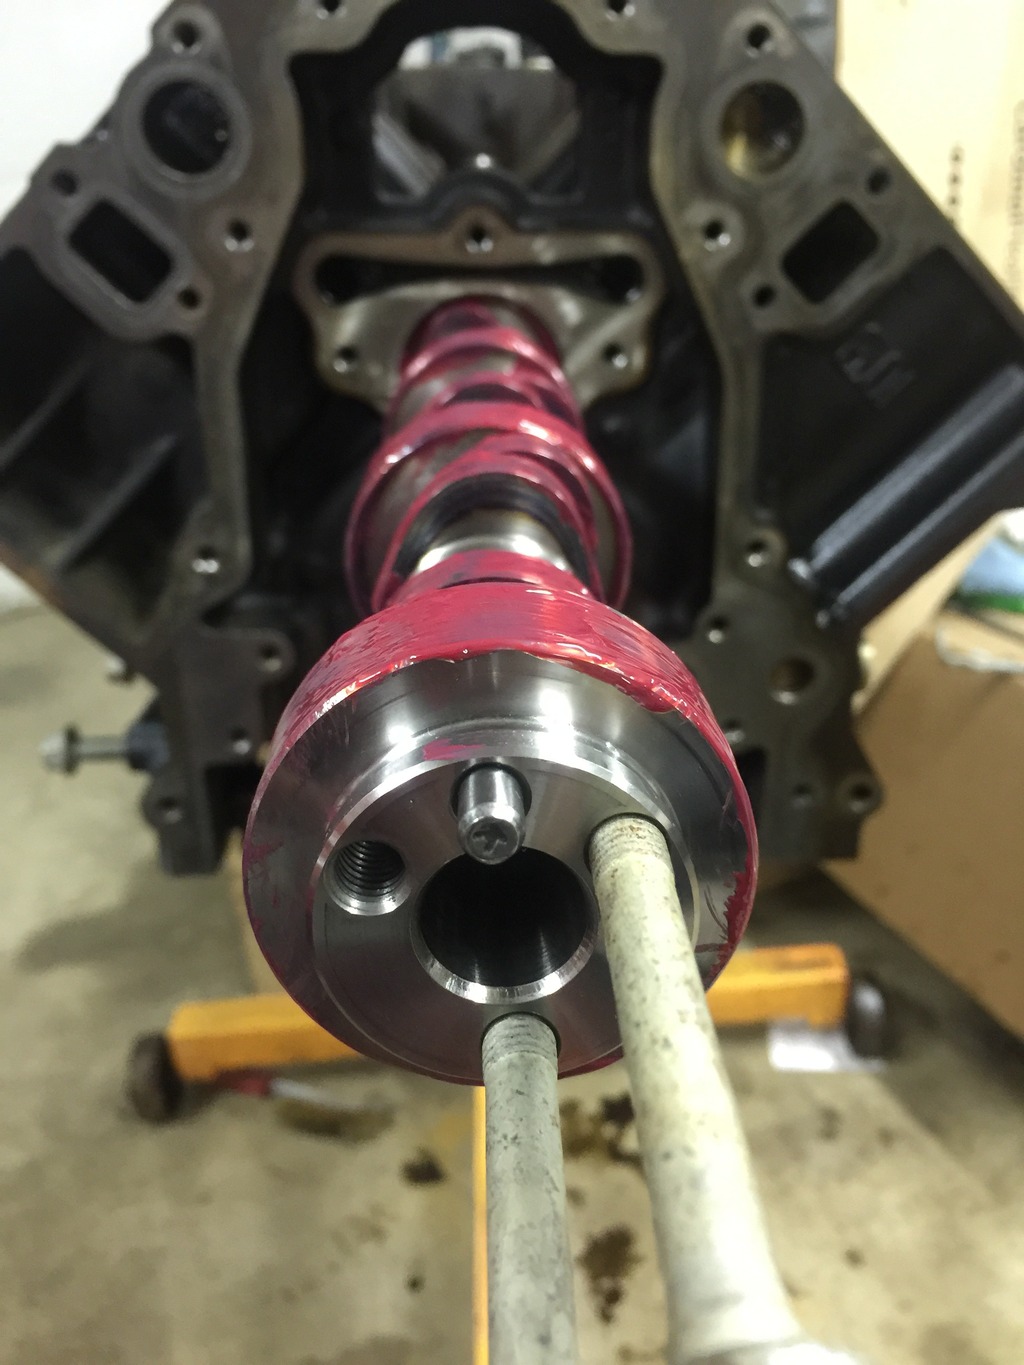
I put the camshaft retainer plate on and torqued the bolts down to 18 ft/lbs.
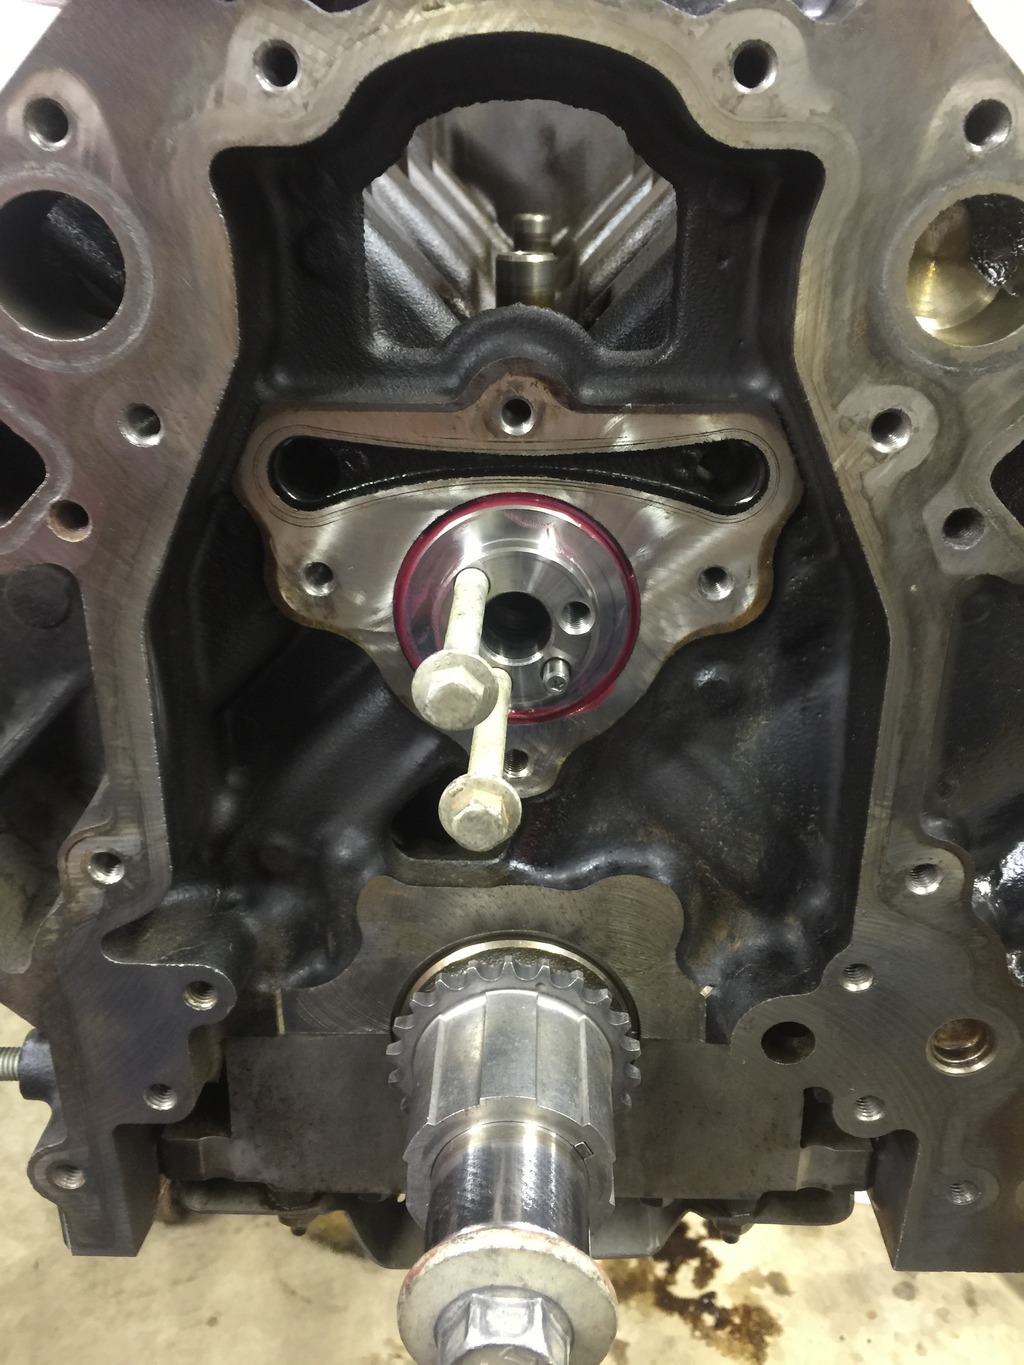
Next I put on the camshaft sprocket and timing chain.
It blows my mind that this much slack is okay.
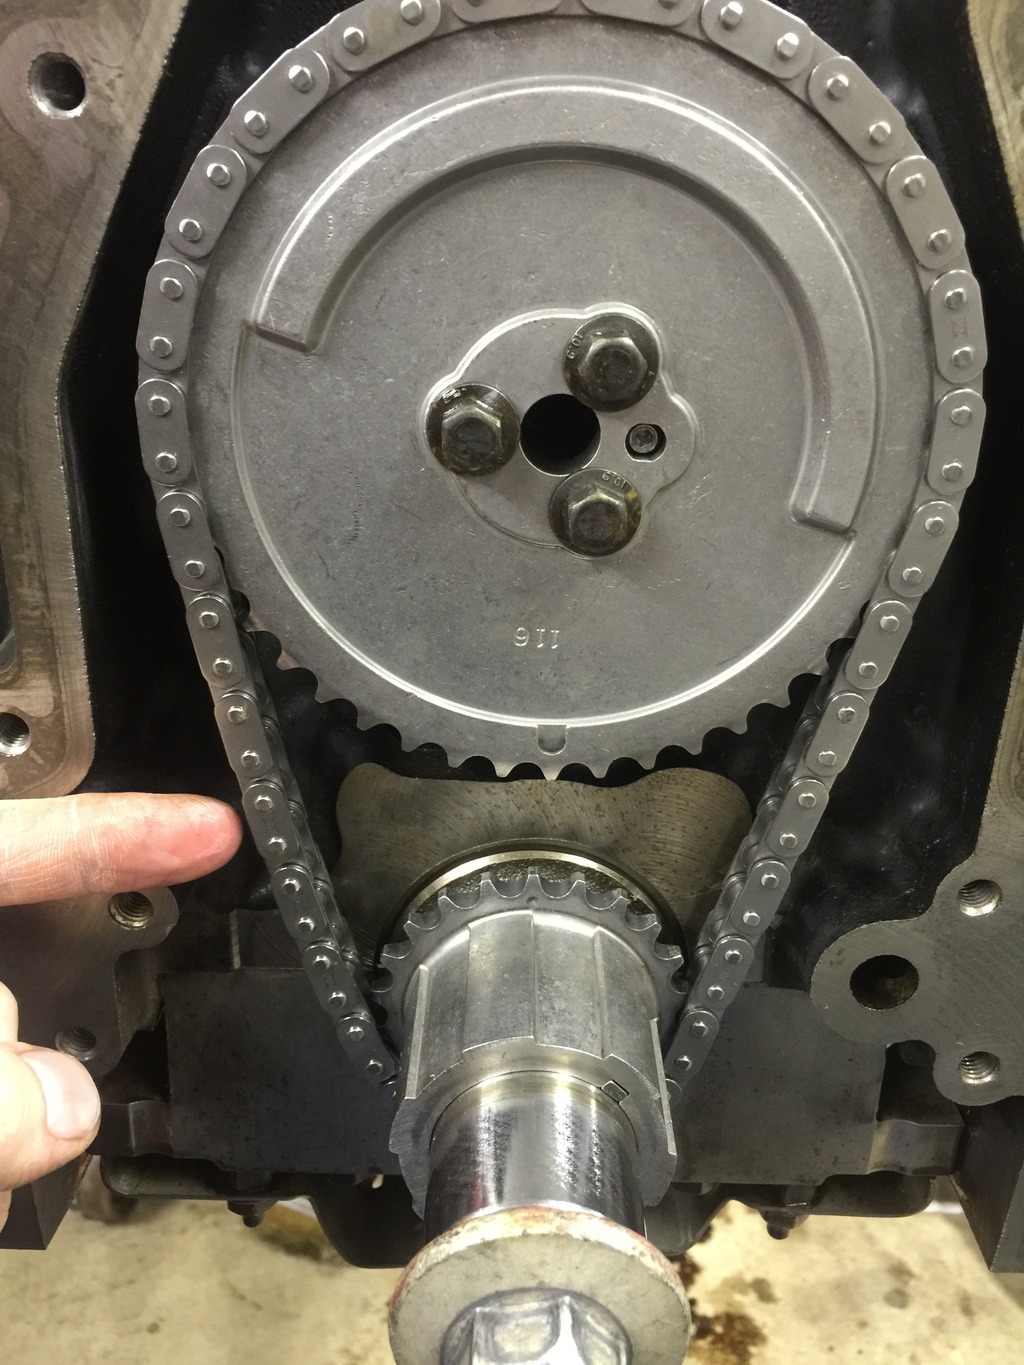
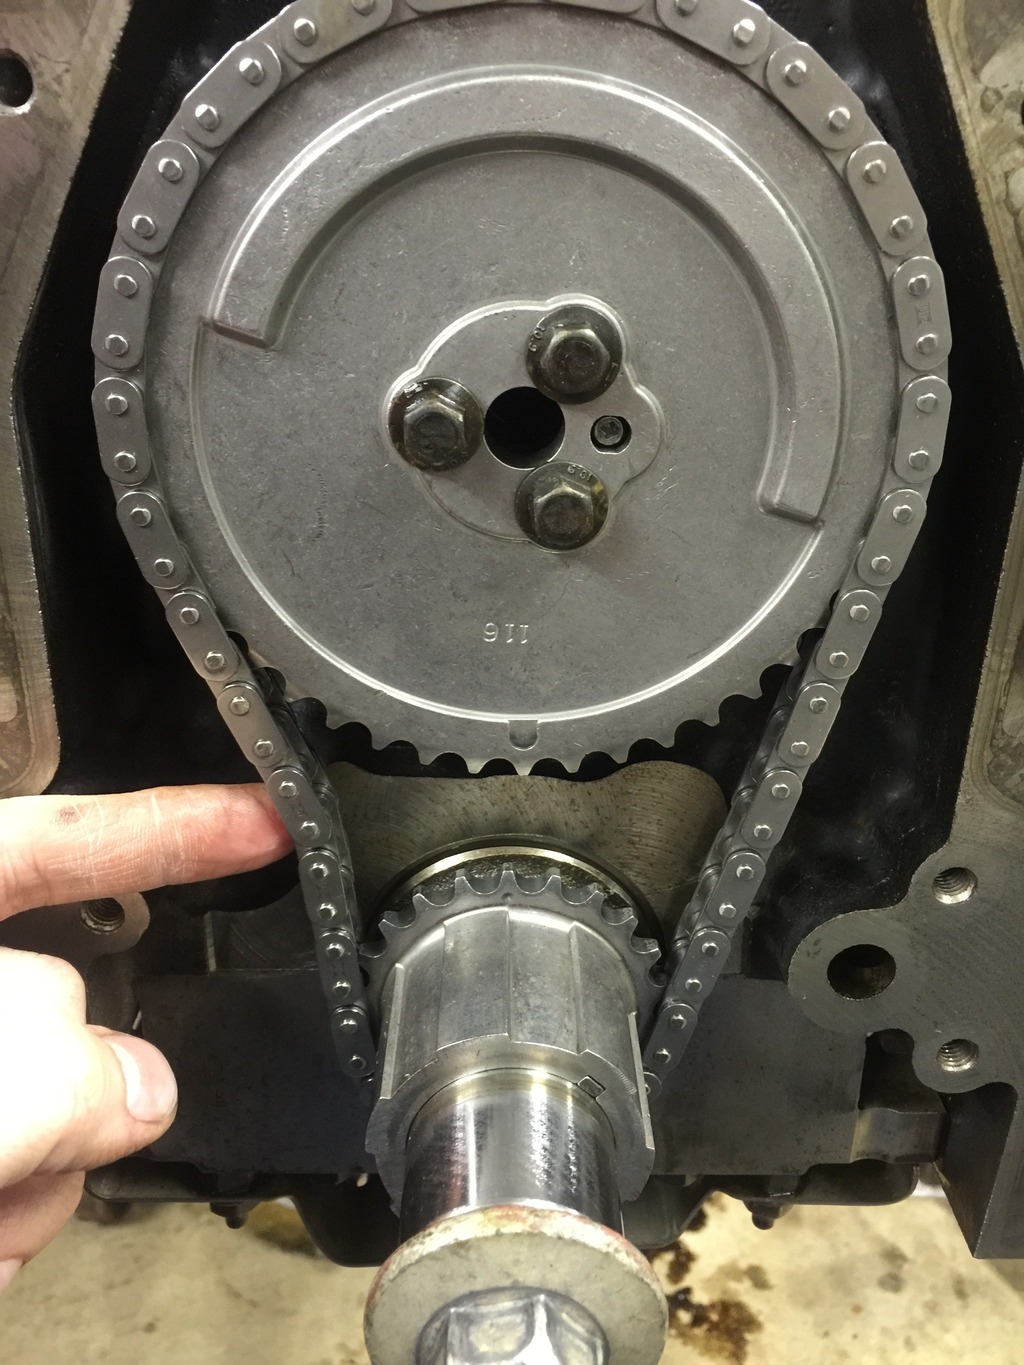
Seriously? That's okay? I can move it by hand what feels like 5� just from the slack. Seems crazy.

 12-22-2015, 02:21 PM
#413
Awesome. Thank you.
What do you think about running this?
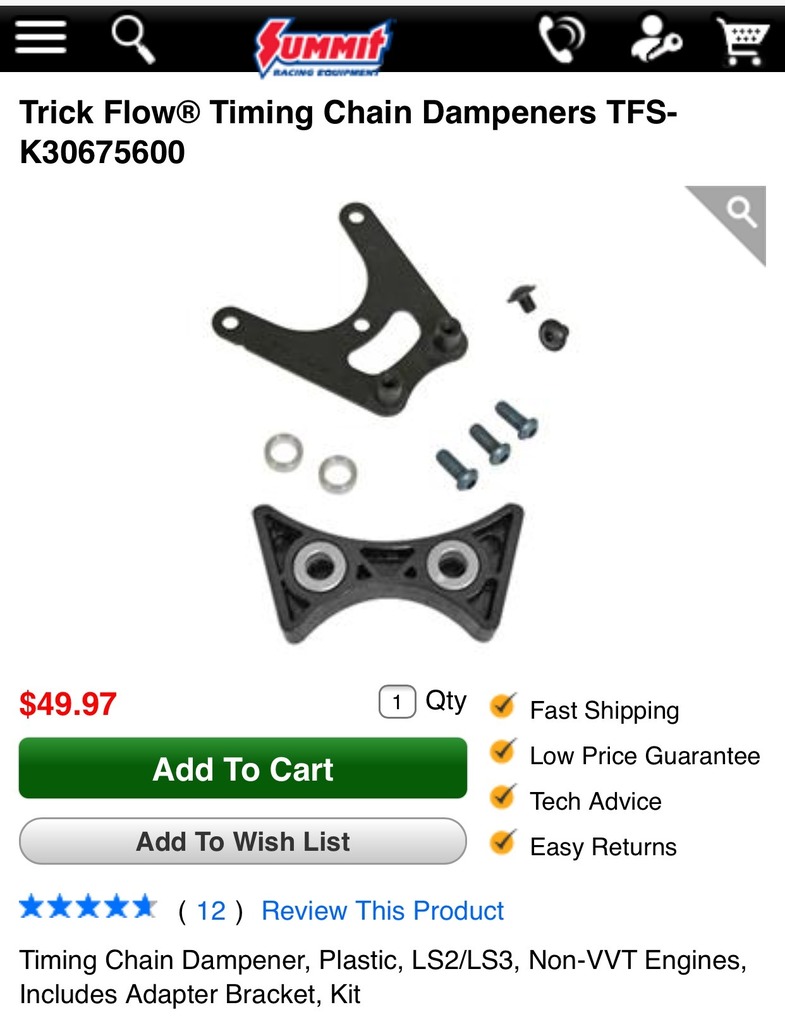
Some people swear by it. I'm don't have one in front of me so I'm not sure how much it could help deflection. Other engines I've built have had guides but they're usually on the other side of the chain.
What does adding the dampener do? Increase timing chain longevity? I haven't read where people have broke timing chains. It makes me wonder how necessary a double roller chain or dampener actually is.
Last edited by iregret; 12-22-2015 at 07:15 PM.
12-23-2015, 05:15 AM
#414
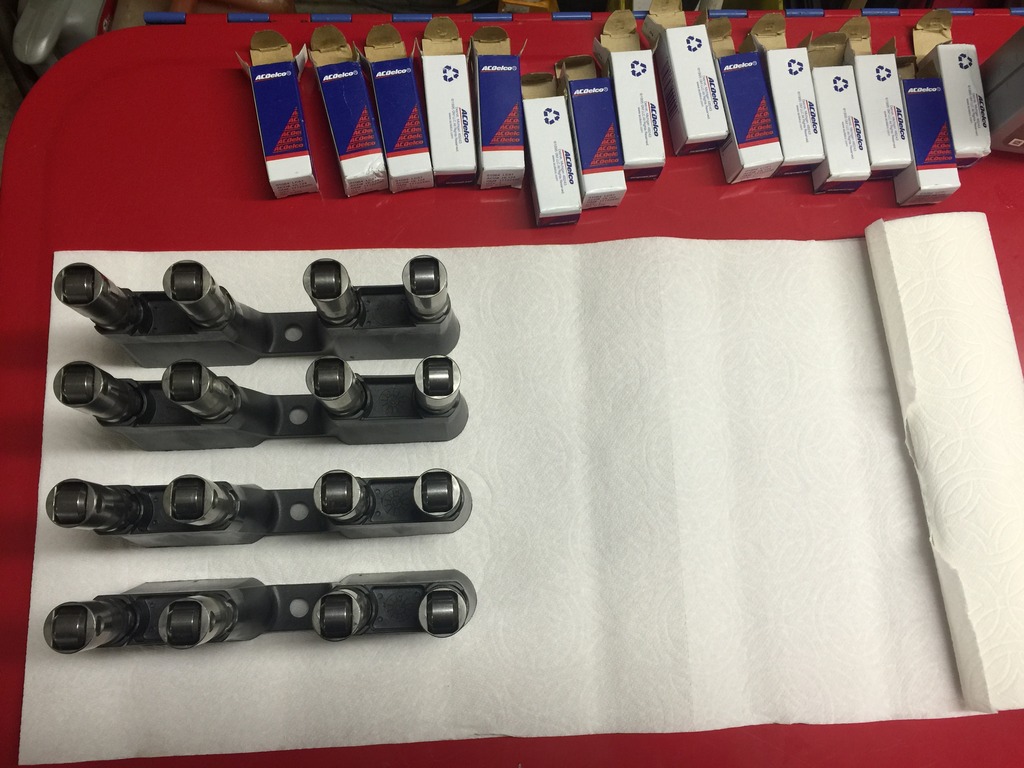
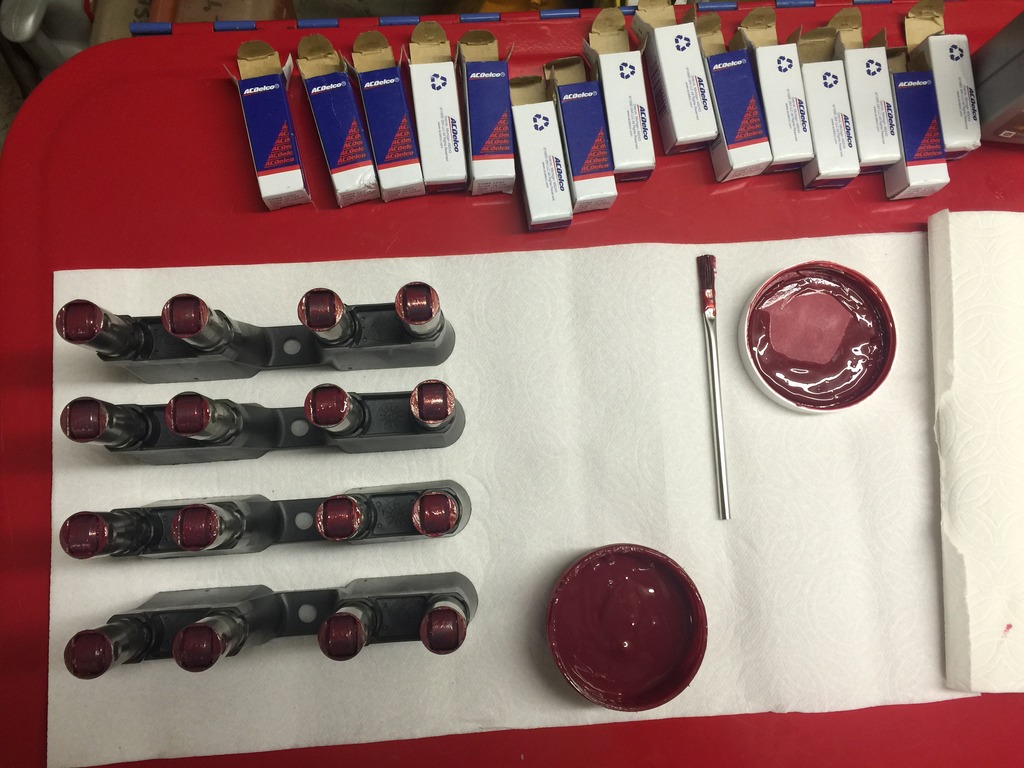
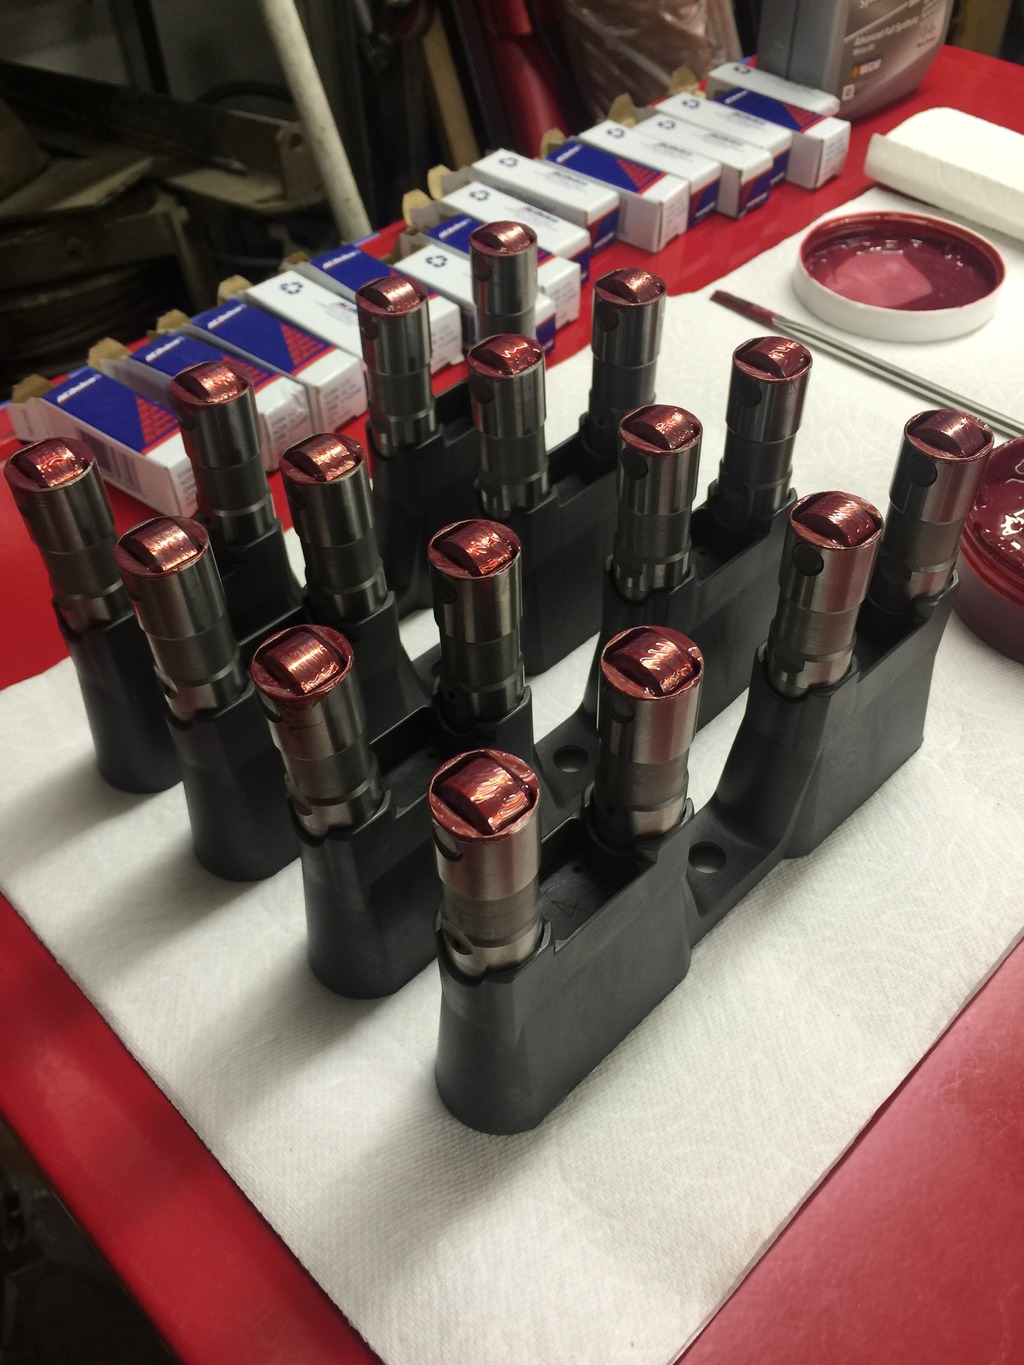
I put the lifters in their guides and then coated them in assembly lube.
Decided against the dampener. Everyone is telling me the slack is normal and I just don't know if the dampener matters that much. So I out the oil pump and pickup tube on.
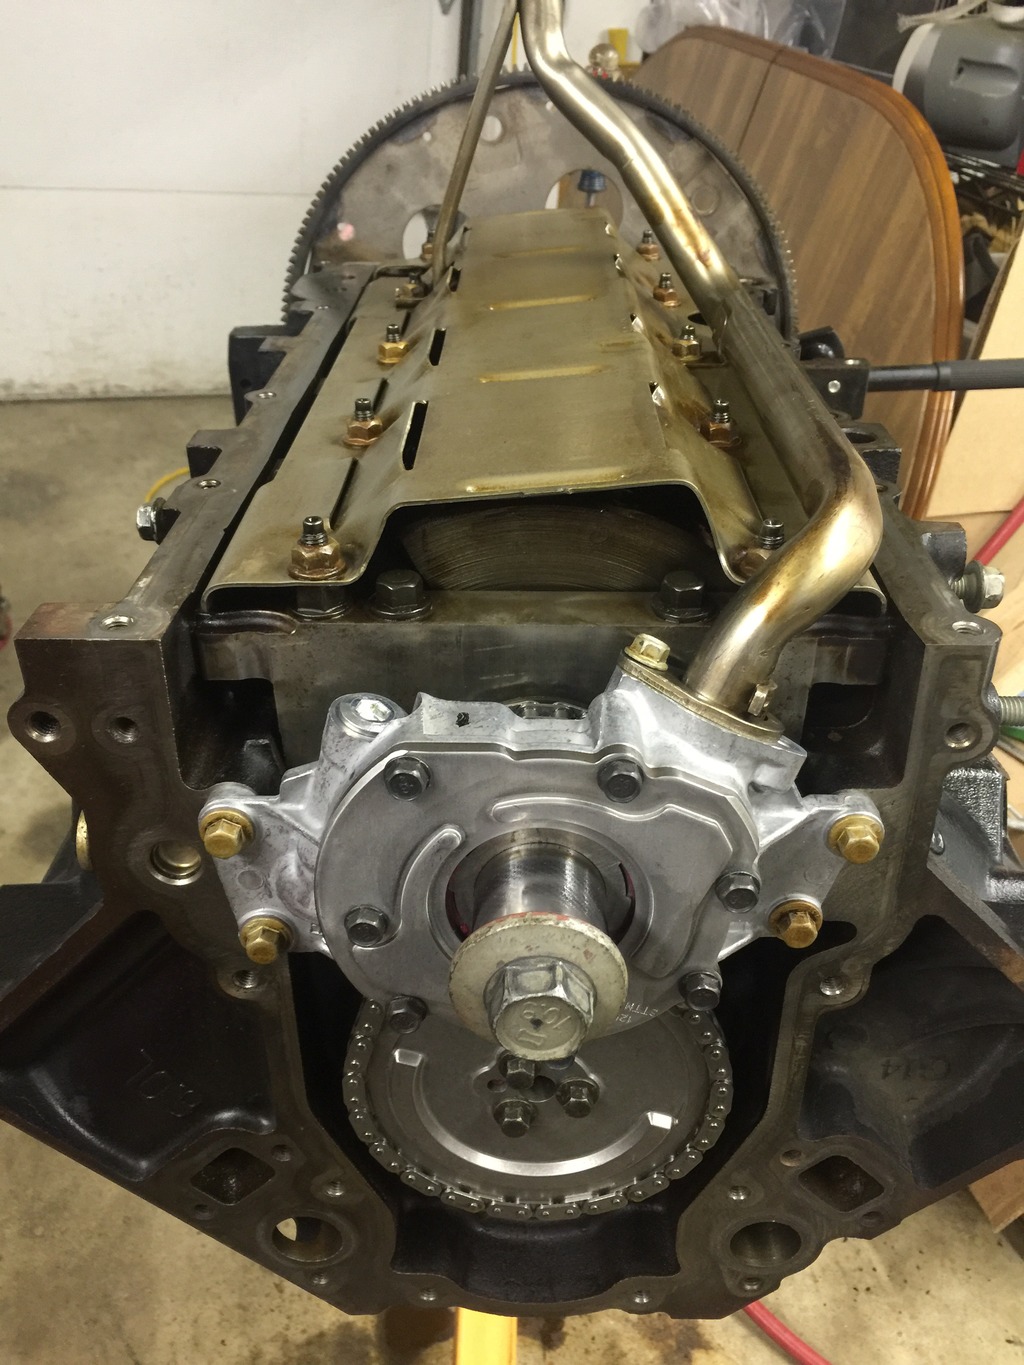
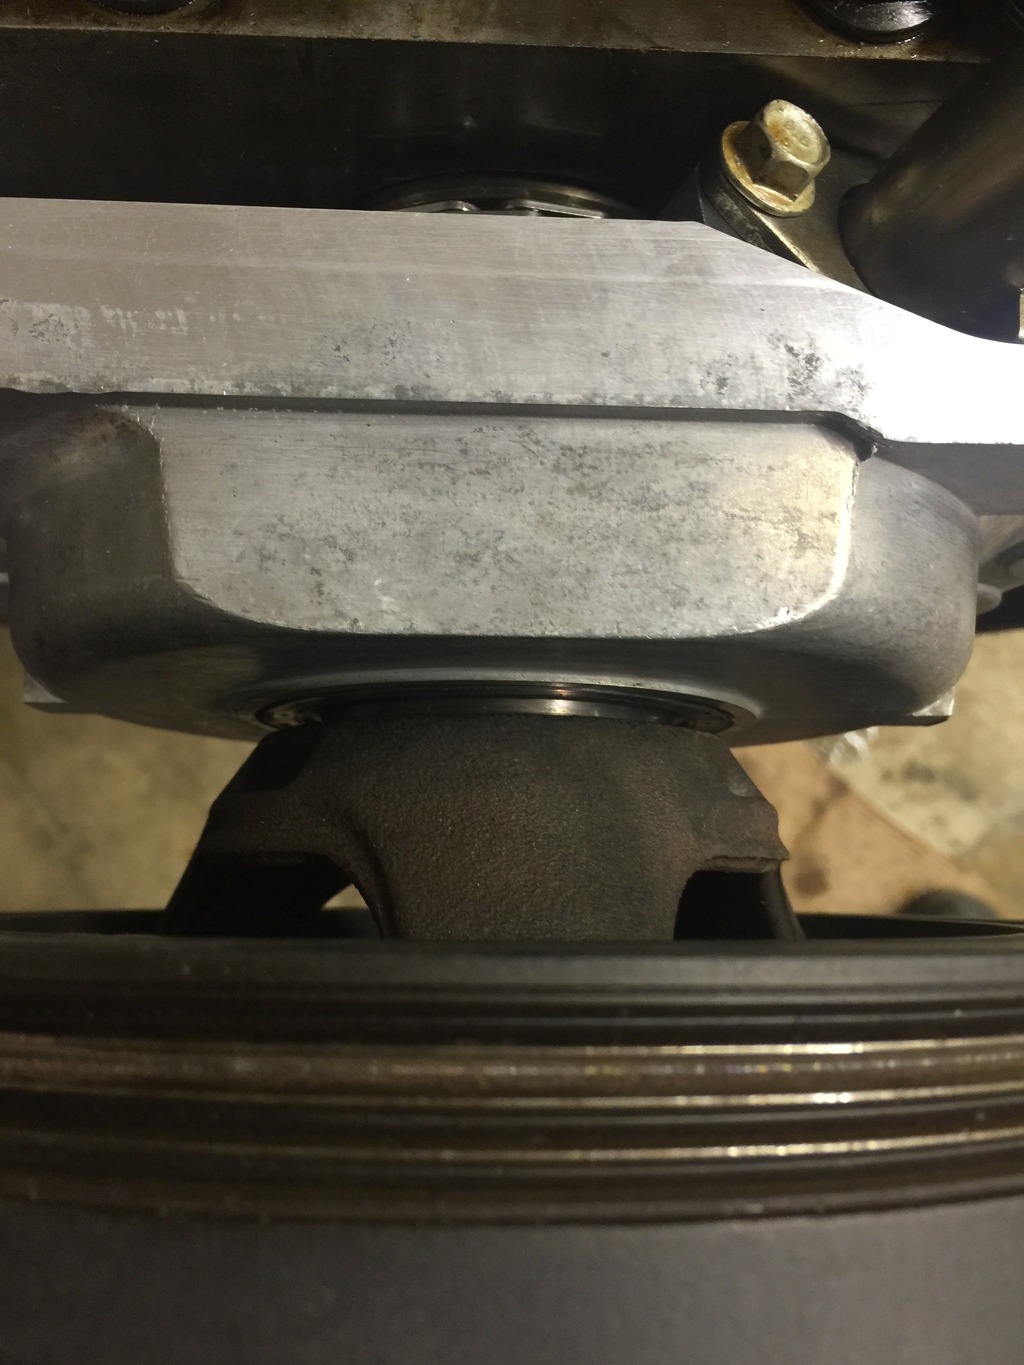
After that, I put the harmonic balancer/pulley on. Does this look fully seated to you guys?
I cleaned the surfaces with brake cleaner and put a dab of silicone on the corners.
Then I laid the oil pan gasket on.
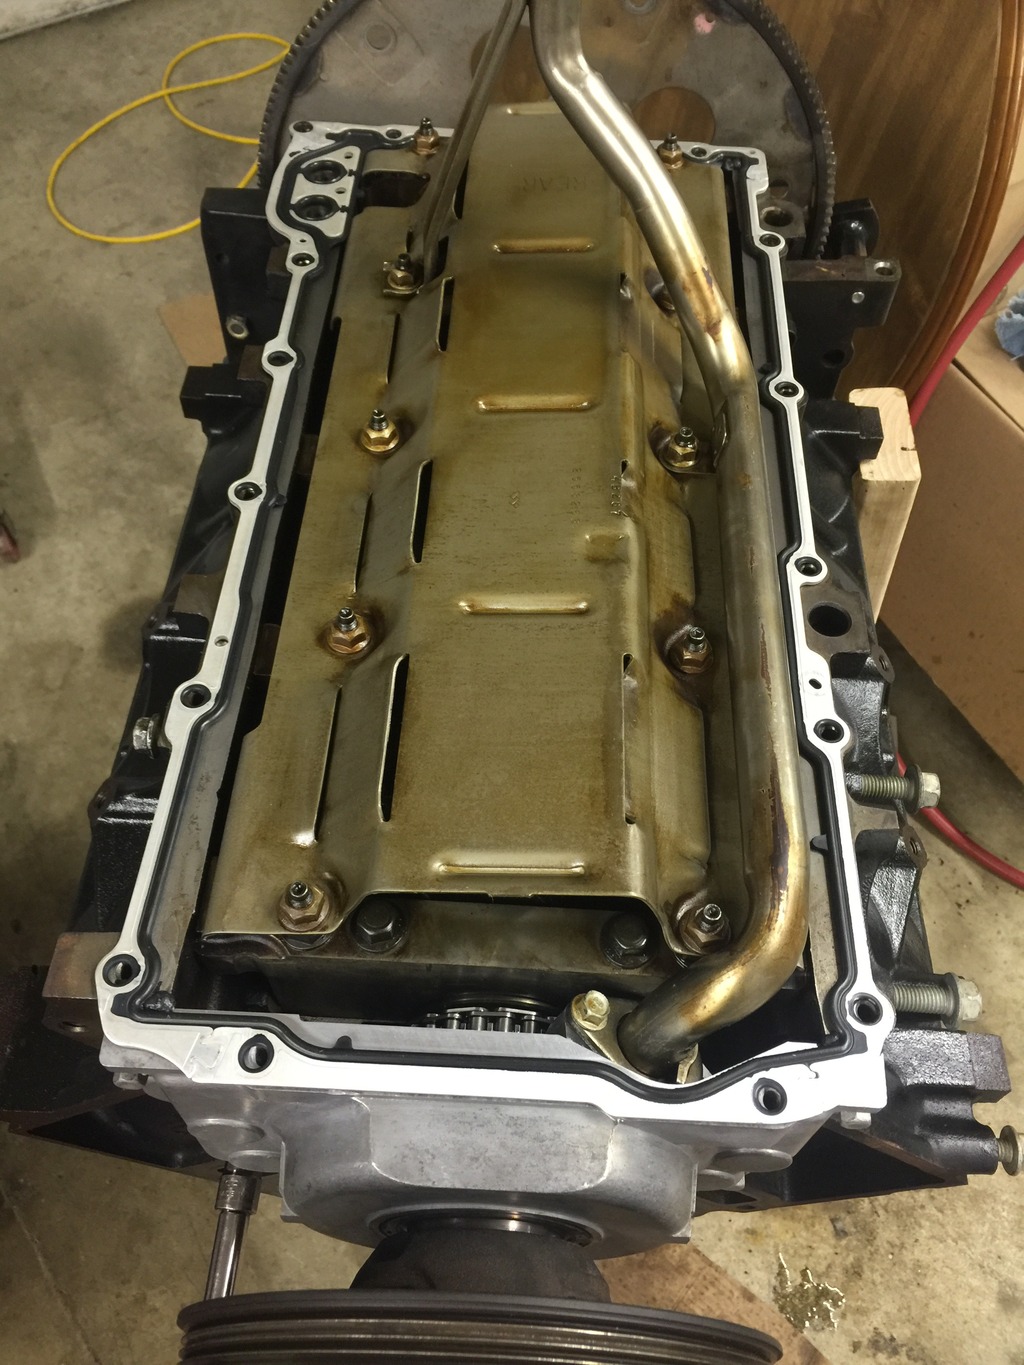
After that, I put the oil pan on and torqued the bolts to 18 ft/lbs. Except for the 2 rear long oil pan bolts, they're 106 in/lbs.


Decided against the dampener. Everyone is telling me the slack is normal and I just don't know if the dampener matters that much. So I out the oil pump and pickup tube on.

After that, I put the harmonic balancer/pulley on. Does this look fully seated to you guys?

I cleaned the surfaces with brake cleaner and put a dab of silicone on the corners.

Then I laid the oil pan gasket on.

After that, I put the oil pan on and torqued the bolts to 18 ft/lbs. Except for the 2 rear long oil pan bolts, they're 106 in/lbs.
12-24-2015, 06:33 AM
#415

I chased the threads. I cleaned the threads. I made absolutely sure they were as clean as I could possibly get them and that there was no water/fluid in there. It's hard to photograph, but the threads are as clean as I could get them.

I used ARP torque lube on all the surfaces. I applied it with a brush.

I screwed in all the studs by hand until they stopped.

Installed the LS9 head gasket next. Make sure you put them I facing the correct direction. I researched it a little and read that they are to be installed dry, no copper spray.

Looking at the gaskets. All the layers are sort of strange to me.

Next I slowly sat the head in place.

One set of instructions I read said to put the ARP lube on the studs threads before installing the head. I was concerned that I'd get the lube on the head's surface, so I carefully lubed them up with a brush instead.
Also, lube the washers and nut's threads as well.
Here's the torque sequence I followed.

First I tightened all the nuts down by hand. Then I torqued the big studs in three passes, ignoring the smaller studs. I went 20 ft/lbs then 40 ft/lbs and finally, 70 ft/lbs. After the big studs were tightened down, I torqued the smaller studs to 22 ft/lbs.
Finally, after the last pass, I went back through for a fourth pass at 70 ft/lbs just to make sure they were all equal.
Repeat for the other side.

All done!

There's something about it being in a storage bag that makes me excited. LOL.

I didn't put the valve covers on because I need to clean them again. They were on a shelf below the head I had to drill the stud out of so they're covered in aluminum flakes.
 12-24-2015, 10:24 AM
#418

That's right, studs go in the block dry. It's probably fine considering the nuts were only tightened to 70ftlbs. With the type and amount of lube used, I would not over torque them for risk of the course threads spinning and putting pressure on the block.
 12-24-2015, 04:23 PM
#420
First off, everyone should know that these are eBay studs, not ARP. That being said, I always welcome criticism! That way I can learn.
I did a bit of research before installing the studs. I wanted to make sure I did everything correctly. I watched YouTube videos, read other build-ups, plus I have two different books.
Here's ARP's FAQ site:
The Official ARP Web Site | FAQ
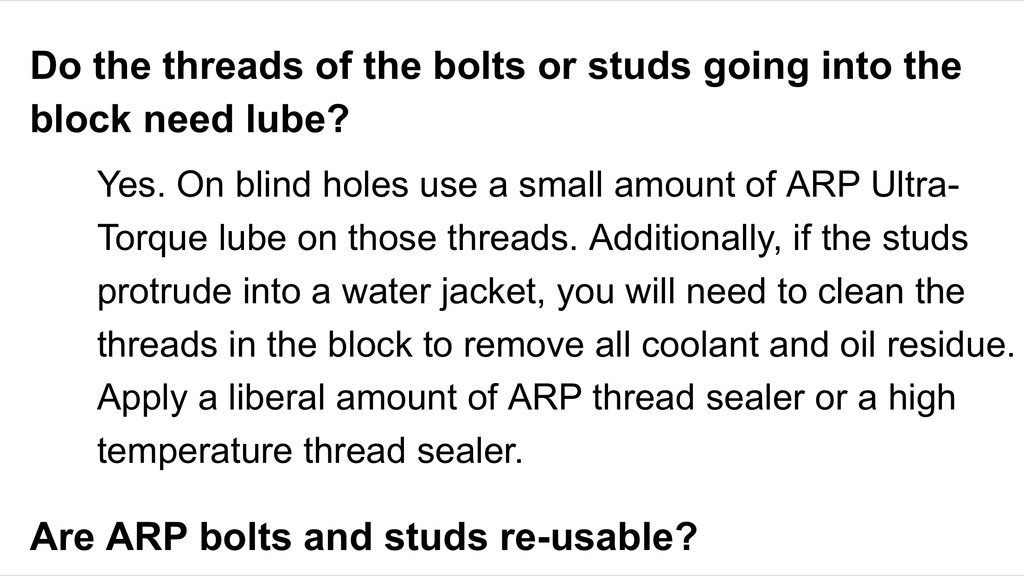
Here's the part about moly lube in the block.
Here's a write up I found years ago. On step two he/she says to lube the studs and put them in the block.
ARP Head Studs Install - Blackcamaro.com
Another set of instructions I found.
http://www.hughesengines.com/Upload/...ifications.pdf
Either way, it's too late now. LOL. Hopefully there's no problems! After you guys replied I started searching around. I found a few threads on ls1tech that says to install them dry and others that says use ARP lube. ????
Thanks everyone!
I did a bit of research before installing the studs. I wanted to make sure I did everything correctly. I watched YouTube videos, read other build-ups, plus I have two different books.
Here's ARP's FAQ site:
The Official ARP Web Site | FAQ
Here's the part about moly lube in the block.

Here's a write up I found years ago. On step two he/she says to lube the studs and put them in the block.
ARP Head Studs Install - Blackcamaro.com
Another set of instructions I found.
http://www.hughesengines.com/Upload/...ifications.pdf
Either way, it's too late now. LOL. Hopefully there's no problems! After you guys replied I started searching around. I found a few threads on ls1tech that says to install them dry and others that says use ARP lube. ????
Thanks everyone!
The following users liked this post:
54inches (05-01-2024)