
2000 Chevy Silverado project "Charlie Murphy"


 04-27-2012, 02:21 PM
#42

I wish I would have gotten the DJM ones that were posted. It seems like a better design.
Yes I'm sure the bolt protruded through into the axle mount. It may not be as deep as the factory had it though. The replacement bolt's heads were exactly the same height as the factory ones. No spacers were included.
Like I said, the DJM ones look to be a much better design.
Yes I'm sure the bolt protruded through into the axle mount. It may not be as deep as the factory had it though. The replacement bolt's heads were exactly the same height as the factory ones. No spacers were included.
Like I said, the DJM ones look to be a much better design.
04-27-2012, 07:18 PM
#43
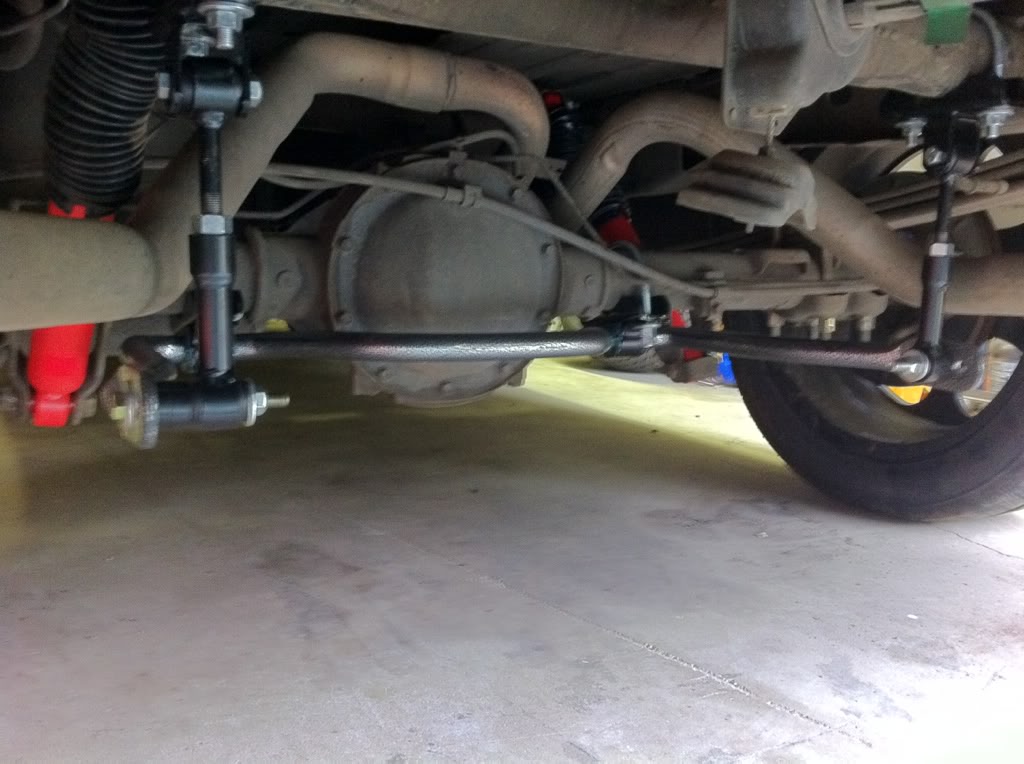
I started messing around with my rear sway bar setup.
Here's everything all lined out. I went with the Hellwig 7800 adjustable rear sway bar kit.

The first thing I did was loosely mount the front U-bolts to the rear bar.

My exhaust is in the way to properly mount the rear bar. You're supposed mount the rear links on the outside of the bar.
I centered the bar and front mounts the best I could. On the driver's side the upper shock mount was in the way. What I ended up doing was using 2 1/2 inch spacers on the drivers side. While this isn't ideal, I think it will suffice until I remove the exhaust and replace it with a single 3 inch exhaust.

Here it is all said and done.
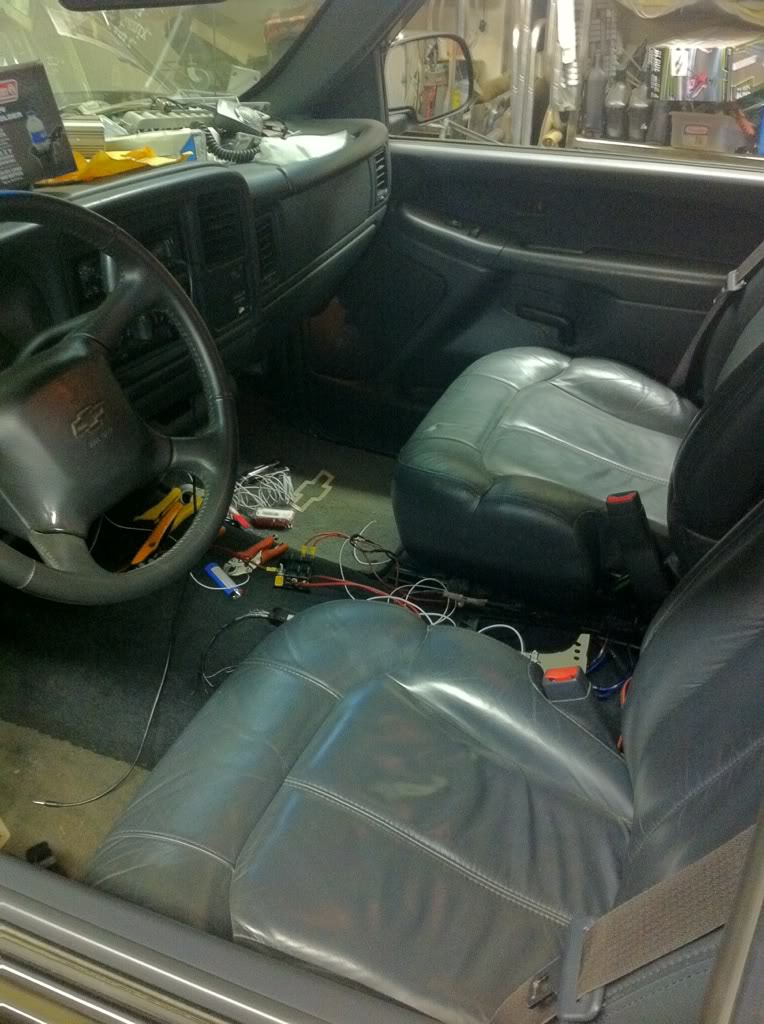
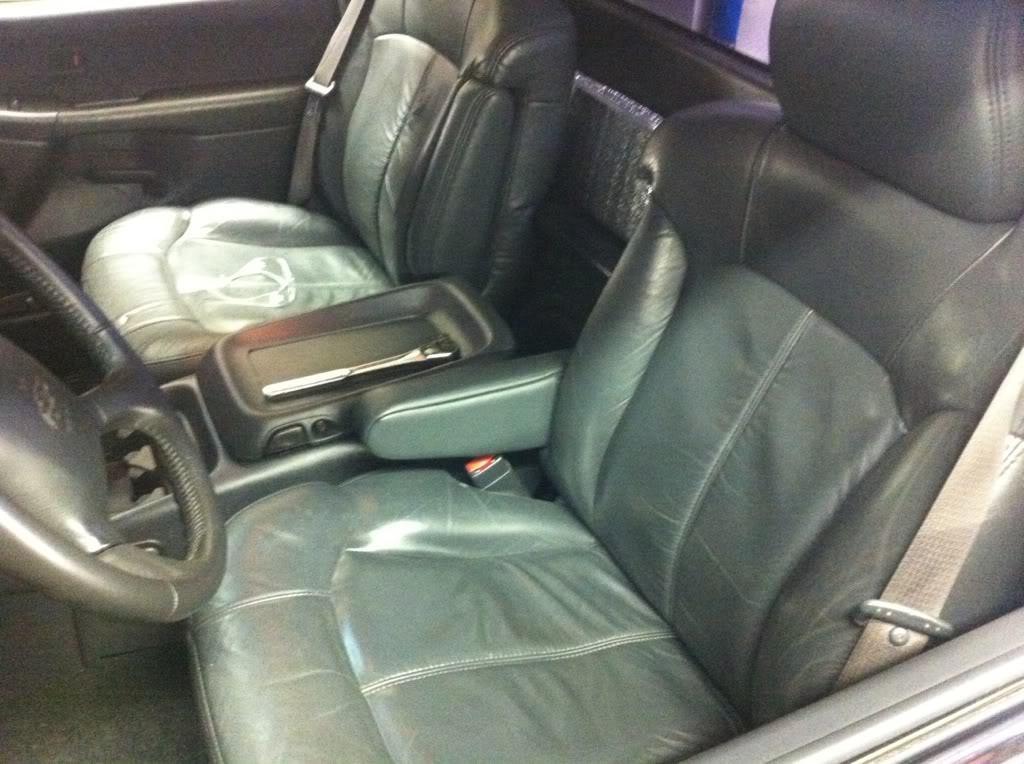
After that I started messing around with my electric seats. A while back, when I was collecting my brake upgrade parts, I noticed an all leather interior truck. I ended up picking up the 2 seats and center console. Since its so rare that there are 3 bodies in my truck, I decided it would be okay to give up my center seat.
When I bought my truck the first thing I did was take the interior apart and apply sound deadener. I ended up running out of time and only getting the rear wall and drivers side deadened.
So I took my seats and console out and pulled back the carpet.

...and applied a nice layer of Damplifier.
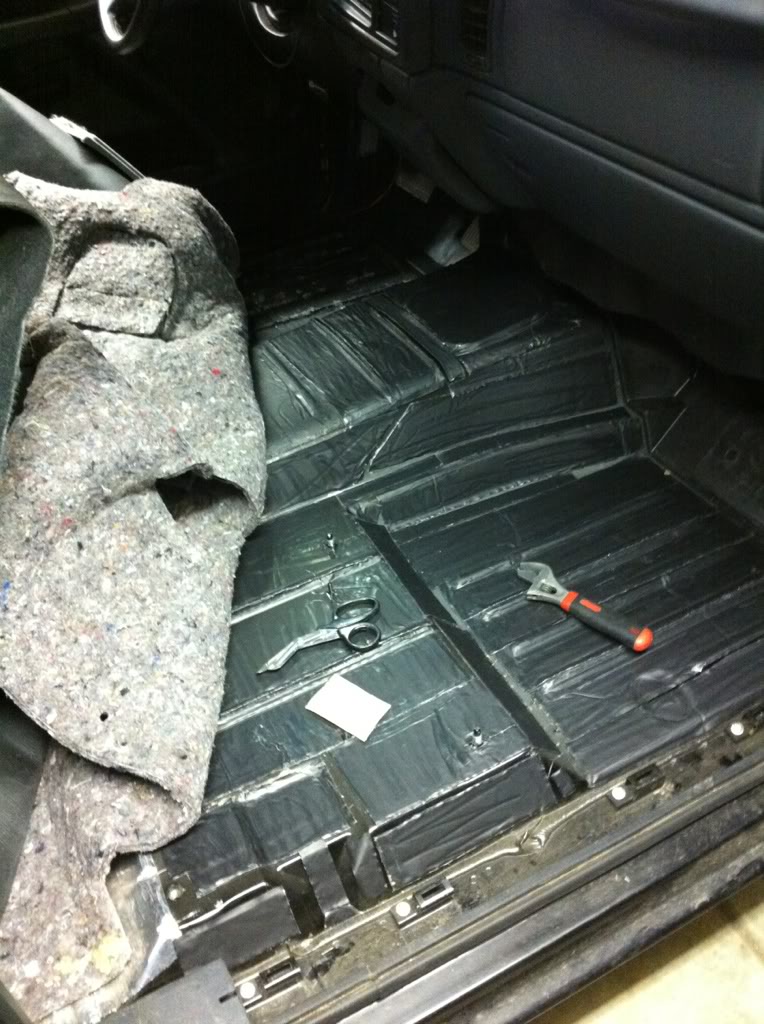
So that's pretty much it for deadener. I still have the roof to do but I'm going to have to order some more.
In case you're wondering, here's what the sub box I built looks like. (Too bad I never finished it.) It contours around the 3 factory seats. My next box will be similar except it's also going into the center console and using a completely different subwoofer. I've never liked how this subwoofer sounds. I just put it in because I had it.

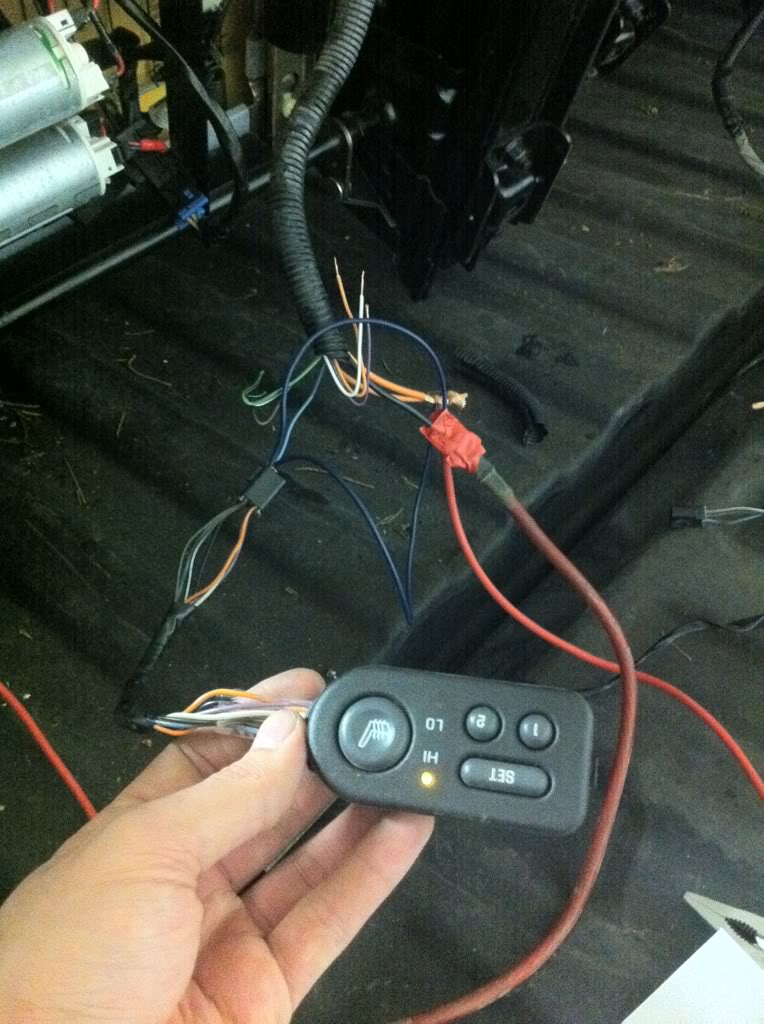
I got to messing around with the seat harness. Basically all you have to do to get the powered seats to function is to connect all the orange wires to 12+ and all the black wires to ground.
But, I want the heated seats to work as well. I started a thread asking for help. I got some wiring diagrams but unfortunately they were for 2003 seats. Mine are apparently from a 2002.
I ended up figuring it out though and with a little creativity, I got the heated seats to work.
Now, if I really wanted to be trick, I'd wire in the memory seats as well. I'm not going to do that and here's why.
With my truck being a regular cab, its possible for the seats to be pushed into positions where the seat could interfere with the cab. The last thing I need is the seat trying to move into a memory position but running into the back window and burning up a motor.
The only other person that drives my truck is my wife and that's not very often. She'll just have to adjust the seat manually.
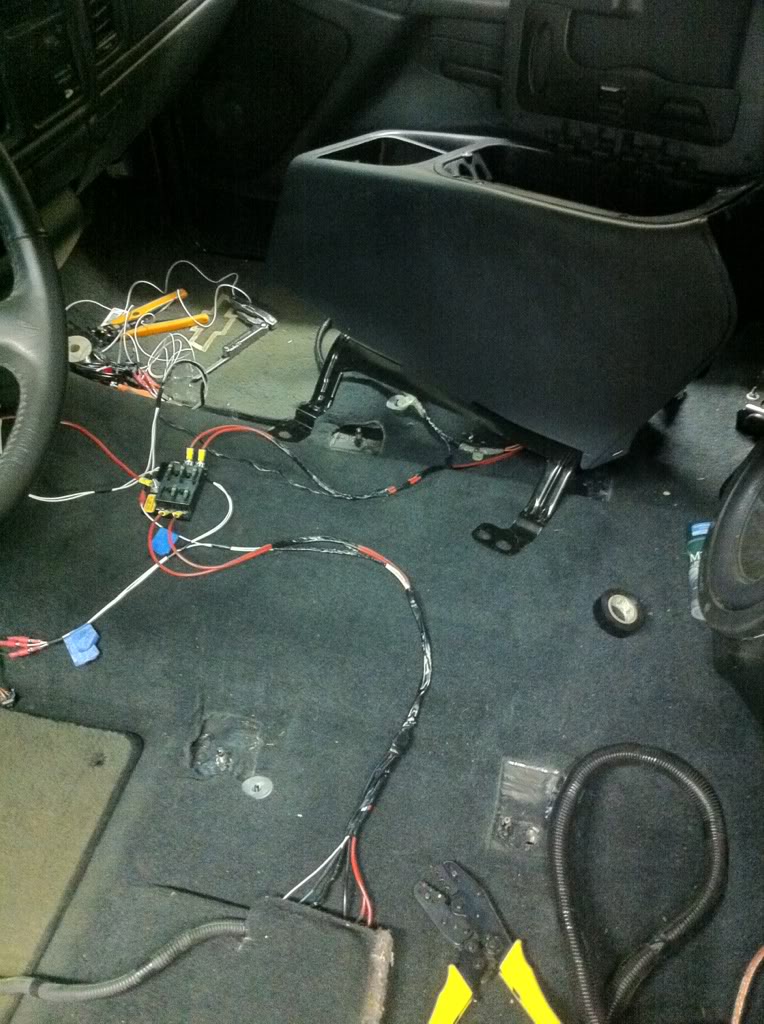
Here's a pic of the beginnings of my hand built harness. When it's all said and done everything will be hidden. I'm thinking I'm going to mount the heated seat button on the side of the console.

That's as far as I got this weekend. I'm real close to driving it soon. All I have to do is finish up the seat wiring, put in the center console, bleed the brakes and get an alignment. That would get me to driving again. I'd also like to cut and buff the paint before I drive it. (and put on my secret decals.)
Oh, one more thing...
(How Steve Jobs of me. lol)
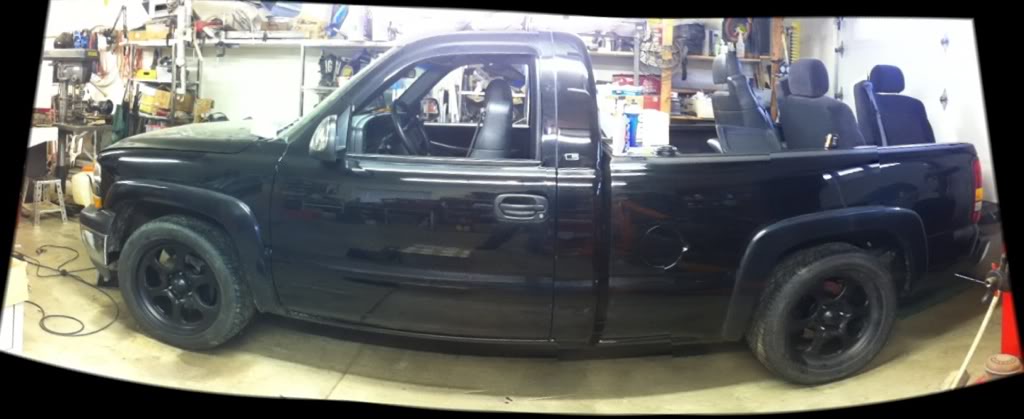
I haven't really gotten a good pic of my truck. It's kind of buried in a garage. I thought I'd mess around with my panoramic app on my iPhone. The pic I got didn't turn out how I thought it would, but it is kind of neat.
Here's everything all lined out. I went with the Hellwig 7800 adjustable rear sway bar kit.
The first thing I did was loosely mount the front U-bolts to the rear bar.
My exhaust is in the way to properly mount the rear bar. You're supposed mount the rear links on the outside of the bar.
I centered the bar and front mounts the best I could. On the driver's side the upper shock mount was in the way. What I ended up doing was using 2 1/2 inch spacers on the drivers side. While this isn't ideal, I think it will suffice until I remove the exhaust and replace it with a single 3 inch exhaust.
Here it is all said and done.
After that I started messing around with my electric seats. A while back, when I was collecting my brake upgrade parts, I noticed an all leather interior truck. I ended up picking up the 2 seats and center console. Since its so rare that there are 3 bodies in my truck, I decided it would be okay to give up my center seat.
When I bought my truck the first thing I did was take the interior apart and apply sound deadener. I ended up running out of time and only getting the rear wall and drivers side deadened.
So I took my seats and console out and pulled back the carpet.
...and applied a nice layer of Damplifier.
So that's pretty much it for deadener. I still have the roof to do but I'm going to have to order some more.
In case you're wondering, here's what the sub box I built looks like. (Too bad I never finished it.) It contours around the 3 factory seats. My next box will be similar except it's also going into the center console and using a completely different subwoofer. I've never liked how this subwoofer sounds. I just put it in because I had it.
I got to messing around with the seat harness. Basically all you have to do to get the powered seats to function is to connect all the orange wires to 12+ and all the black wires to ground.
But, I want the heated seats to work as well. I started a thread asking for help. I got some wiring diagrams but unfortunately they were for 2003 seats. Mine are apparently from a 2002.
I ended up figuring it out though and with a little creativity, I got the heated seats to work.
Now, if I really wanted to be trick, I'd wire in the memory seats as well. I'm not going to do that and here's why.
With my truck being a regular cab, its possible for the seats to be pushed into positions where the seat could interfere with the cab. The last thing I need is the seat trying to move into a memory position but running into the back window and burning up a motor.
The only other person that drives my truck is my wife and that's not very often. She'll just have to adjust the seat manually.
Here's a pic of the beginnings of my hand built harness. When it's all said and done everything will be hidden. I'm thinking I'm going to mount the heated seat button on the side of the console.
That's as far as I got this weekend. I'm real close to driving it soon. All I have to do is finish up the seat wiring, put in the center console, bleed the brakes and get an alignment. That would get me to driving again. I'd also like to cut and buff the paint before I drive it. (and put on my secret decals.)
Oh, one more thing...
(How Steve Jobs of me. lol)
I haven't really gotten a good pic of my truck. It's kind of buried in a garage. I thought I'd mess around with my panoramic app on my iPhone. The pic I got didn't turn out how I thought it would, but it is kind of neat.
05-03-2012, 01:06 AM
#44
I haven't had a lot of time to work on my truck like I'd like to. I have gotten all of the powered and heated seat's wiring figured out.
I didn't take any close up shots of the actual harness itself. I have no need to have the memory function of the seats work, so I didn't wire that in, but basically it goes like this:
To power the seats you connect the 2 orange wires to 12v+ and the black wire to ground. You can tell which wires they are because they are larger than the others. (Like 10-12 gauge wires. Don't forget to install a fuse.) That's it for the powered seats.
To make the heated seats work you're going to need the switches out of the door handles. (Duh.) They have several wires on them, but all you need are the black, brown, and light blue. (Not the brown wire with a white stripe.)
The black wire goes to ground.
The brown wire goes to a switched 12 volt source.
The blue wire goes to the blue wire in the seat's harness.
That's it. That will make the heated seats work. Now if you wanted to you could wire the brown wire in with the orange ones. The problem with that is the heated sets would always stay on. I wanted the heated seats to automatically shut off when I turned the key off. Oh, and you can get a switched 12 volt source in the fuse panel under the steering wheel right beside the brake pedal.
Harness is almost done. All of this will be hidden in the center console. It's almost like those seats were meant to be there!

I just ran out of time. The powered seats work 100% and I need to make 3 connections for the heated seats to work on the passengers side.
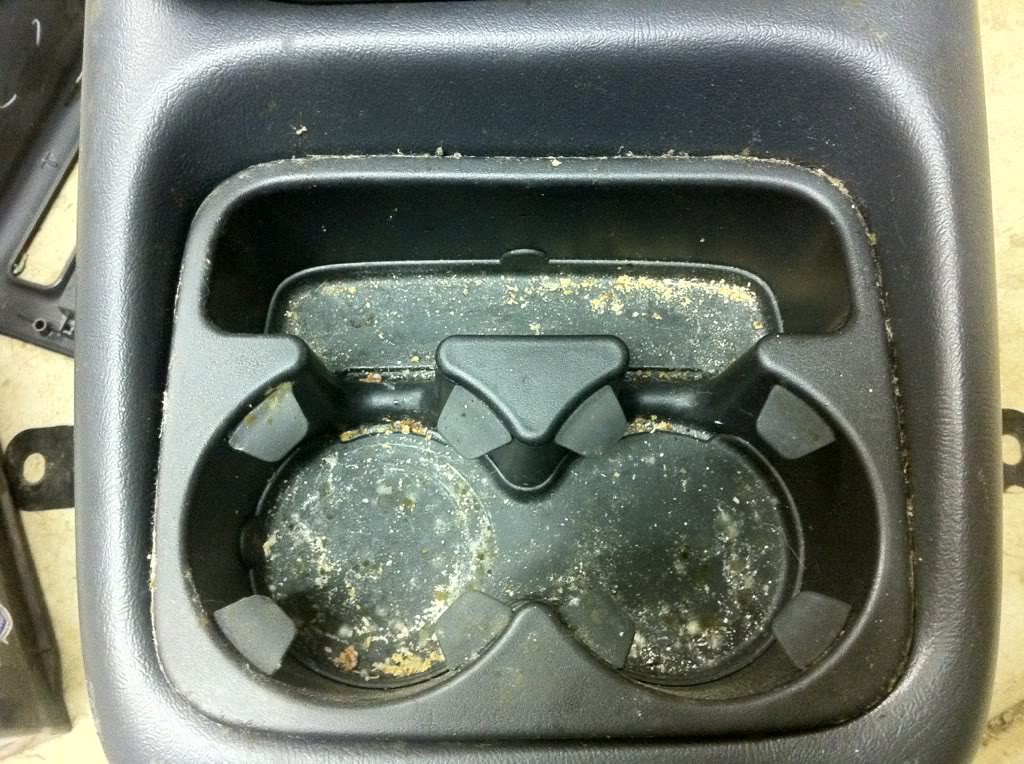
What I'd like to do next is move on to stereo installation, but I need to make a new subwoofer box and order a digital sound processor. I really need to clean up the seats and console though. The last owners were pigs!
I didn't take any close up shots of the actual harness itself. I have no need to have the memory function of the seats work, so I didn't wire that in, but basically it goes like this:
To power the seats you connect the 2 orange wires to 12v+ and the black wire to ground. You can tell which wires they are because they are larger than the others. (Like 10-12 gauge wires. Don't forget to install a fuse.) That's it for the powered seats.
To make the heated seats work you're going to need the switches out of the door handles. (Duh.) They have several wires on them, but all you need are the black, brown, and light blue. (Not the brown wire with a white stripe.)
The black wire goes to ground.
The brown wire goes to a switched 12 volt source.
The blue wire goes to the blue wire in the seat's harness.
That's it. That will make the heated seats work. Now if you wanted to you could wire the brown wire in with the orange ones. The problem with that is the heated sets would always stay on. I wanted the heated seats to automatically shut off when I turned the key off. Oh, and you can get a switched 12 volt source in the fuse panel under the steering wheel right beside the brake pedal.
Harness is almost done. All of this will be hidden in the center console. It's almost like those seats were meant to be there!
I just ran out of time. The powered seats work 100% and I need to make 3 connections for the heated seats to work on the passengers side.
What I'd like to do next is move on to stereo installation, but I need to make a new subwoofer box and order a digital sound processor. I really need to clean up the seats and console though. The last owners were pigs!
 05-04-2012, 07:02 AM
#46
Yuck! Check out how disgustingly dirty the console from the junkyard is. I know I'm not great about keeping my vehicle perfectly clean but this is just gross. There's crumbs and pop syrup all over the place!
*
Wiring finally done.
Here it is hidden under the console.
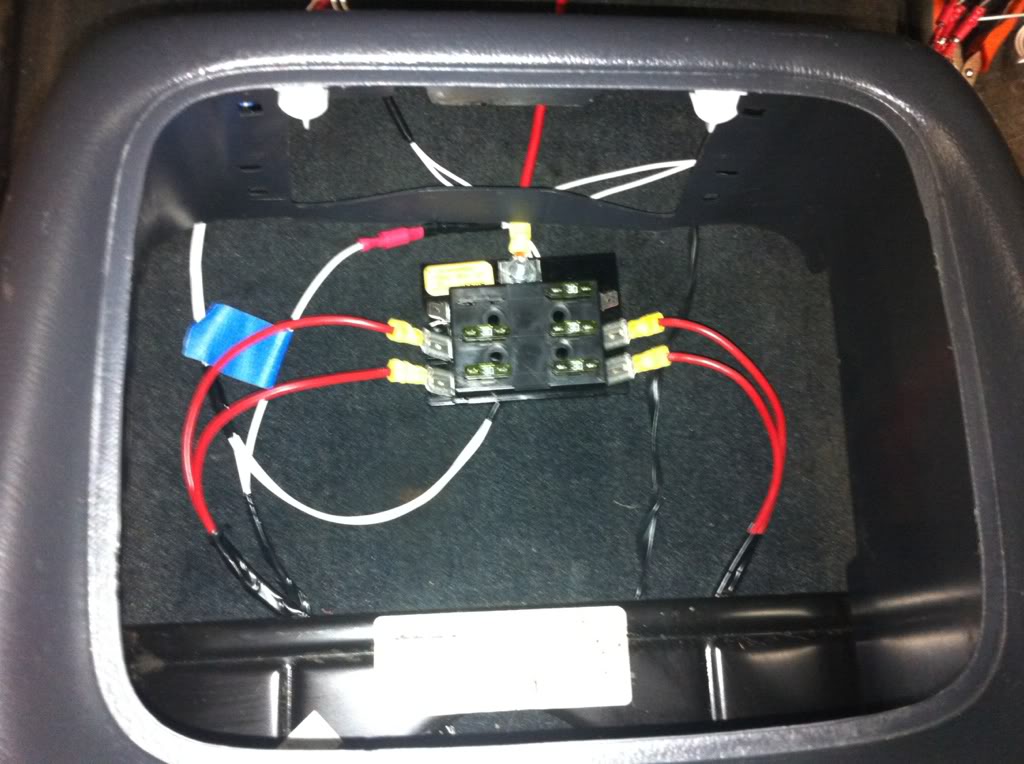
Check it out all done. Like it was meant to be there.
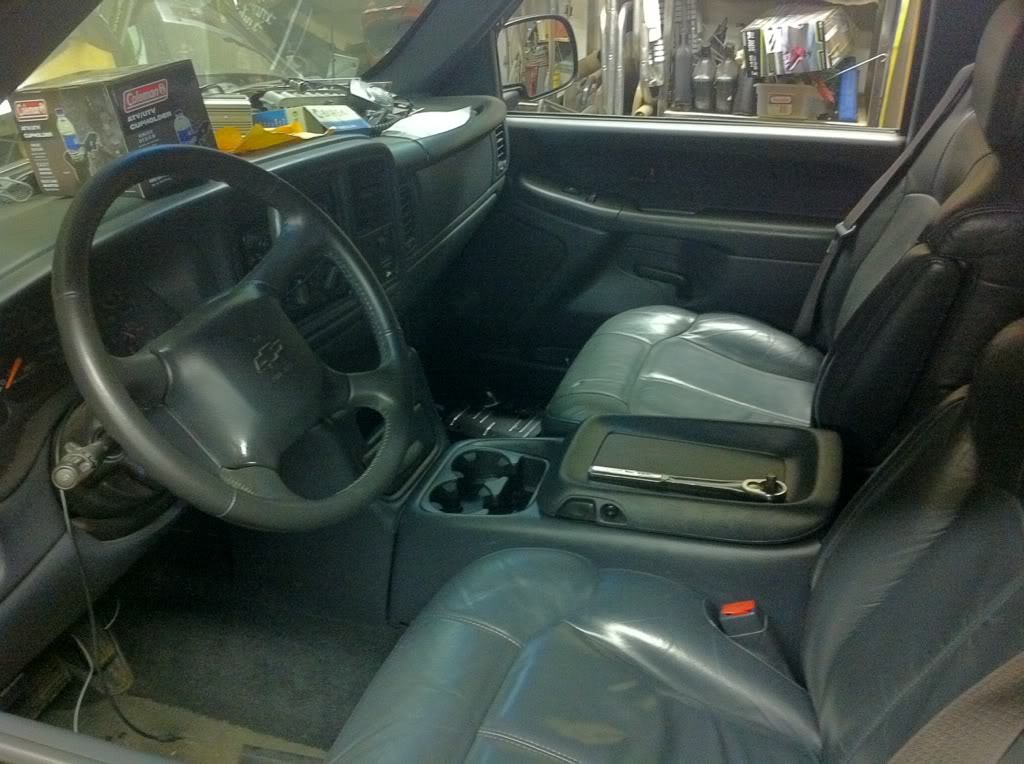
Yay console! That empty spot above the door there is where the factory cassette player was. I think I'll put my wideband there.

I broke the hook part of the latch off and now the door won't stay closed. Does anyone know where I can buy another one?

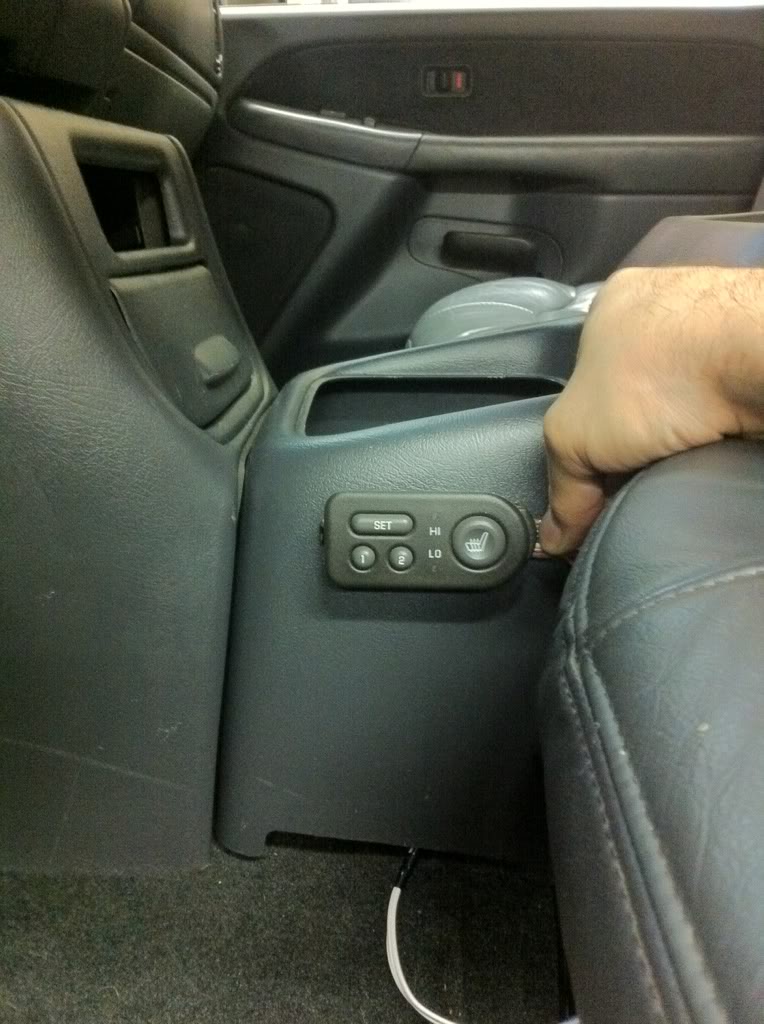
This is where I think I'll mount the heated seat switch. What do you guys think?
*
Wiring finally done.
Here it is hidden under the console.
Check it out all done. Like it was meant to be there.
Yay console! That empty spot above the door there is where the factory cassette player was. I think I'll put my wideband there.
I broke the hook part of the latch off and now the door won't stay closed. Does anyone know where I can buy another one?
This is where I think I'll mount the heated seat switch. What do you guys think?
05-12-2012, 02:09 AM
#47
Heated seats switches are mounted and functional.
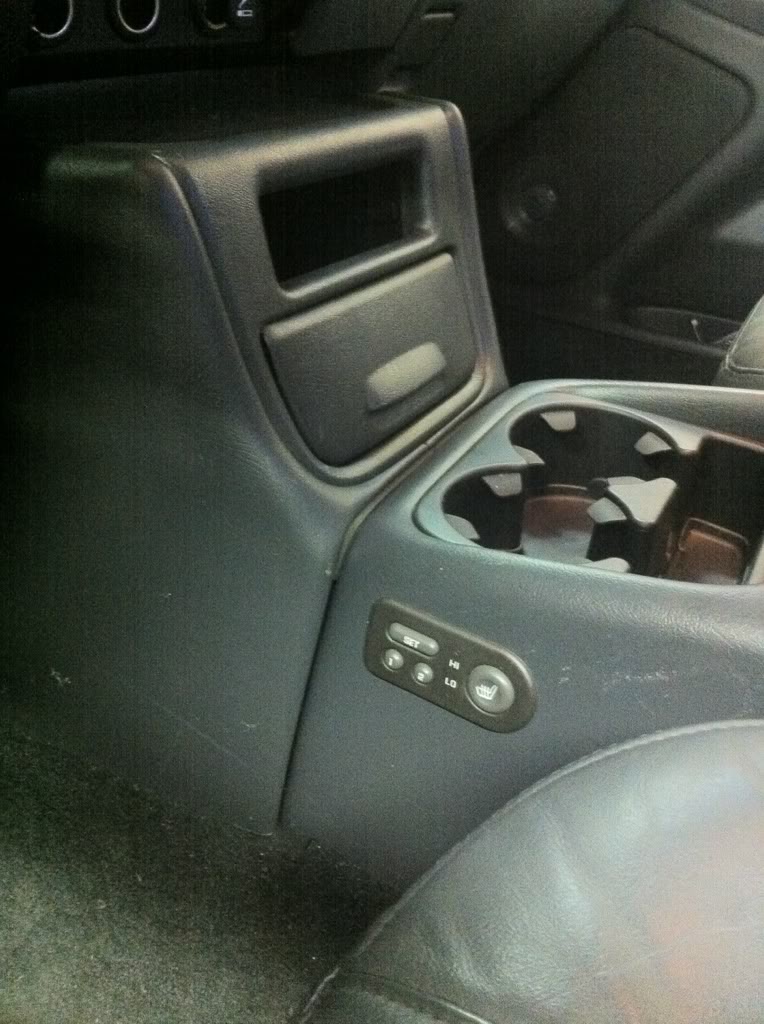
Seats and console are 100% done. Now I just need to fab up a subwoofer enclosure. I'm going to see if I can fit a 12" IDMAX.
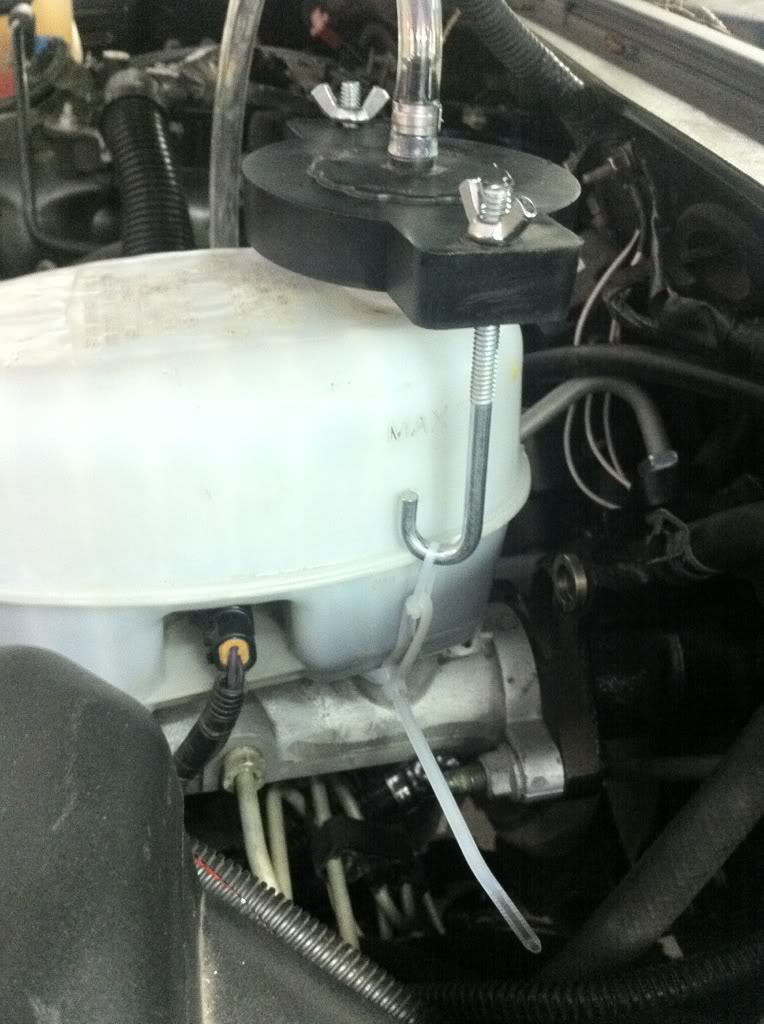
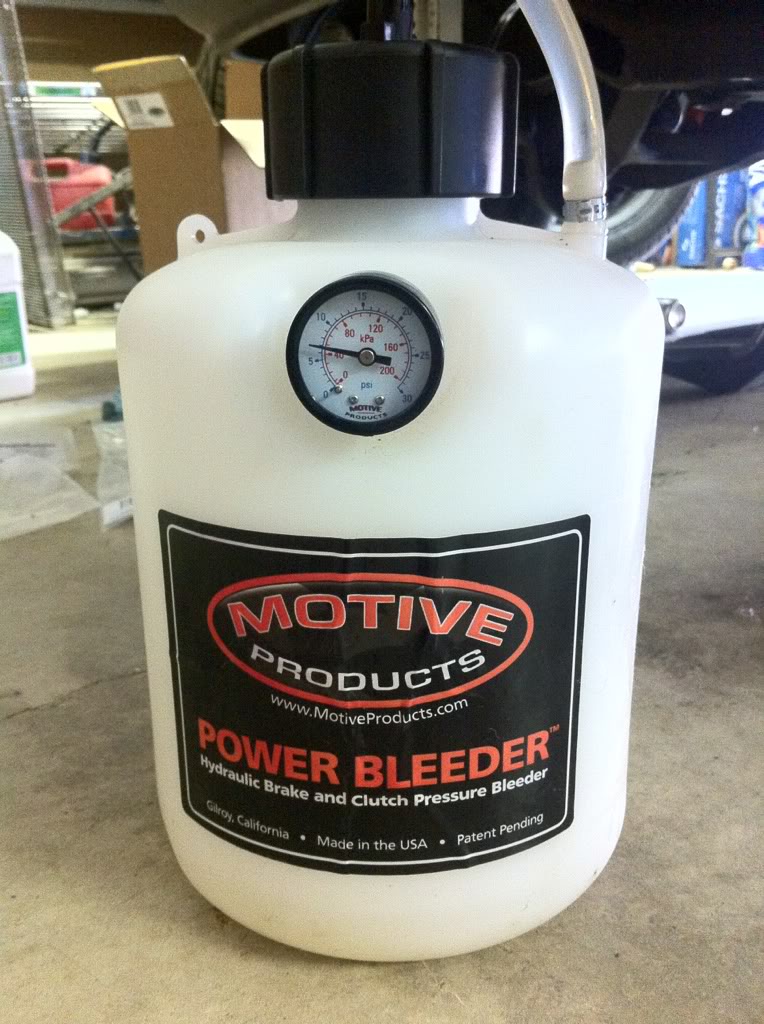
I messed around with bleeding the brakes today. My stepfather has a pressure brake bleeder. I have never used one before.
I couldn't get the hooks to secure the lid so I zip tied it on.
I pumped up around 5 psi and began bleeding the brakes.
Then the zip ties broke so I used a chain instead.
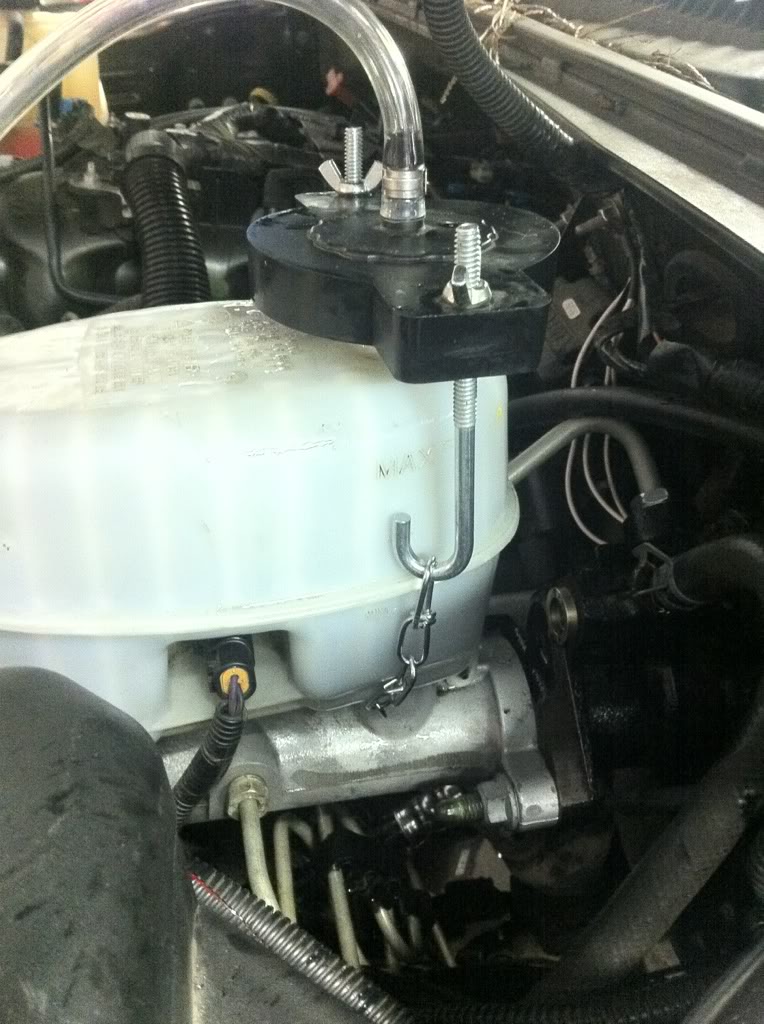
The zip tie incident caused a bit of a leak.

I bled the brakes in the typical fashion. Starting from the right rear, to left rear, to right front then left front. I ended up doing this twice and then had my son press on the brake pedal while I cracked the line. There was a lot of air in the lines since they were almost completely emptied.
When I finally got the brakes bled the best I could, I took the truck for a test drive. Everything felt weird and different but seemed to functioning properly. Remember, I lowered the truck, replaced and upgraded the brakes, added hydroboost, front and rear swaybars, and shocks.
I started out really slow. The brakes felt good. Nothing spongy or anything like that. I like how hydroboost feels.
I sped up to 10 mph and slowed down to a stop. I sped up to 30 mph and then to a stop. Everything felt good. Too good. I just kept waiting for something to go wrong, but it didn't.
After I felt the brakes were going to indeed stop me in an emergency, I sped up to 60 mph. Then I slowed down to 10 mph, but not to a stop. I did this several times (6-8 times) every time being harder and harder on the brakes but never coming to a complete stop, or pushing it hard enough to engage the ABS. Finally, I drove around for a few miles at the speed limit trying to use the brakes as little as possible.
They're great! 05+/SUV brakes plus hydroboost are pretty amazing. I've got around 750.00 into the entire swap.
I haven't rallied around any corners yet to get a feel for the sway bars, but the few turns I did take, the truck did feel like it went where you pointed it. How much of this is a lowered center of gravity and how much are the sway bars, I don't know.
The truck feels more solid all around. It feels more responsive. I think that's due mostly to the new shocks. My previous shocks were the factory ones and with the truck having 70k miles on it, the were definitely shot.
I did one last thing before putting the truck back in the shop. I found a gravel road and sped up fast enough to slam on the brakes and engage ABS. immediately, the pedal feel changed. It still feels solid, but the position is much lower to the floor.
I plan on bleeding the brakes again tomorrow. Then I'll go out and engage the ABS again. I'll continue doing this until nothing changes.
I searched around and apparently the proper way to bleed the ABS module requires a GM Tech 2. Aklowrider suggested the gravel route.
So far I really like the improvements I've made. The leather/heated seats are nice and the sound proofing helps. The first time I drove the truck, it really felt weird. The truck is lower, but it feels like I sit a tiny bit higher with the powered seats.
Overall, I love what I've done so far!
Now, I need to get an alignment and I can drive my truck again. Hopefully I'll be able to try buffing the paint tomorrow. We'll see.
Seats and console are 100% done. Now I just need to fab up a subwoofer enclosure. I'm going to see if I can fit a 12" IDMAX.
I messed around with bleeding the brakes today. My stepfather has a pressure brake bleeder. I have never used one before.
I couldn't get the hooks to secure the lid so I zip tied it on.
I pumped up around 5 psi and began bleeding the brakes.
Then the zip ties broke so I used a chain instead.
The zip tie incident caused a bit of a leak.
I bled the brakes in the typical fashion. Starting from the right rear, to left rear, to right front then left front. I ended up doing this twice and then had my son press on the brake pedal while I cracked the line. There was a lot of air in the lines since they were almost completely emptied.
When I finally got the brakes bled the best I could, I took the truck for a test drive. Everything felt weird and different but seemed to functioning properly. Remember, I lowered the truck, replaced and upgraded the brakes, added hydroboost, front and rear swaybars, and shocks.
I started out really slow. The brakes felt good. Nothing spongy or anything like that. I like how hydroboost feels.
I sped up to 10 mph and slowed down to a stop. I sped up to 30 mph and then to a stop. Everything felt good. Too good. I just kept waiting for something to go wrong, but it didn't.
After I felt the brakes were going to indeed stop me in an emergency, I sped up to 60 mph. Then I slowed down to 10 mph, but not to a stop. I did this several times (6-8 times) every time being harder and harder on the brakes but never coming to a complete stop, or pushing it hard enough to engage the ABS. Finally, I drove around for a few miles at the speed limit trying to use the brakes as little as possible.
They're great! 05+/SUV brakes plus hydroboost are pretty amazing. I've got around 750.00 into the entire swap.
I haven't rallied around any corners yet to get a feel for the sway bars, but the few turns I did take, the truck did feel like it went where you pointed it. How much of this is a lowered center of gravity and how much are the sway bars, I don't know.
The truck feels more solid all around. It feels more responsive. I think that's due mostly to the new shocks. My previous shocks were the factory ones and with the truck having 70k miles on it, the were definitely shot.
I did one last thing before putting the truck back in the shop. I found a gravel road and sped up fast enough to slam on the brakes and engage ABS. immediately, the pedal feel changed. It still feels solid, but the position is much lower to the floor.
I plan on bleeding the brakes again tomorrow. Then I'll go out and engage the ABS again. I'll continue doing this until nothing changes.
I searched around and apparently the proper way to bleed the ABS module requires a GM Tech 2. Aklowrider suggested the gravel route.
So far I really like the improvements I've made. The leather/heated seats are nice and the sound proofing helps. The first time I drove the truck, it really felt weird. The truck is lower, but it feels like I sit a tiny bit higher with the powered seats.
Overall, I love what I've done so far!
Now, I need to get an alignment and I can drive my truck again. Hopefully I'll be able to try buffing the paint tomorrow. We'll see.
05-13-2012, 12:06 AM
#48
TECH Addict
iTrader: (12)

Join Date: Aug 2008
Location: Springfield, Tn
Posts: 2,186
Likes: 0
Received 0 Likes
on
0 Posts
I was helping a buddy bled brakes on a truck at his shop. Same thing, never felt exactly right. He found out he needed to do something from the computer.
After that, it was a snap and everything was fine.
After that, it was a snap and everything was fine.
05-13-2012, 12:45 AM
#49
The brakes feel good. I just wanted to make sure the ABS module was bled.
I did the same thing today. I took it for a spin and slammed the brakes on a gravel patch. The ABS engaged and the pedal position felt like it was lower.
I took it back to the shop and bled the brakes. Not a single bit of air escaped. I pressure bled it and then bled it in the more conventional fashion. I had my son push the brake pedal for me.
Not a single air bubble.
I'm wondering if that's just how the pedal feels when the ABS is engaged.
I even took a few shots of my truck with its new stance.
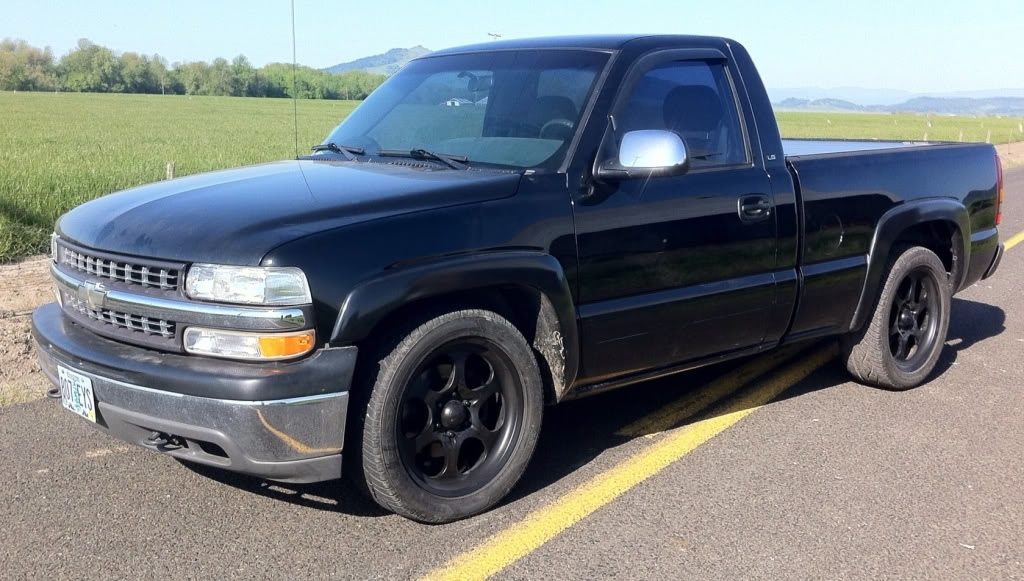
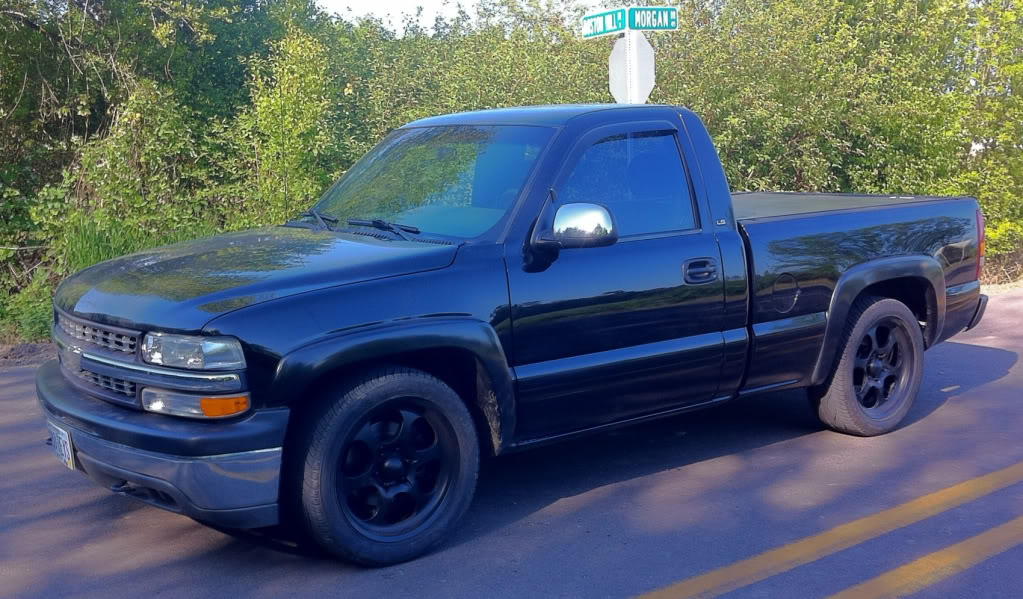
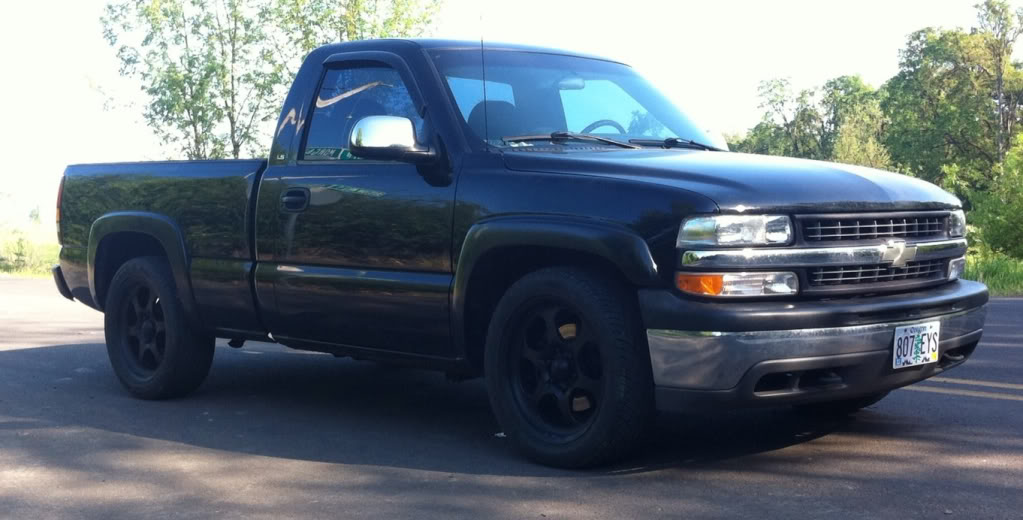
What do you guys think? Does it look 2 wheel drive?
I did the same thing today. I took it for a spin and slammed the brakes on a gravel patch. The ABS engaged and the pedal position felt like it was lower.
I took it back to the shop and bled the brakes. Not a single bit of air escaped. I pressure bled it and then bled it in the more conventional fashion. I had my son push the brake pedal for me.
Not a single air bubble.
I'm wondering if that's just how the pedal feels when the ABS is engaged.
I even took a few shots of my truck with its new stance.
What do you guys think? Does it look 2 wheel drive?
05-13-2012, 01:10 AM
#50
TECH Addict
iTrader: (12)
Join Date: Aug 2008
Location: Springfield, Tn
Posts: 2,186
Likes: 0
Received 0 Likes
on
0 Posts
We weren't getting any air either. It stopped, but the pedal just had an odd slight spongy feeling.
After he did the bleed sequence on the ABS, it fixed it.
It was the first time I had ever run into that problem, but probably also the first time I have ever worked on something with ABS that was drained 100% totally dry.
If you know someone that has the equipment, I would try it. Only took him a minute to do it.
EDIT: truck looks good by the way. I thought it was a 2wd at first glance.