
2000 Chevy Silverado project "Charlie Murphy"
 06-13-2012, 02:04 PM
#61

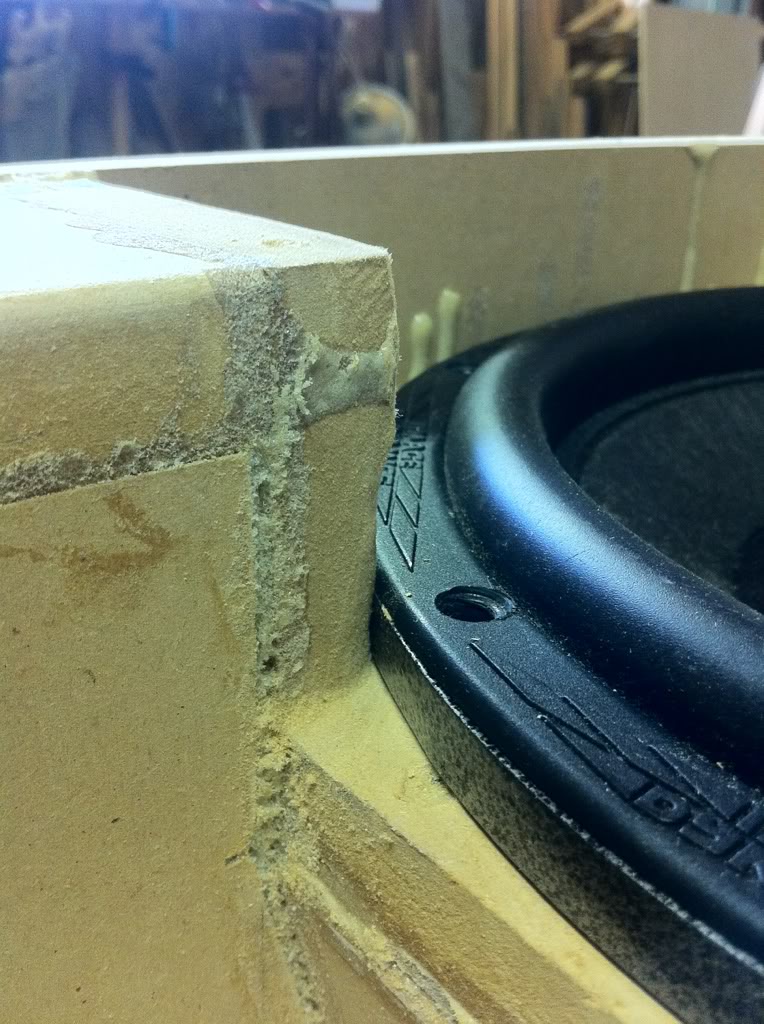
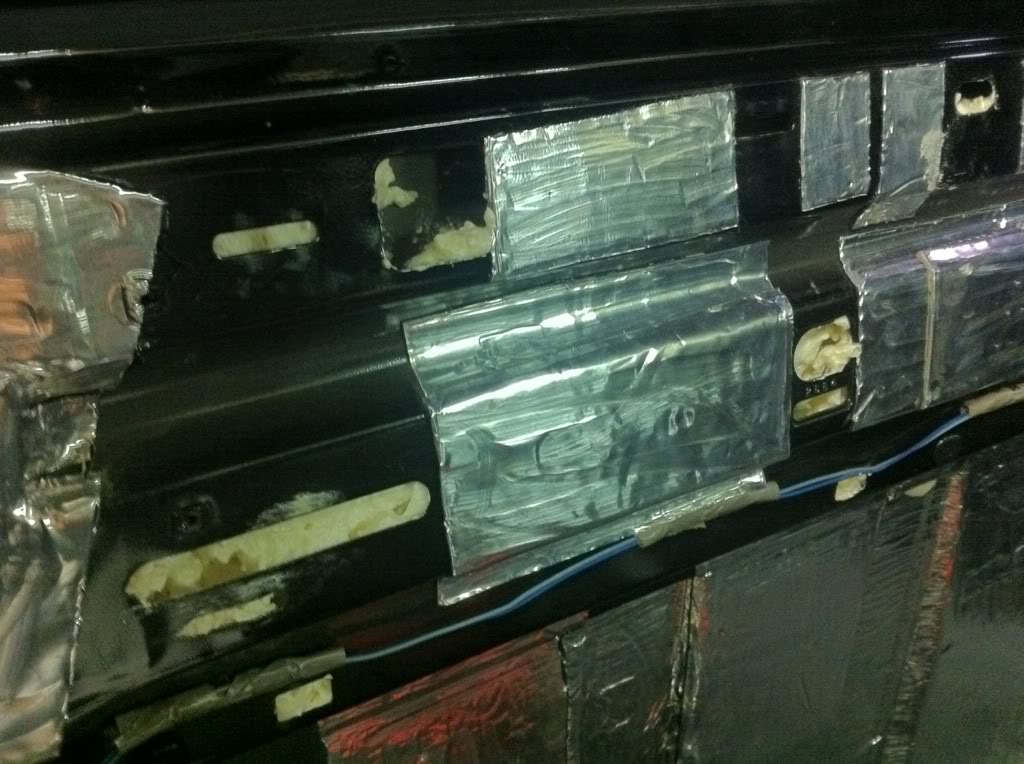
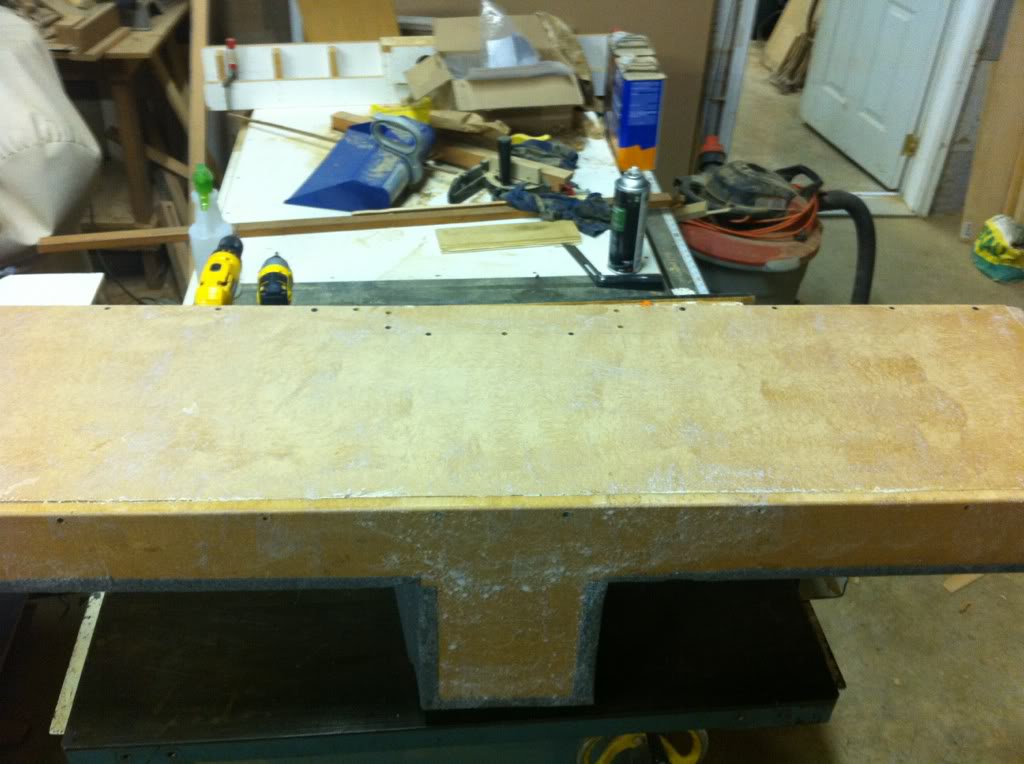
I've never used this expanding foam glue before. I'm sure I used too much but it seems to have filled all the cracks nicely.

I usually go over all the joints with silicone. That foam seems to have filled everything so well that I don't think it'll be necessary. I had already bought the silicone so I just went through the box and applied some here and there. I still don't think I had to, but what the heck.
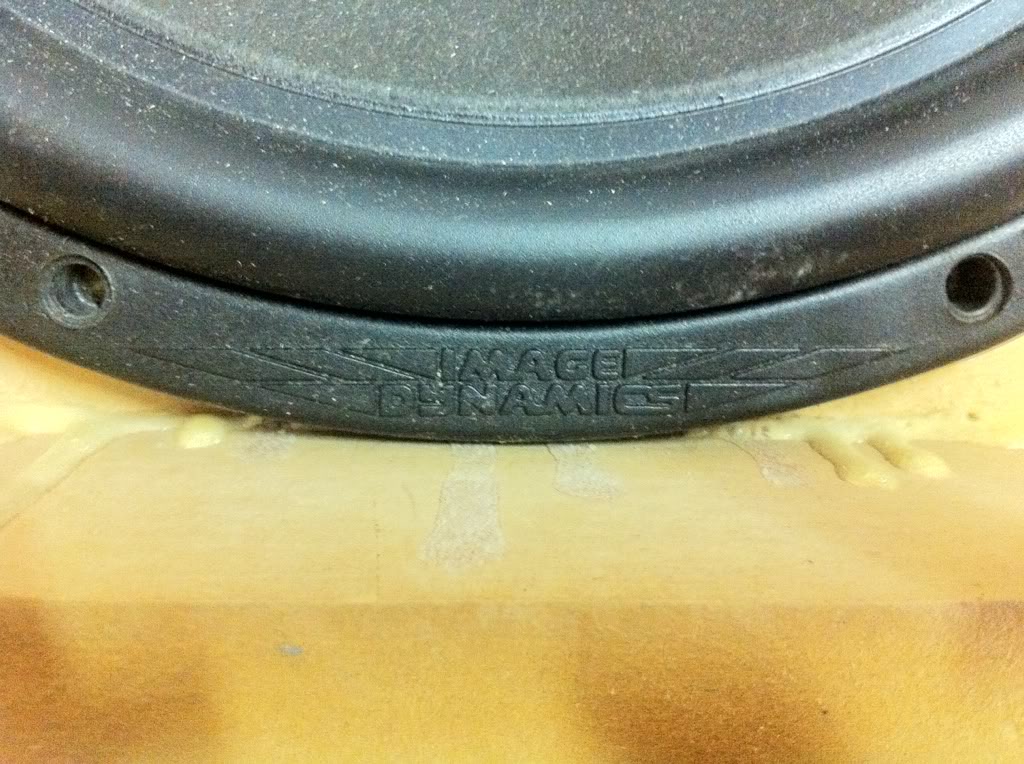
I had to file away at a few parts so the subwoofer would clear.
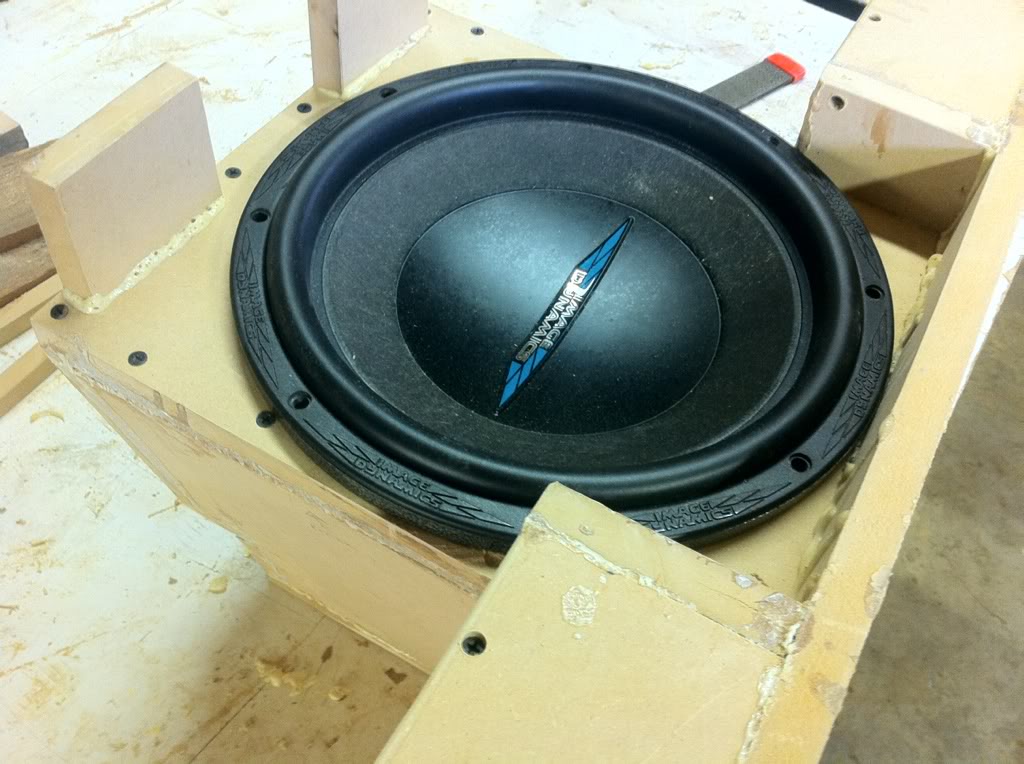
I always measure twice, cut once, but geez this is close.
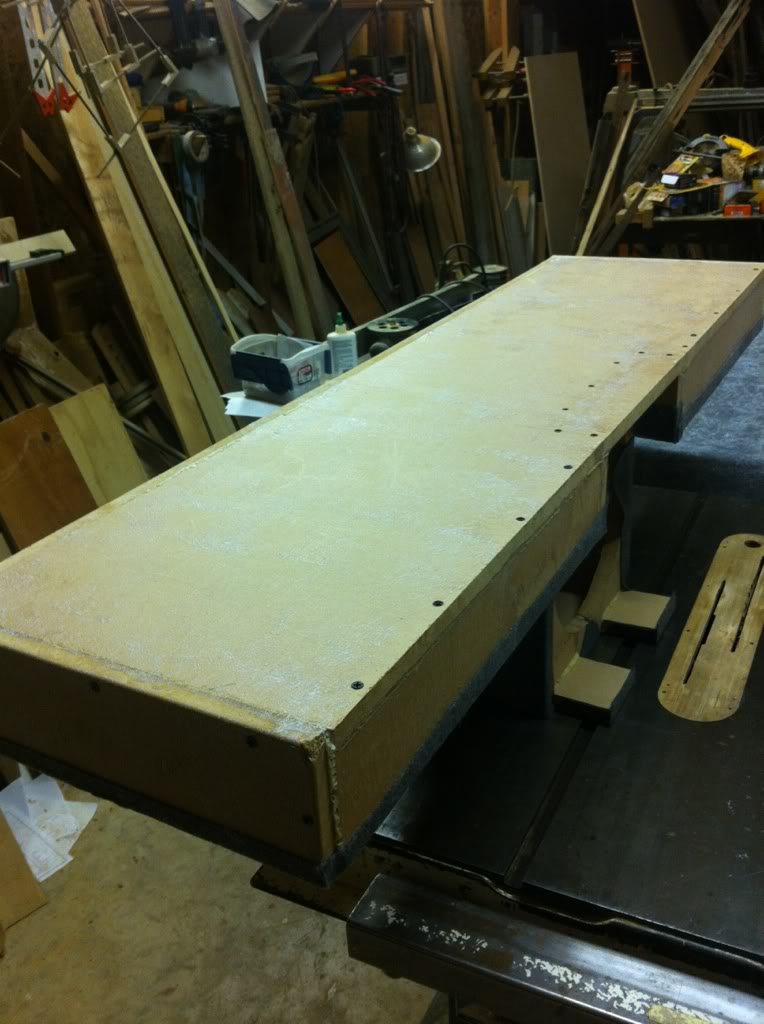
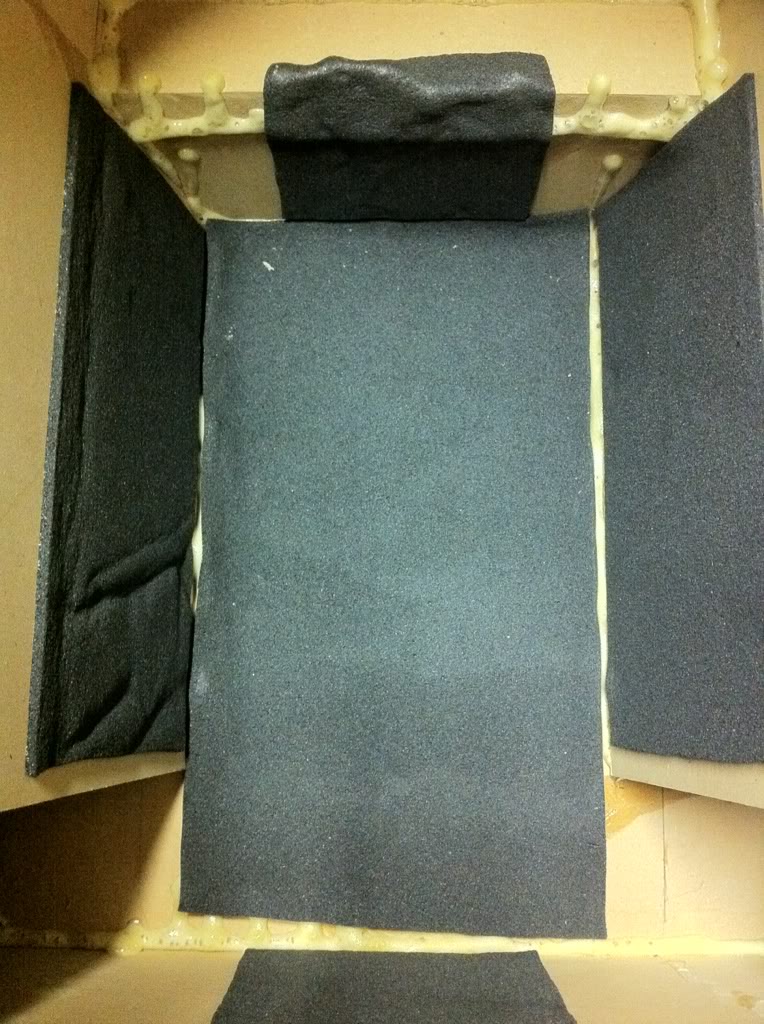
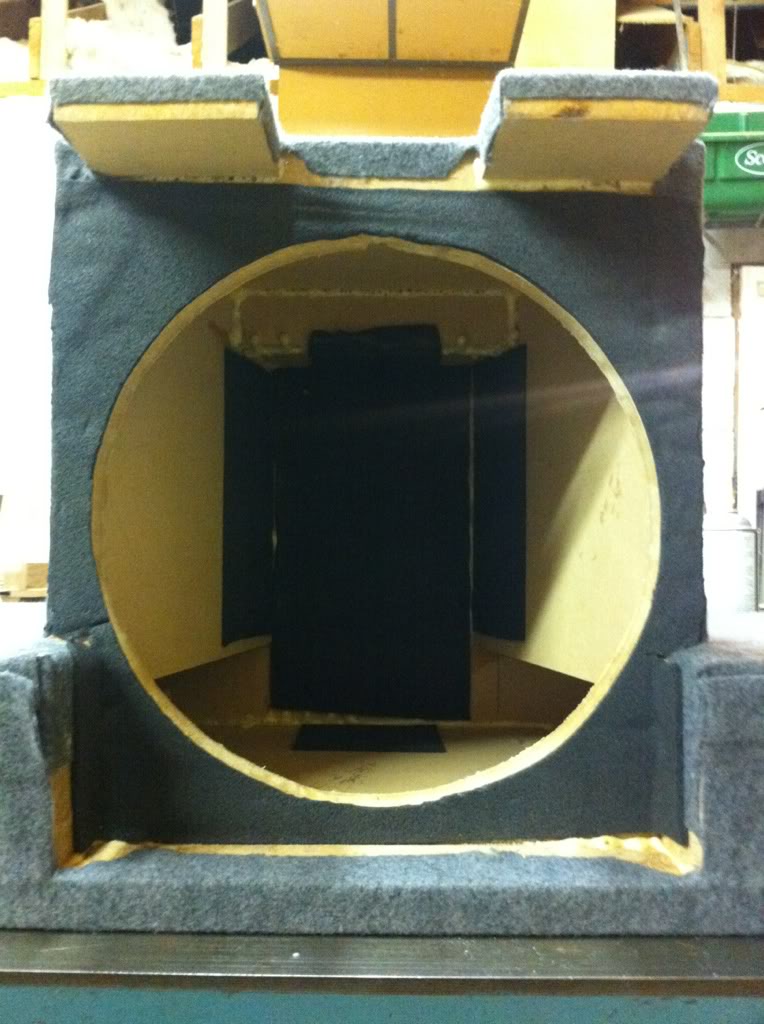
Here's a shot from the inside where you can see that the subwoofer has plenty of clearance and how well that foaming glue sealed up the joints.
After that I glued on the end caps and went back to working on the truck.
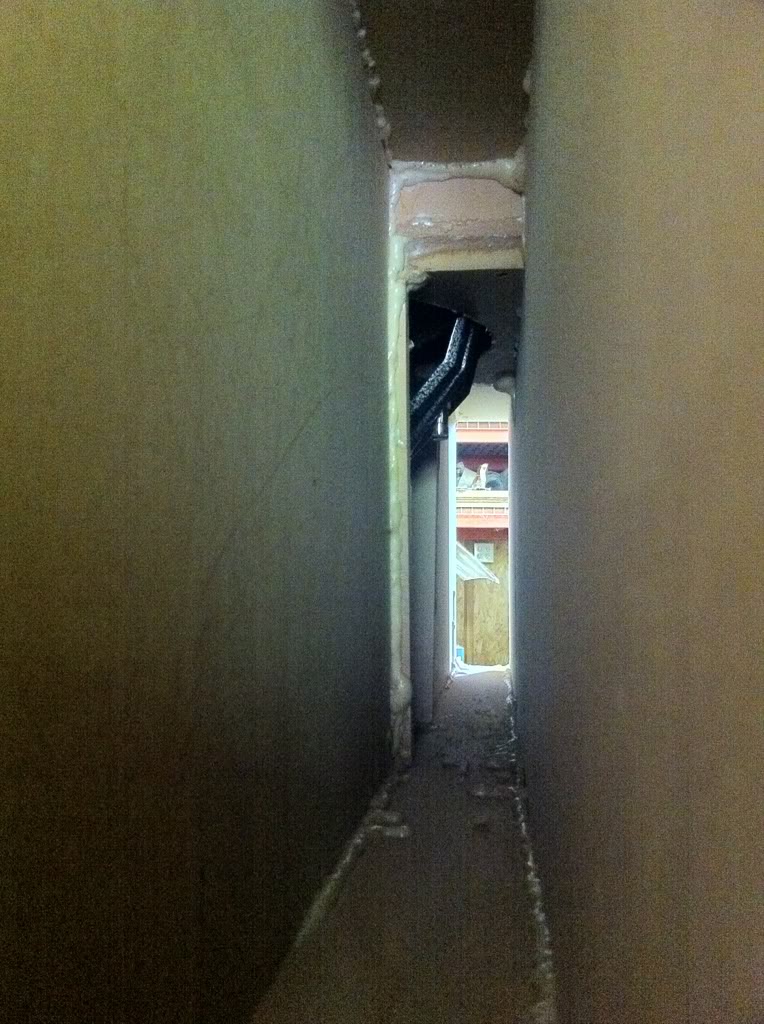
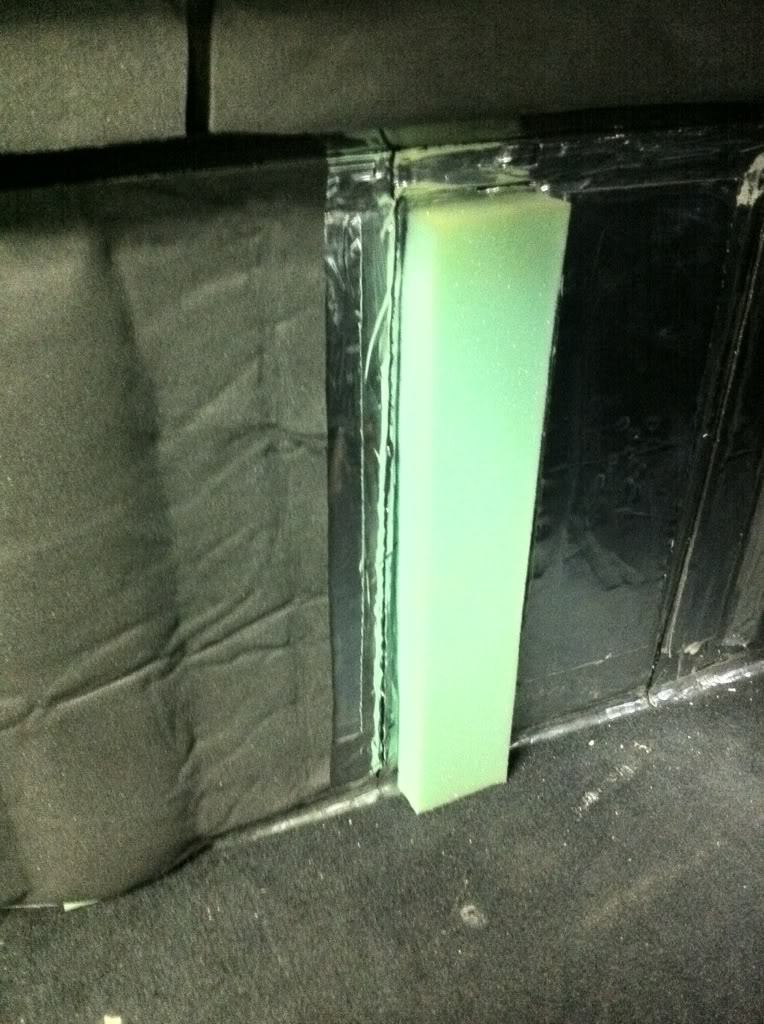
With that expanding glue I got to thinking about the back panel. There's this gap above where the box is going, under the rear window. I had previously deadened it but there was no way to get to the outer skin. So I bought some expanding foam. The stuff I used said it was for gaps 1 inch or less. I filled the gap as best I could until I ran out. Hope it helps!
This was actually right after I sprayed it. It expanded and filled that gap even more.
Next I moved on to deadening the drivers door. I basically did the same thing to the drivers side as the passengers. I closed up all the holes and applied a layer of ensolite foam. I didn't get a picture of it.
I ran out of time. I'll get the foam applied to the rear part, behind the subwoofer and get the subwoofer installed and the box covered. Then I'll be done with most of the hard stuff!
I usually go over all the joints with silicone. That foam seems to have filled everything so well that I don't think it'll be necessary. I had already bought the silicone so I just went through the box and applied some here and there. I still don't think I had to, but what the heck.
I had to file away at a few parts so the subwoofer would clear.
I always measure twice, cut once, but geez this is close.
Here's a shot from the inside where you can see that the subwoofer has plenty of clearance and how well that foaming glue sealed up the joints.
After that I glued on the end caps and went back to working on the truck.
With that expanding glue I got to thinking about the back panel. There's this gap above where the box is going, under the rear window. I had previously deadened it but there was no way to get to the outer skin. So I bought some expanding foam. The stuff I used said it was for gaps 1 inch or less. I filled the gap as best I could until I ran out. Hope it helps!
This was actually right after I sprayed it. It expanded and filled that gap even more.
Next I moved on to deadening the drivers door. I basically did the same thing to the drivers side as the passengers. I closed up all the holes and applied a layer of ensolite foam. I didn't get a picture of it.
I ran out of time. I'll get the foam applied to the rear part, behind the subwoofer and get the subwoofer installed and the box covered. Then I'll be done with most of the hard stuff!
 06-16-2012, 11:13 PM
#62
I got to work on the truck a little bit today. Only for an hour or so.
I added another layer of matting to the low spots on the rear panel. Then I got to thinking.
I have seen where other guys filled the low spots with mdf and then attached the sub box to the mdf. I didn't really want to drill into the back of my cab. I had bought a sheet of foam with the idea of experimenting with filling the cab vents.
As I was looking at the foam I thought. What if I used this foam to fill the low spots? The subwoofer box would butt up against the foam. It would kind of be a cushion.
So that what I did. I used the peel and stick ensolite foam to hold it in place.
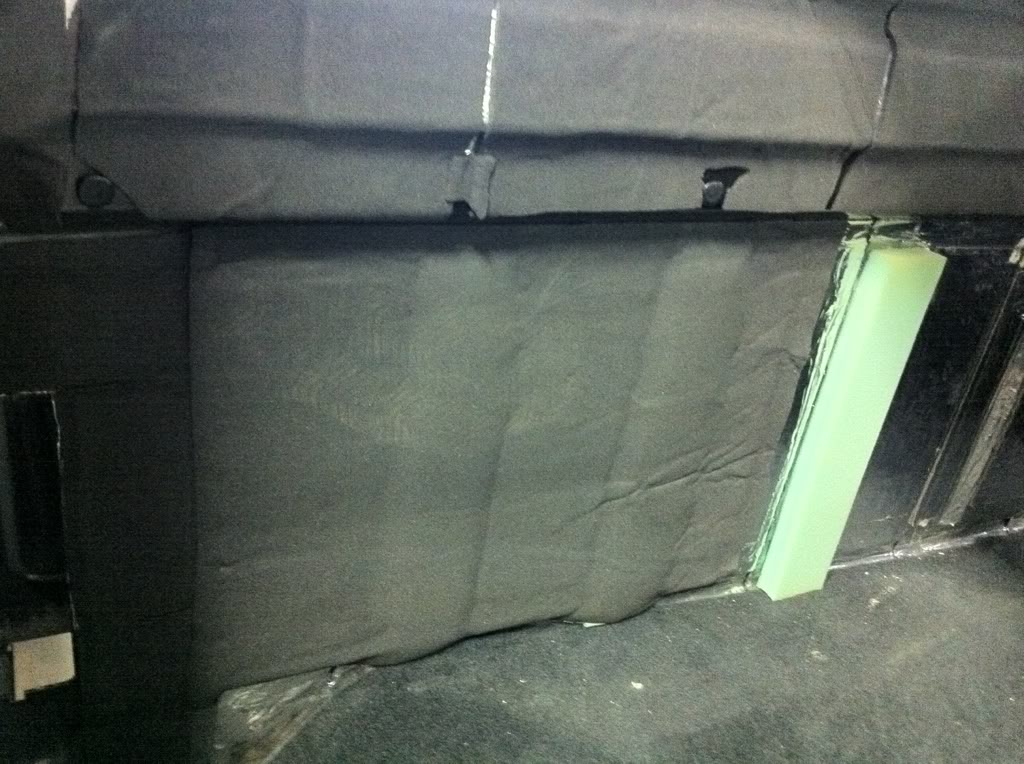
I'm finally done with the rear wall.
I've never used this peel and stick ensolite foam before. I haven't got to experience driving with the foam installed, but do far it seems to really make a difference. I'm actually going to order a few more yards of the stuff.
I added another layer of matting to the low spots on the rear panel. Then I got to thinking.
I have seen where other guys filled the low spots with mdf and then attached the sub box to the mdf. I didn't really want to drill into the back of my cab. I had bought a sheet of foam with the idea of experimenting with filling the cab vents.
As I was looking at the foam I thought. What if I used this foam to fill the low spots? The subwoofer box would butt up against the foam. It would kind of be a cushion.
So that what I did. I used the peel and stick ensolite foam to hold it in place.
I'm finally done with the rear wall.
I've never used this peel and stick ensolite foam before. I haven't got to experience driving with the foam installed, but do far it seems to really make a difference. I'm actually going to order a few more yards of the stuff.
06-27-2012, 04:34 AM
#63
Back at it again. I ordered some peel and stick ensolite from raamaudio on the 16th and it hasn't shown up yet. I was hoping it would be here so I could install it on my roof.
Anyway, here's what I started with.
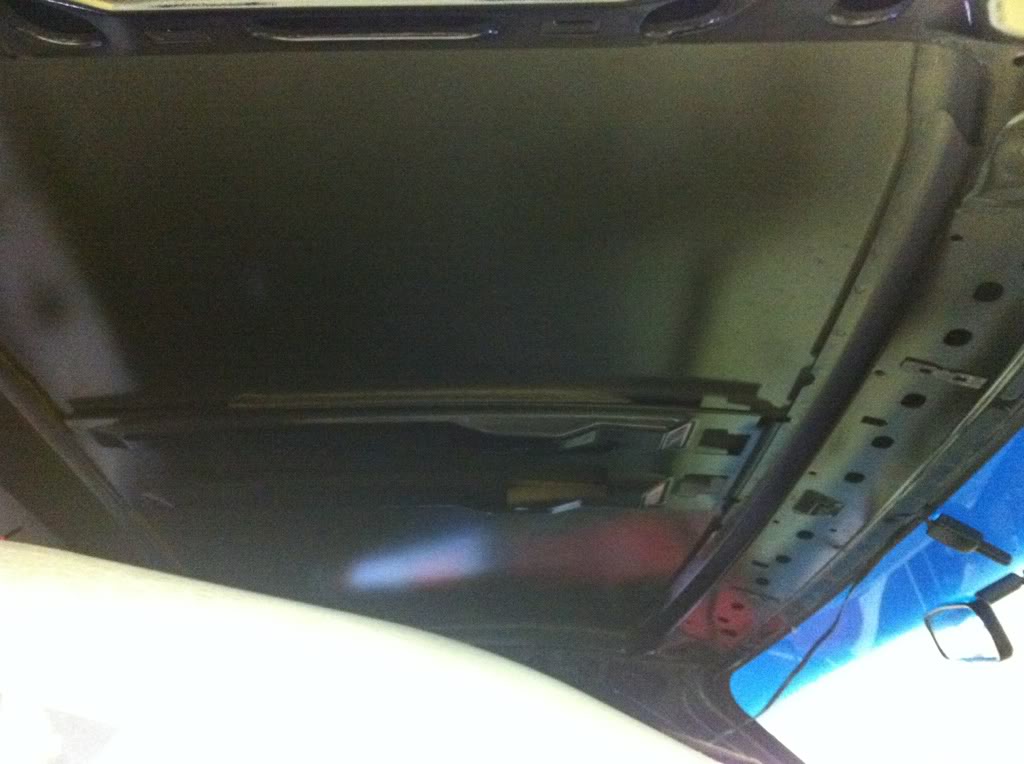
See that separate support piece in the center there? That wiggled and vibrated like crazy! I put deadener on the roof skin behind it where I could. After that, I filled the gap with spray foam. What's funny is there's some flexible foam in between the panels from the factory.
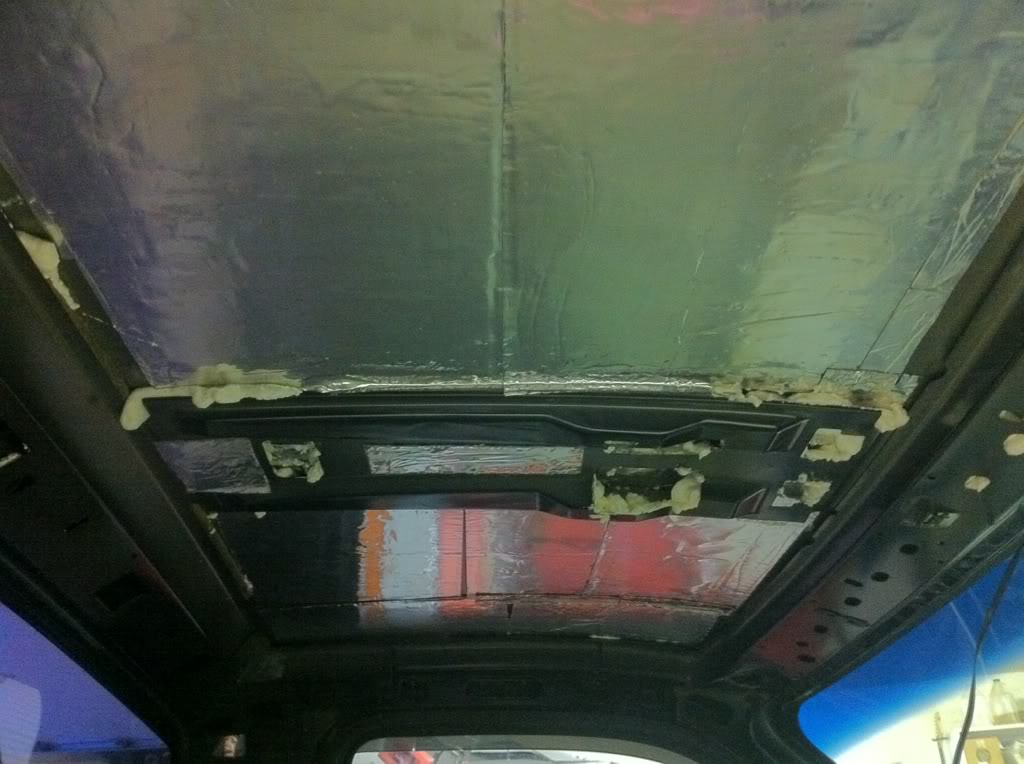
I'm going to end up covering all the holes with raamat. That top piece is solid now. After that, I'll add a layer of ensolite.
I really hope all this effort is going to be worth it. I've never done this extensive of a job before.
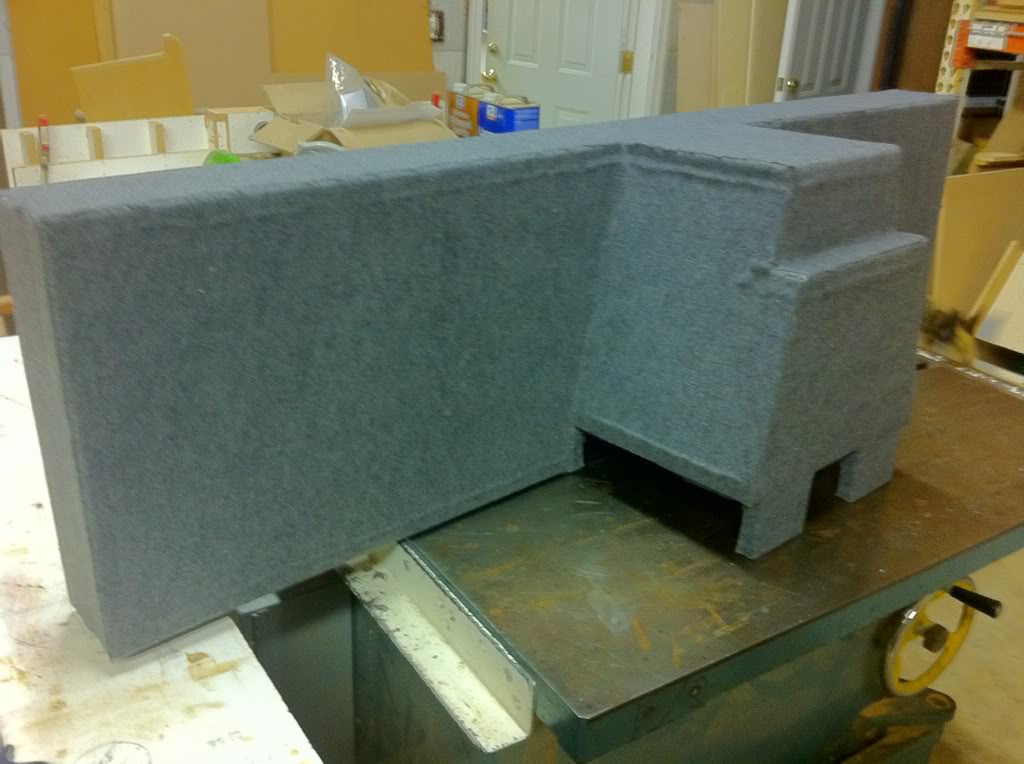
While the spray foam was setting up I decided to carpet my subwoofer enclosure.
I didn't know the best way to go about carpeting this box, so I kinda winged it.
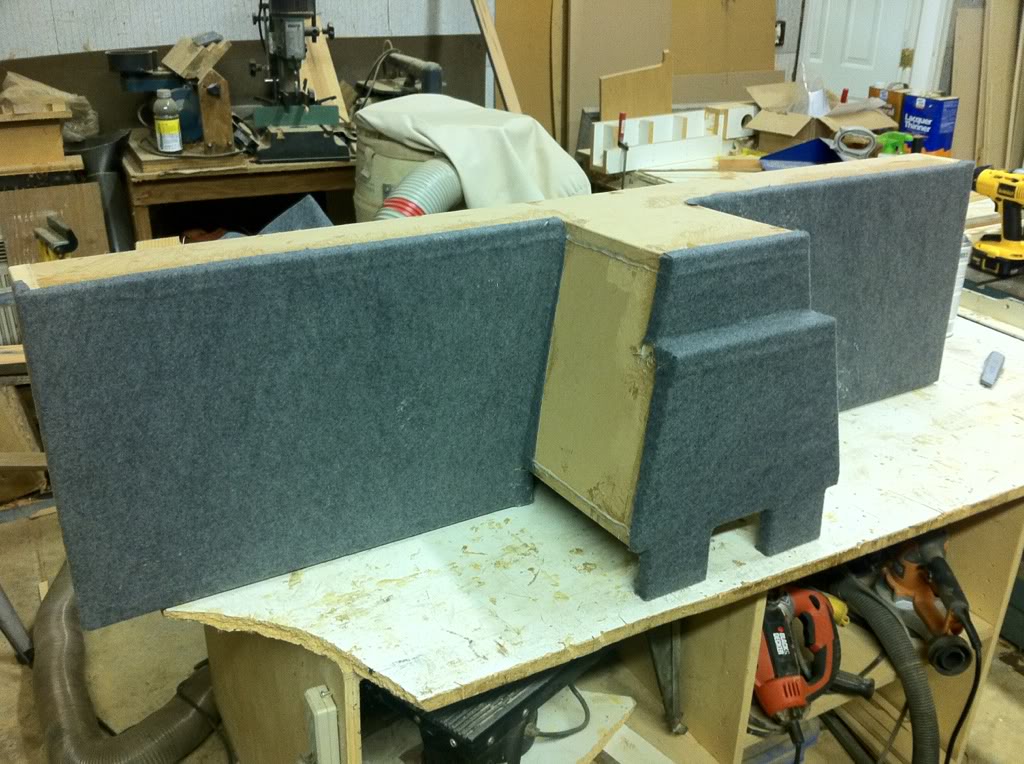
I sprayed adhesive on the felt and the box. I basically did it in a crisscross pattern. One layer one direction, another layer the opposite direction.
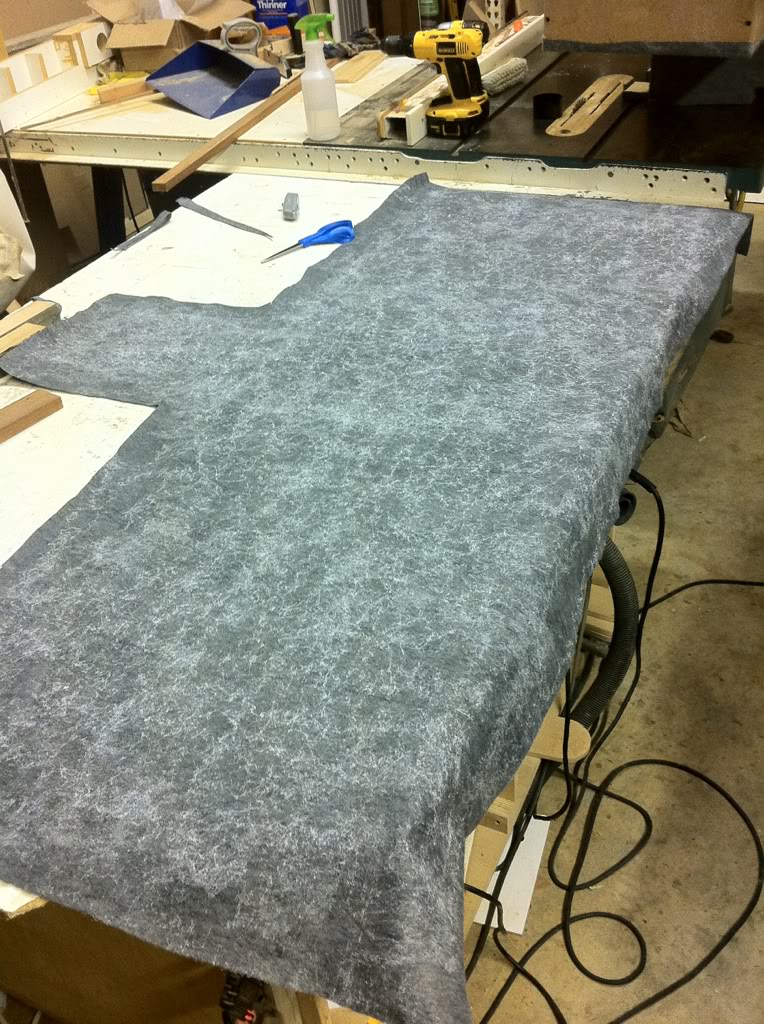
Well, this is what I ended up with. I'm not to happy with it, but this is what you get at 1:00 am. It's not my best work, but most of the box will be hidden anyway.
The back looks pretty good. Too bad no one will ever see it. LOL.
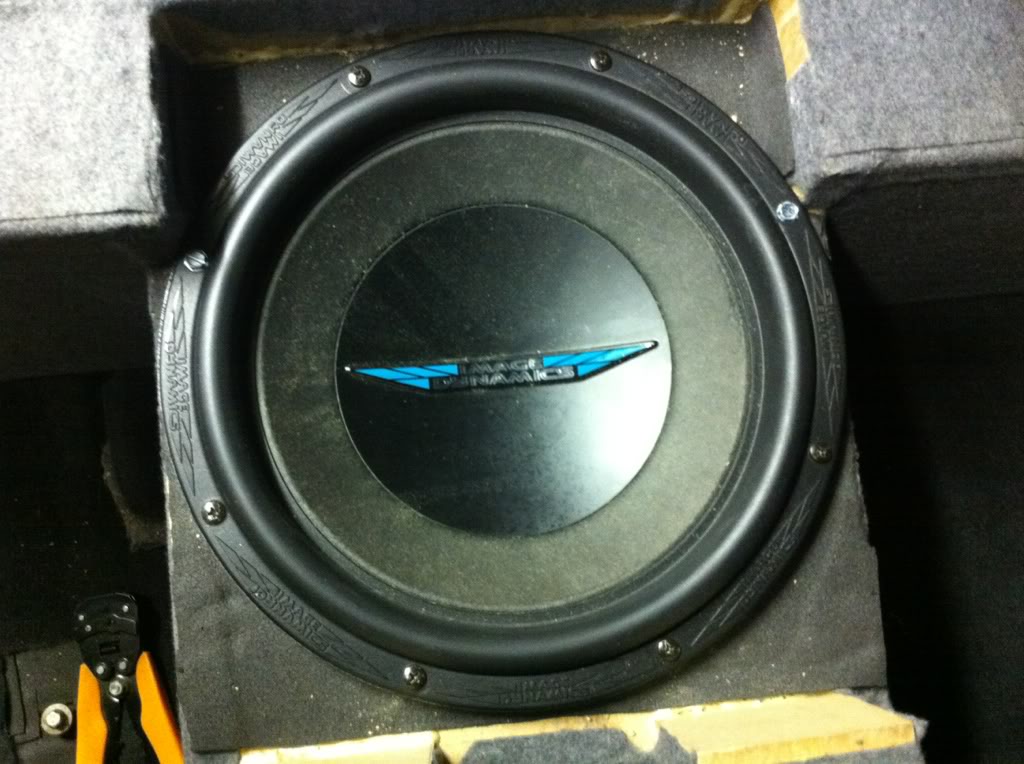
I put a couple of pieces of ensolite in the box behind the subwoofer.
Ensolite on the bottom of the box. I'm going to use it as a seal for the IDMAX.
Anyway, here's what I started with.
See that separate support piece in the center there? That wiggled and vibrated like crazy! I put deadener on the roof skin behind it where I could. After that, I filled the gap with spray foam. What's funny is there's some flexible foam in between the panels from the factory.
I'm going to end up covering all the holes with raamat. That top piece is solid now. After that, I'll add a layer of ensolite.
I really hope all this effort is going to be worth it. I've never done this extensive of a job before.
While the spray foam was setting up I decided to carpet my subwoofer enclosure.
I didn't know the best way to go about carpeting this box, so I kinda winged it.
I sprayed adhesive on the felt and the box. I basically did it in a crisscross pattern. One layer one direction, another layer the opposite direction.
Well, this is what I ended up with. I'm not to happy with it, but this is what you get at 1:00 am. It's not my best work, but most of the box will be hidden anyway.
The back looks pretty good. Too bad no one will ever see it. LOL.
I put a couple of pieces of ensolite in the box behind the subwoofer.
Ensolite on the bottom of the box. I'm going to use it as a seal for the IDMAX.
06-29-2012, 05:14 AM
#64
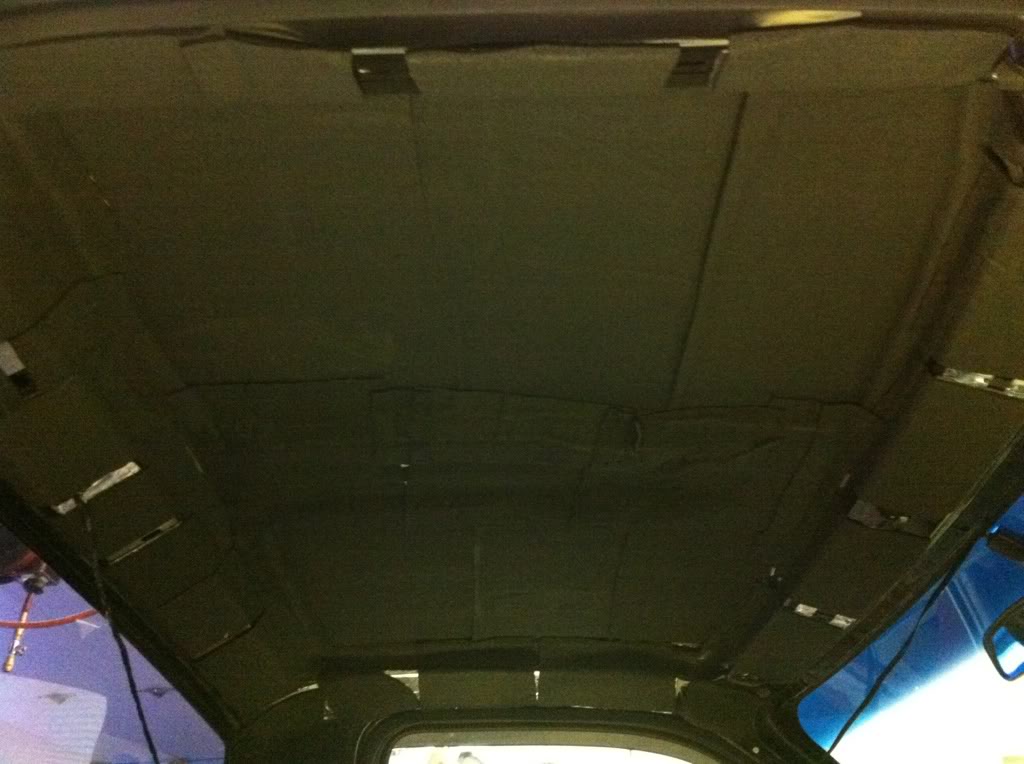
I finished the deadening on the roof.

I put up the rest of my ensolite foam. I ordered more but there was a glitch and it was never shipped.

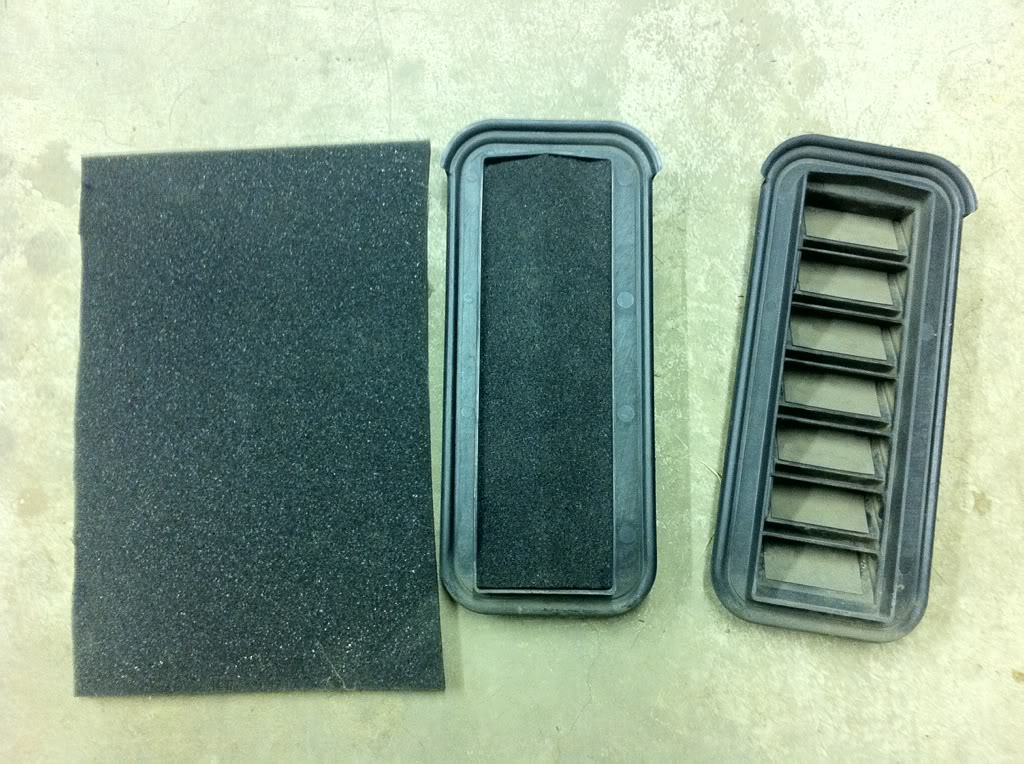
The cabin vents are in just about the worst location. They're at the bottom of the cab, behind the seats. The interior panels basically route the vents to ear level. I decided to try something. I cut some foam put it in the vent.
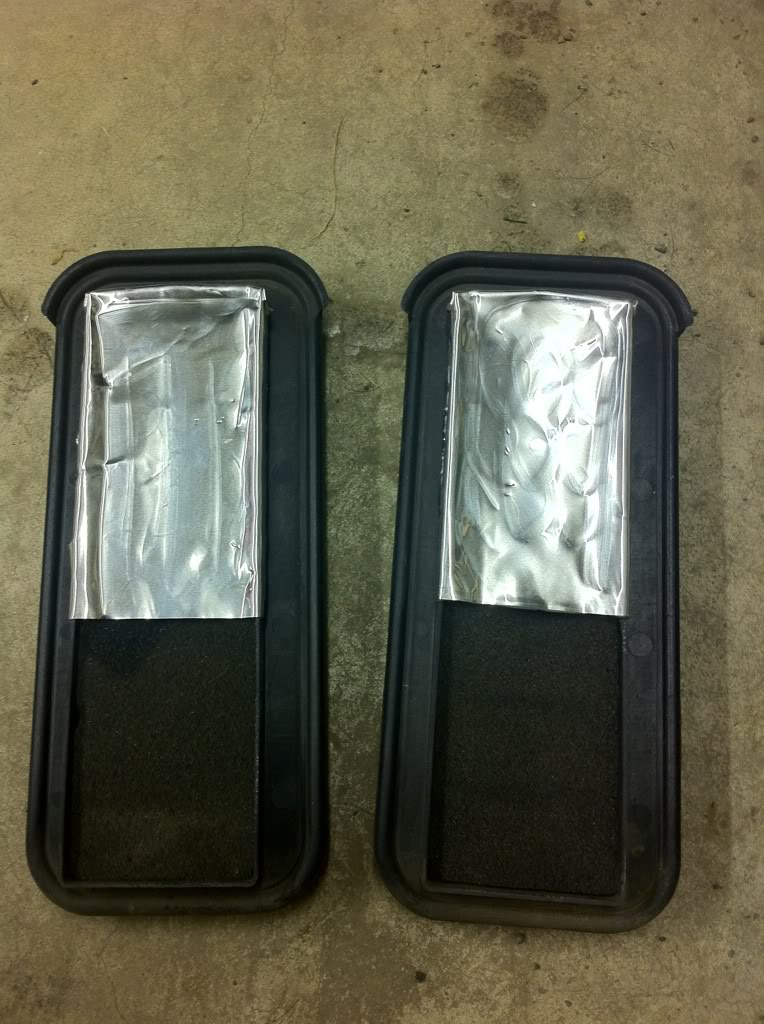
I put some BXT II deadener on the top part of the vent to help protect the foam from water. Hopefully it will help block some road noise. There's actually a space between the deadener and the foam. It's not blocking it off.
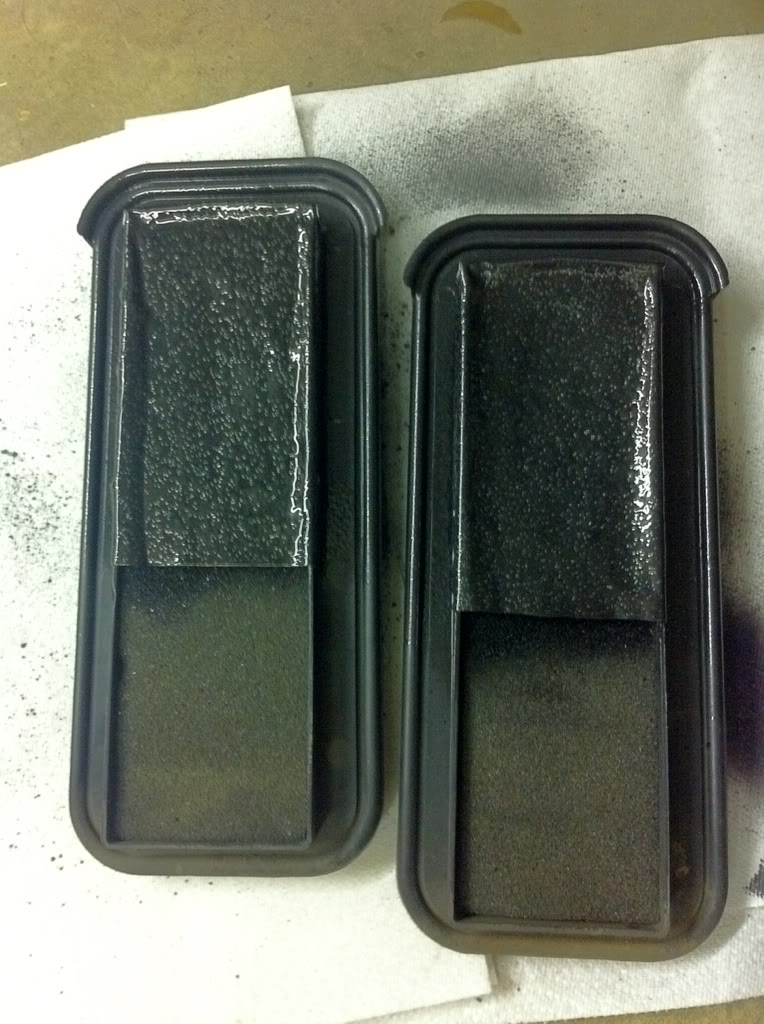
Not that you would ever see them, but I decided to paint the silver black. I had a can of black hammerite paint left over from a previous project.
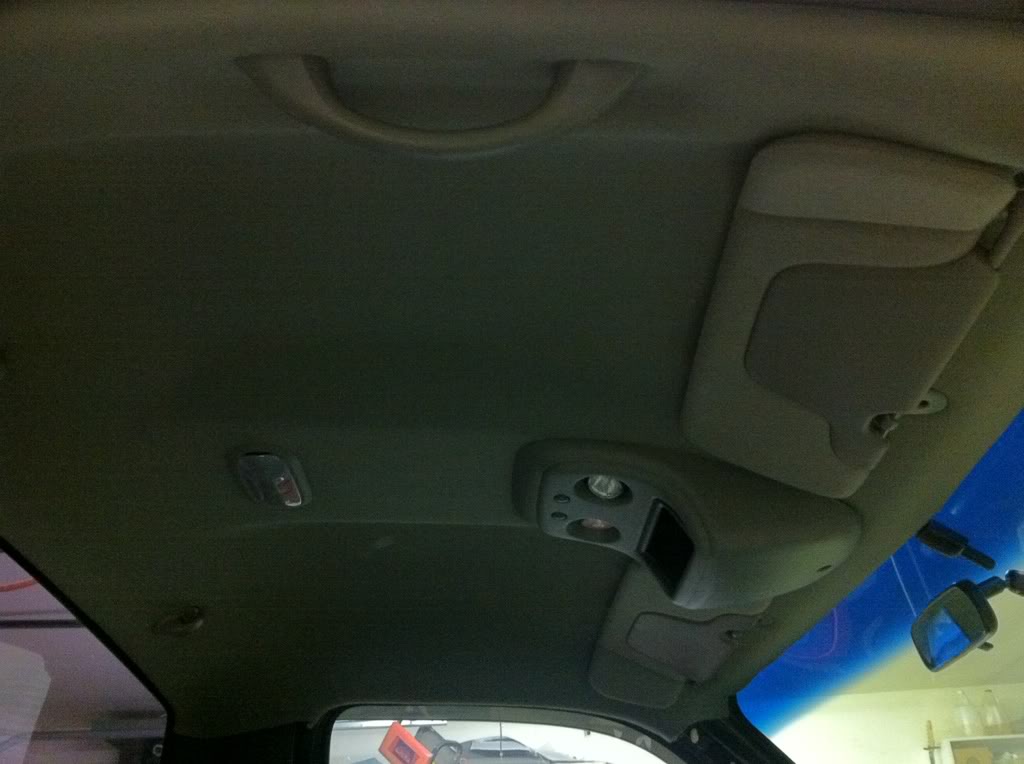
Headliner back on.
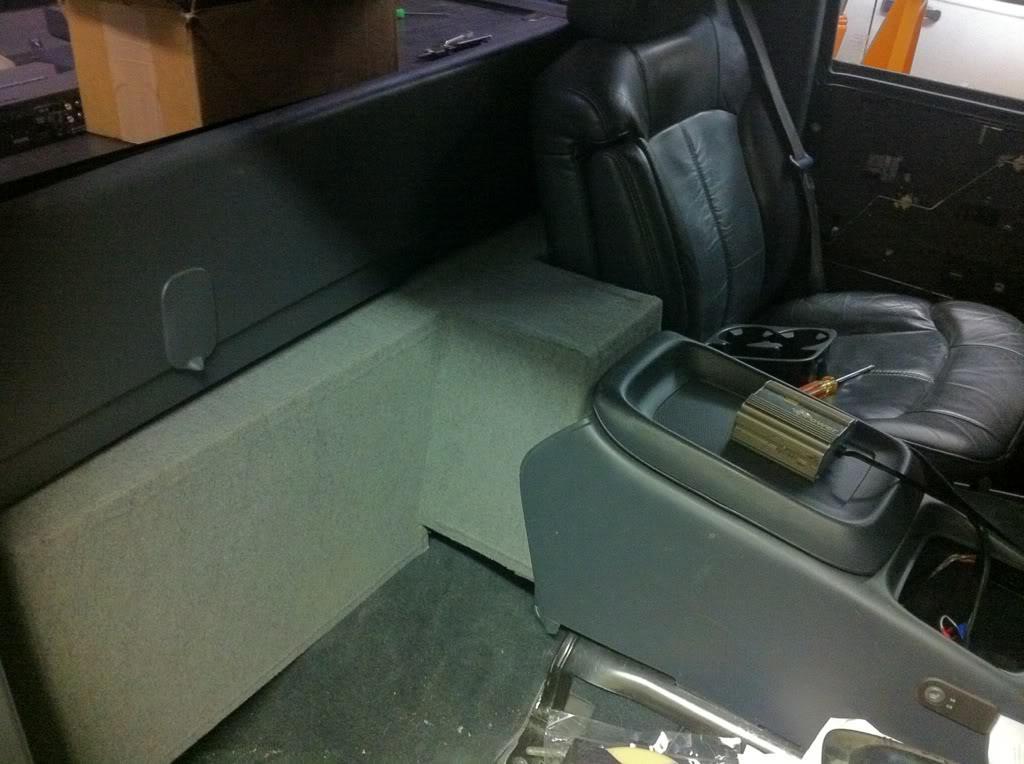
I started to put the interior back together. I need to trim that plastic part above the box. That's why it's just sitting there.
I put up the rest of my ensolite foam. I ordered more but there was a glitch and it was never shipped.
The cabin vents are in just about the worst location. They're at the bottom of the cab, behind the seats. The interior panels basically route the vents to ear level. I decided to try something. I cut some foam put it in the vent.
I put some BXT II deadener on the top part of the vent to help protect the foam from water. Hopefully it will help block some road noise. There's actually a space between the deadener and the foam. It's not blocking it off.
Not that you would ever see them, but I decided to paint the silver black. I had a can of black hammerite paint left over from a previous project.
Headliner back on.
I started to put the interior back together. I need to trim that plastic part above the box. That's why it's just sitting there.
06-29-2012, 02:19 PM
#65
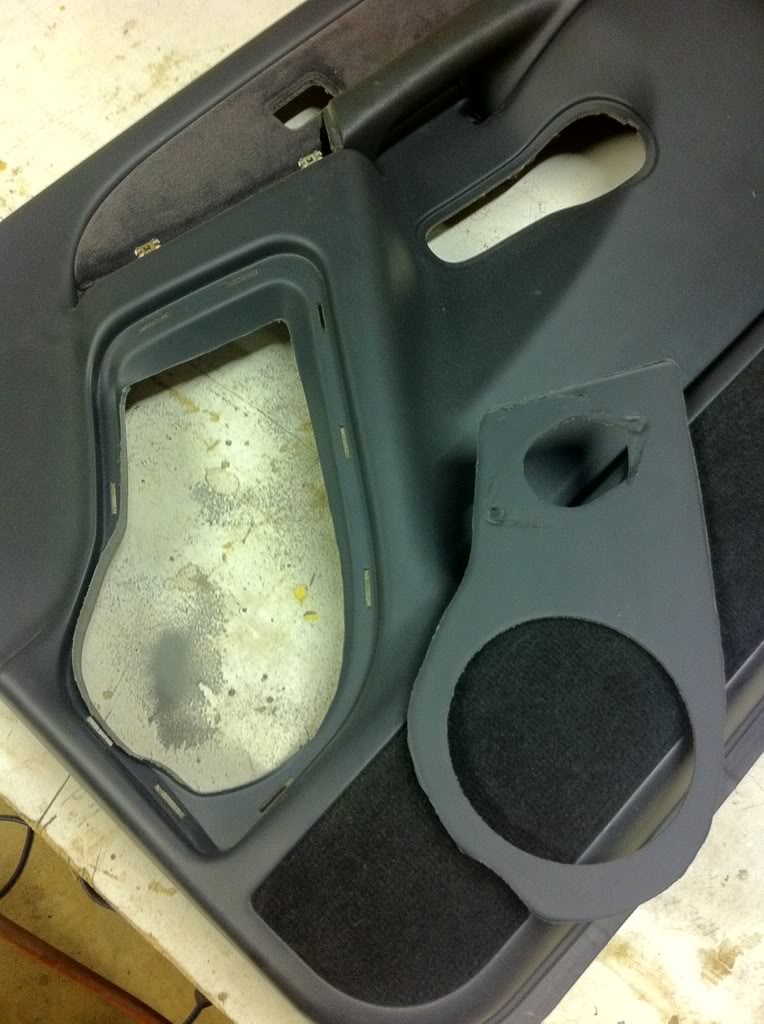
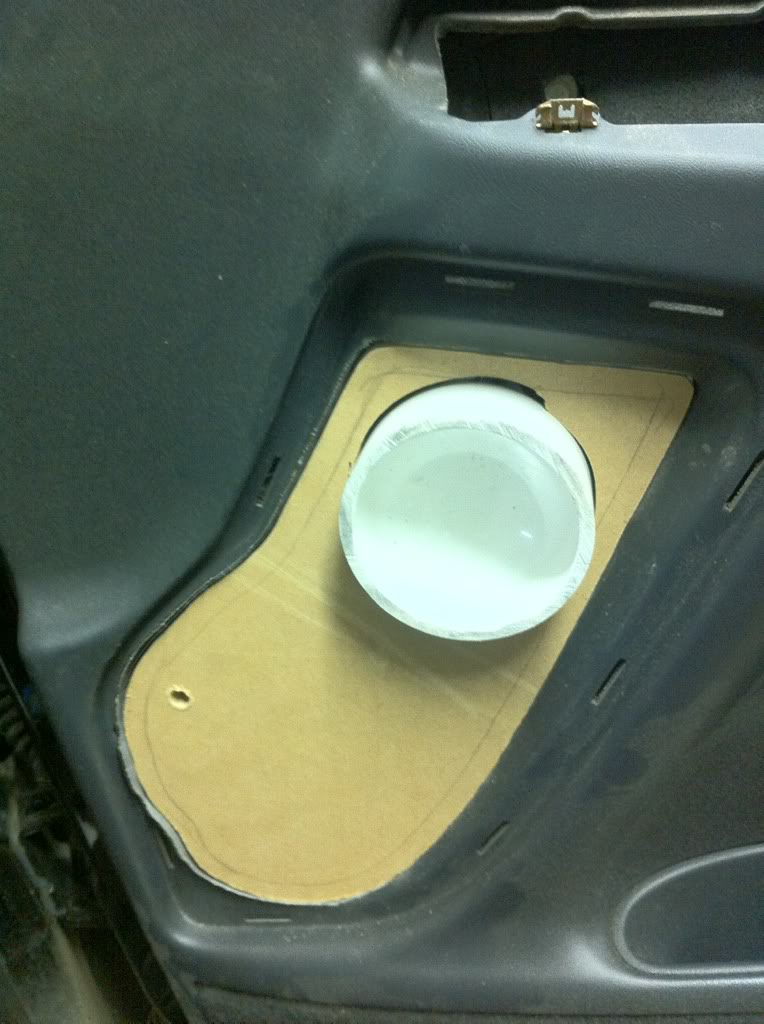
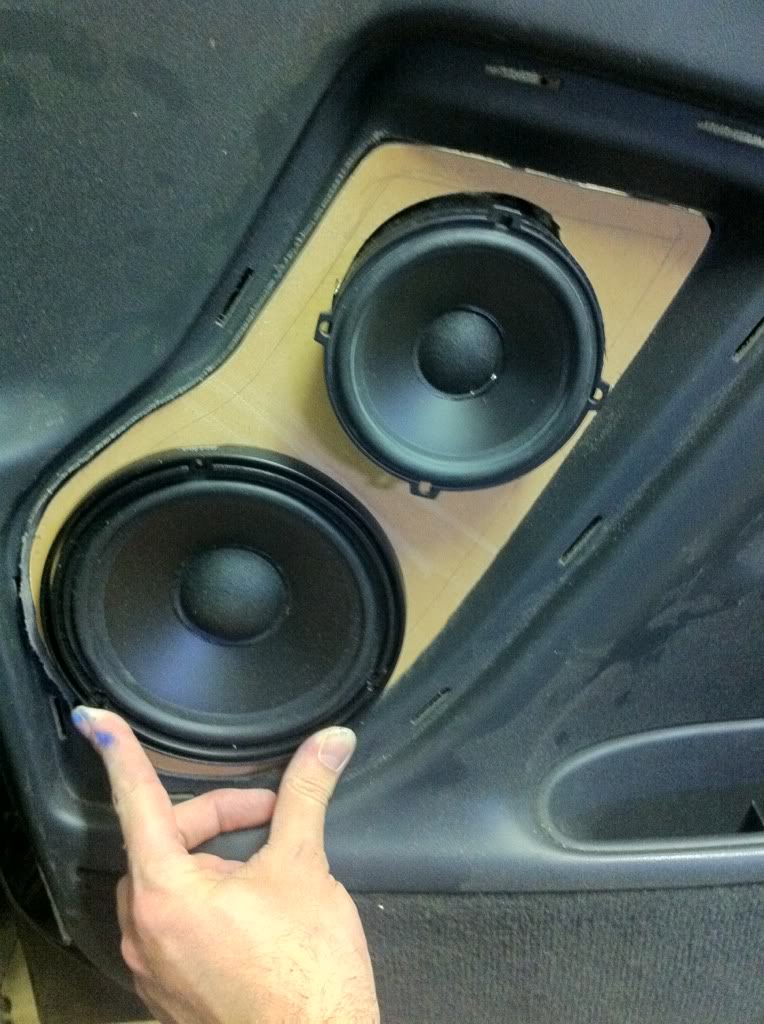
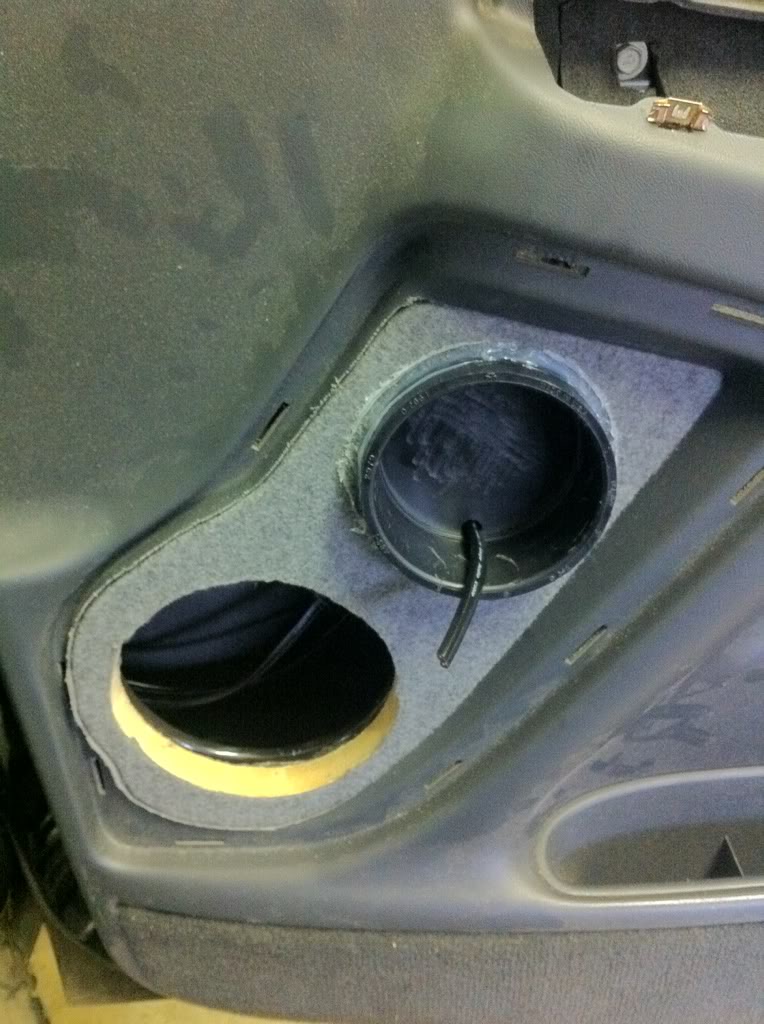
I need to figure out how to fit 2 (maybe 3) drivers into my door panel. Here's what I have to work with.
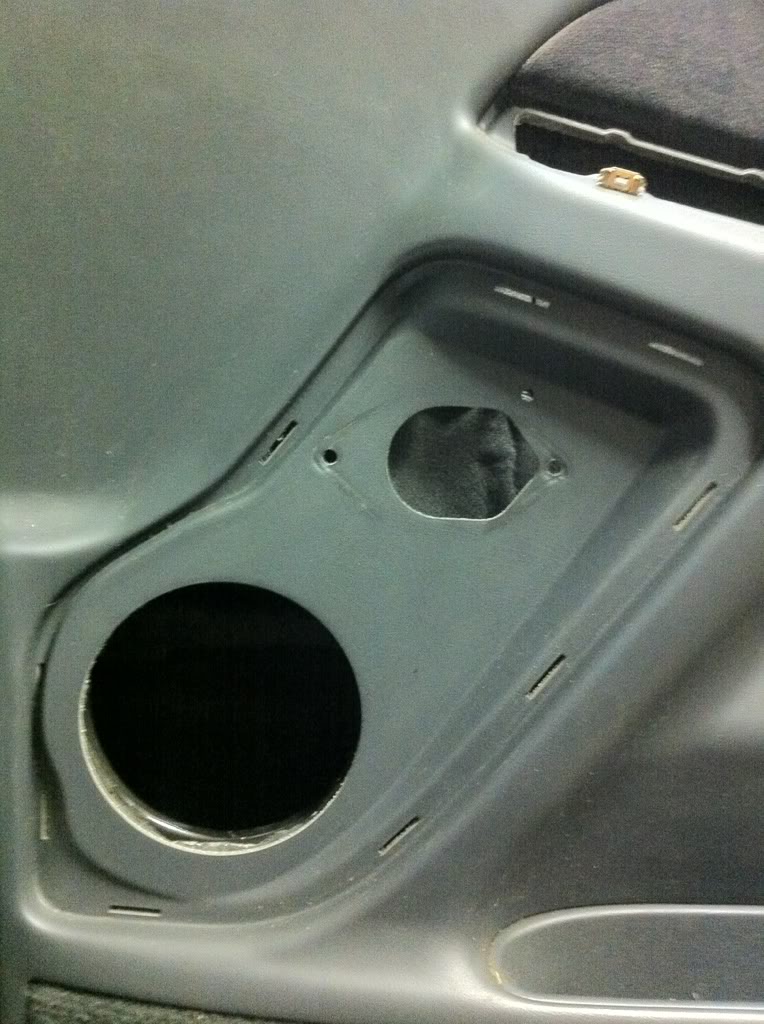
I'm pretty fortunate to have this much room really. I was originally going to build kick panels and mount the drivers there. I actually started the fiberglass work and everything. I decided against it because I put in a center console and I think that will really block a lot of sound.
Right now I'm debating in if I should mount the tweeters in the doors or on the sail panels behind the mirrors? What do you guys think? I'll be using an MS-8 as well.
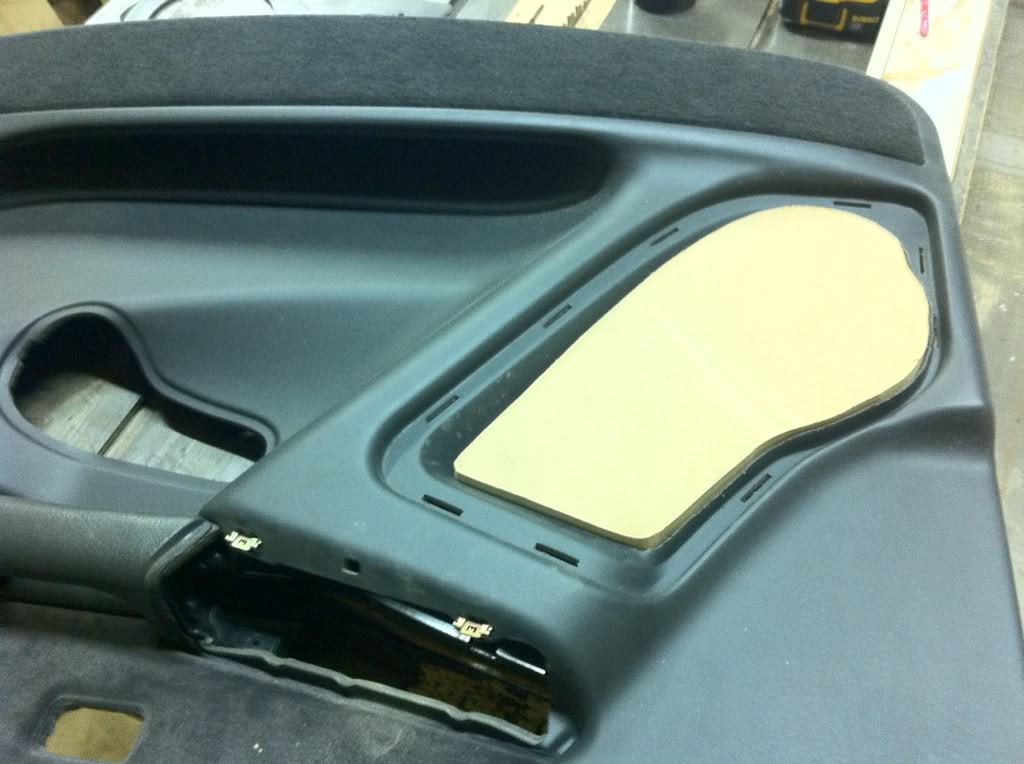
So I cut out where I wanted to mount the drivers.
Then traced that onto some spare 3/4" mdf.

After I cut it out with a jigsaw, it almost fit. I ended up shaping it with a belt sander for final fitment.
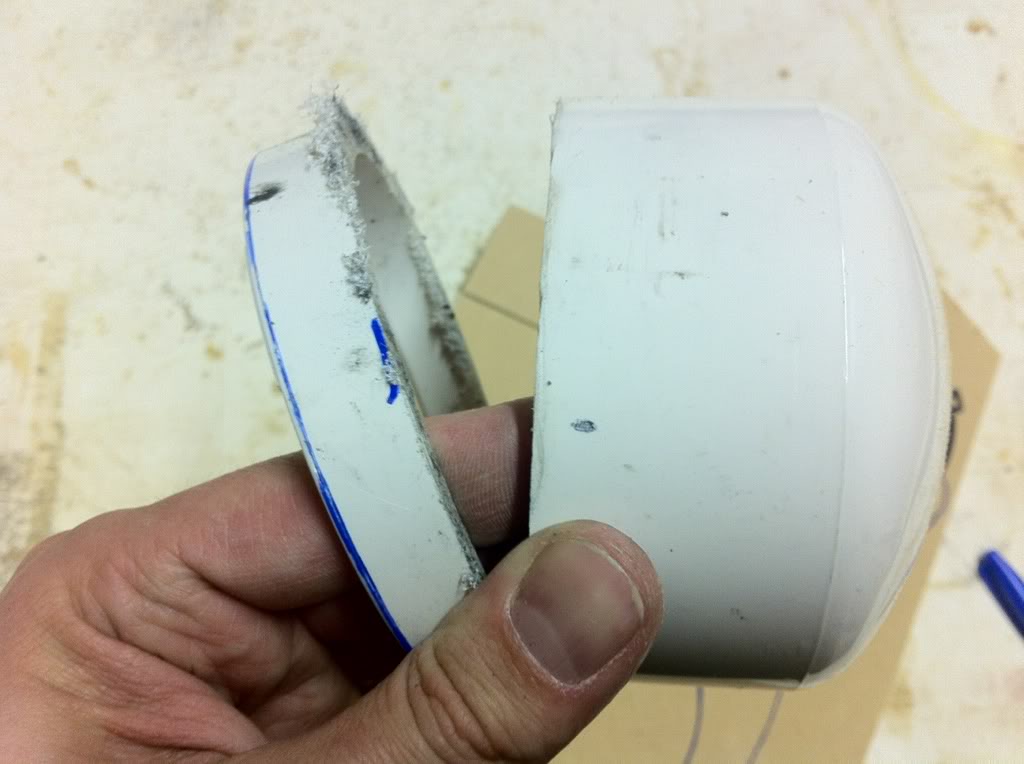
So my idea was to use a 3" PVC cap for my midrange. It's too deep to clear the door panel and grill, so I cut it. (I found out later that its about 3mm too tall so I'm going to go buy a black end cap. They have a flat bottom instead of rounded so it should clear.)
Here it is trimmed up and fit into the door panel. The hole is cut for the 3" PVC cap.
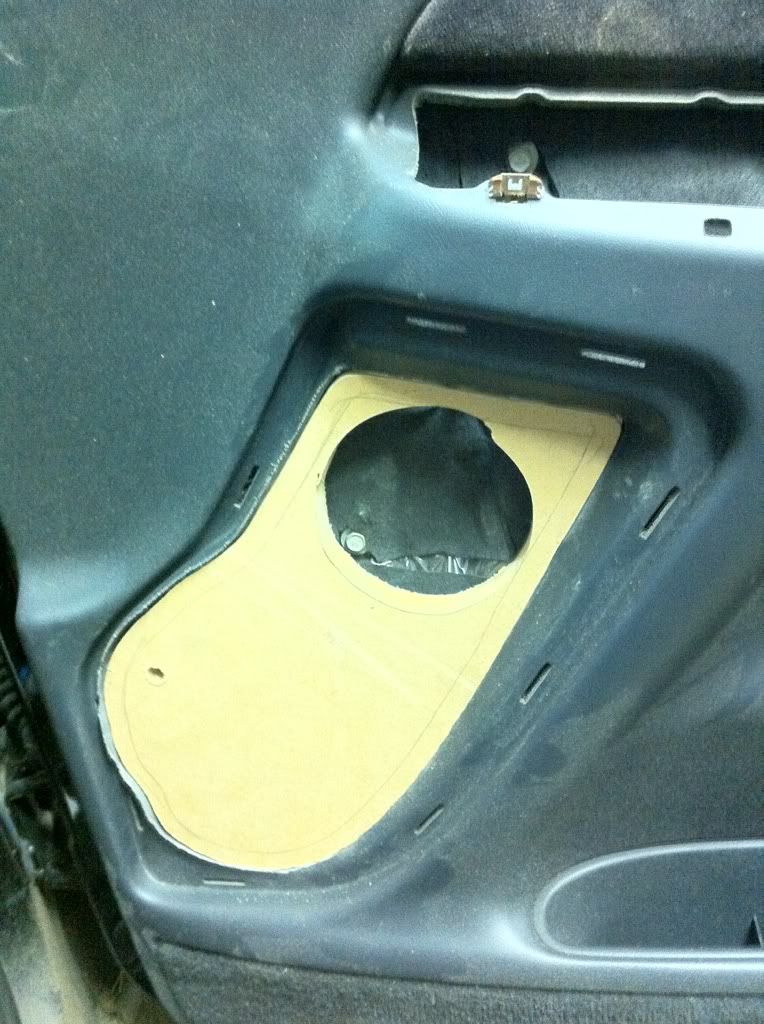
Now you're getting the idea.
Today I'm heading to Home Depot and picking up the black end caps. Hopefully by tonight I can have it all built and installed. Then I'll be done with door panels!
I'm pretty fortunate to have this much room really. I was originally going to build kick panels and mount the drivers there. I actually started the fiberglass work and everything. I decided against it because I put in a center console and I think that will really block a lot of sound.
Right now I'm debating in if I should mount the tweeters in the doors or on the sail panels behind the mirrors? What do you guys think? I'll be using an MS-8 as well.
So I cut out where I wanted to mount the drivers.
Then traced that onto some spare 3/4" mdf.
After I cut it out with a jigsaw, it almost fit. I ended up shaping it with a belt sander for final fitment.
So my idea was to use a 3" PVC cap for my midrange. It's too deep to clear the door panel and grill, so I cut it. (I found out later that its about 3mm too tall so I'm going to go buy a black end cap. They have a flat bottom instead of rounded so it should clear.)
Here it is trimmed up and fit into the door panel. The hole is cut for the 3" PVC cap.
Now you're getting the idea.
Today I'm heading to Home Depot and picking up the black end caps. Hopefully by tonight I can have it all built and installed. Then I'll be done with door panels!
 06-30-2012, 12:32 AM
#67
Thanks man! It turned out to be way more complicated than I thought it would be.
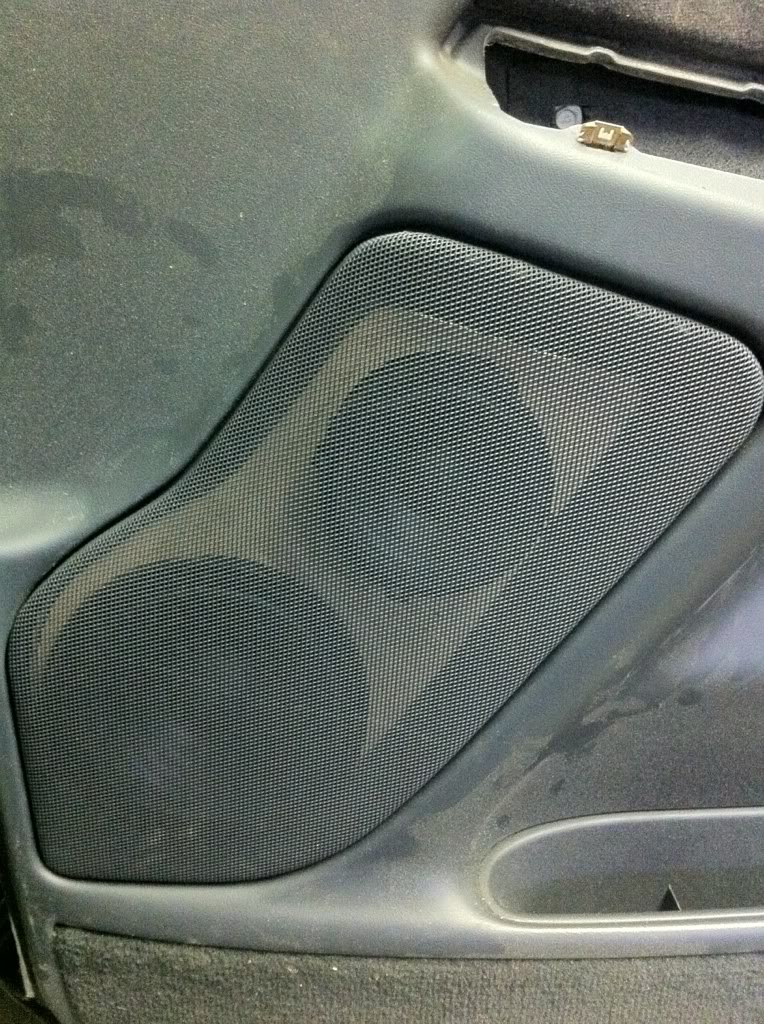
So here's roughly how it will look.
Nice and hidden behind that huge factory grill. Even with the black caps that have flat bottoms, there's barely enough room to clear, but it does clear.
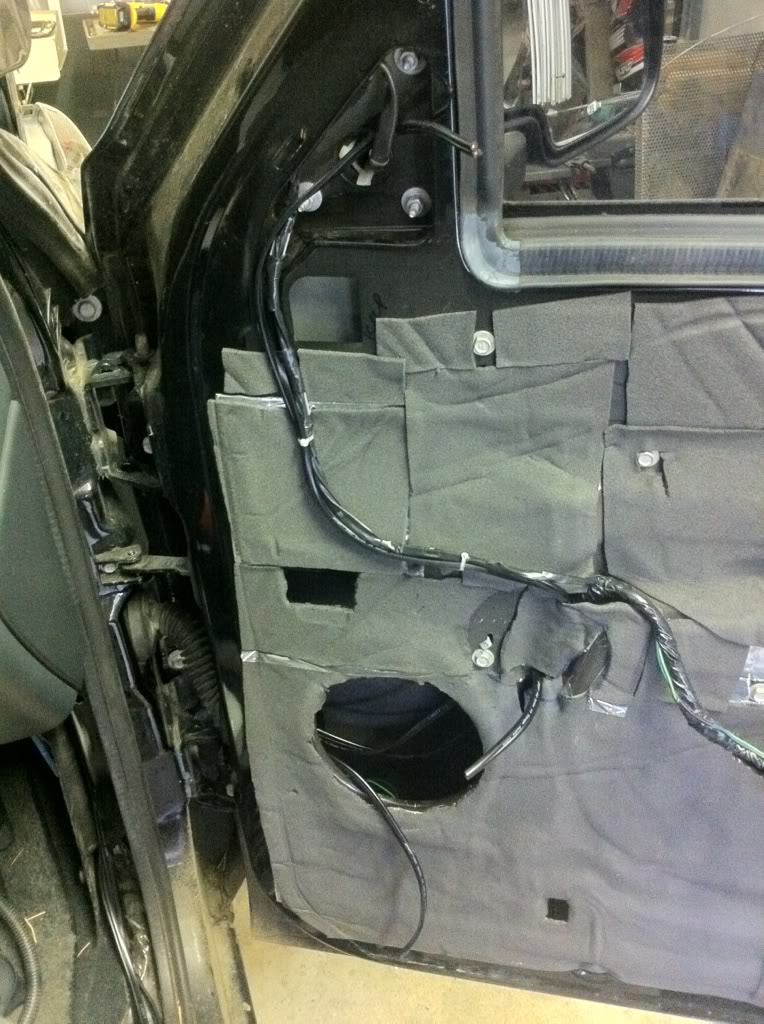
After that I ran the wiring for all three speakers. It was quite the pain to get that 14 gauge wire through the factory rubber loom between the door and the body. I wanted them in there though for as stealth an install as possible.
I went ahead and carpeted it since I had some scraps from the subwoofer enclosure. That way you won't notice them in the door. I siliconed in the black end cap, but prior to that I drilled a hole in it for the wire to go through.
I started on the drivers side. All I got done though was cutting the door panel, making the driver's mount and carpeting it. Hopefully I have enough speaker wire to reach the amplifiers from the drivers door.
So here's roughly how it will look.
Nice and hidden behind that huge factory grill. Even with the black caps that have flat bottoms, there's barely enough room to clear, but it does clear.
After that I ran the wiring for all three speakers. It was quite the pain to get that 14 gauge wire through the factory rubber loom between the door and the body. I wanted them in there though for as stealth an install as possible.
I went ahead and carpeted it since I had some scraps from the subwoofer enclosure. That way you won't notice them in the door. I siliconed in the black end cap, but prior to that I drilled a hole in it for the wire to go through.
I started on the drivers side. All I got done though was cutting the door panel, making the driver's mount and carpeting it. Hopefully I have enough speaker wire to reach the amplifiers from the drivers door.
07-04-2012, 04:17 PM
#68
Got a little bit more work done.
I had previously ran out of the Ensolite foam. I ordered some more from raammat and it finally showed up.
So I took the interior back out and finished up the floors.
Here's before. Look at that old Second Skin Damplifier. Before they switched to black!
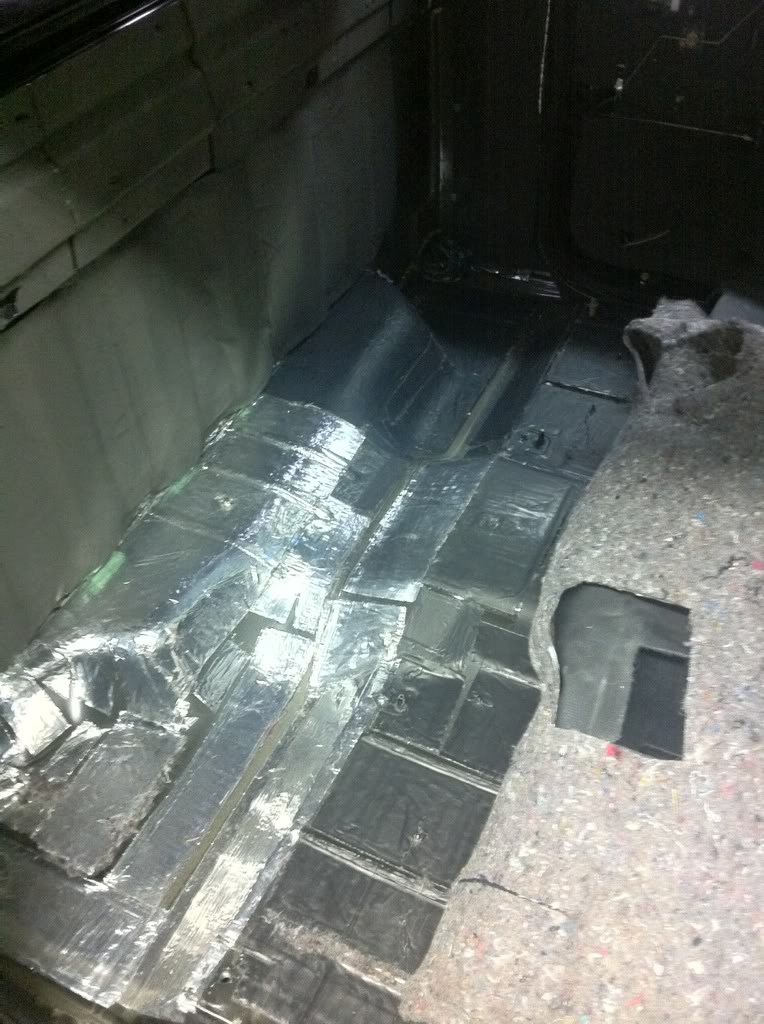
The rear half done.
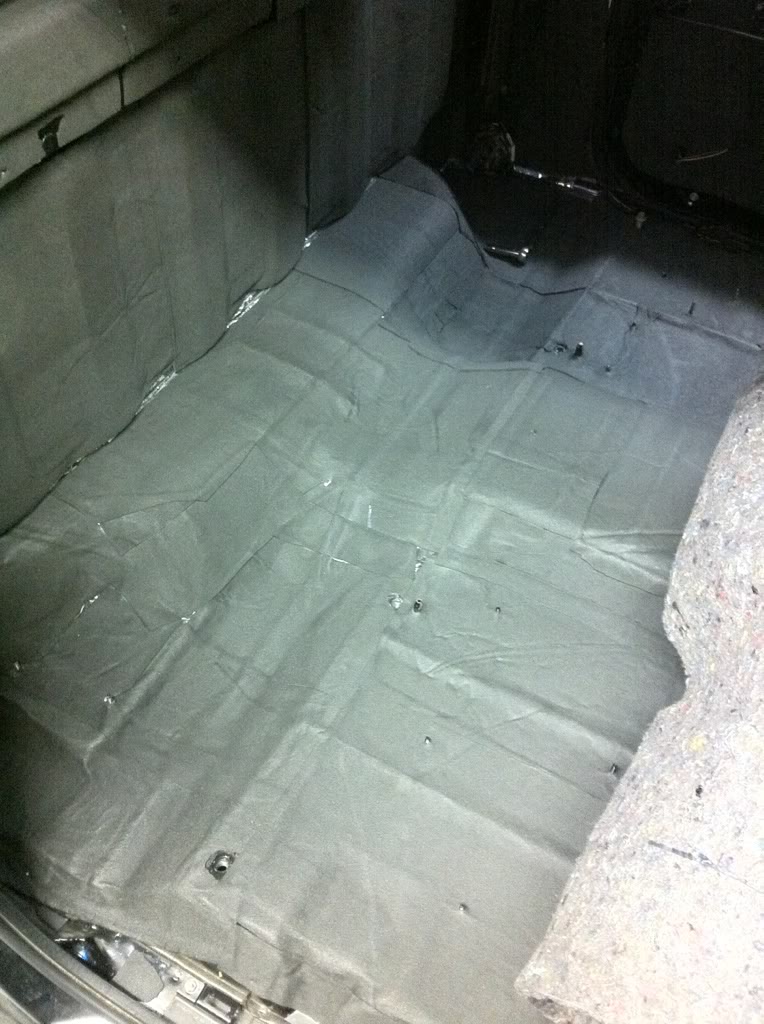
The front half done.
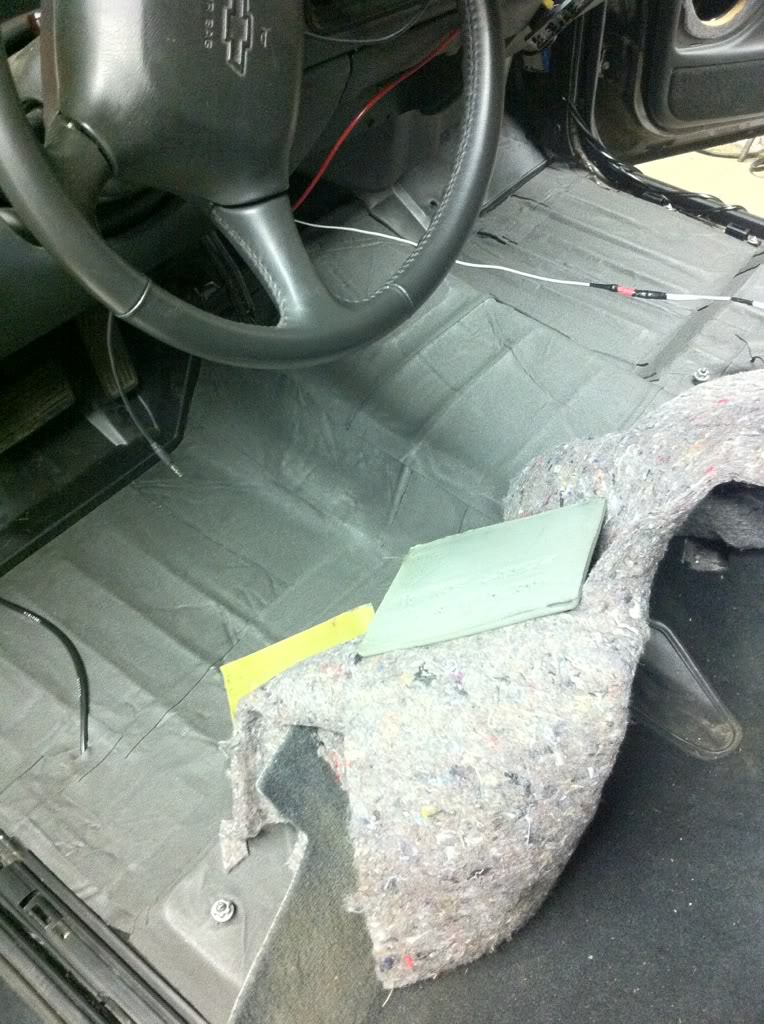
This would be the time where you would normally add mass loaded vinyl. Well, I couldn't find a supplier locally, and I don't feel like waiting or tearing the interior apart again.
What's weird, is my factory carpet really feels like mass loaded vinyl. I know it doesn't have the same mass, but it's strikingly similar! Basically, I'm calling this good enough.
I have a tiny bit left to do on the headliner and then deadening is done once and for all.
After that I'm going to finish the driver's side door panel install and wiring and then it's stereo gear install time!
Head unit: DRX9255
Processor: MS-8
Amplifiers: A/D/S PQ10
Sub Amp: Rockford Fosgate T500-1BD
I had previously ran out of the Ensolite foam. I ordered some more from raammat and it finally showed up.
So I took the interior back out and finished up the floors.
Here's before. Look at that old Second Skin Damplifier. Before they switched to black!
The rear half done.
The front half done.
This would be the time where you would normally add mass loaded vinyl. Well, I couldn't find a supplier locally, and I don't feel like waiting or tearing the interior apart again.
What's weird, is my factory carpet really feels like mass loaded vinyl. I know it doesn't have the same mass, but it's strikingly similar! Basically, I'm calling this good enough.
I have a tiny bit left to do on the headliner and then deadening is done once and for all.
After that I'm going to finish the driver's side door panel install and wiring and then it's stereo gear install time!
Head unit: DRX9255
Processor: MS-8
Amplifiers: A/D/S PQ10
Sub Amp: Rockford Fosgate T500-1BD
07-06-2012, 12:37 AM
#69
I finished up the installation of the closed cell foam on the roof. The deadening process is now 100% done!
I wired up and installed my IDMAX. It's a V3 D4, so I wired it for a 2 ohm load.
I drilled a hole and siliconed in the speaker wire. I don't like speaker terminals.
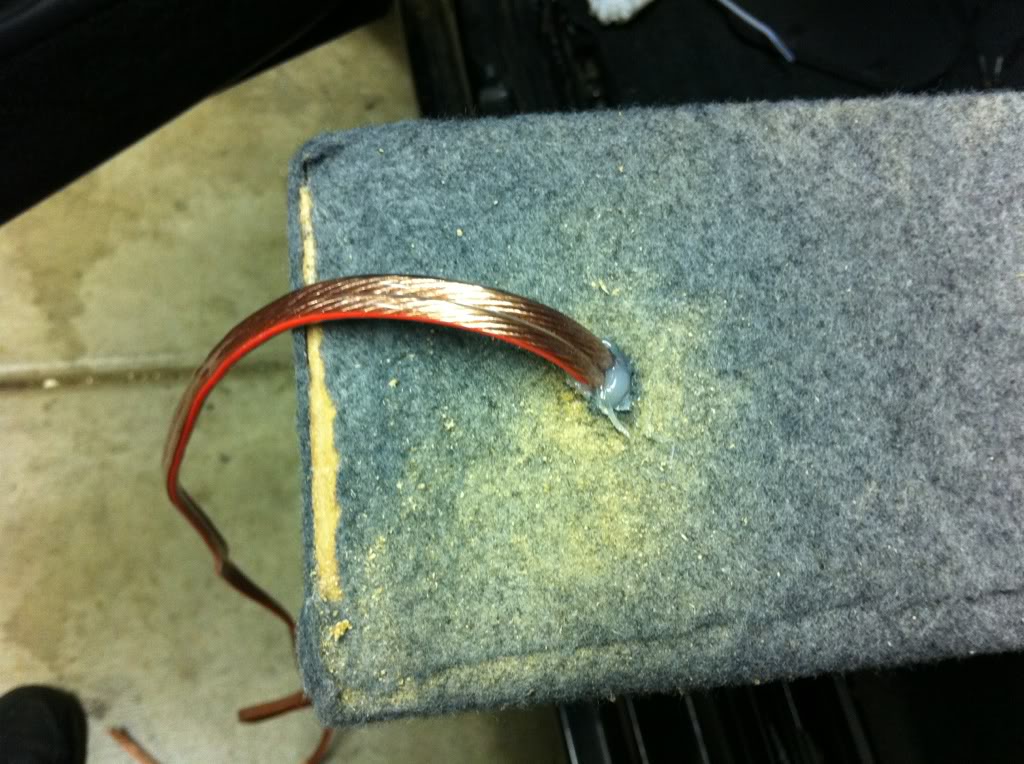
I wired up and installed my IDMAX. It's a V3 D4, so I wired it for a 2 ohm load.
I drilled a hole and siliconed in the speaker wire. I don't like speaker terminals.
07-07-2012, 04:14 PM
#70
I'm to the more boring part of the install now. I finished up a few things and started wiring.
The first thing I did was install my fancy-pants Die Hard Platinum battery.
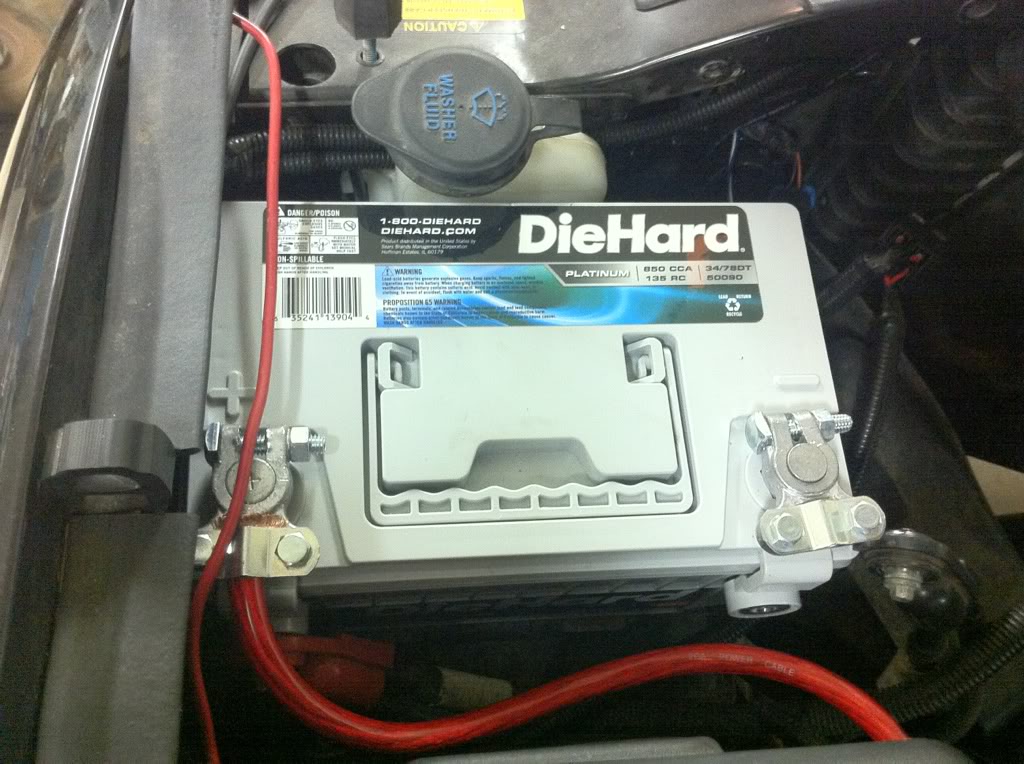
The Die Hard Platinum is a rebranded Odyssey. Sears had a 10% off 4th of July sale, so I bought one.
After that, I ran the main power wire that goes to the distribution block for the amplifiers. That's a 200 amp circuit breaker.
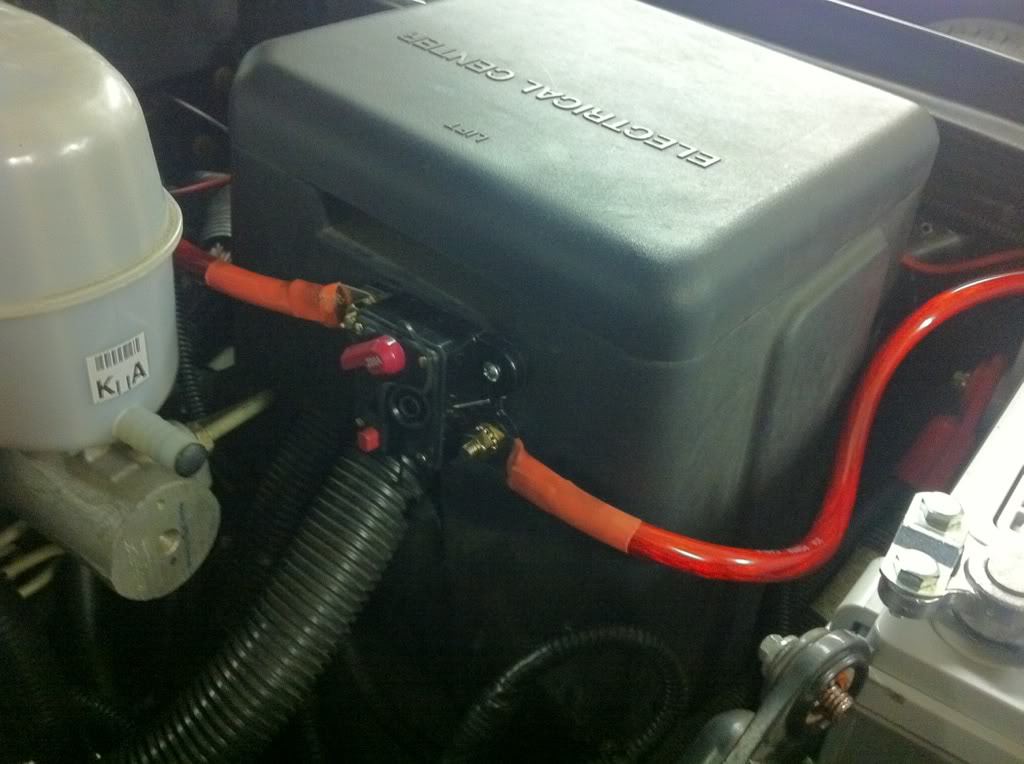
I used a piece of mdf to mount my distribution blocks down to. I'll post up a picture after everything is mounted down, and the wires are ran.
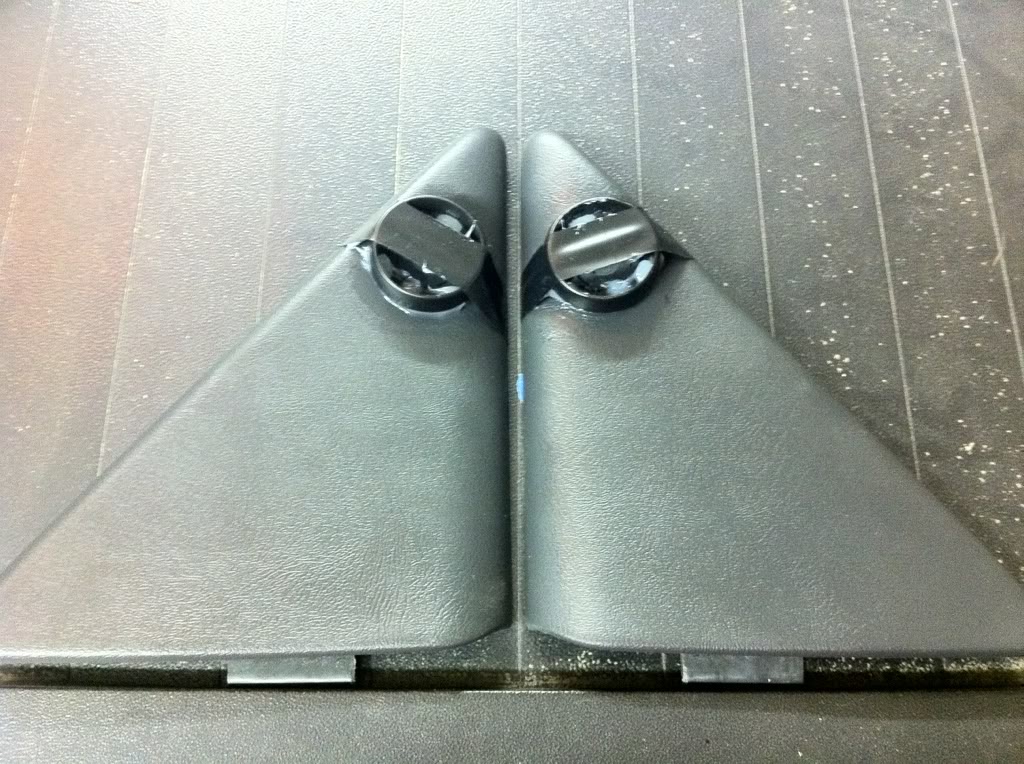
I started experimenting with mounting the tweeters. I bought my Boston Acoustics used and the tweeters didn't come with surface or flush mounts, only angle.
I started searching for information and what I gathered is these tweeters are designed to be mounted on axis. So I temporarily mounted what I had to my sail panels.
One other thing I found out was I have Boston Acoustics 6.43s, not 6.53s like I thought. From what I can tell, the main difference is the tweeter. The 6.43 has a titanium tweeter and the 6.53 has an aluminum tweeter.
Having previously ran the 6.53, and loving them, I'm wondering what I'll think of these.
The first thing I did was install my fancy-pants Die Hard Platinum battery.
The Die Hard Platinum is a rebranded Odyssey. Sears had a 10% off 4th of July sale, so I bought one.
After that, I ran the main power wire that goes to the distribution block for the amplifiers. That's a 200 amp circuit breaker.
I used a piece of mdf to mount my distribution blocks down to. I'll post up a picture after everything is mounted down, and the wires are ran.
I started experimenting with mounting the tweeters. I bought my Boston Acoustics used and the tweeters didn't come with surface or flush mounts, only angle.
I started searching for information and what I gathered is these tweeters are designed to be mounted on axis. So I temporarily mounted what I had to my sail panels.
One other thing I found out was I have Boston Acoustics 6.43s, not 6.53s like I thought. From what I can tell, the main difference is the tweeter. The 6.43 has a titanium tweeter and the 6.53 has an aluminum tweeter.
Having previously ran the 6.53, and loving them, I'm wondering what I'll think of these.