
2000 ecsb z71 build thread


 10-25-2013, 01:53 PM
#12
Staging Lane
Thread Starter
Join Date: Oct 2013
Posts: 83
Likes: 0
Received 0 Likes
on
0 Posts
 11-18-2013, 08:00 AM
#14
Staging Lane
Thread Starter
Join Date: Oct 2013
Posts: 83
Likes: 0
Received 0 Likes
on
0 Posts
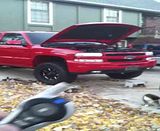
Got it in and running. holds 50psi oil pressure. still need to work out a few kinks before the tune. just glad to hear the junk yard motor running lol. This is my first motor swap, up before this the most I've ever gotten into a vehicle was changing a water pump.
vid is open headers. untuned.
vid is open headers. untuned.
11-18-2013, 11:43 AM
#15
TECH Apprentice

Join Date: Sep 2011
Location: college station, TX
Posts: 368
Likes: 0
Received 0 Likes
on
0 Posts
12-10-2013, 12:04 PM
#16
Staging Lane
Thread Starter
Join Date: Oct 2013
Posts: 83
Likes: 0
Received 0 Likes
on
0 Posts
A little update. Swap is done. Everything hooked up. Got a quick tune on it to get me by. Truck doesn't want to idle hot or cold. Still gotta address the following-
-Power steering is acting up. Have soft/hard spots in wheel. Might be a kink in the line or something, I never disconnected it on motor swap.
-AC compressor doesn't engage. Has a pin broke off. Need to fix or replace.
-Need to install new fuel pressure regulator. Could be my idle issue.
-Truck is throwing a P0200 injector circuit code. I didn't know the 5.3 injectors were different than a 6.0, so my 5.3 injectors were turned up a bit by my tuner. Have another set of 5.3 injectors to swap around, maybe a bad ground or loose connection. I don't know.
-Put on spark plug sleeves as a few lay on the headers.
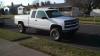
Pretty quick for what I'm used to. A turd compared to some of u guys. Need gears ASAP. This is still 3:73s on 33/12.50s.
-Power steering is acting up. Have soft/hard spots in wheel. Might be a kink in the line or something, I never disconnected it on motor swap.
-AC compressor doesn't engage. Has a pin broke off. Need to fix or replace.
-Need to install new fuel pressure regulator. Could be my idle issue.
-Truck is throwing a P0200 injector circuit code. I didn't know the 5.3 injectors were different than a 6.0, so my 5.3 injectors were turned up a bit by my tuner. Have another set of 5.3 injectors to swap around, maybe a bad ground or loose connection. I don't know.
-Put on spark plug sleeves as a few lay on the headers.
Pretty quick for what I'm used to. A turd compared to some of u guys. Need gears ASAP. This is still 3:73s on 33/12.50s.
12-29-2013, 11:09 AM
#17
Staging Lane
Thread Starter
Join Date: Oct 2013
Posts: 83
Likes: 0
Received 0 Likes
on
0 Posts
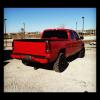
Fixed fuel pressure regulator. Fixed p0200 code. Was an injector wire slightly pulled out of the connector. Have a new 145a alternator and new power steering pump ready to go in. I also picked up a tbss intake. Also installed some lights yesterday. Rigid flush mount dually cubes (SKU:21211) for Christmas. They are the flood light pattern. I installed em yesterday so I figured I'd post a few pics. I don't have any pics of the wiring as I was running out of daylight. But I tapped them into the reverse lights and also ran them to a stand alone switch. So I can still turn them on to work behind the truck or **** off somebody behind me, but I don't have to flip the switch when I want them on in reverse.
Excuse the filthy truck. All the snow is melting and salt is everywhere.
Here's the before shot. I chose to mount them next to the license plate because I think it looks cleaner than spread out wide. I plan on getting more cubes or LEDs to mount under the rear at an angle to get light out wide. Dgaf about cutting holes in bumper, they're cheap to replace if I didn't like it.

First I removed the spare tire door and took it all out. I don't run a spare tire, only on long trips I toss one in the bed. I cleaned and taped the surface to help prevent paint chipping.

I traced the pattern on. I used a uni-bit or step-up bit to drill out the corners. I then took an exacto knife and traced my markings and cut into the paint to help avoid bad chipping. Not sure if this helped or not... Left you can see where I drilled, right you can see it cut out. The extra gouge on the right side is where the factory spare tire hole was. The light's border covers it.

Here's with both cut out and drilled. I measured many times before I cut. I tried to clean up the edges better but the cut off wheel I used was pretty big and bulky and it was tough to get it straight and perfect with the bumper pad there. Not worried about edges being perfectly straight, the lights cover it.

Had a lot of bare metal I didn't want to rust. So I taped it up and sprayed with Duplicolor perfect match spray paint. Paint is a very very close match. Once again not worried about seeing paint lines as it's all covered by the light's border, I just wanted to help prevent rust.

Here they are mounted up. Pic makes it appear a bit crooked but it's the rubber gasket poking out behind the light. I trimmed it after this pic.

Like I said I don't have any wiring pics as we were running out of daylight. Had to extend the wiring harness. Mounted the switch by the cup holder next to my Escort radar switch. Wiring is under the carpet and goes out where the e-brake does. No drilling holes in firewall or floor. Wires are ran inside the frame rails and secured with self tapping mounts and zip ties. Used butt connectors and heat shrink.


Here's the switch

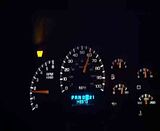
I also made a custom mount for my new Ultragauge. Got the gauge on a trade. Have no idea how to use it yet, I just made a mount while I was messing with the truck.

I think it turned out pretty well. Very happy with quality of kit. They are bright as ****. I'm gonna add some more under the truck pointed to the corners some day. But for now these will do.
Excuse the filthy truck. All the snow is melting and salt is everywhere.
Here's the before shot. I chose to mount them next to the license plate because I think it looks cleaner than spread out wide. I plan on getting more cubes or LEDs to mount under the rear at an angle to get light out wide. Dgaf about cutting holes in bumper, they're cheap to replace if I didn't like it.

First I removed the spare tire door and took it all out. I don't run a spare tire, only on long trips I toss one in the bed. I cleaned and taped the surface to help prevent paint chipping.

I traced the pattern on. I used a uni-bit or step-up bit to drill out the corners. I then took an exacto knife and traced my markings and cut into the paint to help avoid bad chipping. Not sure if this helped or not... Left you can see where I drilled, right you can see it cut out. The extra gouge on the right side is where the factory spare tire hole was. The light's border covers it.

Here's with both cut out and drilled. I measured many times before I cut. I tried to clean up the edges better but the cut off wheel I used was pretty big and bulky and it was tough to get it straight and perfect with the bumper pad there. Not worried about edges being perfectly straight, the lights cover it.

Had a lot of bare metal I didn't want to rust. So I taped it up and sprayed with Duplicolor perfect match spray paint. Paint is a very very close match. Once again not worried about seeing paint lines as it's all covered by the light's border, I just wanted to help prevent rust.

Here they are mounted up. Pic makes it appear a bit crooked but it's the rubber gasket poking out behind the light. I trimmed it after this pic.

Like I said I don't have any wiring pics as we were running out of daylight. Had to extend the wiring harness. Mounted the switch by the cup holder next to my Escort radar switch. Wiring is under the carpet and goes out where the e-brake does. No drilling holes in firewall or floor. Wires are ran inside the frame rails and secured with self tapping mounts and zip ties. Used butt connectors and heat shrink.


Here's the switch

I also made a custom mount for my new Ultragauge. Got the gauge on a trade. Have no idea how to use it yet, I just made a mount while I was messing with the truck.

I think it turned out pretty well. Very happy with quality of kit. They are bright as ****. I'm gonna add some more under the truck pointed to the corners some day. But for now these will do.
01-07-2014, 06:44 PM
#18
On The Tree

Join Date: May 2013
Location: Oklahoma
Posts: 117
Likes: 0
Received 0 Likes
on
0 Posts
What kind of gears did you end up puting in? im gonna have basically the same setup as you, already have the level and ordered the 1.5" BL, But im gonna get 305's soon, im thinkin bout gettin 4.56's, but what do you suggest?
03-10-2014, 09:16 AM
#19
Staging Lane
Thread Starter
Join Date: Oct 2013
Posts: 83
Likes: 0
Received 0 Likes
on
0 Posts
04-18-2014, 01:04 PM
#20
Staging Lane
Join Date: Dec 2013
Location: Spokane WA
Posts: 64
Likes: 0
Received 0 Likes
on
0 Posts
Sub'd!
Gorgeous truck. badass to see it evolve over time. how is the 6.0 doing?
Im putting in LQ4 in my 98 when i get home from afganistan.
waiting in my garage already
Gorgeous truck. badass to see it evolve over time. how is the 6.0 doing?
Im putting in LQ4 in my 98 when i get home from afganistan.
waiting in my garage already