
2000 Silverado Frame Restoration
 09-05-2012, 08:13 PM
#1
Teching In
Thread Starter

Join Date: Sep 2012
Posts: 5
Likes: 0
Received 0 Likes
on
0 Posts
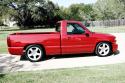
Hey,[INDENT]So if you are here because you saw my thread on the new members page, thanks for following me, and if this is your first time, then thanks for viewing. So I guess I will start over; this is the truck when my dad first brought it home from the dealership that he works at.

Good lookin for a 2000 Right???
So then you would think, how can this truck have a rotted frame when it is in this good of shape? Well I can't answer that, however I can show you the frame in its sad state.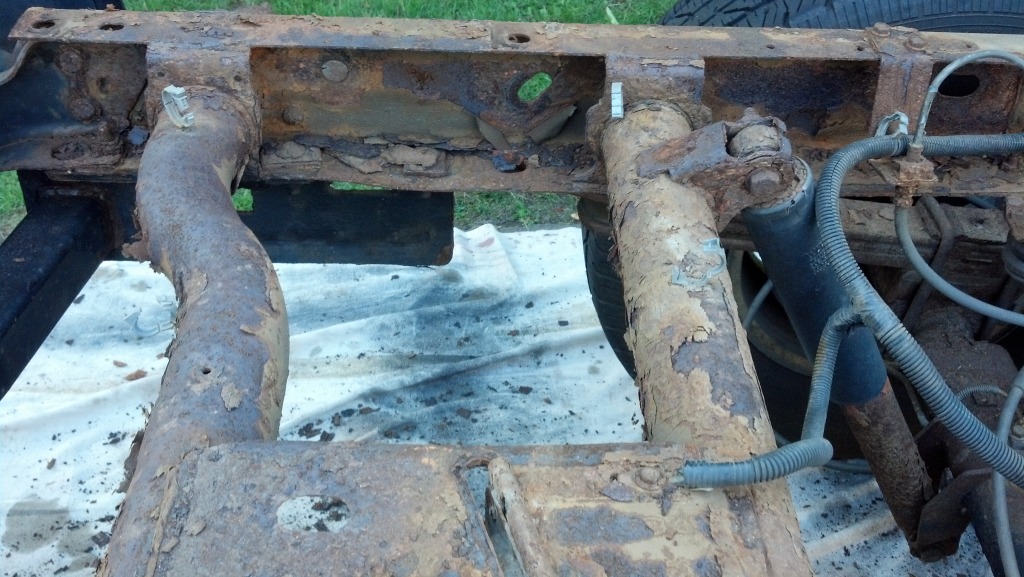
Since we got the truck my dad and I have taken to restoring it to what it once was. The plan was to remove surface rust which you see here.

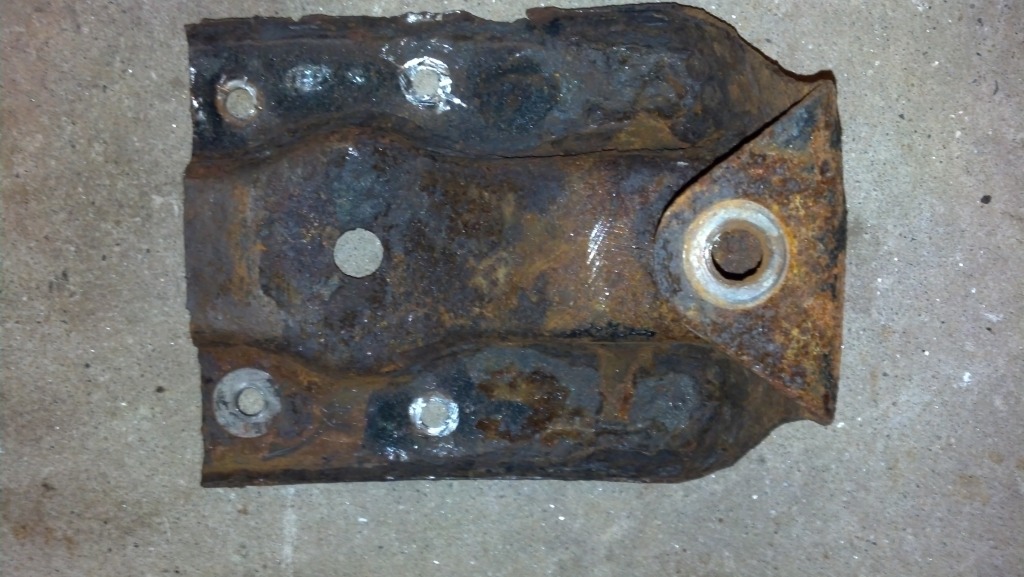
This is after some of the rust has been removed. We soon realized that some parts on the frame needed to be replaced like the leaf spring brackets.
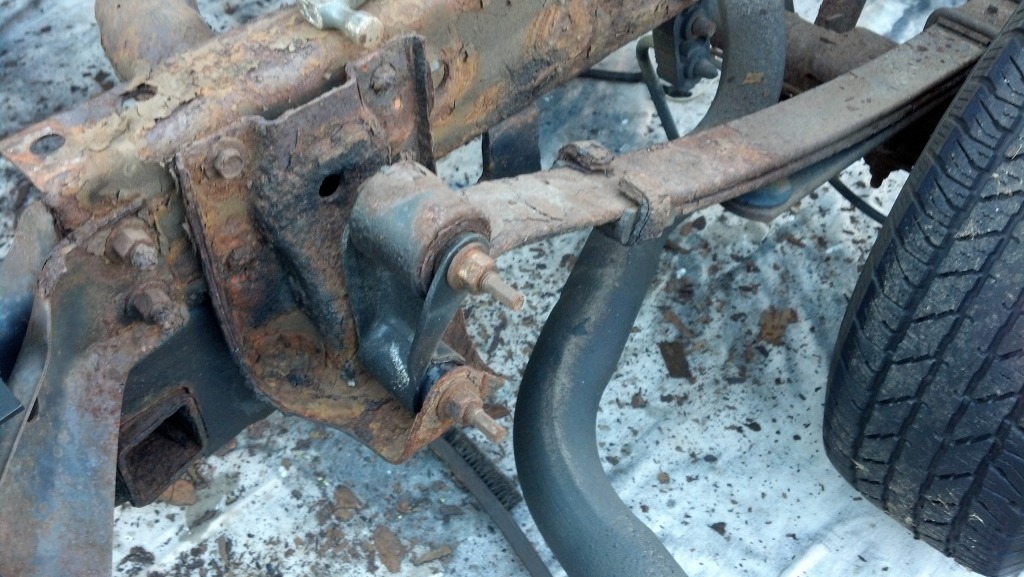
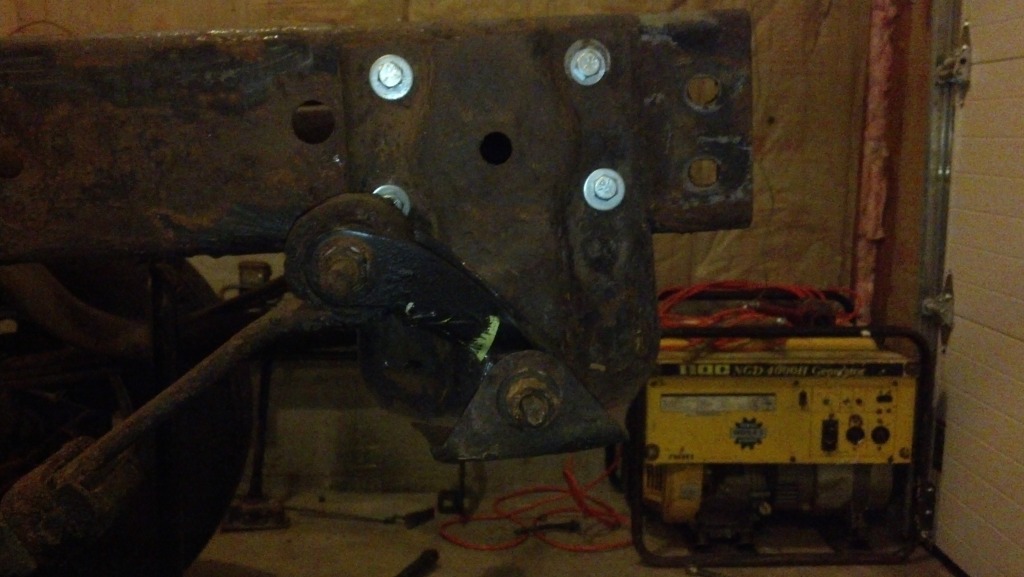
You might not be able to tell from that side, but they are shot! And not sure if any of you know but these brackets are priced at the ungodly amount of over $100 a side!!! That's my dads employee cost!! We have since found some cheaper ones online for $80 a pair, stupid GM markup... Thankfully the previous owner replaced the shackles so we don't have to worry about those. A few nights ago we got the bumper off, and last night the trailer hitch which is in surprisingly good shape compared to the rest of the frame.
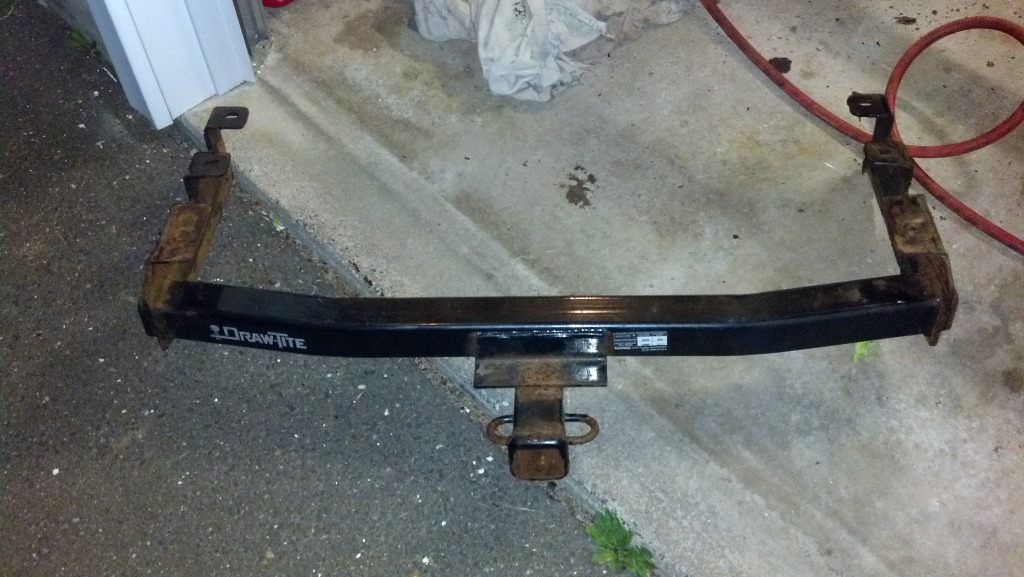
Some of the cross members of the frame look a bit iffy, so the trailer hitch will hopefully keep everything together rock solid.
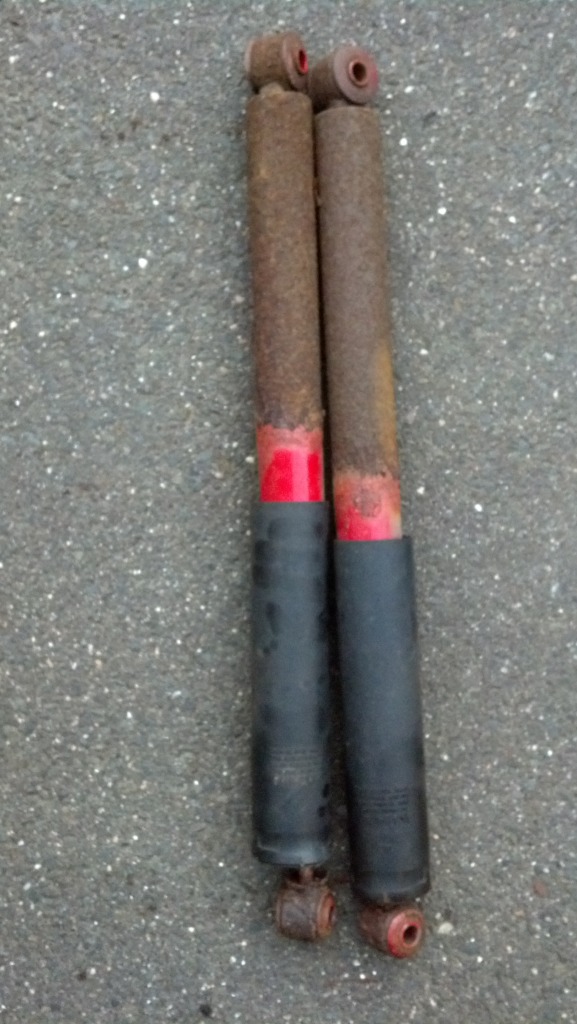
Tonight we took on the task of removing the shocks when we realized that the shock tower mounts are paper thin, and kind of scary...

We searched but could not find these parts (probably because they are welded to the frame) so we are devising a way to strengthen them by welding other reinforcements on. Suggestions appreciated. The shocks need replacing, not because of their function, but the rust has worn them down.
We plan on cheaply replacing them, because when I salvage enough money to purchase my rough country lift kit, it will come with some nice shocks, but that could be a year from now. We also removed the fuel pump ground from where the spare holder thingy was. What a B@#ch!!! man! Long story short I ended up snapping the bolt and we had to heat up the nut with a blow torch, and use vice grips to get it out. That's all for now, but tomorrow my dad is borrowing a sand blaster from a friend at work. With it I hope to get into all of the nooks and crannies that I can not reach with a hammer and a chisel. I will post how that goes tomorrow! C Ya!
Back, tonight we took off the leaf spring brackets!
This one is not so bad, but the other one is messed up on the bottom. What we decided to do was cut off the rivets and replace them with some bolts that we can take off easily when we get the new brackets. It was easier to lose the rivets now then when the bed is back on.
That's really all that we had time for today, we messed around with that sand blaster that my dad got from his friend, and it kept getting clogged. So we bought a cheap one from Sears for $60 not expecting much, but it didn't work for S#!T Not sure why could have been our compressor not being strong enough, only a 2 horse... Also could have been us using play sand... we are going to try and buy some finer sand specifically for sand blasting tomorrow. That's all for now hopefully I can get to the POR15 by next week!! Anxious to drive again!
Well I'm excited, I got the sand blaster working after reading numerous posts that people were complaining about the same problem that I had. Turns out I had to move out the ceramic tip because if it is pushed too far in, then it clogs the nozzle.
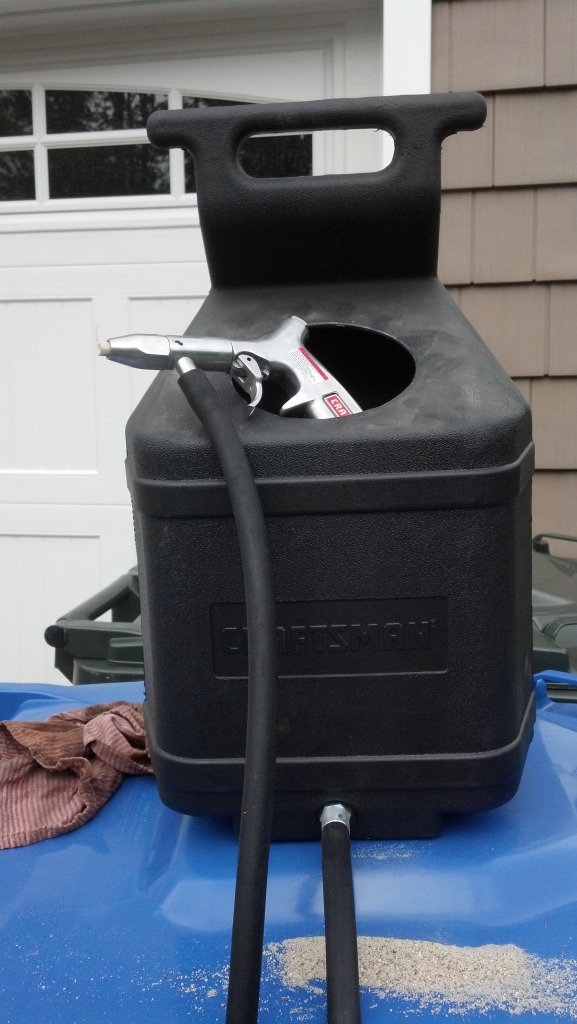
Ya might be able to see from that pic. I was also able to use the play sand as well; this is also good because the play sand is only $2.50 a 50 lb bag or something like that, whereas the media sand is $22 a 100 lb bag. Hopefully if all goes well today, and we get most of the frame done. Looks like it will rain though...
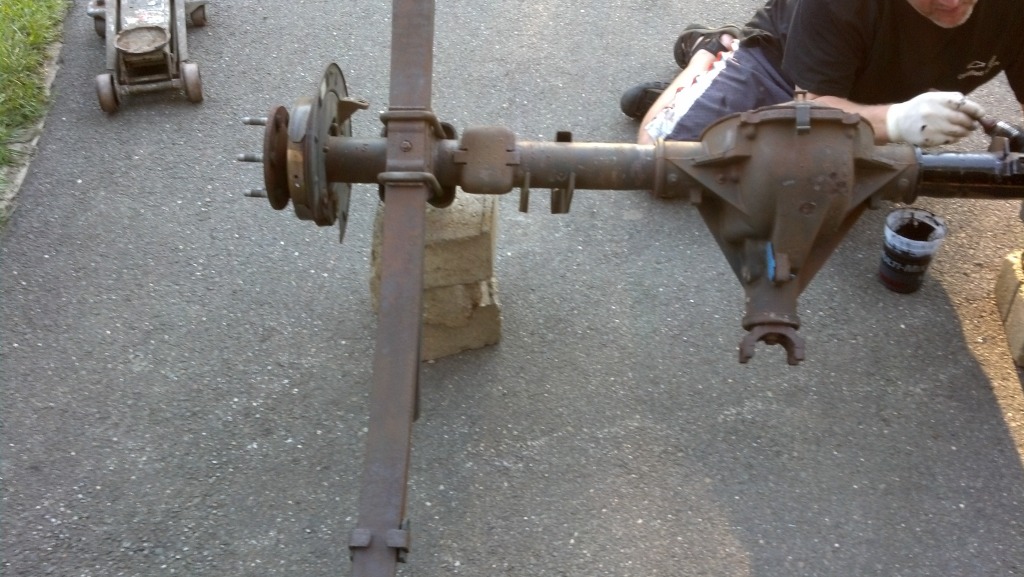
Good God did it rain! I was able to get most of the blasting done that I wanted to though. We ended up stripping the rest of the rear end apart.
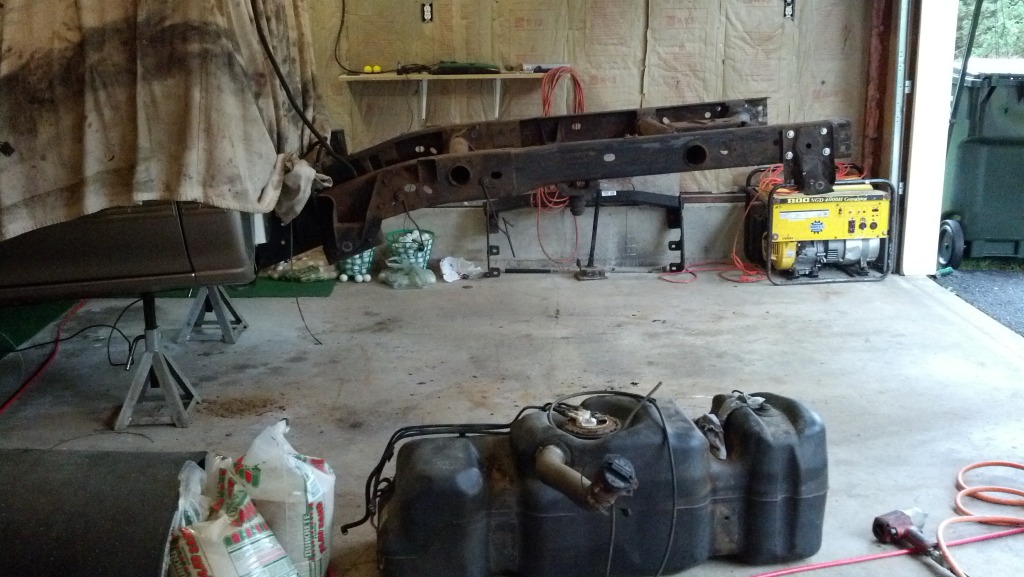
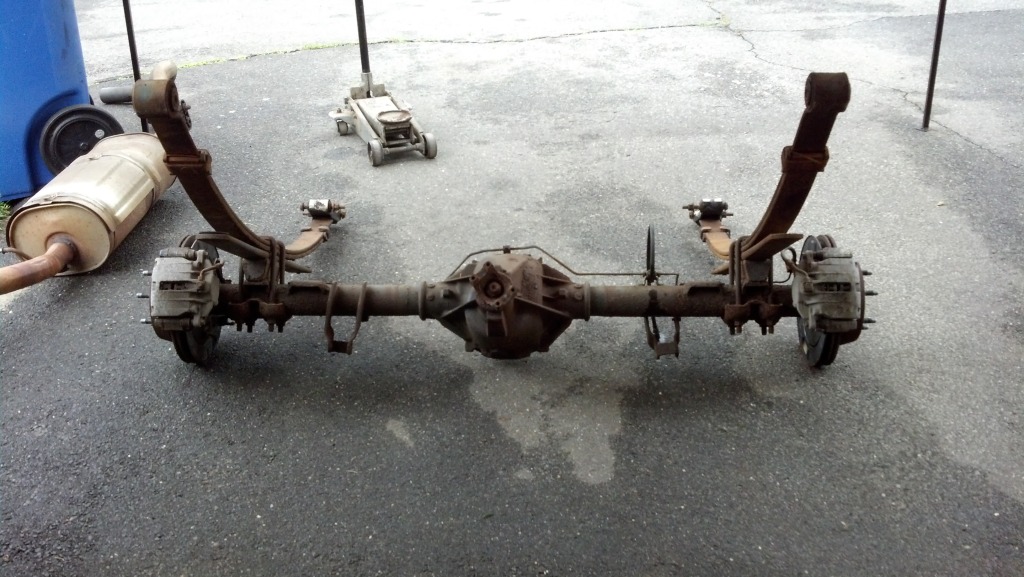
The truck looks naked! In the process of removing the tank that you see there we ruptured the rusted fuel lines, so its going to be a while before this truck goes anywhere. Which is disappointing because that is a $200 job. Anyway, I blasted the drive shaft as well as the rear axle and leaf springs. It really looks great, cant wait to get some paint on them. By the way these are pictures before I hit them with the sandblaster.
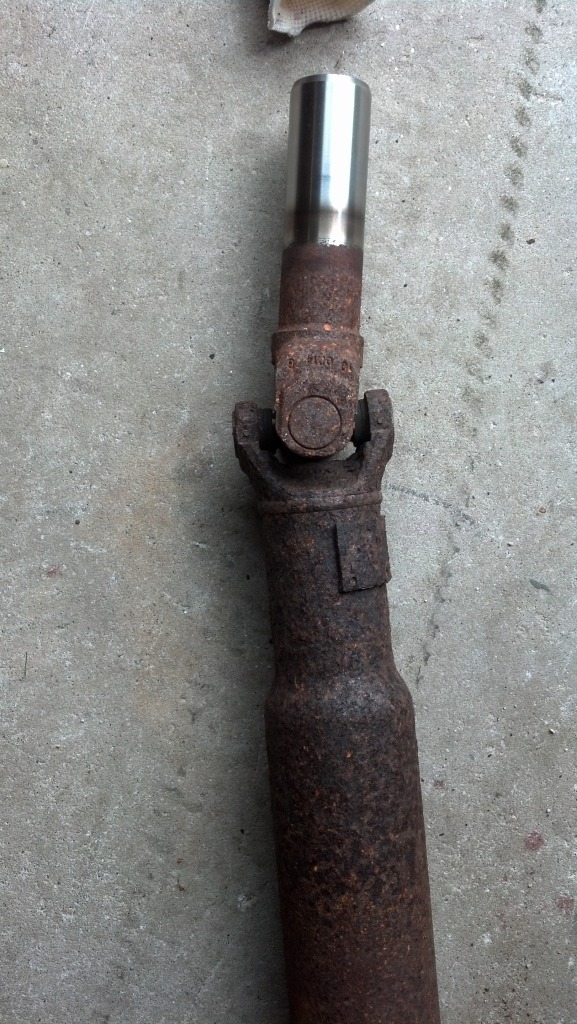
Will only do a light coat on the drive shaft as not to throw it out of balance, cant be any worse than the way it is now with all the rust on it lol.
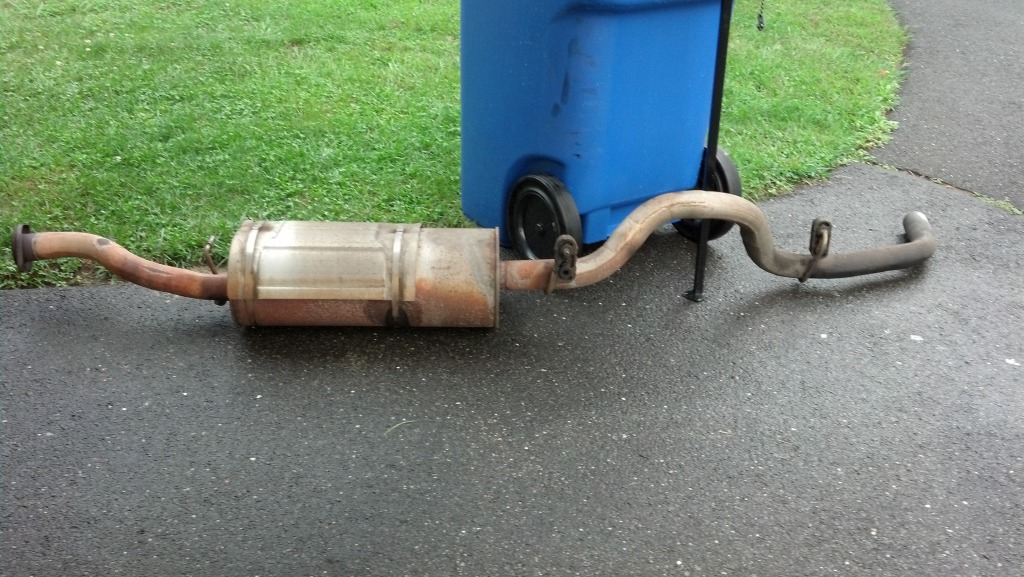
Exhaust system came out too, not after also snapping the bolts off of it!
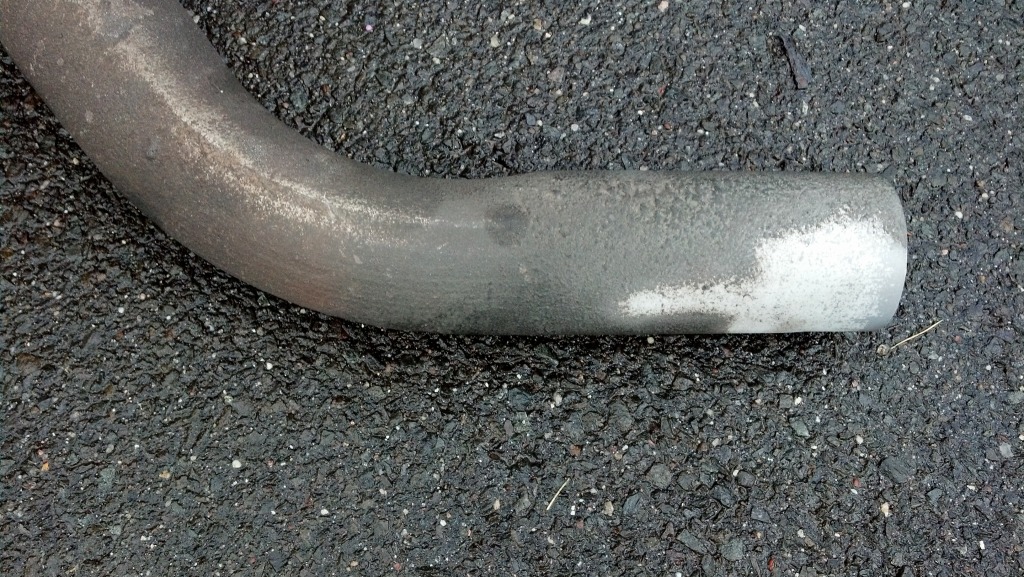
Started to sandblast, that was coming out good, probably going to prime and paint a gloss black or something until I am able to put an exhaust system in it.
Also started blasting the calipers and brackets, going to prime and paint them hopefully a nice flashy color. Either a red to match the Z71 sticker, or a black. Let me know not sure which... I will post pictures of all of those things tomorrow though.
Well homework has been kicking my a$$ lol but I have a few things for ya. This is the removed rear axle and leaf springs before and after POR15.
I mean really it looked pretty crappy, but what about now????
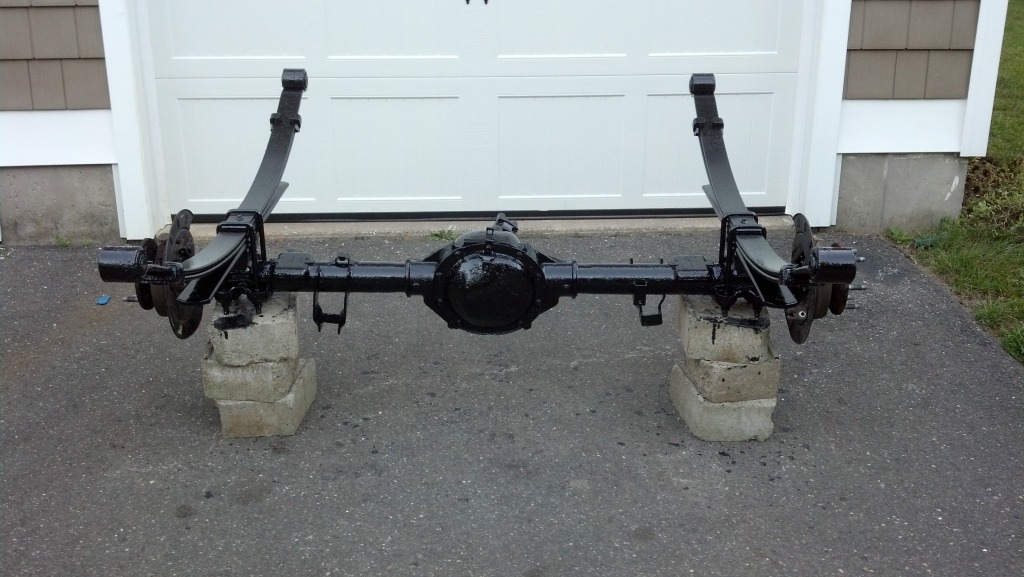
Looks like literally new! This is after it dried too. Not so sure about the gloss, but its tough as nails so far.
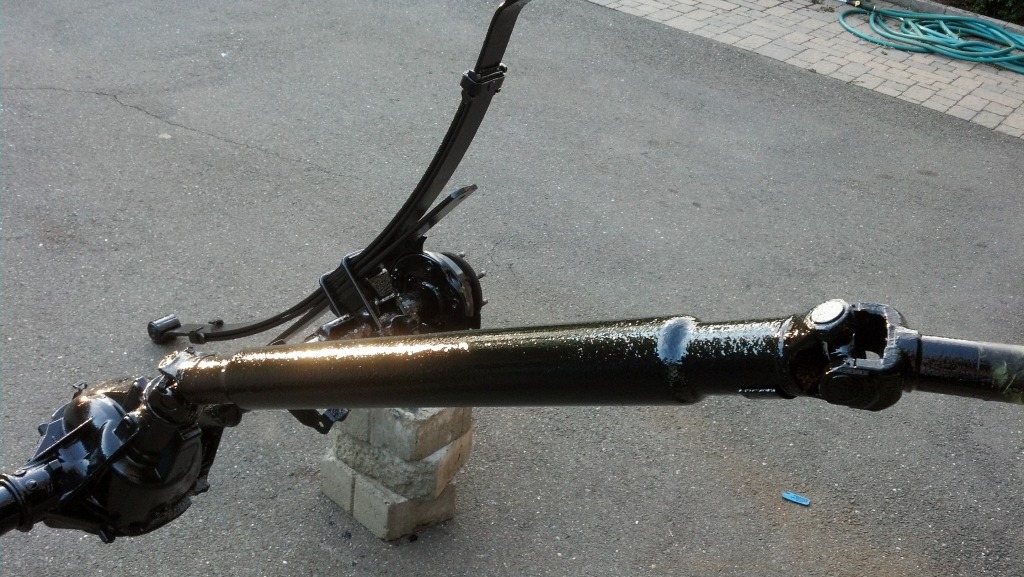
That's one with the drive shaft on it as well. I was blasting the calipers tonight when it crapped out!! Pissed, we will return it tomorrow. But I got some done, it went from this...
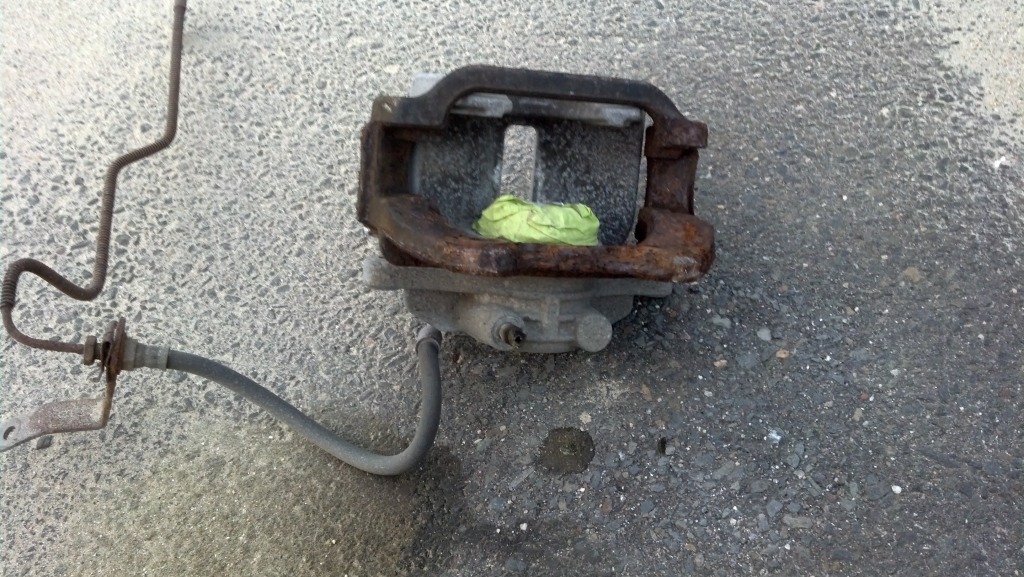
To this.
Sick right!! It really does a good job, when it's working well. Going to get them finished, and paint the brackets black, and the calipers are getting some gloss red. That's all for now.
Good lookin for a 2000 Right???
So then you would think, how can this truck have a rotted frame when it is in this good of shape? Well I can't answer that, however I can show you the frame in its sad state.
Since we got the truck my dad and I have taken to restoring it to what it once was. The plan was to remove surface rust which you see here.
This is after some of the rust has been removed. We soon realized that some parts on the frame needed to be replaced like the leaf spring brackets.
You might not be able to tell from that side, but they are shot! And not sure if any of you know but these brackets are priced at the ungodly amount of over $100 a side!!! That's my dads employee cost!! We have since found some cheaper ones online for $80 a pair, stupid GM markup... Thankfully the previous owner replaced the shackles so we don't have to worry about those. A few nights ago we got the bumper off, and last night the trailer hitch which is in surprisingly good shape compared to the rest of the frame.
Some of the cross members of the frame look a bit iffy, so the trailer hitch will hopefully keep everything together rock solid.
Tonight we took on the task of removing the shocks when we realized that the shock tower mounts are paper thin, and kind of scary...
We searched but could not find these parts (probably because they are welded to the frame) so we are devising a way to strengthen them by welding other reinforcements on. Suggestions appreciated. The shocks need replacing, not because of their function, but the rust has worn them down.
We plan on cheaply replacing them, because when I salvage enough money to purchase my rough country lift kit, it will come with some nice shocks, but that could be a year from now. We also removed the fuel pump ground from where the spare holder thingy was. What a B@#ch!!! man! Long story short I ended up snapping the bolt and we had to heat up the nut with a blow torch, and use vice grips to get it out. That's all for now, but tomorrow my dad is borrowing a sand blaster from a friend at work. With it I hope to get into all of the nooks and crannies that I can not reach with a hammer and a chisel. I will post how that goes tomorrow! C Ya!
Back, tonight we took off the leaf spring brackets!
This one is not so bad, but the other one is messed up on the bottom. What we decided to do was cut off the rivets and replace them with some bolts that we can take off easily when we get the new brackets. It was easier to lose the rivets now then when the bed is back on.
That's really all that we had time for today, we messed around with that sand blaster that my dad got from his friend, and it kept getting clogged. So we bought a cheap one from Sears for $60 not expecting much, but it didn't work for S#!T Not sure why could have been our compressor not being strong enough, only a 2 horse... Also could have been us using play sand... we are going to try and buy some finer sand specifically for sand blasting tomorrow. That's all for now hopefully I can get to the POR15 by next week!! Anxious to drive again!
Well I'm excited, I got the sand blaster working after reading numerous posts that people were complaining about the same problem that I had. Turns out I had to move out the ceramic tip because if it is pushed too far in, then it clogs the nozzle.
Ya might be able to see from that pic. I was also able to use the play sand as well; this is also good because the play sand is only $2.50 a 50 lb bag or something like that, whereas the media sand is $22 a 100 lb bag. Hopefully if all goes well today, and we get most of the frame done. Looks like it will rain though...
Good God did it rain! I was able to get most of the blasting done that I wanted to though. We ended up stripping the rest of the rear end apart.
The truck looks naked! In the process of removing the tank that you see there we ruptured the rusted fuel lines, so its going to be a while before this truck goes anywhere. Which is disappointing because that is a $200 job. Anyway, I blasted the drive shaft as well as the rear axle and leaf springs. It really looks great, cant wait to get some paint on them. By the way these are pictures before I hit them with the sandblaster.
Will only do a light coat on the drive shaft as not to throw it out of balance, cant be any worse than the way it is now with all the rust on it lol.
Exhaust system came out too, not after also snapping the bolts off of it!
Started to sandblast, that was coming out good, probably going to prime and paint a gloss black or something until I am able to put an exhaust system in it.
Also started blasting the calipers and brackets, going to prime and paint them hopefully a nice flashy color. Either a red to match the Z71 sticker, or a black. Let me know not sure which... I will post pictures of all of those things tomorrow though.
Well homework has been kicking my a$$ lol but I have a few things for ya. This is the removed rear axle and leaf springs before and after POR15.
I mean really it looked pretty crappy, but what about now????
Looks like literally new! This is after it dried too. Not so sure about the gloss, but its tough as nails so far.
That's one with the drive shaft on it as well. I was blasting the calipers tonight when it crapped out!! Pissed, we will return it tomorrow. But I got some done, it went from this...
To this.
Sick right!! It really does a good job, when it's working well. Going to get them finished, and paint the brackets black, and the calipers are getting some gloss red. That's all for now.
Last edited by mxrrider; 09-13-2012 at 07:56 PM.
 09-05-2012, 10:43 PM
#2
TECH Apprentice

Join Date: Sep 2011
Location: college station, TX
Posts: 368
Likes: 0
Received 0 Likes
on
0 Posts
i seriously advise you not to buy rough country lift. ive seen these lifts break countless mounts of times. if you really plan on lifting it buy a good lift.
09-06-2012, 05:24 AM
#3
Teching In
Thread Starter
Join Date: Sep 2012
Posts: 5
Likes: 0
Received 0 Likes
on
0 Posts
Hey thanks for your input. The reason that I was considering purchasing a rough country lift is because of the price tag. If you know of any 3-4" suspension lifts that are in the same price range I would be thankful.
09-06-2012, 06:03 AM
#4

I don't know prices but BDs lifts are lower cost and very well built.
Wow, That frame is crazy! I thought my undercarages were rusty! Mine is not rotted through cancer though! Where do you live?
Wow, That frame is crazy! I thought my undercarages were rusty! Mine is not rotted through cancer though! Where do you live?
09-06-2012, 05:45 PM
#5
Teching In
Thread Starter
Join Date: Sep 2012
Posts: 5
Likes: 0
Received 0 Likes
on
0 Posts
Yeah I will check those out. Haha the frame is pretty bad right? I live in CT. Damn the northeast all the salt that they put on the road!
09-06-2012, 07:04 PM
#6
On The Tree

Join Date: Jul 2004
Location: MT
Posts: 106
Likes: 0
Received 0 Likes
on
0 Posts
Would have been easier to just swap out a good frame.
I hate rust. I dont know what they put in your salt but my 88 barely has any surface rust and I only washed it 1 or 2 times a year.
I hate rust. I dont know what they put in your salt but my 88 barely has any surface rust and I only washed it 1 or 2 times a year.

Trending Topics
09-19-2012, 08:49 PM
#8
Teching In
Thread Starter
Join Date: Sep 2012
Posts: 5
Likes: 0
Received 0 Likes
on
0 Posts
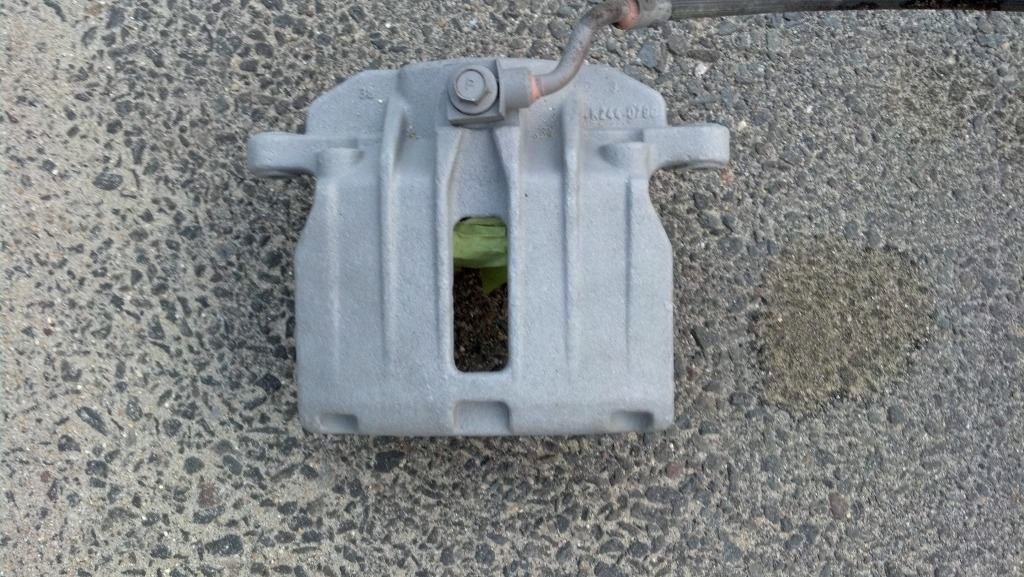
Well it's been a while since posting, that's because I've been busy with the truck, and school. While that picture is still fresh in your mind I will show you the finished caliper and bracket.
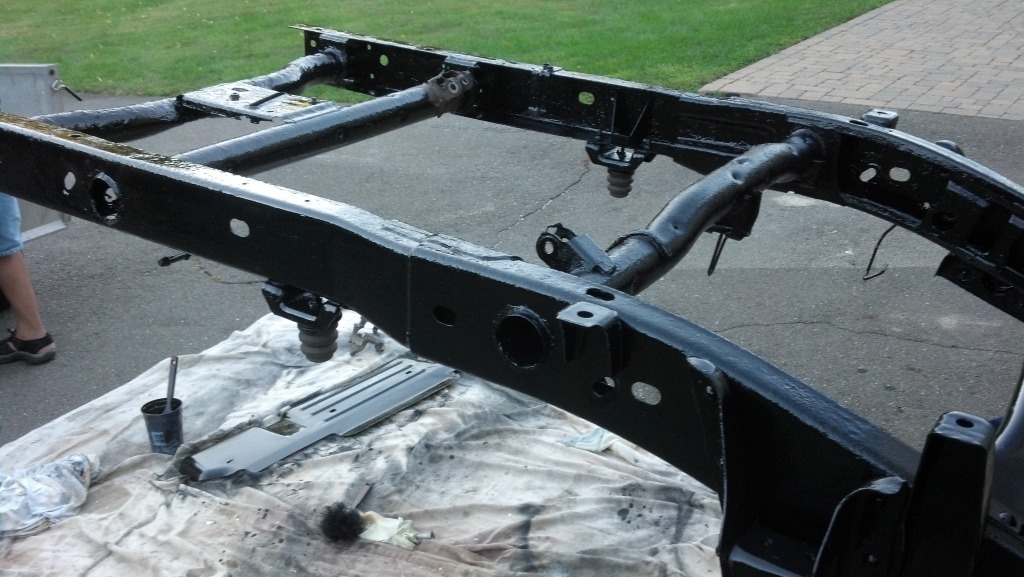
came out great! We got the frame finished looks amazing, and it looks like it adhered well, and that all of the prep work that we did payed off.
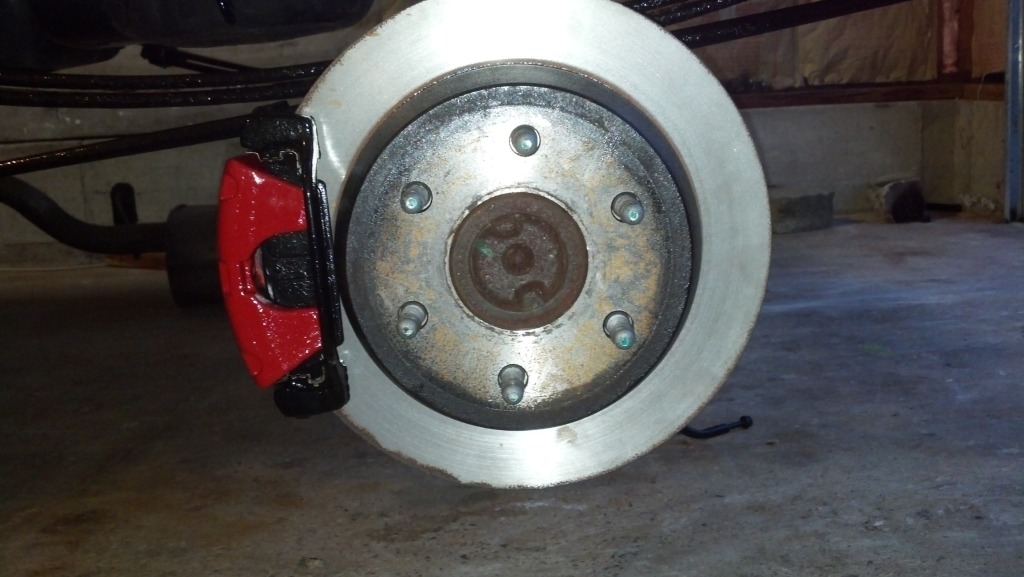
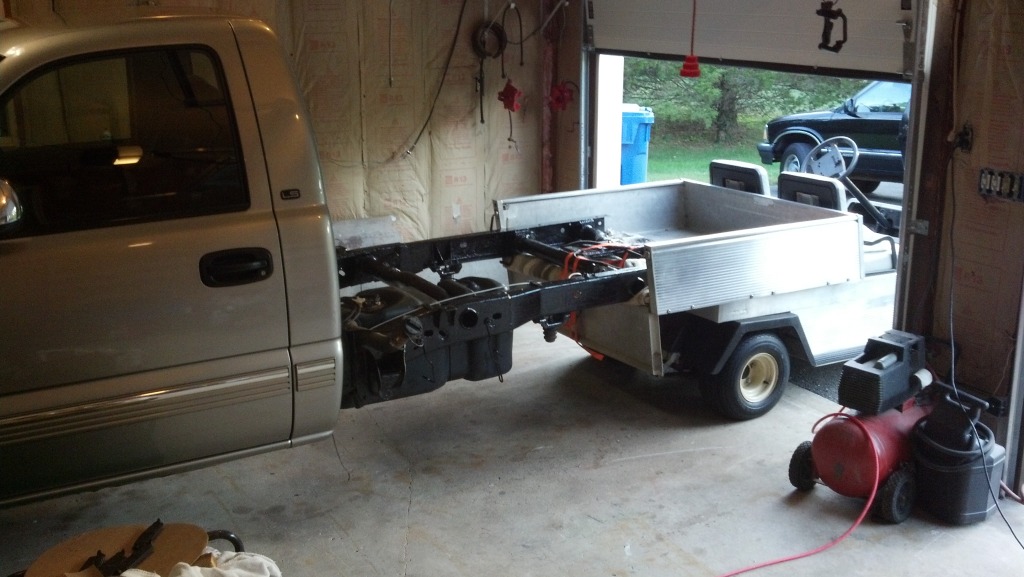
Dad and I ran all new brake lines in the rear, and they were bent perfectly, just like the factory. I will post pictures soon. I painted it with a stainless steel paint, and it looks great, hopefully it will extend the life of them a little also. The contrast of them and the black rear axle is great. Hah on a side note this is the way that we have been getting it in and out of the garage with no rear axle or drive shaft in it lol! This is no ordinary golf cart.
That's all for now.
came out great! We got the frame finished looks amazing, and it looks like it adhered well, and that all of the prep work that we did payed off.
Dad and I ran all new brake lines in the rear, and they were bent perfectly, just like the factory. I will post pictures soon. I painted it with a stainless steel paint, and it looks great, hopefully it will extend the life of them a little also. The contrast of them and the black rear axle is great. Hah on a side note this is the way that we have been getting it in and out of the garage with no rear axle or drive shaft in it lol! This is no ordinary golf cart.
That's all for now.
 09-20-2012, 06:38 PM
#10
Launching!
iTrader: (5)
Join Date: Nov 2010
Location: Coldspring, TX.
Posts: 212
Likes: 0
Received 0 Likes
on
0 Posts
Doing a good job and looks good. I've been working a frame off resto on a 99 for quite some time. Just about finished. Have fun. It's funny, at one point you'll be able to say you literally know every nut and bolt on the truck.