
72 Ford onto 2002 F150 chassis
 12-13-2012, 12:33 AM
#91
Staging Lane
Thread Starter

Join Date: Nov 2011
Location: Washington
Posts: 55
Likes: 0
Received 0 Likes
on
0 Posts
I really like the time and energy going in to this build man. Looking really good.
I never read the whole thread, but wanted to say at 2 pages in, that you've done some incredible work on making this look very effortless.
I'm really enjoying how all these parts are coming together without that much trouble. The only big modifications were done for your own aesthetic purposes.
I will read the rest later
I'm really enjoying how all these parts are coming together without that much trouble. The only big modifications were done for your own aesthetic purposes.
I will read the rest later
Yes my writing has improved and posting the pic's is really hard so I'm glad you like the work so far.....lol Sorry just had to. Some times it feels that way, posting everything is more work than the truck.
i love the use of heavy machinery to remove the cab lol classic !
Well been working on the truck but ran into some problems getting things to line up, so I had to blow the front end apart again. The radiator core support isn't lining up with everything else. I marked where the mounts should be with everything bolted to it and lined up but it still isn't working out, my holes I drilled didn't end up right at all. (to far forward). So I had to stop and think this one out before doing any more fab work. The frame rails are different sizes from side to side and the driver side sit a 1/4" lower. Spacers will work to make up the difference but still need to get the mounts in the right spot. I have a plan to fix it so hope to have more pic's soon.

 12-19-2012, 05:10 PM
#93
Staging Lane
Thread Starter
Join Date: Nov 2011
Location: Washington
Posts: 55
Likes: 0
Received 0 Likes
on
0 Posts
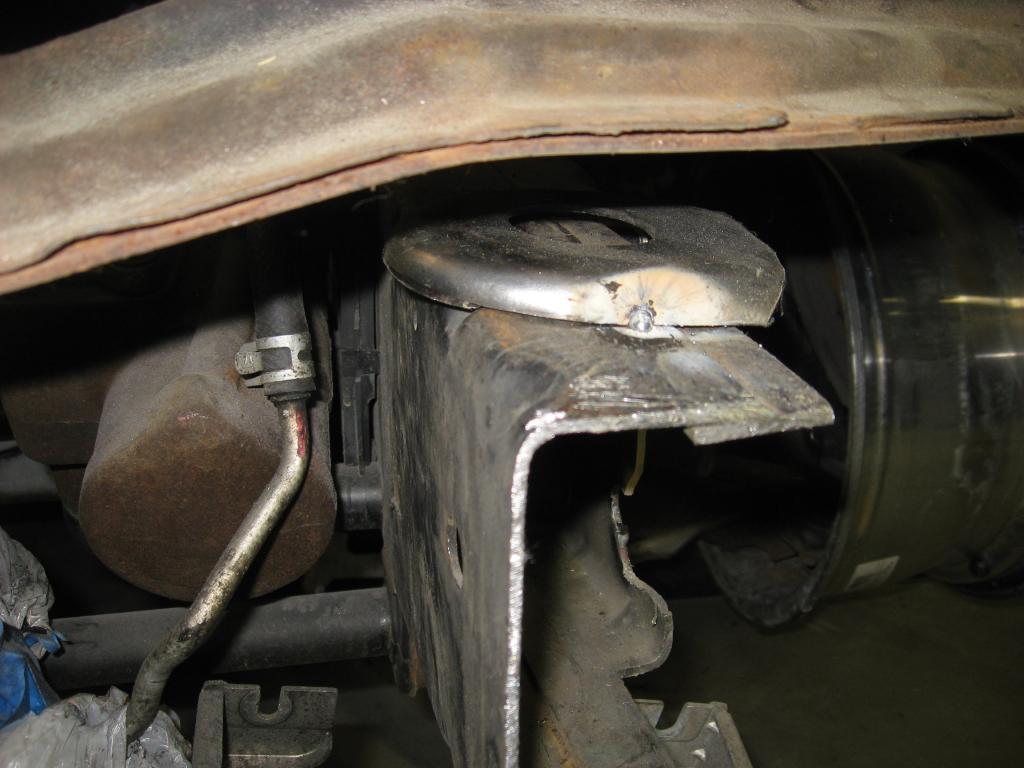
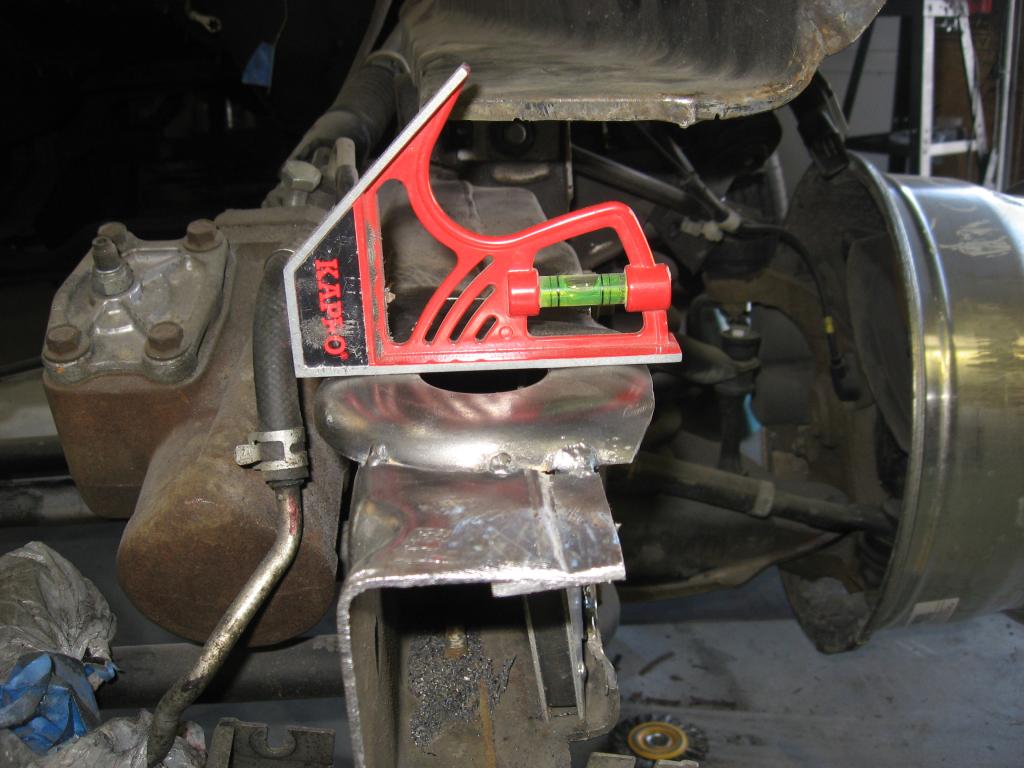
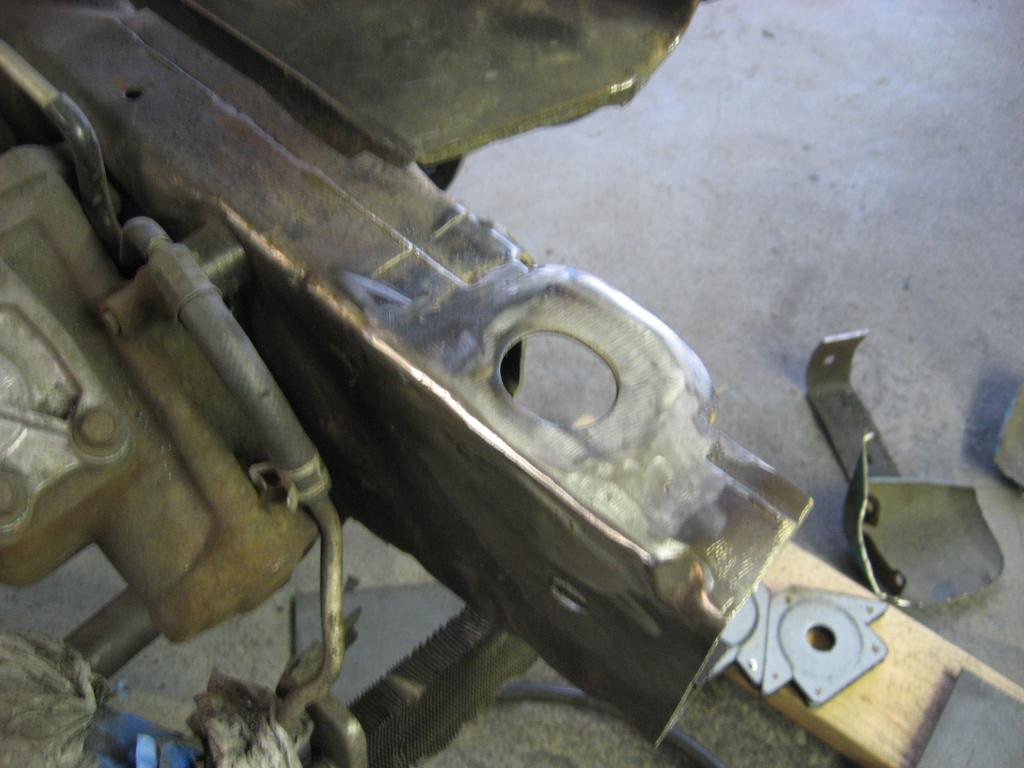
Ok, so after a lot longer than I wanted I finally have the radiator core support done, as you can see from the pic's the first round hole I drilled didn't line up to well and you can really see it looking down through the bolt holes. Still not sure how I got it so far off.


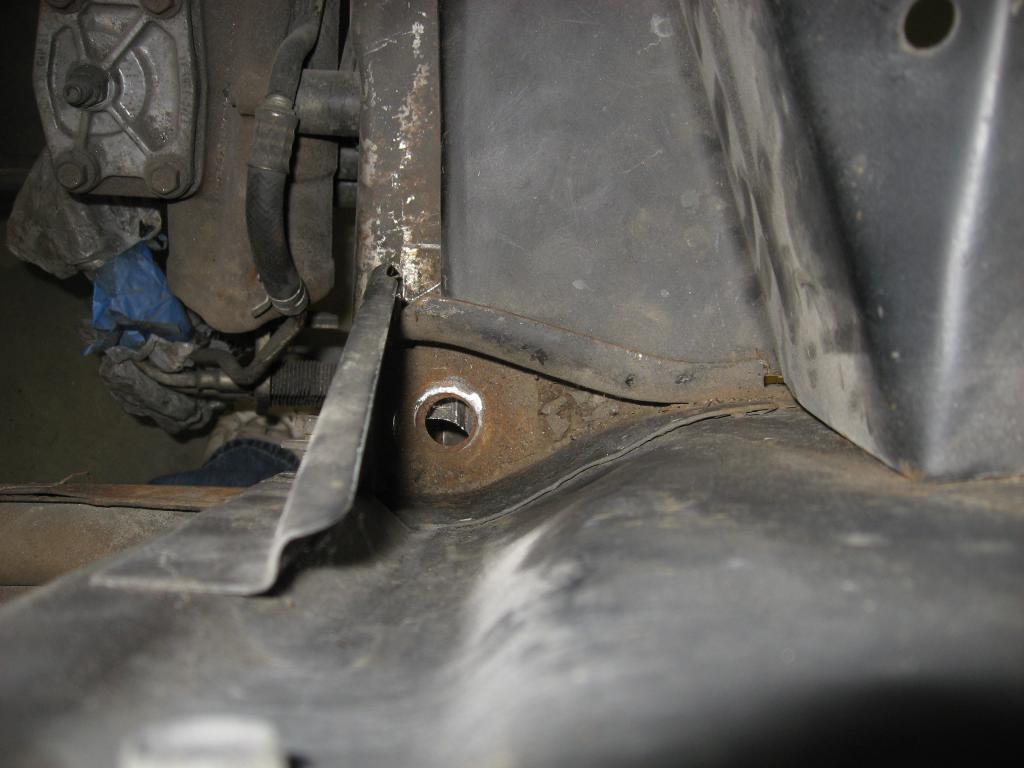
I leveled the frame to the shop floor and took some measurements. With the front end all lined up and bolted together you can see that the bottom of the radiator core support is at 26" on both sides but the top of the drivers side frame rail is 1/4" lower than the passenger side.


So I took the supports I had cut off of the 2002 frame and cut them to match what I needed for each side.
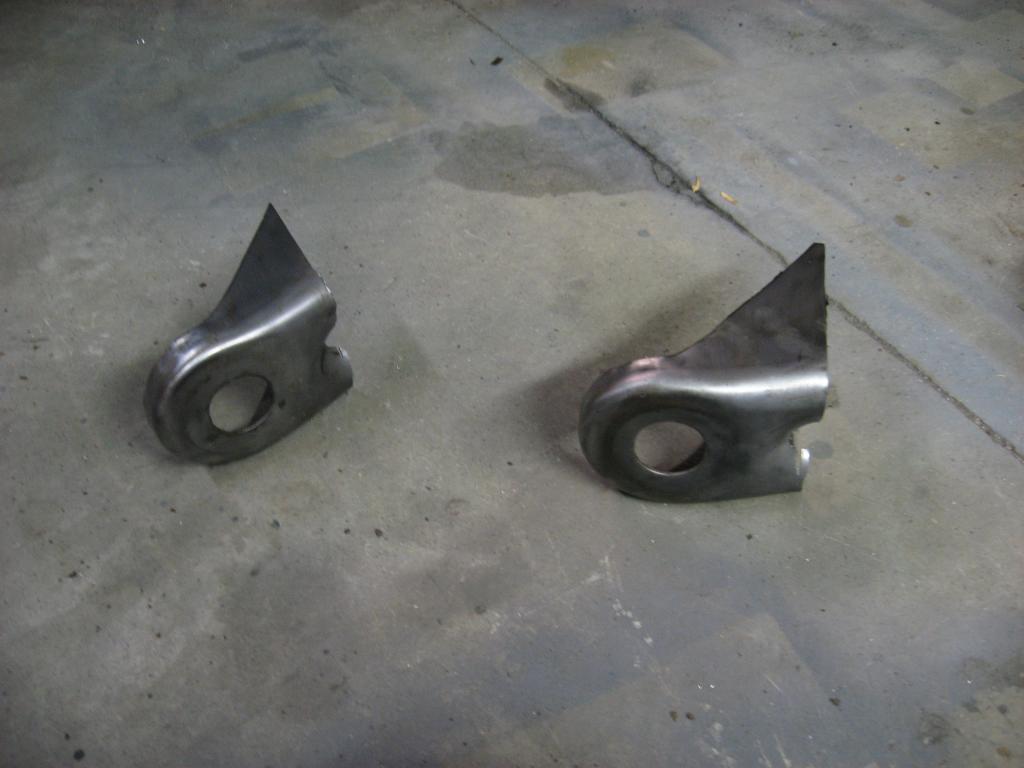

I then lined them up and tacked them into place.

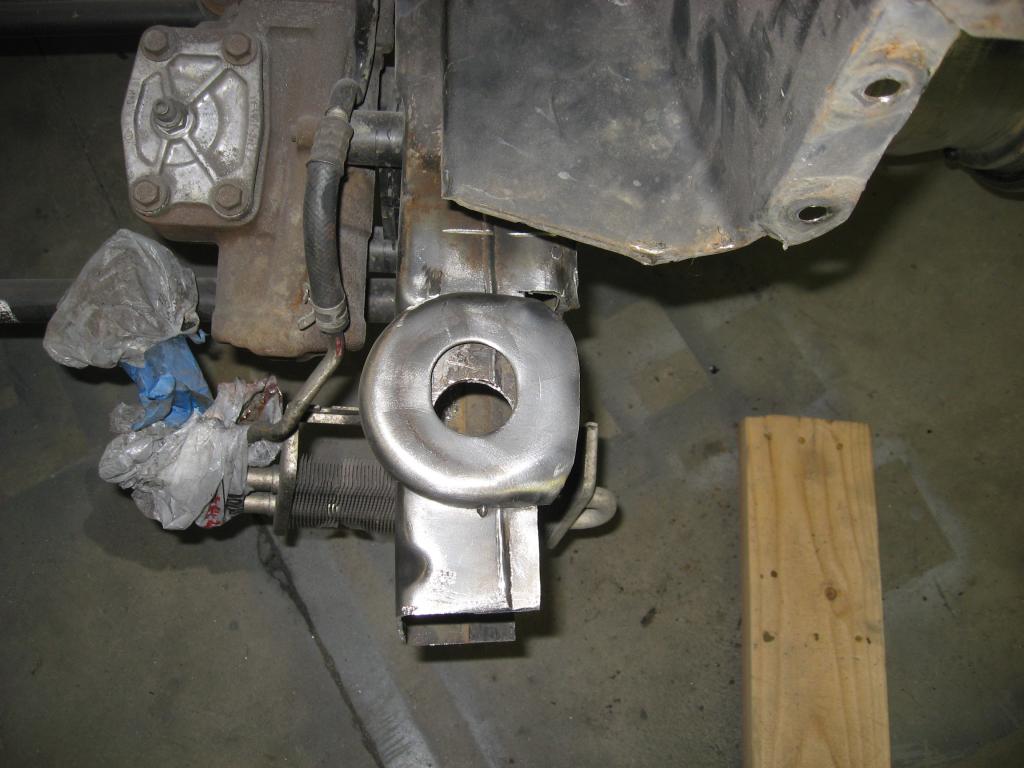

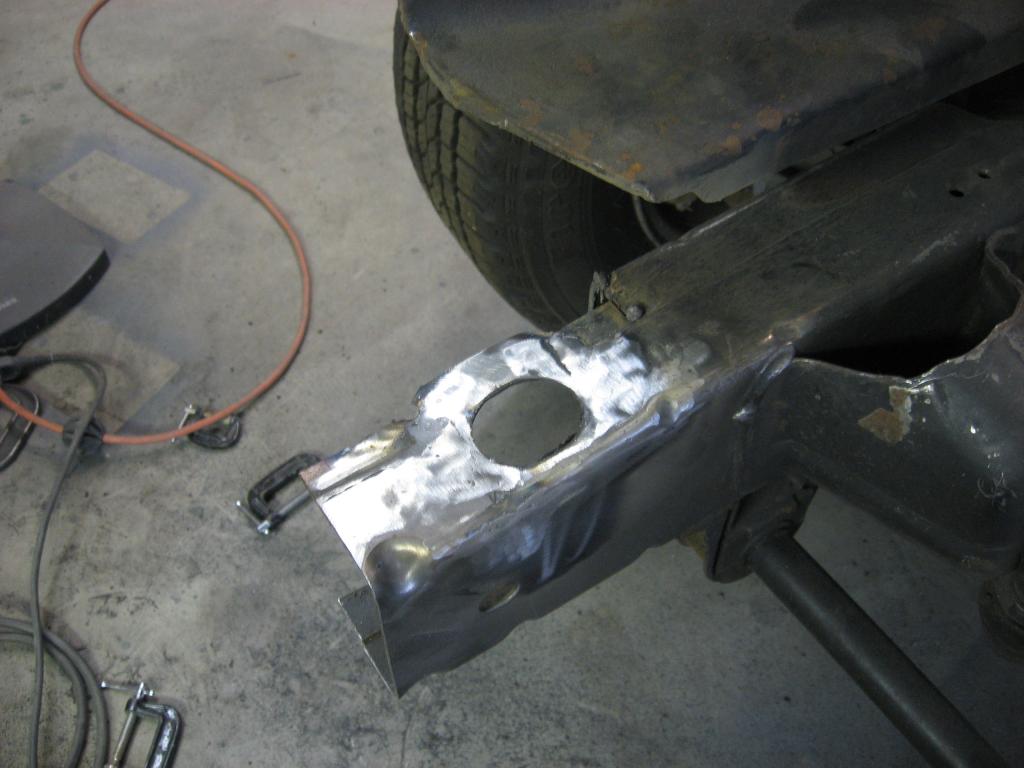
On the passenger side I cut right down through both the new plate and the frame then clamped it in place and welded it in.
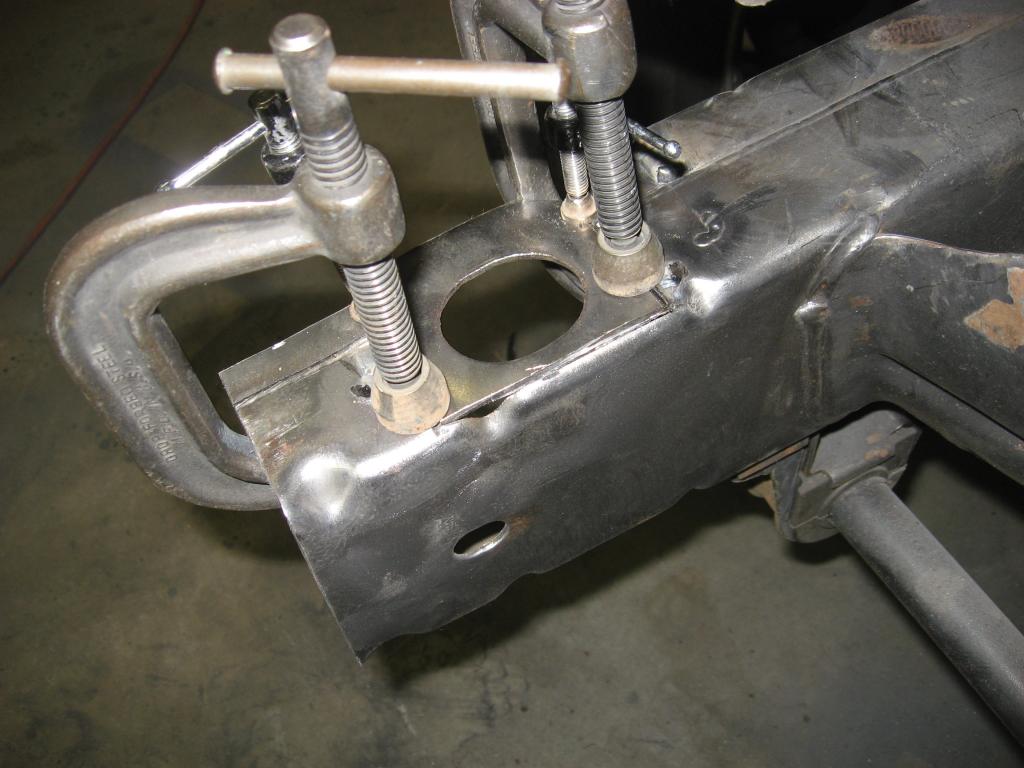
The drivers side I traced it onto the frame & cut it out. Then tacked it into place to check how it lined up.

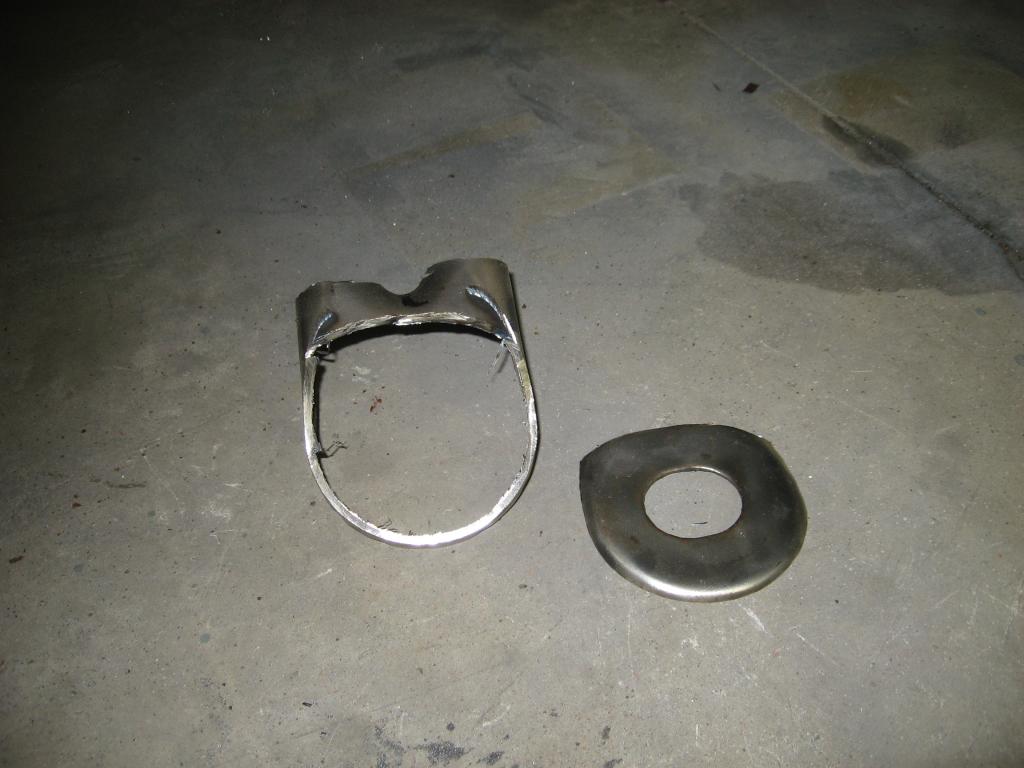
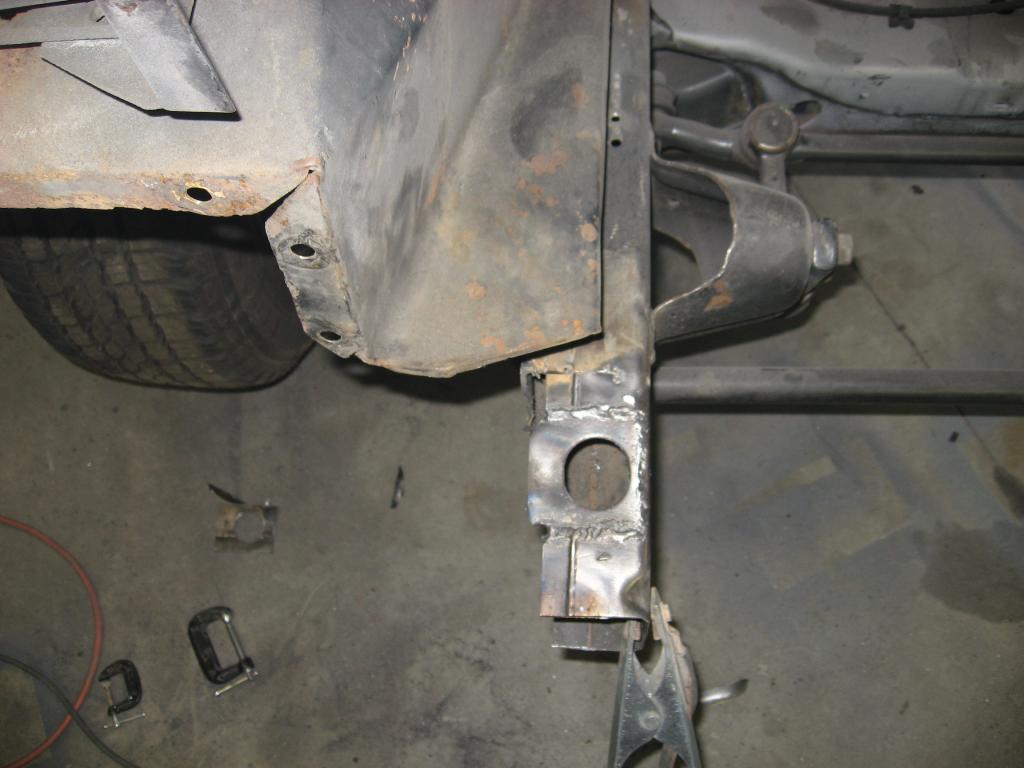
Burned in the drivers side, cut off the rounded part that was sticking out and welded in a little plate. and then ground everything smooth.

So now I can bolt the front end back on and get back to the front bumper...
I leveled the frame to the shop floor and took some measurements. With the front end all lined up and bolted together you can see that the bottom of the radiator core support is at 26" on both sides but the top of the drivers side frame rail is 1/4" lower than the passenger side.
So I took the supports I had cut off of the 2002 frame and cut them to match what I needed for each side.
I then lined them up and tacked them into place.
On the passenger side I cut right down through both the new plate and the frame then clamped it in place and welded it in.
The drivers side I traced it onto the frame & cut it out. Then tacked it into place to check how it lined up.
Burned in the drivers side, cut off the rounded part that was sticking out and welded in a little plate. and then ground everything smooth.
So now I can bolt the front end back on and get back to the front bumper...

 01-31-2013, 08:44 PM
#96
Staging Lane
Thread Starter
Join Date: Nov 2011
Location: Washington
Posts: 55
Likes: 0
Received 0 Likes
on
0 Posts
Had an unexpected take-over of my shop.... a dam chevy moved in....LOL I ended up getting a great deal on a 1997 suburban parts rig for $450.00 (no engine or trany) but I needed a new fender, AC compressor and a bunch of small items for our suburban so a lot of left over parts to sell. I think I should be able to clear $2000.00 very easily, and that will help out the ol project a lot!
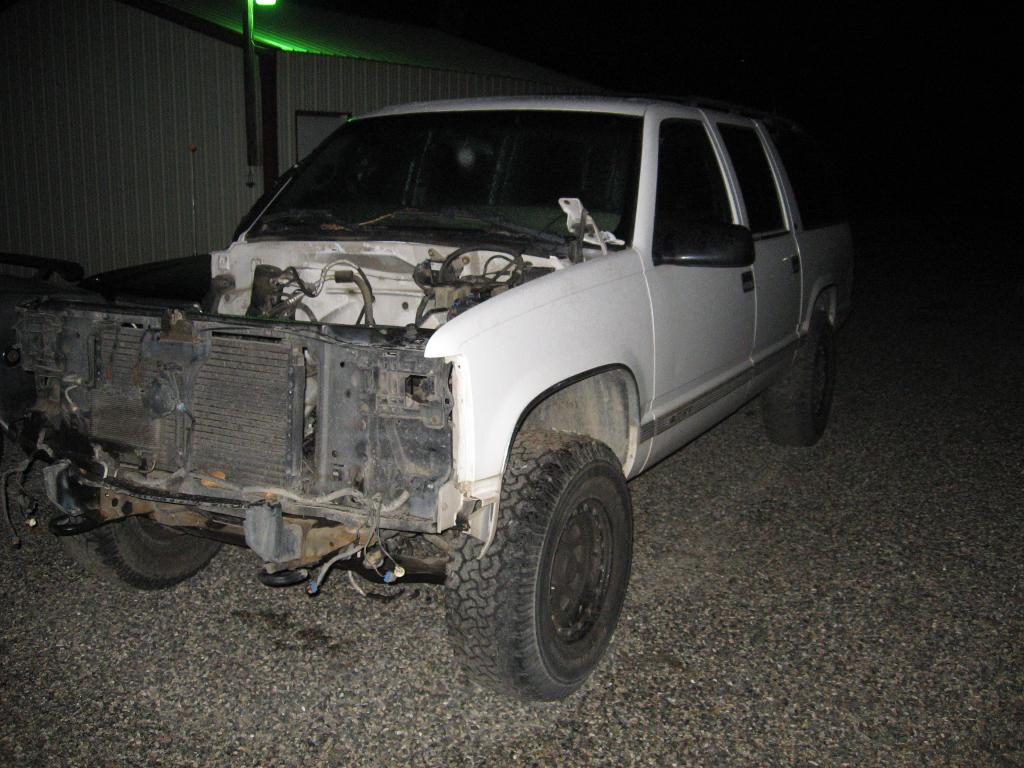

The project might be on hold but that didn�t stop me from some fun with the boom truck from work again. Sure makes parting out a vehicle a lot easier.....
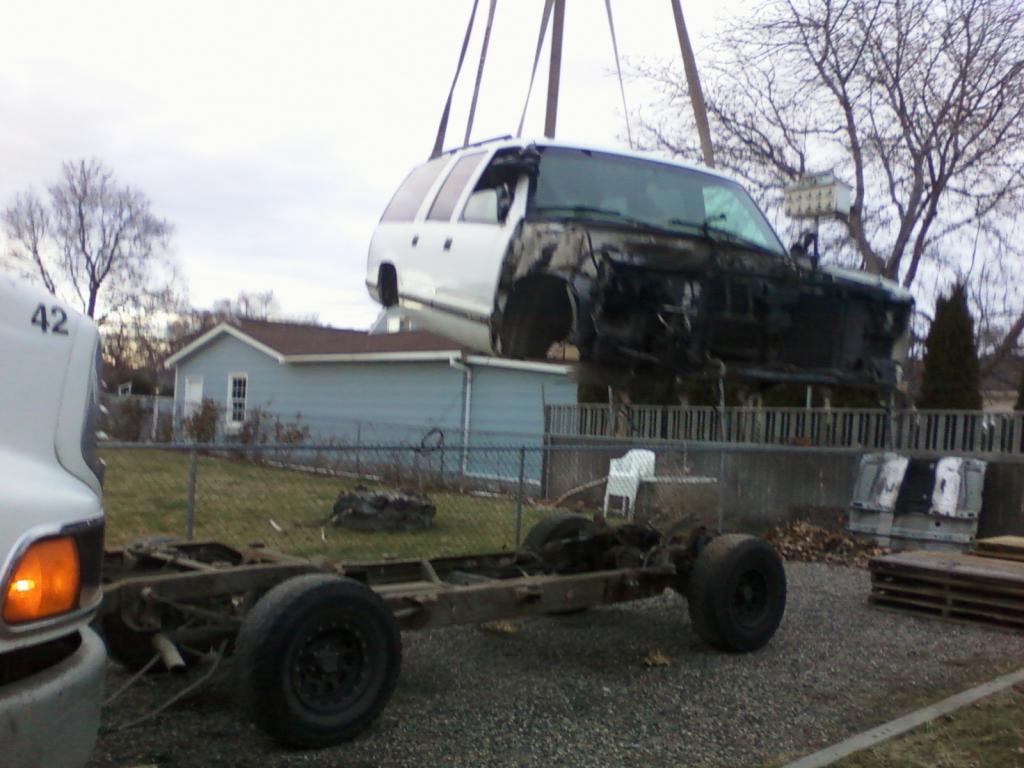
The project might be on hold but that didn�t stop me from some fun with the boom truck from work again. Sure makes parting out a vehicle a lot easier.....
02-14-2013, 11:44 PM
#98
Staging Lane
Thread Starter
Join Date: Nov 2011
Location: Washington
Posts: 55
Likes: 0
Received 0 Likes
on
0 Posts
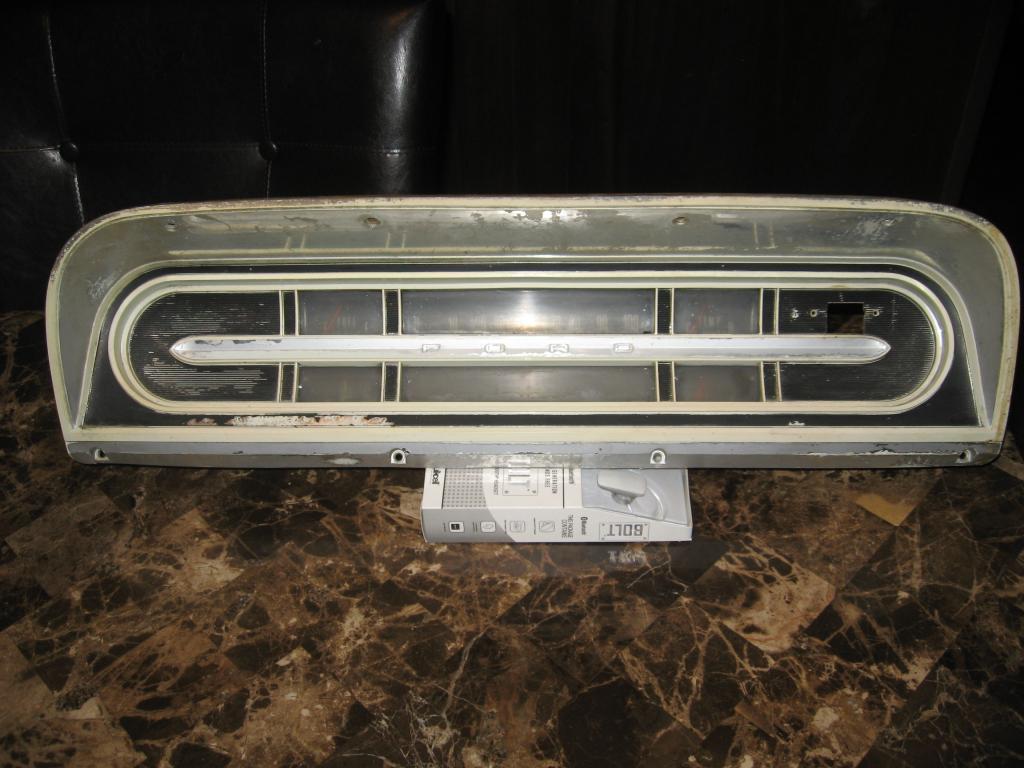
So my wife says my truck is my mistress and that I spend more time with it then her, so today being Valentines Day I bought my truck a gift. a new dash bezel and white gauges..lol not really my wife got them for my Valentines gift. Here are a few before & then the new one.

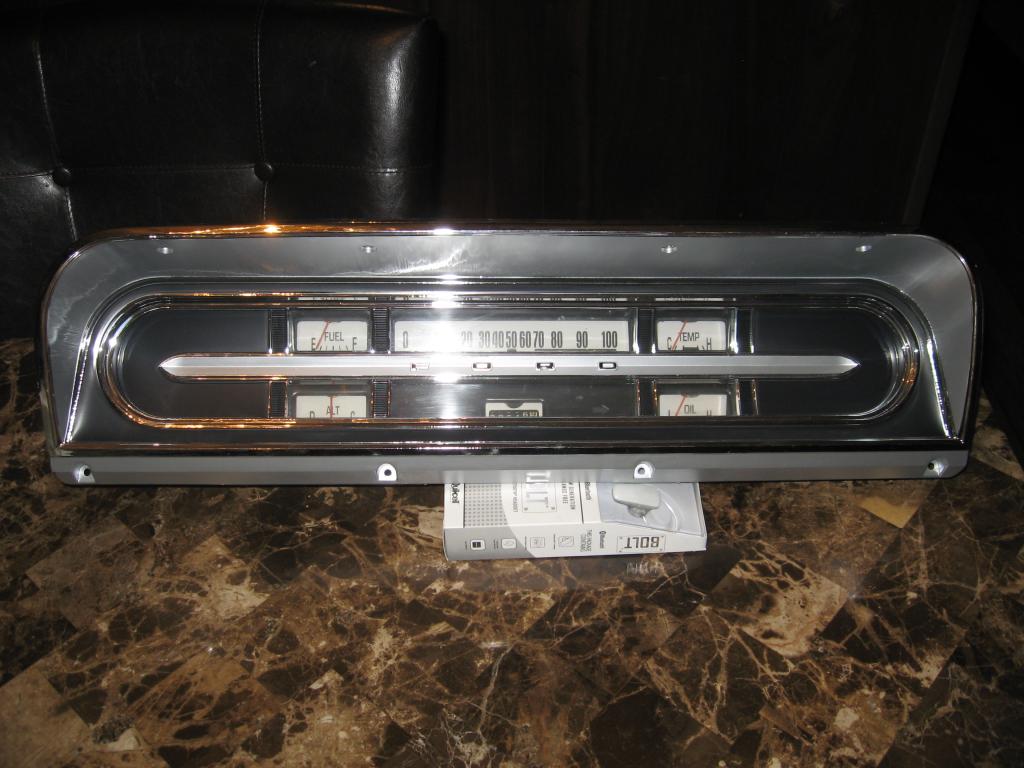

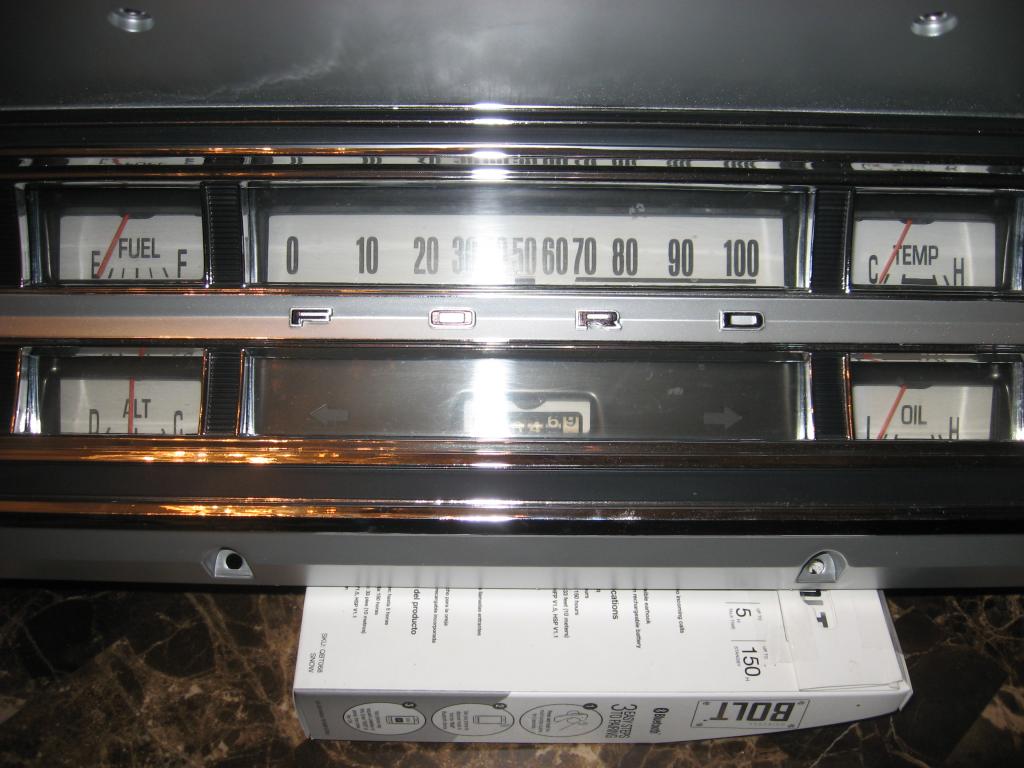
Have to say she did a very good job on picking out my gift this year...beats the box of chocolates any day.
Have to say she did a very good job on picking out my gift this year...beats the box of chocolates any day.
