Another Turbo Silverado...
 08-16-2012, 08:00 PM
#1
Teching In
Thread Starter

Join Date: Aug 2011
Posts: 37
Likes: 0
Received 0 Likes
on
0 Posts
I guess I will start with a little introduction since I have really only trolled the forums for information.
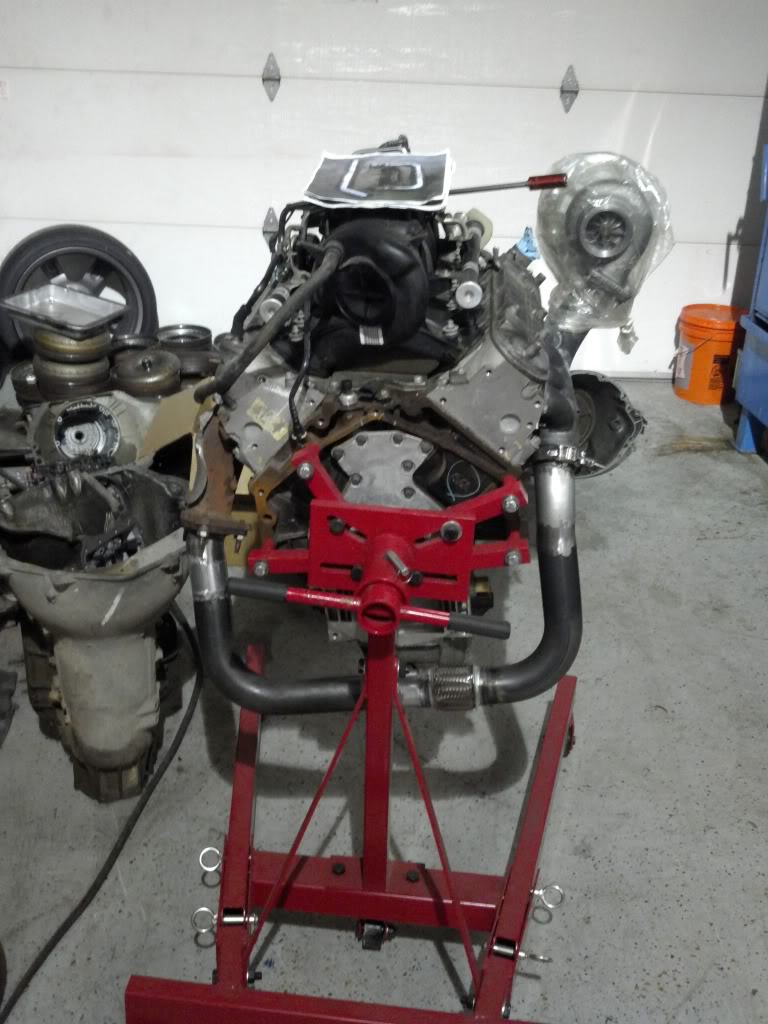
My name is Brandon and I live just north of Detroit and have been a gear-head since I can remember. I decided some time ago that I wanted a turbo 408 c.i. for 67' Chevy Pickup but wanted to test the waters before spending top dollar on that project. As I was working in the garage one night I looked over at my 04 Silverado and decided that would be a good place to start!
All the work with the exception of the tune (Thanks to Kluggs) was done by myself and a good friend of mine that is a custom converter builder/owner at Vortex Converters (Thanks Mike!).
I have a ton of detailed pictures of the build so if you see something and want more detail please don't hesitate to message me.
Truck Specs:
Stock 5.3L (112,000)
LS1 E-Fans
60 lb (Tall EV1) Siemens Deka Injectors
Aeromotive Stealth 340 (Center Inlet)
Racetronix Hot Wire Kit
4l60E and Converter Built by Vortex
3:73 Truetrac
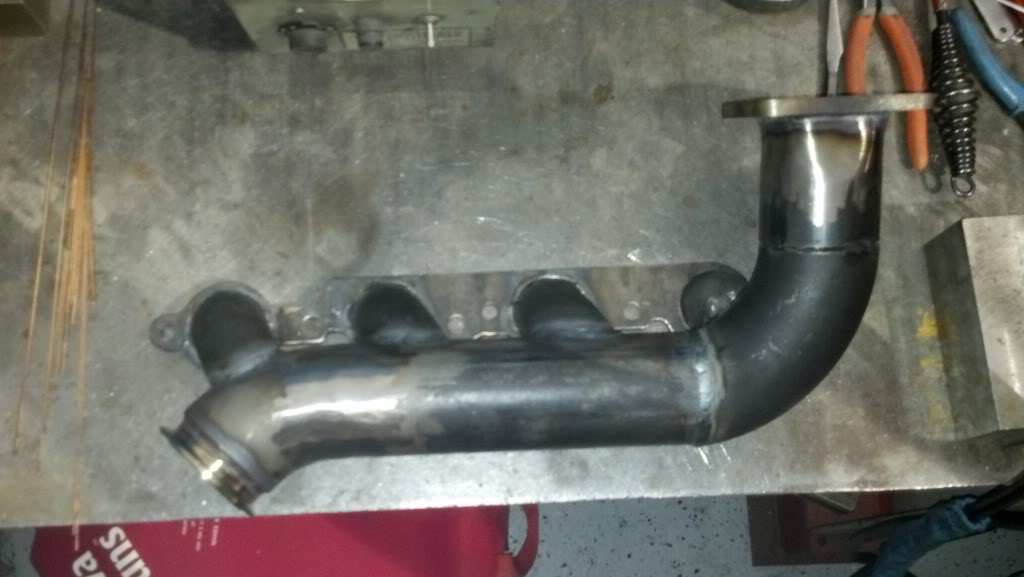
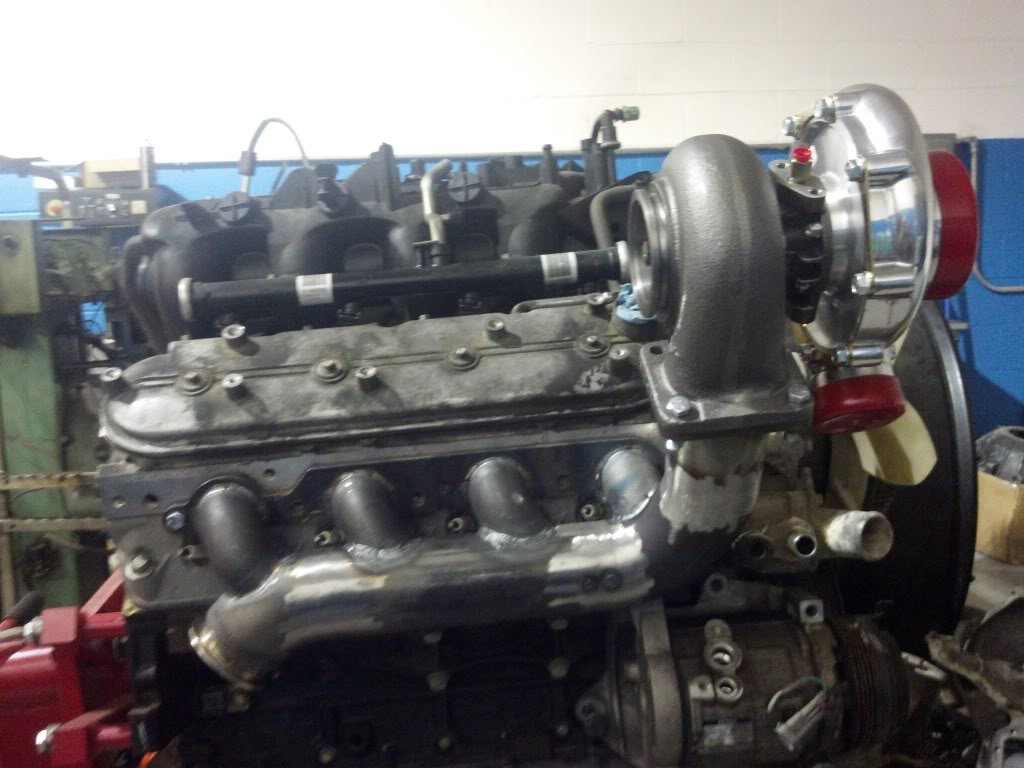
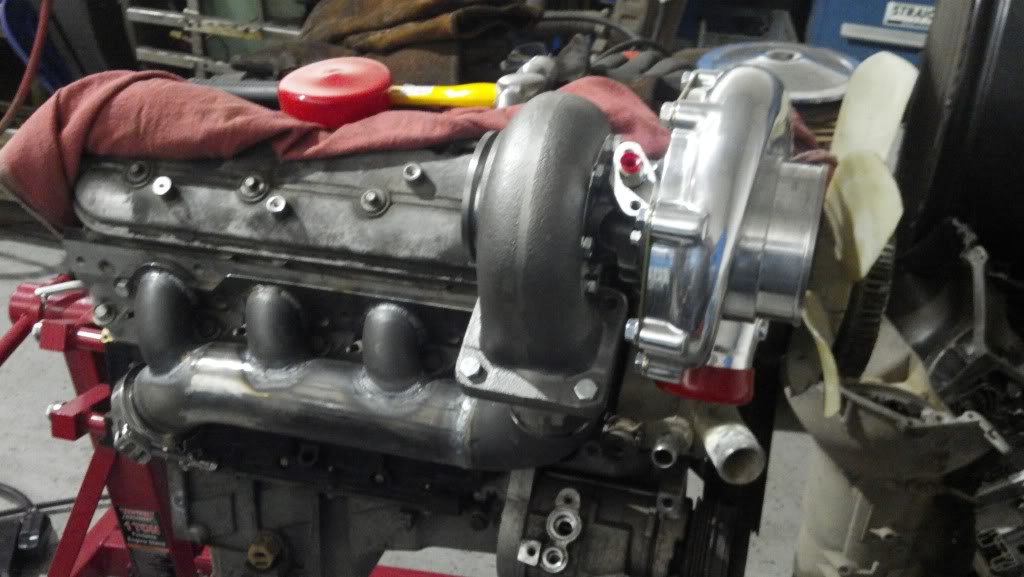
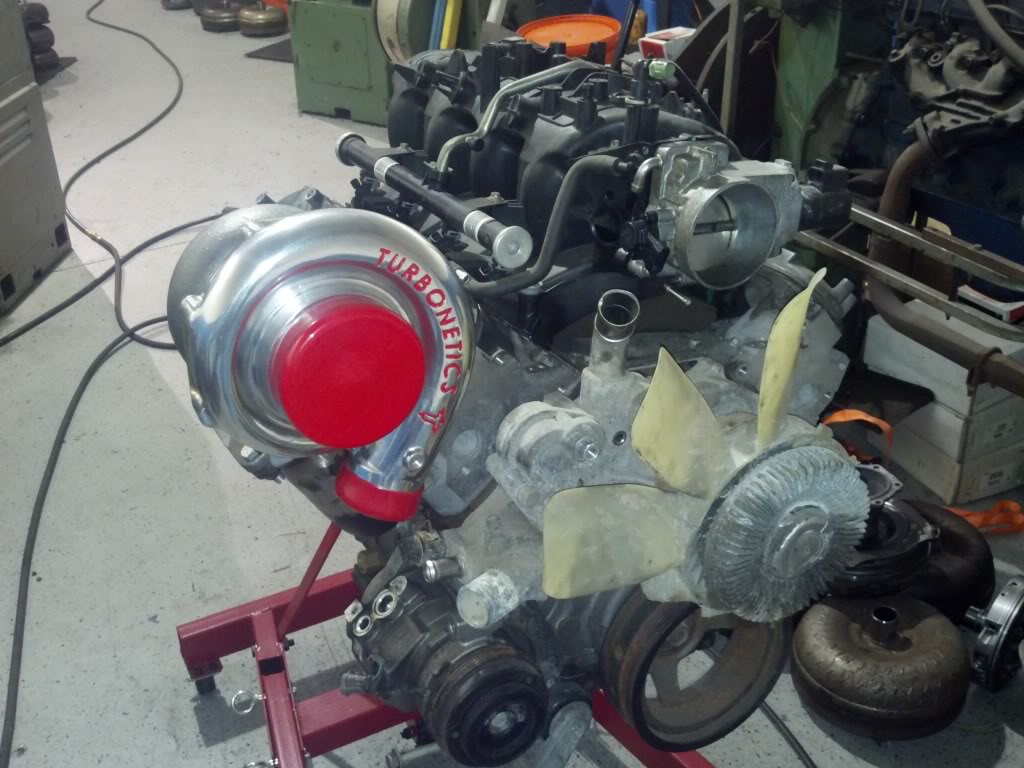
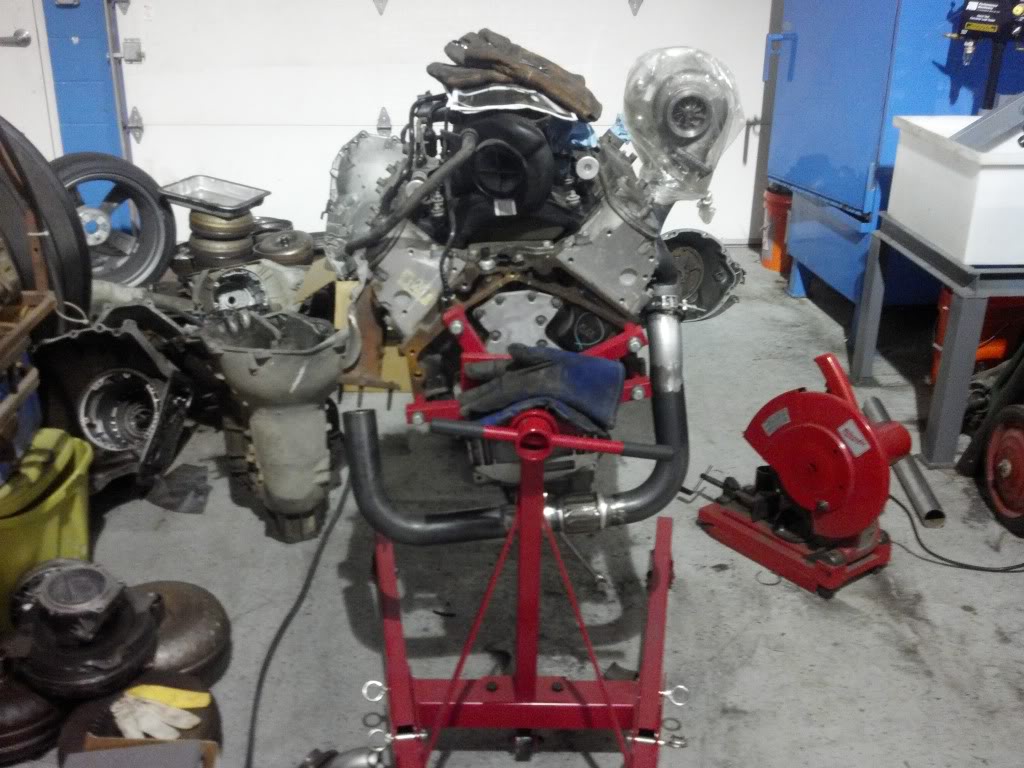
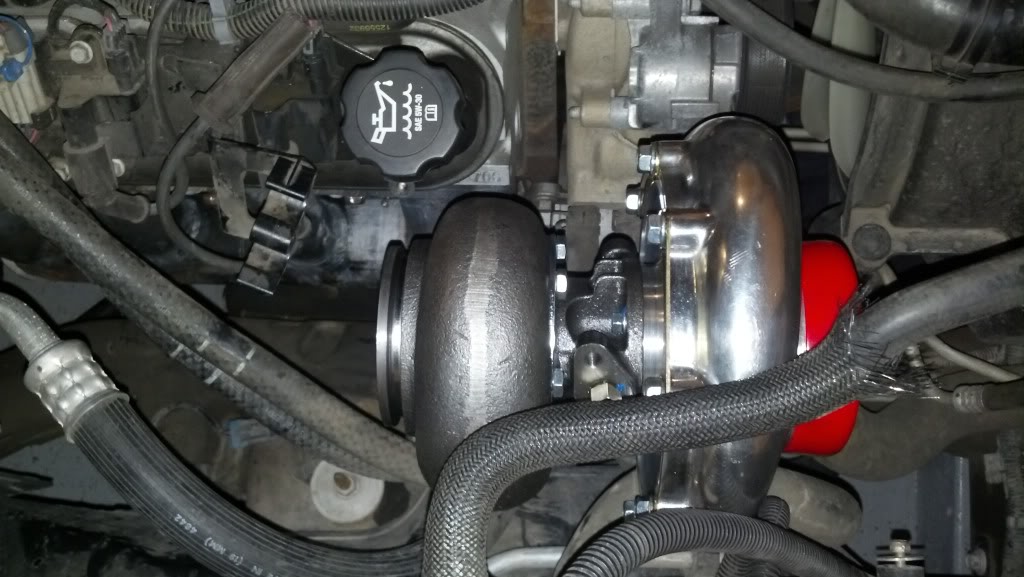
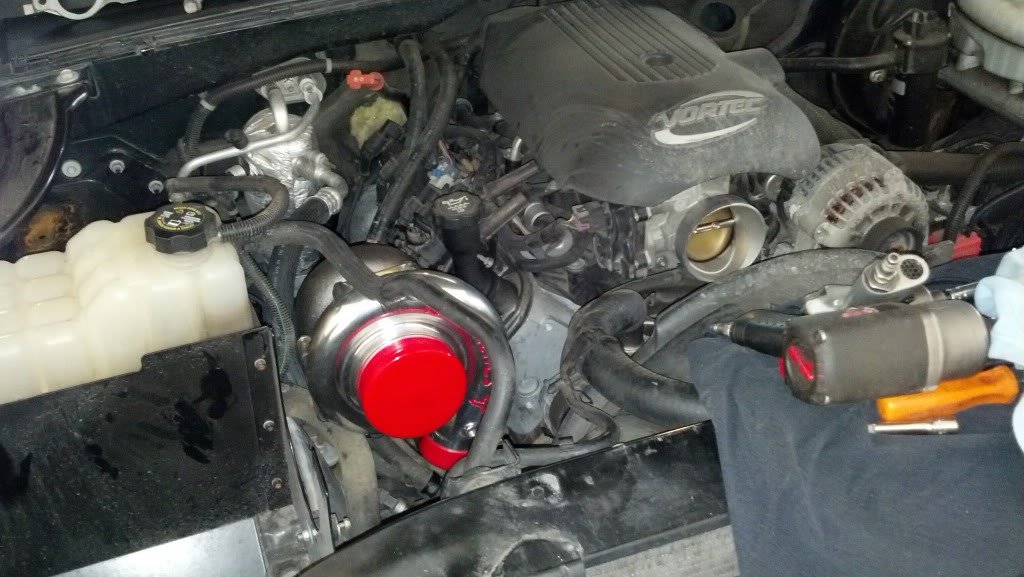
Turbonetics 70mm T70 / P .81 A/R @ 10 lbs
Comp Dual Springs
Body/Suspension
4"/6" Drop
OEM SS Front Bumper
Shaved Tailgate
Rollpan
22" Summer Wheels
Coming Soon:
Isky Triple 12
Methonal
Maybe some Nawz..
I know, I know, get on with the pictures!
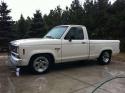
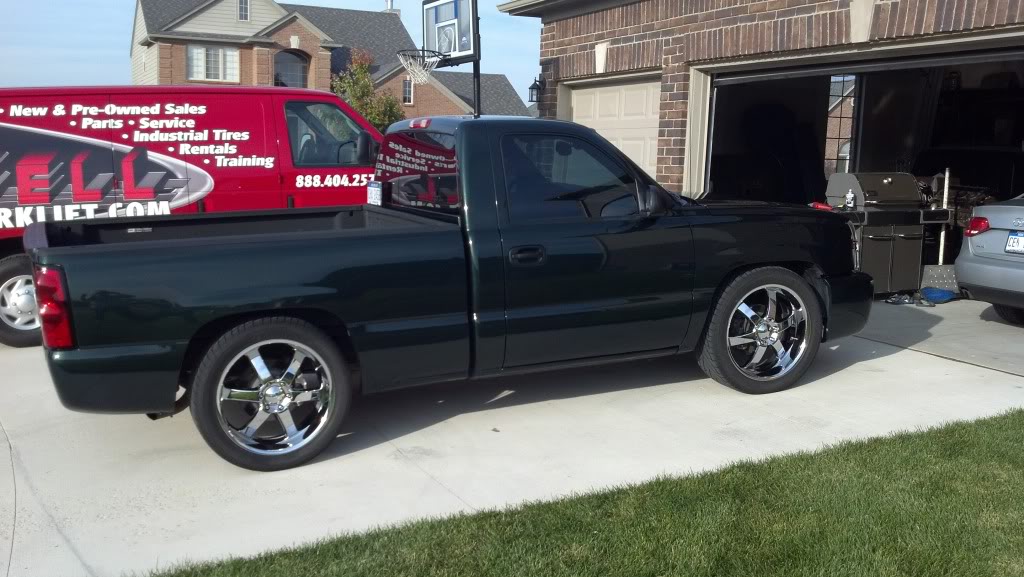
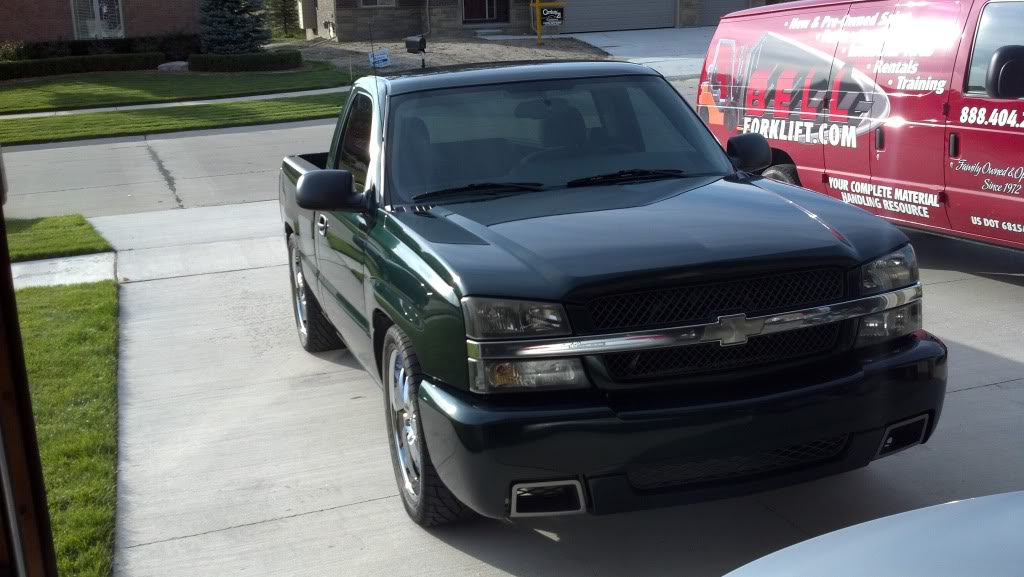
Lets start with the truck, its a 2004 RCSB 2WD
My name is Brandon and I live just north of Detroit and have been a gear-head since I can remember. I decided some time ago that I wanted a turbo 408 c.i. for 67' Chevy Pickup but wanted to test the waters before spending top dollar on that project. As I was working in the garage one night I looked over at my 04 Silverado and decided that would be a good place to start!
All the work with the exception of the tune (Thanks to Kluggs) was done by myself and a good friend of mine that is a custom converter builder/owner at Vortex Converters (Thanks Mike!).
I have a ton of detailed pictures of the build so if you see something and want more detail please don't hesitate to message me.
Truck Specs:
Stock 5.3L (112,000)
LS1 E-Fans
60 lb (Tall EV1) Siemens Deka Injectors
Aeromotive Stealth 340 (Center Inlet)
Racetronix Hot Wire Kit
4l60E and Converter Built by Vortex
3:73 Truetrac
Turbonetics 70mm T70 / P .81 A/R @ 10 lbs
Comp Dual Springs
Body/Suspension
4"/6" Drop
OEM SS Front Bumper
Shaved Tailgate
Rollpan
22" Summer Wheels
Coming Soon:
Isky Triple 12
Methonal
Maybe some Nawz..
I know, I know, get on with the pictures!
Lets start with the truck, its a 2004 RCSB 2WD
Last edited by boostedc10; 08-18-2012 at 09:15 AM.


Trending Topics
08-16-2012, 08:23 PM
#8
Teching In
Thread Starter
Join Date: Aug 2011
Posts: 37
Likes: 0
Received 0 Likes
on
0 Posts
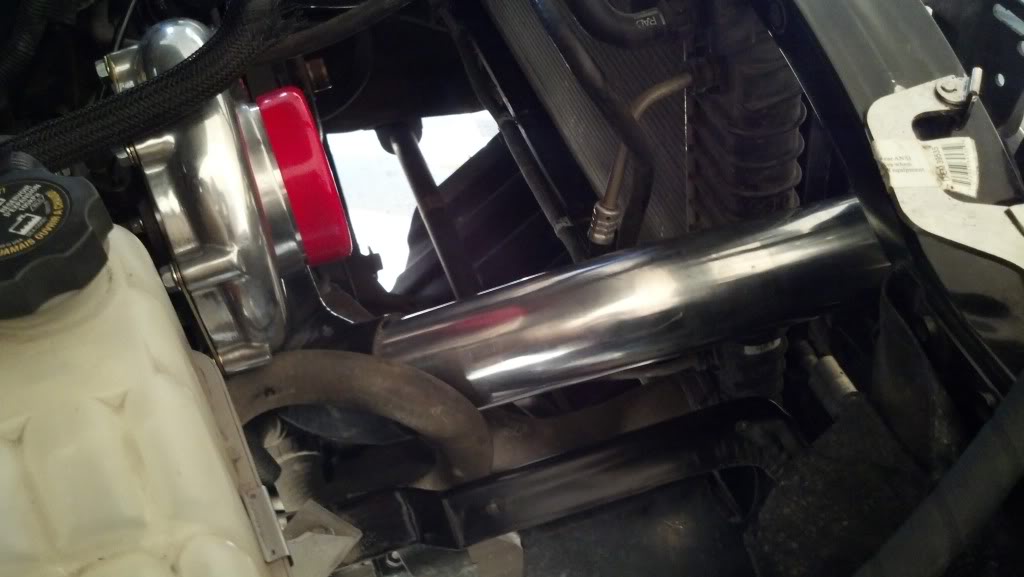
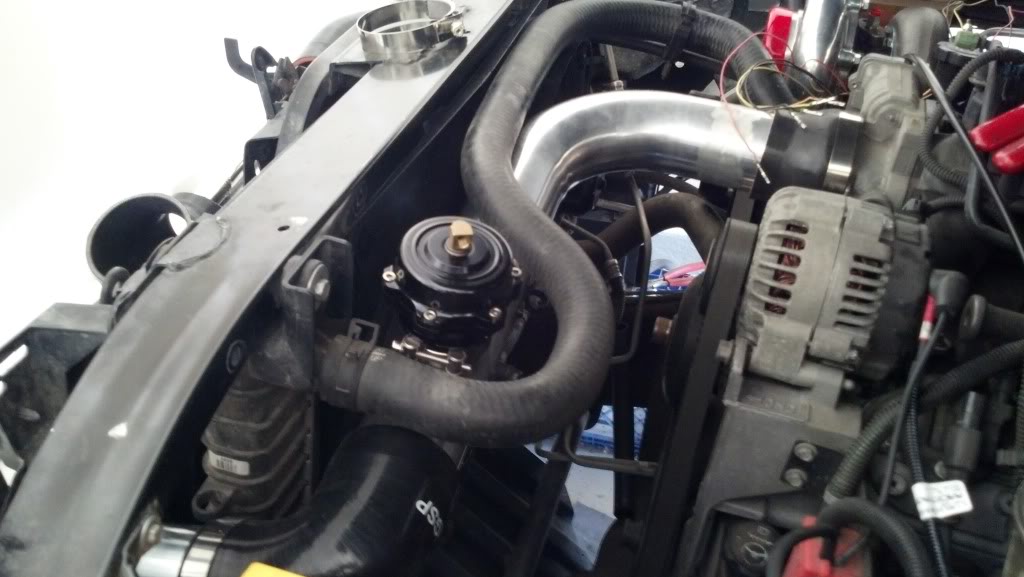
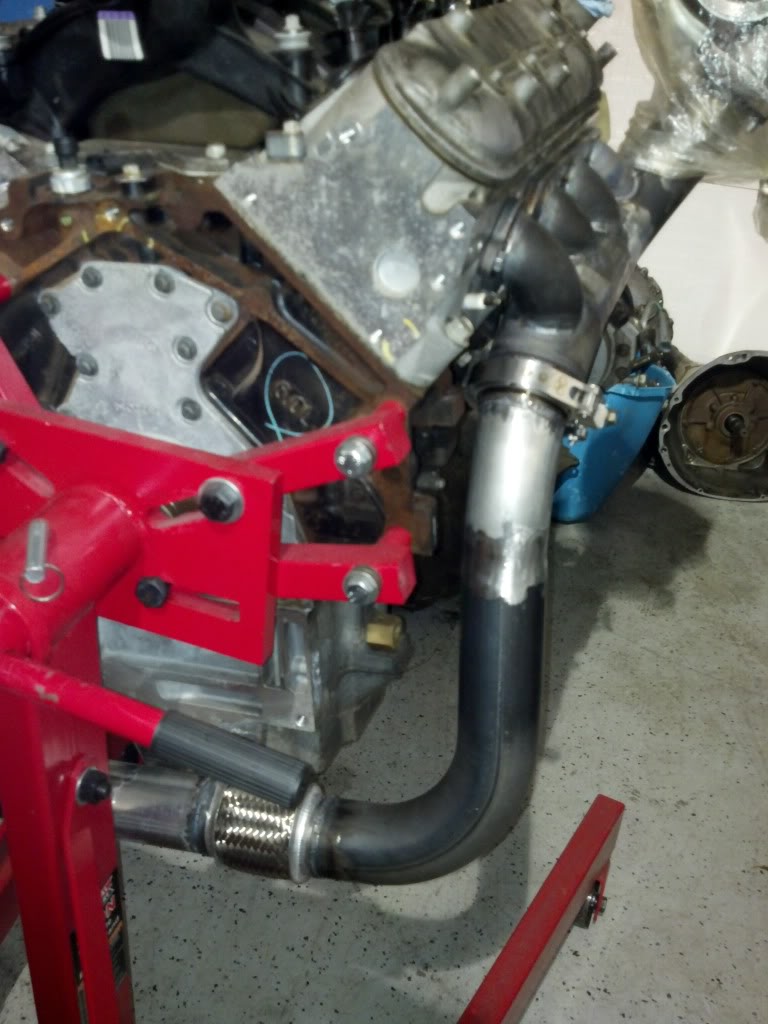
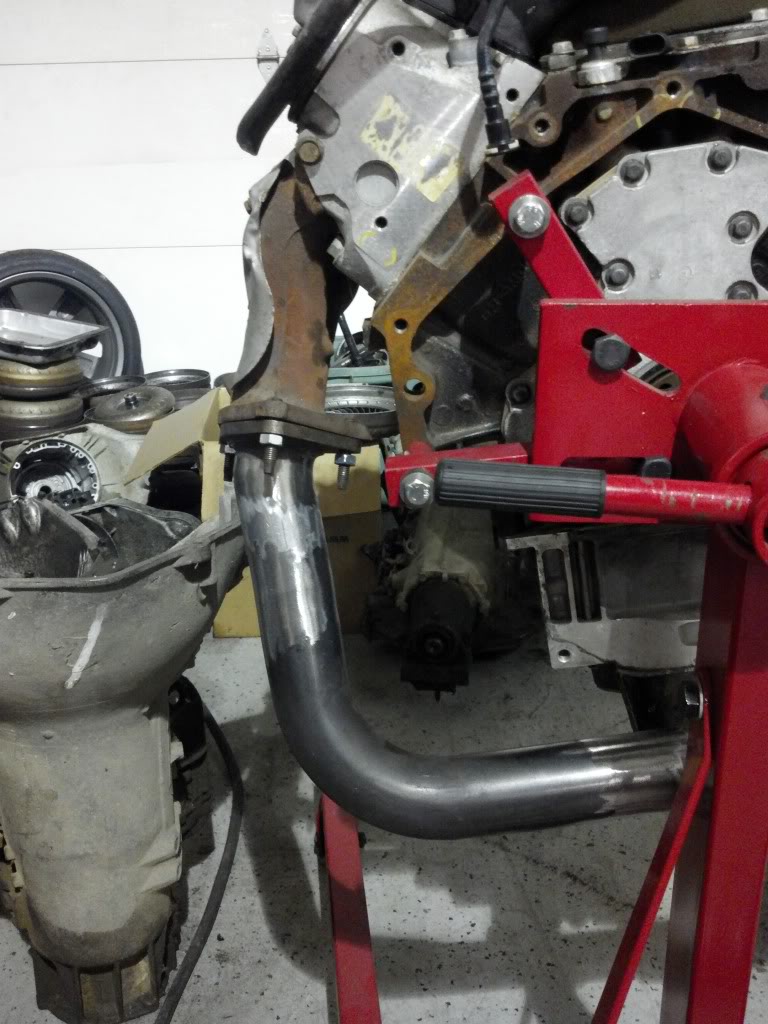
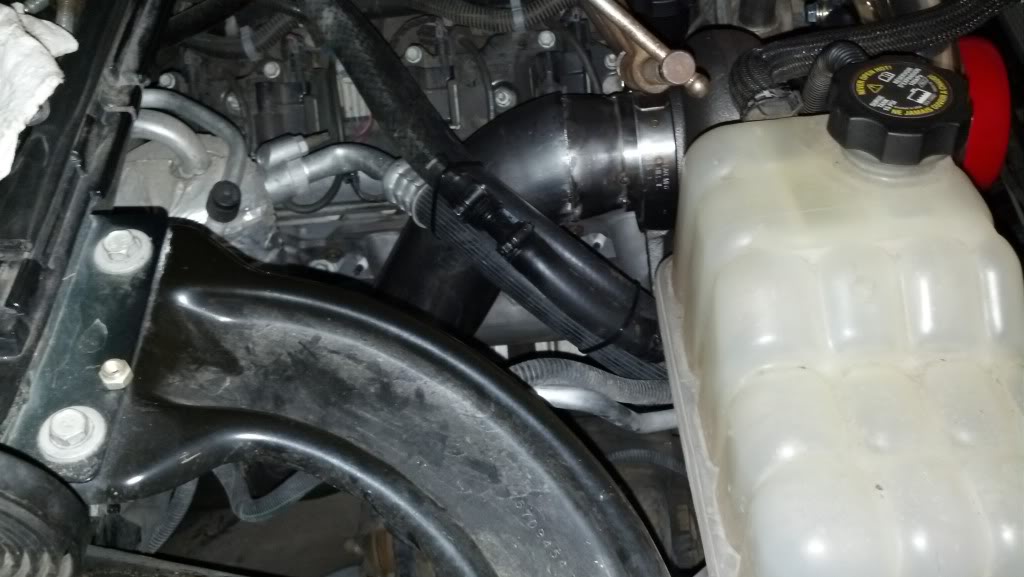
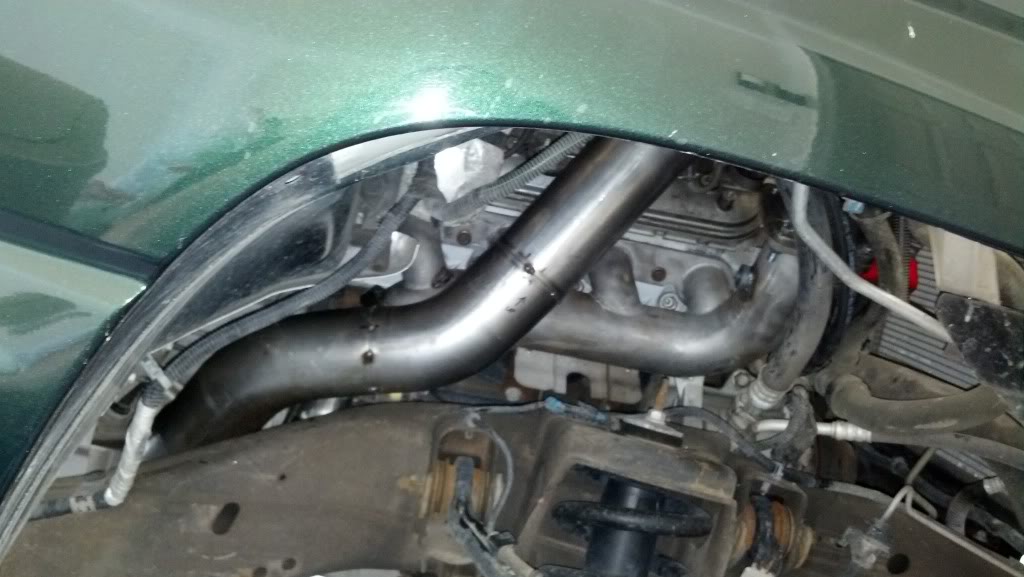
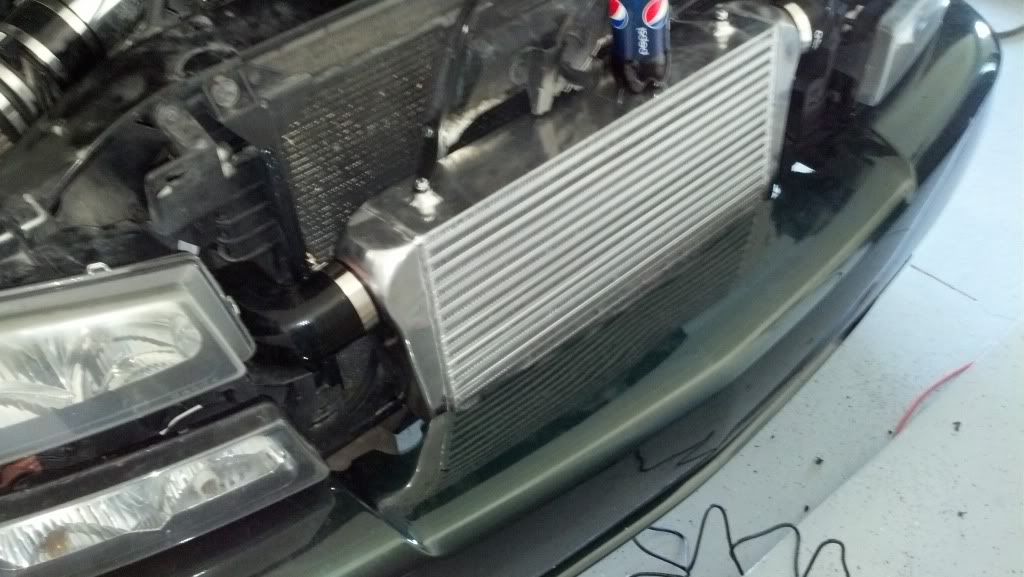
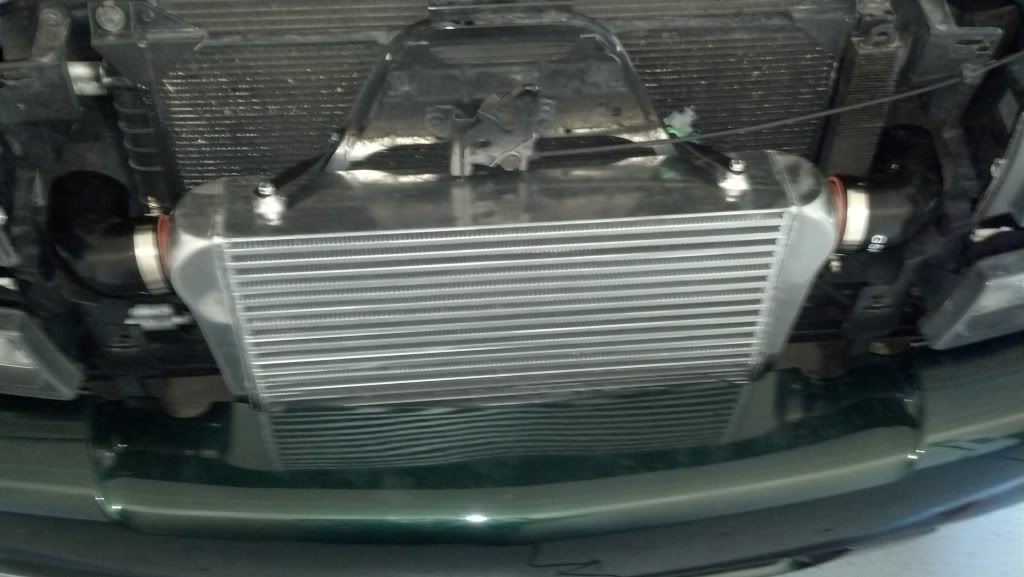
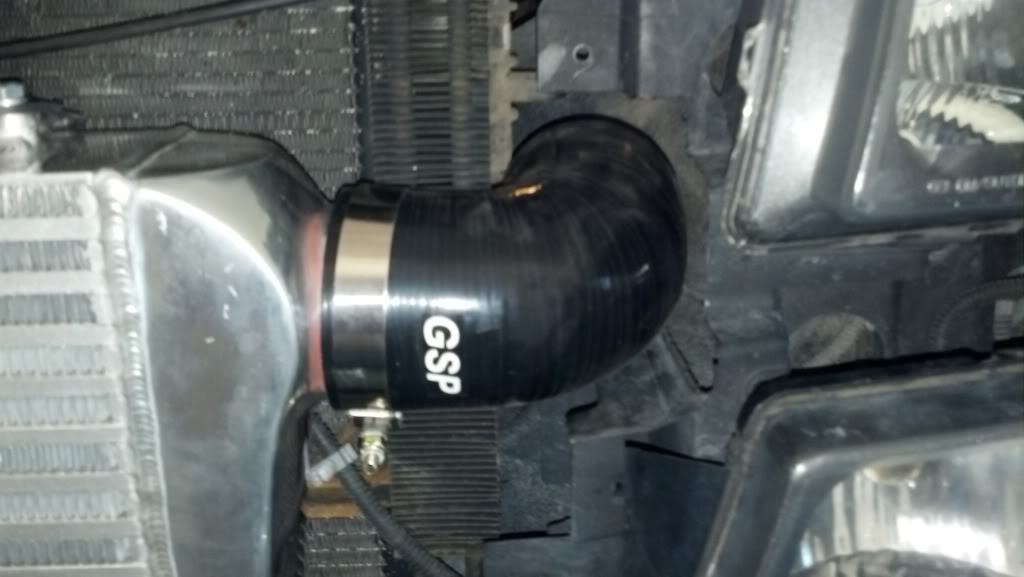
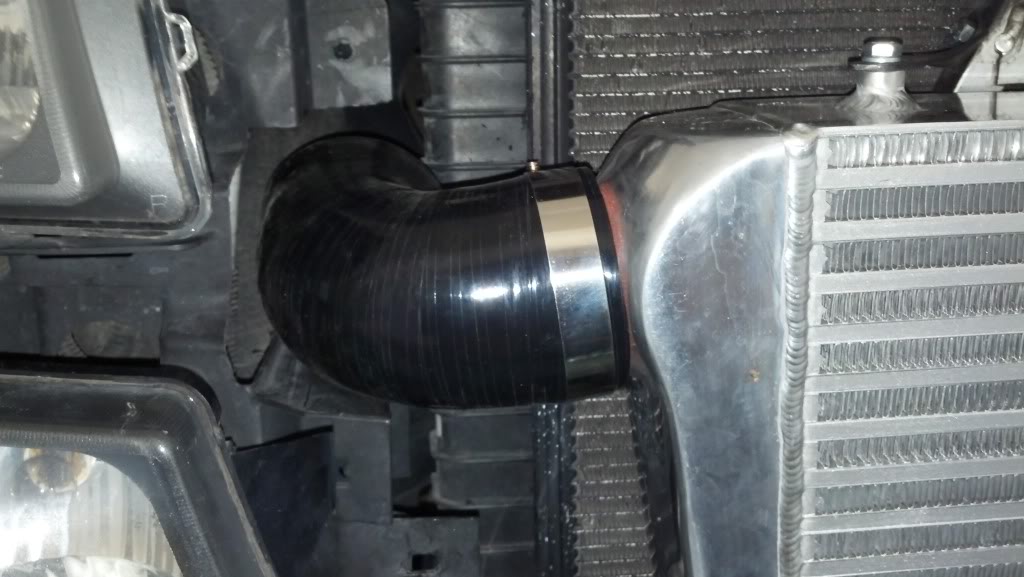
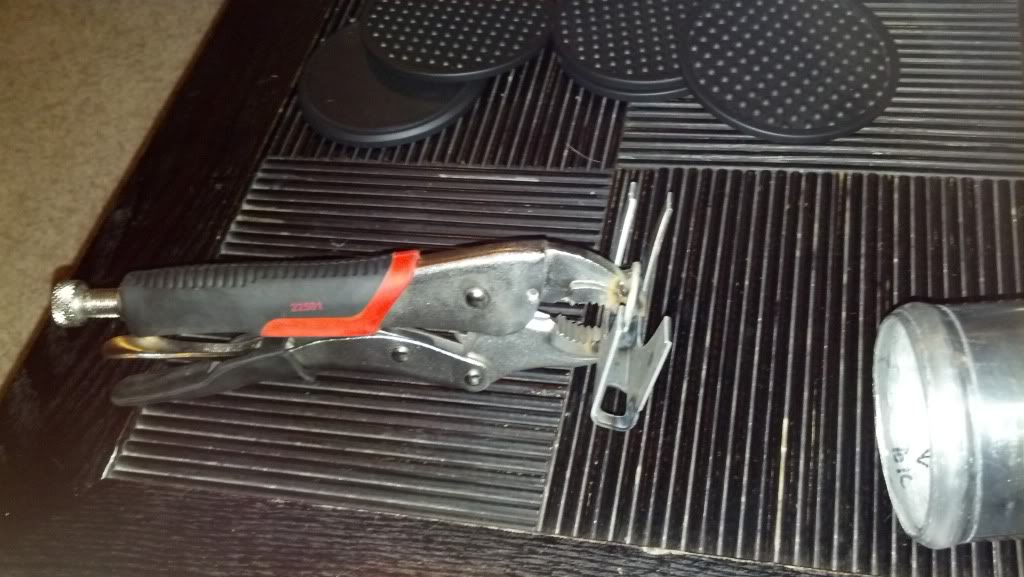
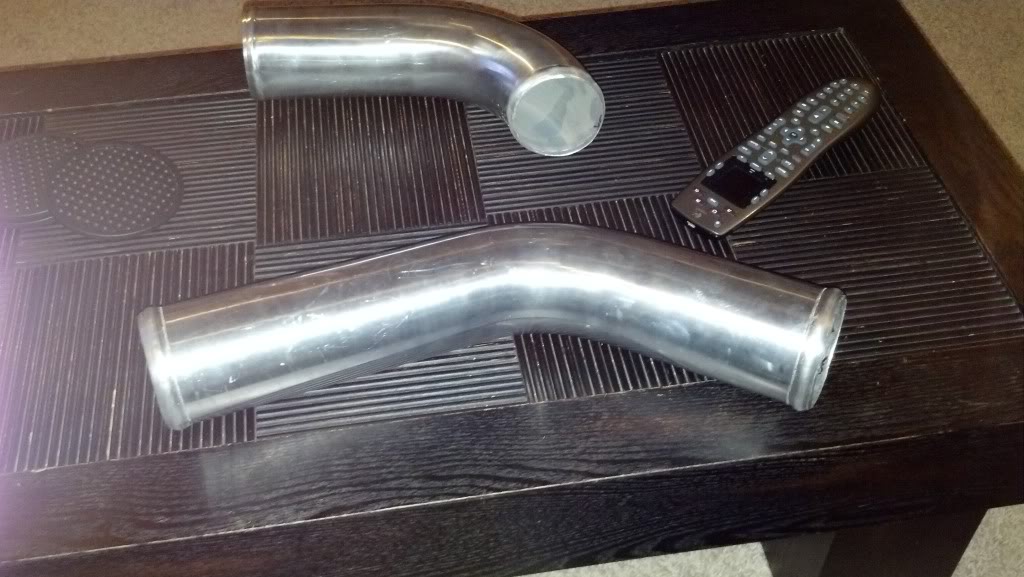
After I did the exhaust and got everything situated in the truck the way I wanted it I moved on to the intercooler piping. Since my buddies Harbor Freight bead roller decided not to cooperate, I decided to do the beads by hand. This was a trick my old man taught me a long time ago and seems to work just fine for aluminum piping. To make the tool cost me all of 15 bucks.
Here is the tool I made to do it
Here are what the beads looked like when I was done
Here is the tool I made to do it
Here are what the beads looked like when I was done