
Blown06-New Build: Cage, 4-Link, Cog Drive, + Too Much More
 07-17-2010 | 10:13 AM
#191

Just read through ALL 19 pages..WOW..looks very well built..I am going to be doing a 4 point cage/triangulated 4 link/fuel cell here soon,I will definately have to take a peek back at this thread for some reference..Now get er done so you can enjoy her
07-17-2010 | 08:18 PM
#192

I told you that dash was a bitch. Why dont we take the AC control panel out and I can make you a mount out of either aluminum or carbon fiber??
Why dont we take the AC control panel out and I can make you a mount out of either aluminum or carbon fiber??
Last edited by 1FastBrick; 10-14-2012 at 06:20 PM.
07-17-2010 | 08:19 PM
#193
I wouldnt waste time on a 4 point cage. The key to making it strong is to triangulate everything. Its like building a bridge.
Last edited by 1FastBrick; 10-14-2012 at 06:21 PM.
07-18-2010 | 02:55 AM
#194

Did a little more work tonight. It actually looks like I can make the original pillar pod still work so thats what I'm gonna do. Got the dash out, and got started on the wiring. I can tell you this, the wiring project is gonna be a pain in the ***. Basically starting with a plug I know is no longer needed, tracing the wires and pulling them out, one plug at a time. Once I get the entire harness untaped it should go pretty quick. I'll get some pics up tomorrow as I should have made some worthy progress by then.
My progress is so much slower on this thing when madman had it. Seems like something is always coming up and then I have to be out of town every week Monday-Friday for work. I've got to go to San Francisco next weekend for some family stuff and then the following friday I'm having knee surgery again. Gonna drive me crazy during recovery time not being able to work on this thing.
Hopefully going to pick up a 6.0 block tomorrow for the new engine build. I'm gonna try a combo I've never seen before (at least on here and in a truck). Forged 370, solid roller cam, afr 245 heads, l19 or 1/2 head studs (haven't figured out which is better yet). Power adder will be cog drive F2 procharger w/A2W intercooler. Not sure how good it'll work but it fits the budget for now. Once I get it dialed in on about 20-25 psi, I'll turn the blower up and see how long it'll hold. That 10-bolt is not gonna like me very much.
The goal is to have this project completely finished, tested and ready by the end of the year.
07-18-2010 | 08:03 AM
#195

With those motor plans you thrown an awfully lot of money out the window keeping that 10 bolt. I cant see it lasting one pass with that motor. If you are lucky a few might be possible. Sounds like you are continuing to build most anyone's dream truck!
07-18-2010 | 02:11 PM
#196

Man, the dash is a bitch to take out, but putting it back in isn't AS bad.. still a pain. I have pity on you. lol Good luck with everything. Keep us posted on the progress, I'm interested to see this thing completed!
Last edited by 1FastBrick; 10-14-2012 at 06:21 PM.
07-19-2010 | 03:10 AM
#197
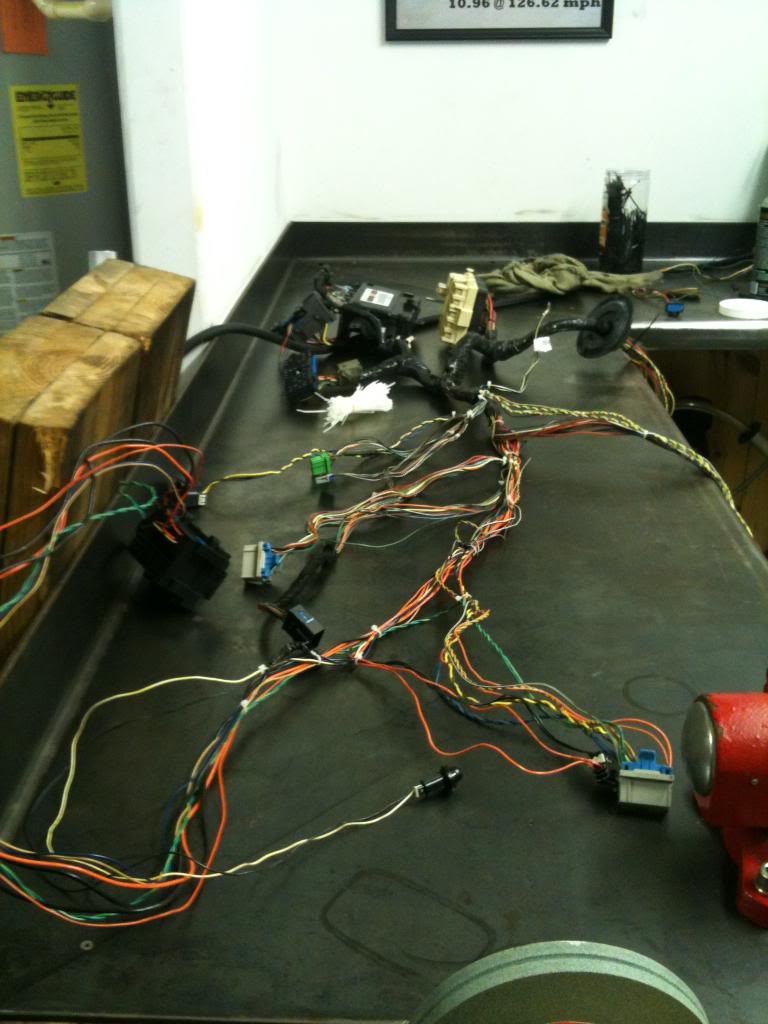
Got the in cab wiring harness done. My fingers are numb and I have a new found hatred for electrical tape. I started out chasing wires and untaping while the harness was still in the cab and that was just a huge pain in the *** trying to manuver around in there. Unwraping the harness in nothing short of a mess. That electric tape leaves a sticky residue on everything and GM made damn good an sure that that they uses a million seperate pieces, none of which were wrapped in the same direction.
So I just removed the entire harness and started working on it on the work bench, which was way easier. I have some before and after pictures but the funny thing is it doesn't look like I removed much until you see the pill of removed wires. No short cuts were taken, termination of each wire consisted of de-pinning the connectors. No wires were terminated by just cutting the wire at the connectors.
Wiring that was removed:
*XM Sat. Radio
*Complete HVAC system
*Air bag harness
*Wiring harness for the factory seats
*Misc. wiring that comes in from under the hood that I removed
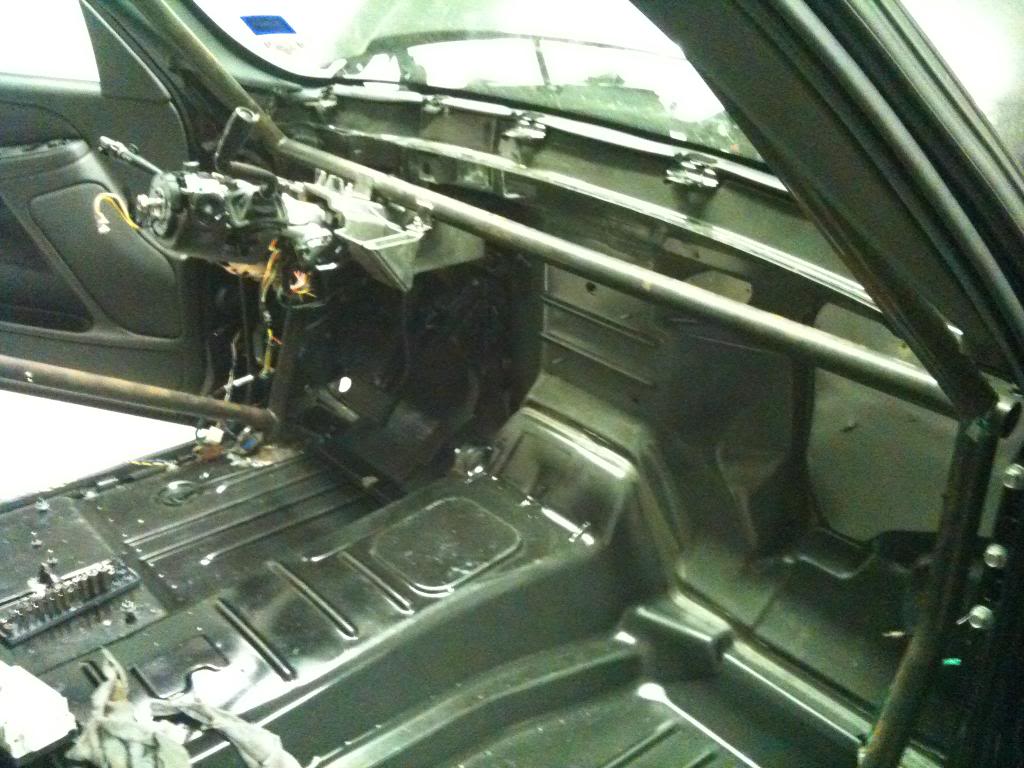
Still retains am/fm cd radio functions with all factory speakers, steering wheel controls, in-cab lighting, automatic head lights, power window, locks, mirrors, factory gauges and dash lighting. Most creature comforts remain, save for the a/c and the interior will still look fairly stock besides the cage and seats. I'm keeping the factory carpet and floor mats as well.
All together I removed 4.2 lbs. of wire from in the cab.
Only problem I'm having is that I'm not sure how to hook up the brake switch with the new brake pedal/master cylinder push rod set up. I'm gonna have to call madman about that one.
Here are the pics.
Harness partially done but removed from the truck:

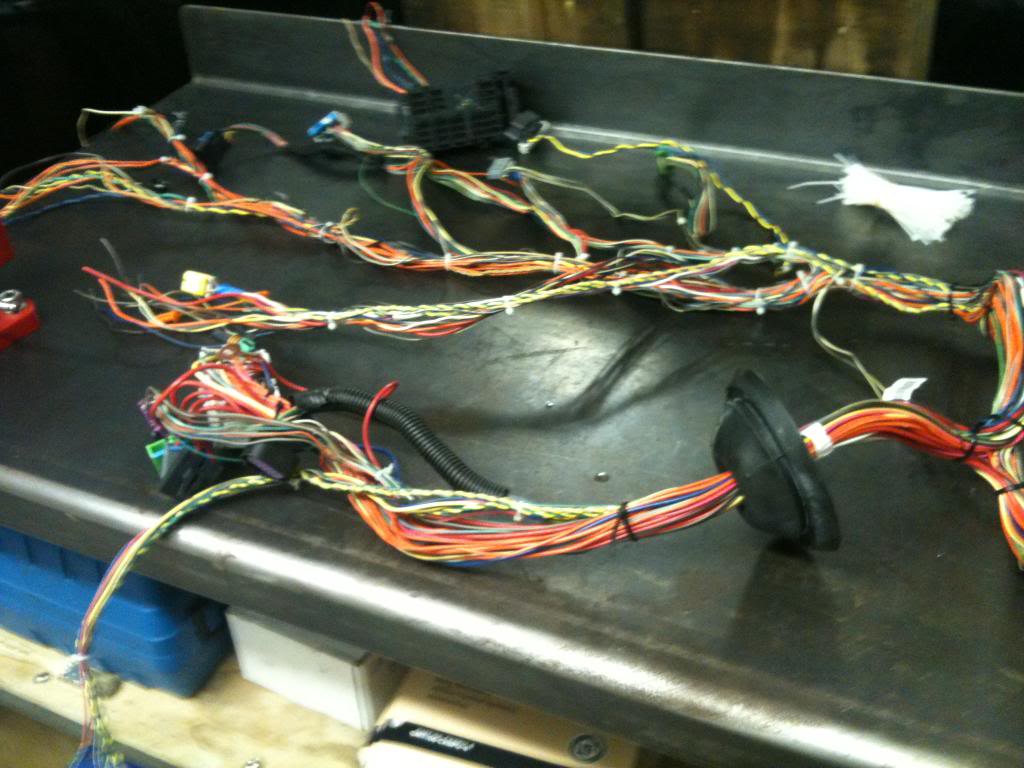
Here are pics of it finished up:
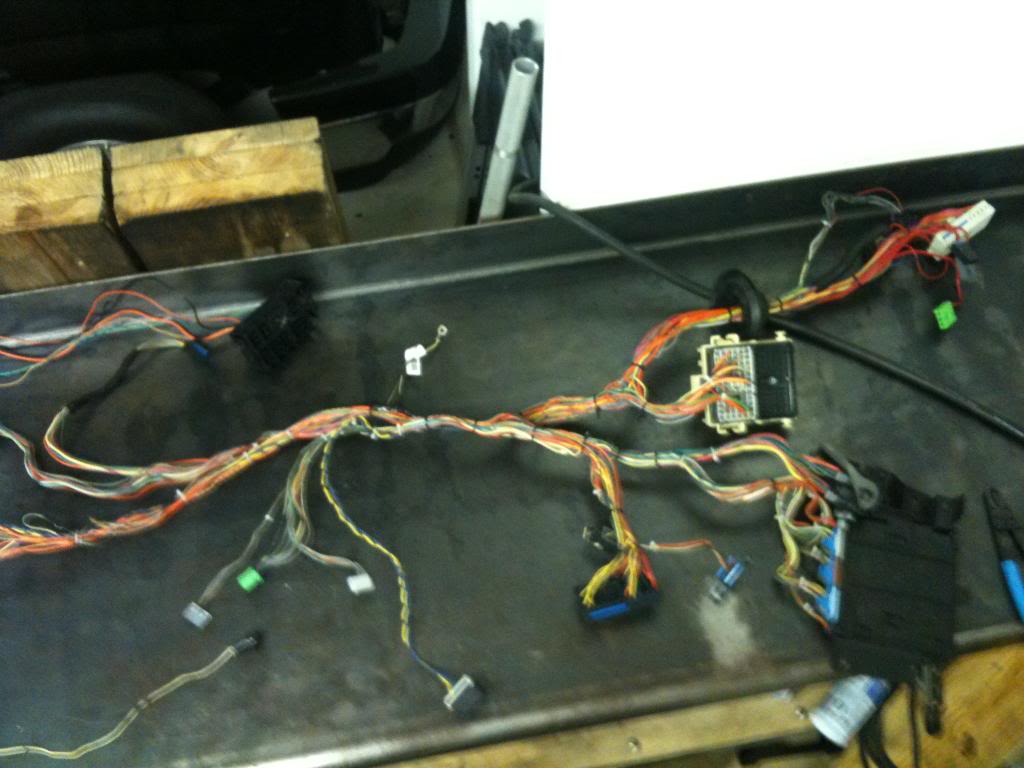

Doesn't look like much till you see this:

Cab without dash or wiring:
So I just removed the entire harness and started working on it on the work bench, which was way easier. I have some before and after pictures but the funny thing is it doesn't look like I removed much until you see the pill of removed wires. No short cuts were taken, termination of each wire consisted of de-pinning the connectors. No wires were terminated by just cutting the wire at the connectors.
Wiring that was removed:
*XM Sat. Radio
*Complete HVAC system
*Air bag harness
*Wiring harness for the factory seats
*Misc. wiring that comes in from under the hood that I removed
Still retains am/fm cd radio functions with all factory speakers, steering wheel controls, in-cab lighting, automatic head lights, power window, locks, mirrors, factory gauges and dash lighting. Most creature comforts remain, save for the a/c and the interior will still look fairly stock besides the cage and seats. I'm keeping the factory carpet and floor mats as well.
All together I removed 4.2 lbs. of wire from in the cab.
Only problem I'm having is that I'm not sure how to hook up the brake switch with the new brake pedal/master cylinder push rod set up. I'm gonna have to call madman about that one.
Here are the pics.
Harness partially done but removed from the truck:
Here are pics of it finished up:
Doesn't look like much till you see this:
Cab without dash or wiring:

 07-20-2010 | 02:06 AM
#200
The factory one. I don't want this truck to start looking like a race car.
Thanks. Whats the status on your stuff. Still rockin the procharger? Have you been any faster with it? Didn't we both break the 10 sec. barrier on the same night without each other knowing about it?
Can anybody get me a wiring diagram for the brake switch off the brake pedal? If I recall it has 8 (or maybe it was 6) wires coming from it. I tried searching all over the net this evening and couldn't find anything other than it should be similar for almost all nbs trucks (at least the dbw ones). I'm trying to figure out what the hell I'm gonna do about remounting this switch and I'm anticipating having to change the wiring around a bit if I can't use the factory switch.