Droppin More Quarters Then Michael J Fox @ a Parking Meter (pic heavy)
 04-05-2014, 02:53 PM
#121
TECH Fanatic
Thread Starter
iTrader: (3)
Join Date: Sep 2012
Location: Calgary, Alberta, Canada
Posts: 1,327
Likes: 0
Received 1 Like
on
1 Post
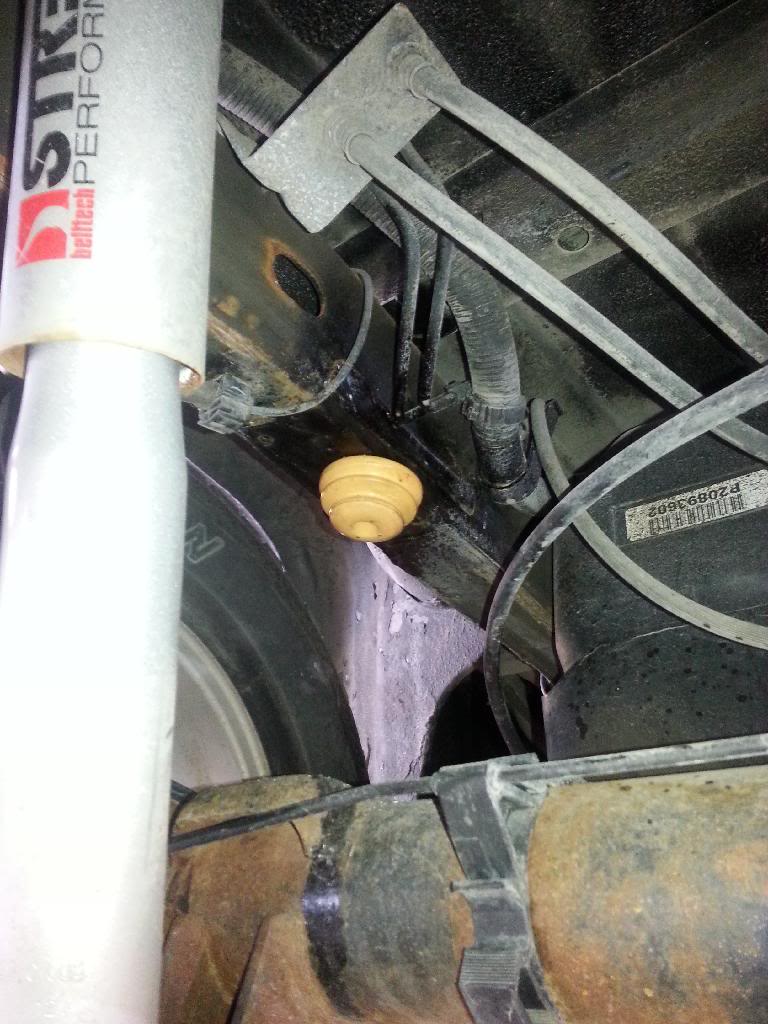
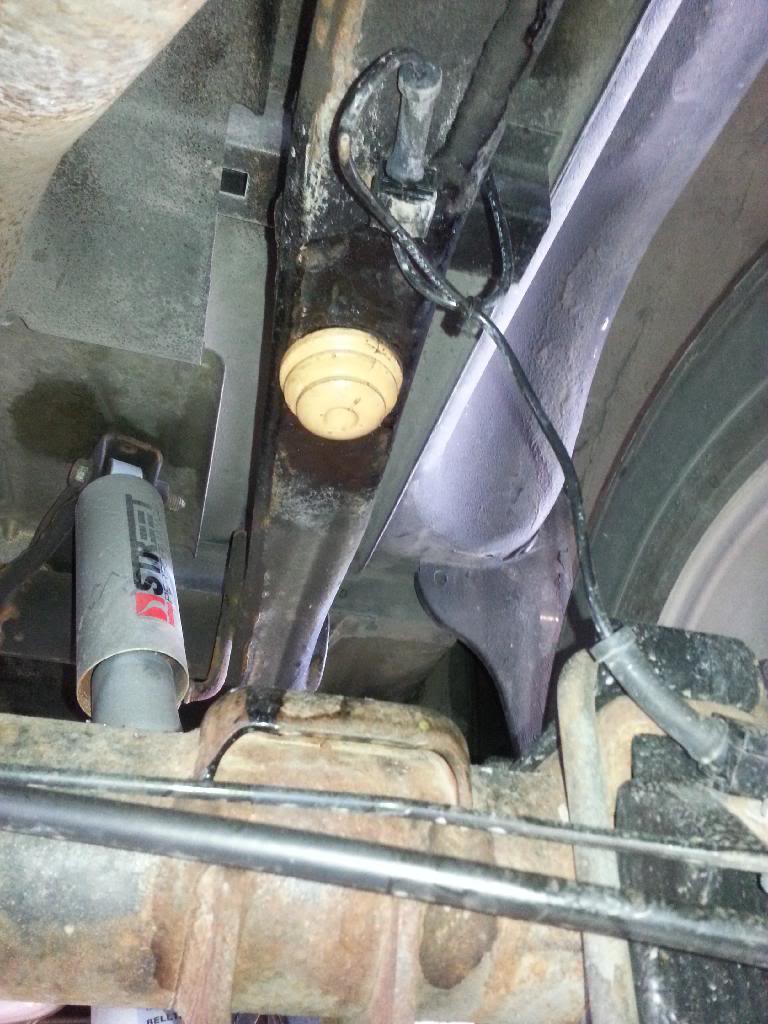
I decided after that ABS wire issue I should probly install some pancake bumpstops
drill a 5/16 hole
thread /w 3/8-16NC tap
red loc tite and install!
if you have the chance...do it before your done the flip kit. I'm just lucky I had a 90* drill but I still didn't get them perfectly centered so I regret not doing that before!
drill a 5/16 hole
thread /w 3/8-16NC tap
red loc tite and install!
if you have the chance...do it before your done the flip kit. I'm just lucky I had a 90* drill but I still didn't get them perfectly centered so I regret not doing that before!
 04-05-2014, 03:41 PM
#122
TECH Fanatic
Thread Starter
iTrader: (3)
Join Date: Sep 2012
Location: Calgary, Alberta, Canada
Posts: 1,327
Likes: 0
Received 1 Like
on
1 Post
I'm terrible at making how too's but I see the thread pop up a bunch and since I was doing mine today I figured I'd put together something basic to give people an idea, show how I did mine and help where I can. I had spoken to ak2007r6 about the basics of the job
The entire job was very straight forward, basic skills and basic tools to do it, a little time, measure 10X cut once. Total install time was 2.5HRS but I also wasted a bunch of time, you could easily do it in an hour but thatd be cutting and hacking it together
Grille Cover:
No photo...if you cant get that one off, please stop now
Grille:
No Photo...Very easy to remove, there are 4 10mm bolts along the top, use needle nose pliers and reach down and while pulling gently on the grille, squeeze the little tabs
Hood Latch Bracket:
I removed this to have better access to everything, undo the hood open connector, for the hood cable theres one clip. remove the 5 10mm bolts and swing it up onto the engine with the latch and cable still attached
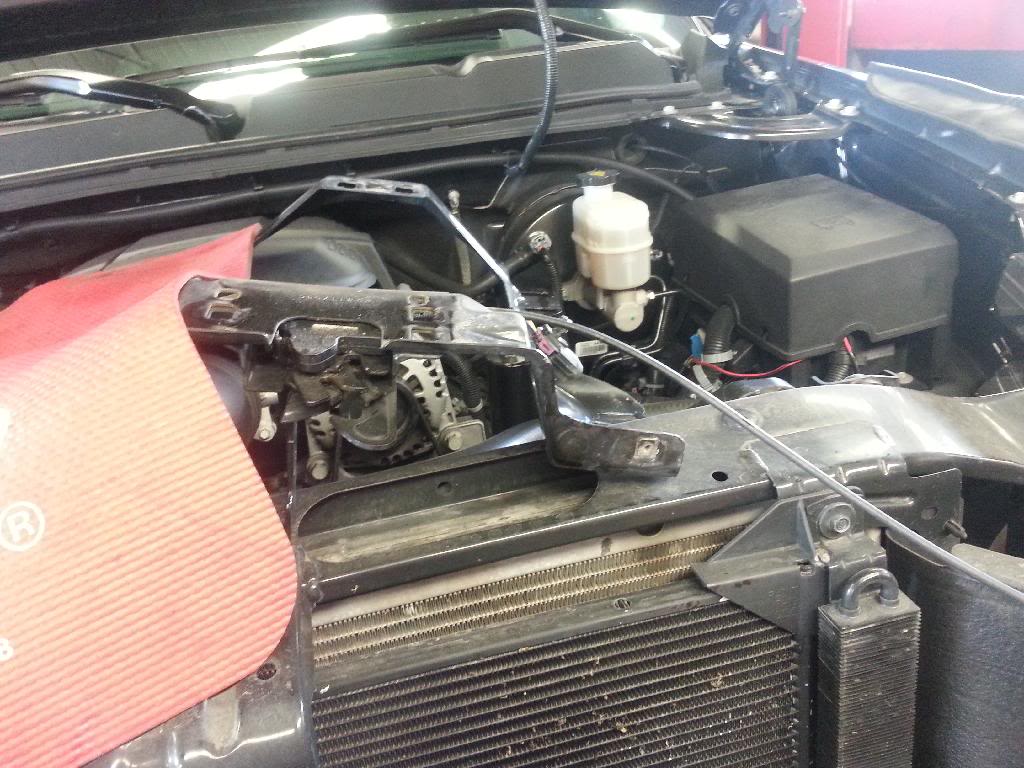
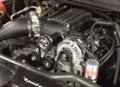
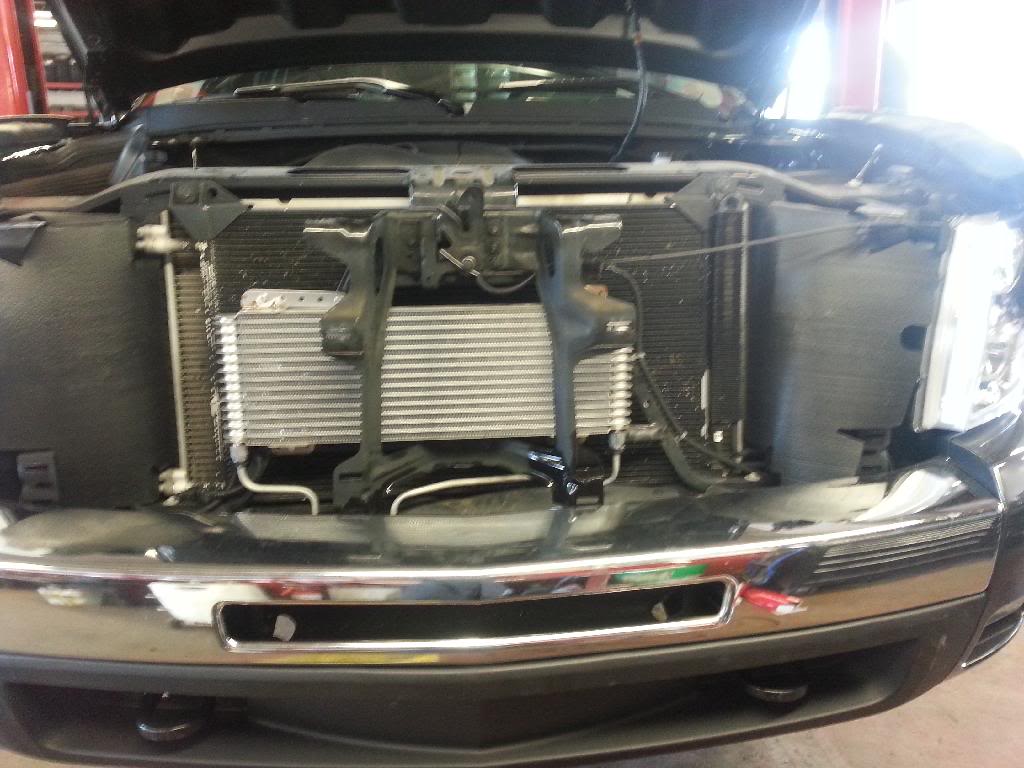
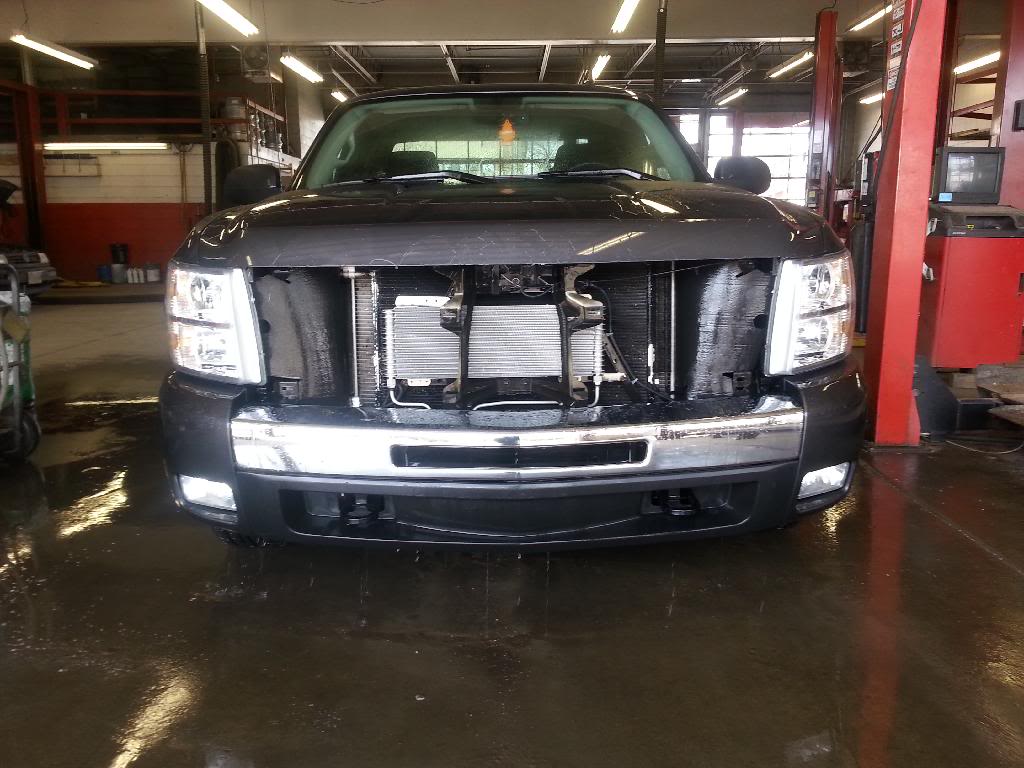
Cooler Removal:
Undo the 2 10mm bolts. with a small pick, pop the line e-clips out of the connections, the lines will pop down...get ready for fluid to spill out (notice the rags I put under it) and slide the cooler outwards (towards the front) then your done!
Time To Trim The OE Cooler Bracket:
At this point, try test fitting your tru-cool, hold it up to where you think it should go...your gonna notice that the bottom doesn't quite sit right! you need to cut off basically the entire top section of the OE trans cooler bracket, I left the center section to help hold up the tru cool

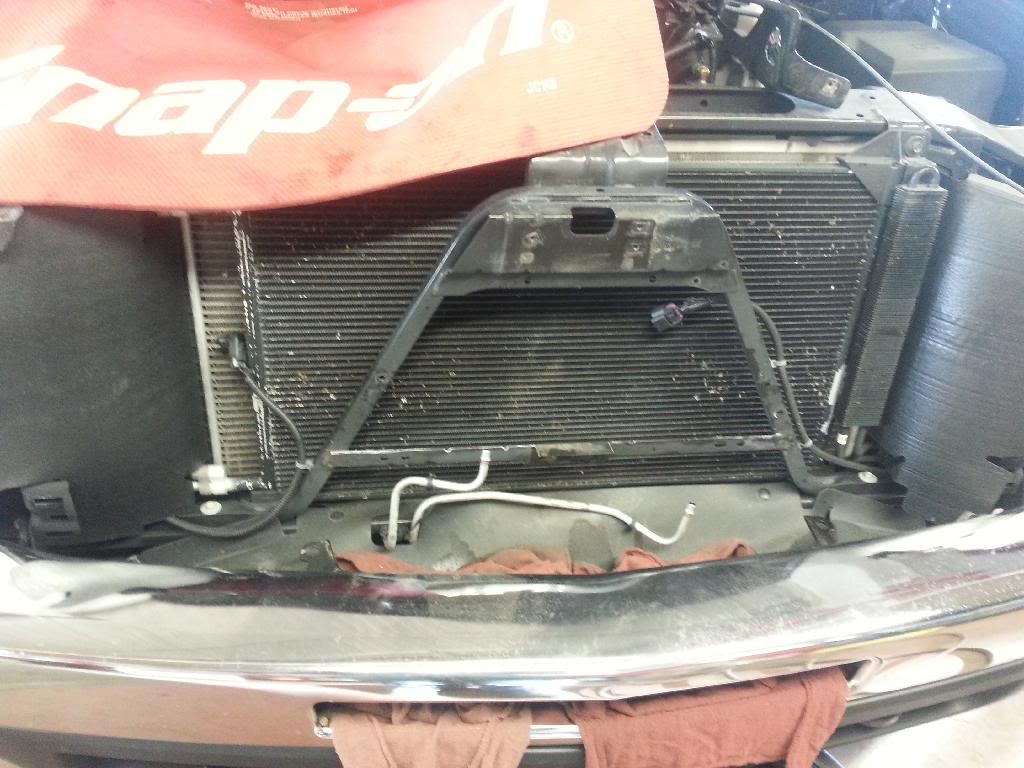
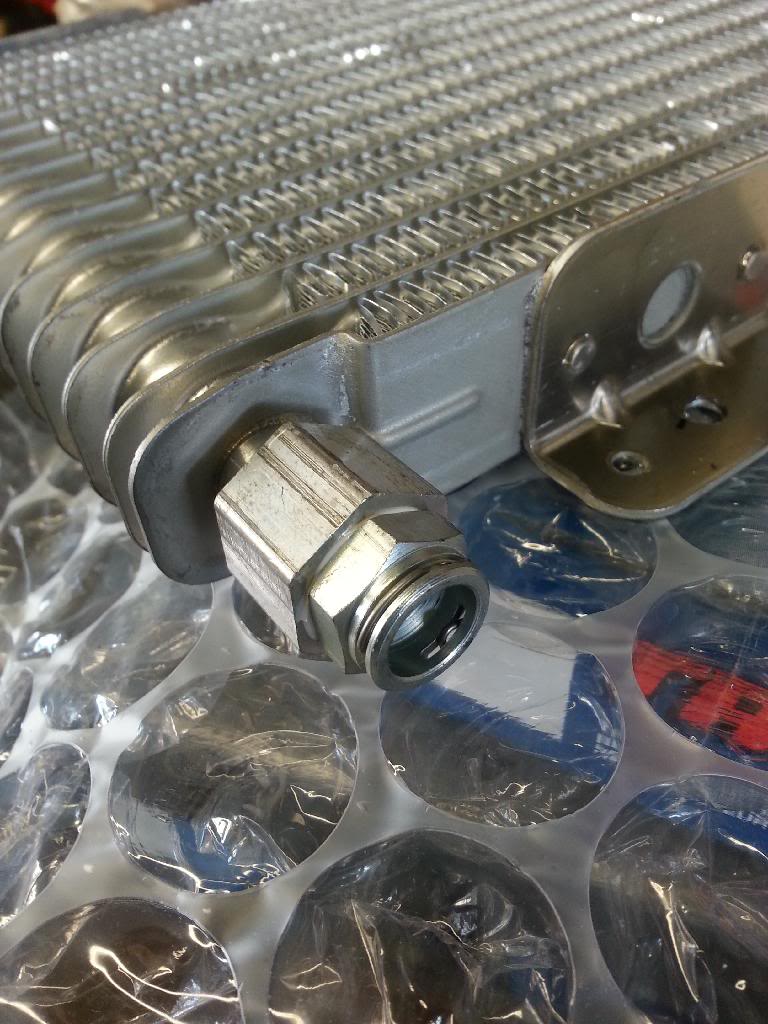
Cut The Passenger Side Cooler Line:
Using a tube cutter, not side cutters, not a cutoff wheel, cut the passenger side trans cooler line, take your time and work it slowly. I have the mac tools set, was only about $50 but I use them often so any cutter would do. I had to use the smaller one cause the bigger one would hit the condenser
after your cut the line, use some sand paper and smooth the burs

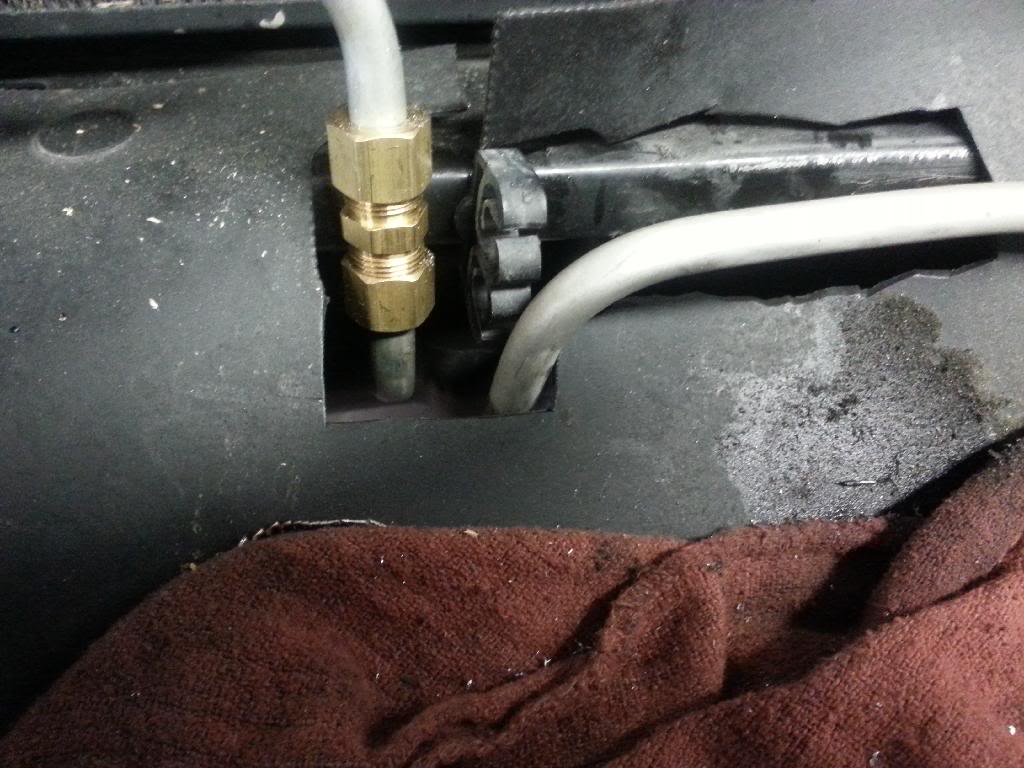
Compression Fitting & Putting A Hole In Your Rubber:
There's a few good youtube how too's for compression fittings, get familiar with them. I just stuck mine in place and threaded it almost finger tight.
grab your tru-cool and hold it up again, see where your lines are at. you'll notice you have to pull the driver side one over to reach. not a problem. if your like me...a sharp blade is just a hips reach away. trim the rubber mat and I didn't like how that one spot was loose, so I drilled a hole and put another push clip to hold that flap down
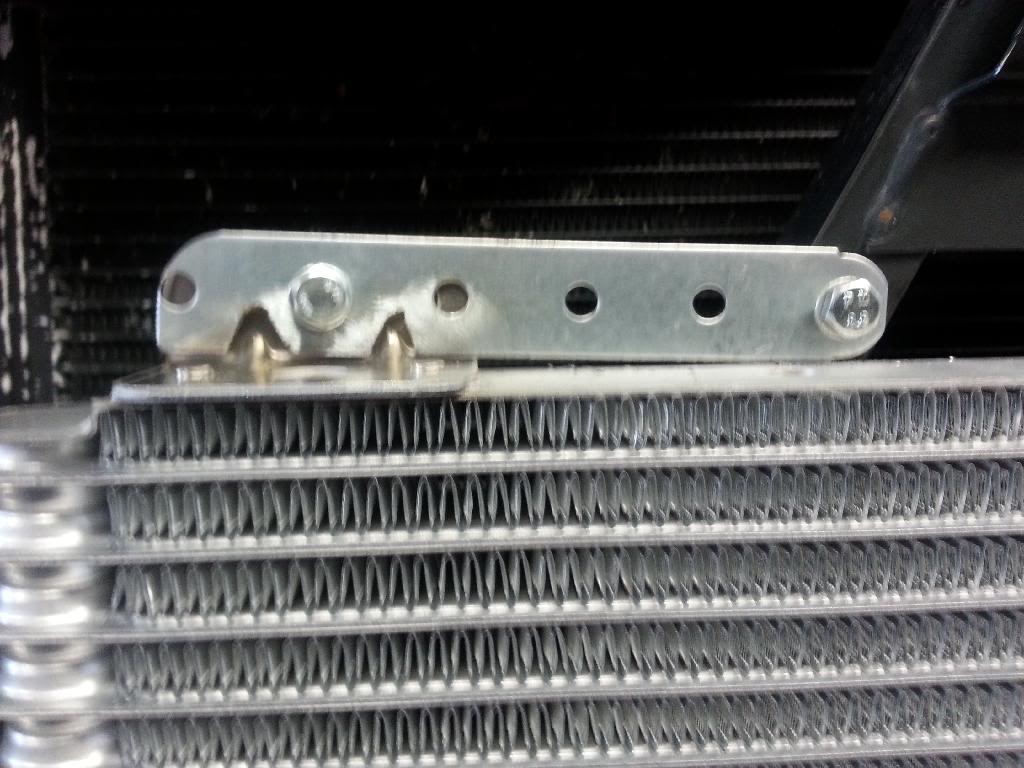
Final Test Fit & Drill:
Hold your tru-cool up again (see how we keep checking the placement ) using a sharpie or whatever, mark the holes you need to drill for mounting. both lower holes will hit that OE trans bracket easily. the driver side will hit the hood latch bracket. the top left will hang out...no worries we'll get to that.
6mm bolts fit threw the tru-cool, I used a 7mm drill bit.
when drilling, make sure to put wood behind it.
for the guys who don't work with refrigerant or A/C
at a static reading your pressure will be almost equal to ambient, so your shops 70 deg, the AC will be at about 65PSI. Refrigerant is attracted to the closest moisture...which are your eyes when your sitting on a stool drilling holes. It will blind you.

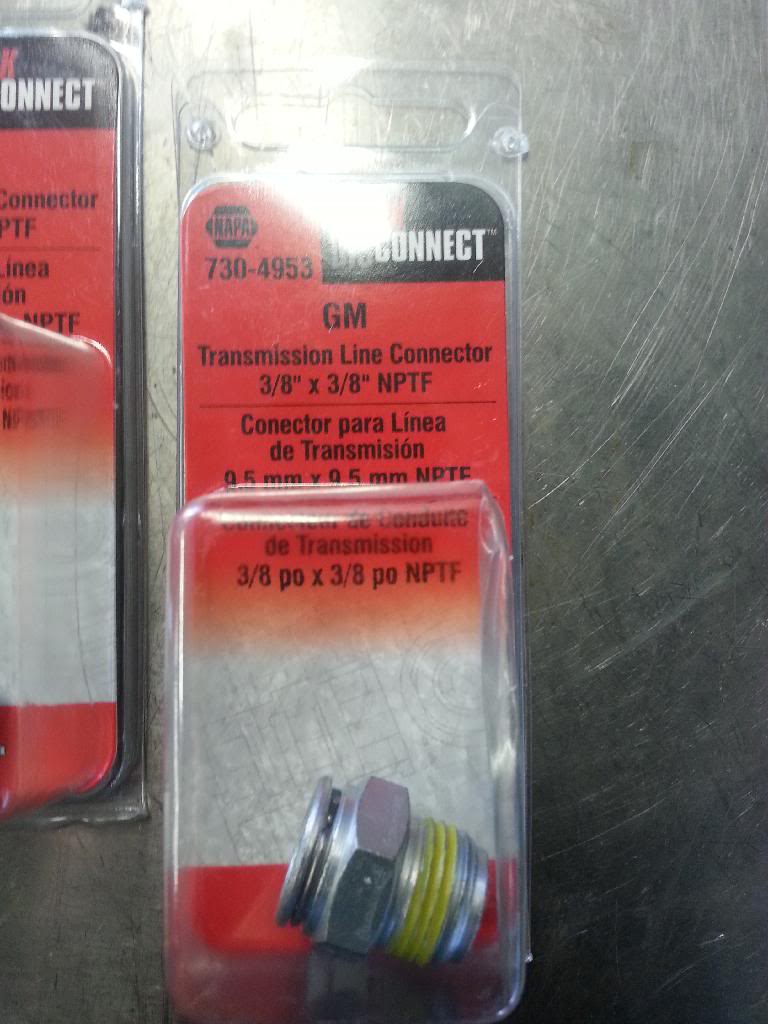
Get The tru-cool ready:
I picked up a couple of quick connect fittings from Napa, like $4 each
The entire job was very straight forward, basic skills and basic tools to do it, a little time, measure 10X cut once. Total install time was 2.5HRS but I also wasted a bunch of time, you could easily do it in an hour but thatd be cutting and hacking it together
Grille Cover:
No photo...if you cant get that one off, please stop now
Grille:
No Photo...Very easy to remove, there are 4 10mm bolts along the top, use needle nose pliers and reach down and while pulling gently on the grille, squeeze the little tabs
Hood Latch Bracket:
I removed this to have better access to everything, undo the hood open connector, for the hood cable theres one clip. remove the 5 10mm bolts and swing it up onto the engine with the latch and cable still attached
Cooler Removal:
Undo the 2 10mm bolts. with a small pick, pop the line e-clips out of the connections, the lines will pop down...get ready for fluid to spill out (notice the rags I put under it) and slide the cooler outwards (towards the front) then your done!
Time To Trim The OE Cooler Bracket:
At this point, try test fitting your tru-cool, hold it up to where you think it should go...your gonna notice that the bottom doesn't quite sit right! you need to cut off basically the entire top section of the OE trans cooler bracket, I left the center section to help hold up the tru cool
Cut The Passenger Side Cooler Line:
Using a tube cutter, not side cutters, not a cutoff wheel, cut the passenger side trans cooler line, take your time and work it slowly. I have the mac tools set, was only about $50 but I use them often so any cutter would do. I had to use the smaller one cause the bigger one would hit the condenser
after your cut the line, use some sand paper and smooth the burs
Compression Fitting & Putting A Hole In Your Rubber:
There's a few good youtube how too's for compression fittings, get familiar with them. I just stuck mine in place and threaded it almost finger tight.
grab your tru-cool and hold it up again, see where your lines are at. you'll notice you have to pull the driver side one over to reach. not a problem. if your like me...a sharp blade is just a hips reach away. trim the rubber mat and I didn't like how that one spot was loose, so I drilled a hole and put another push clip to hold that flap down
Final Test Fit & Drill:
Hold your tru-cool up again (see how we keep checking the placement
) using a sharpie or whatever, mark the holes you need to drill for mounting. both lower holes will hit that OE trans bracket easily. the driver side will hit the hood latch bracket. the top left will hang out...no worries we'll get to that.6mm bolts fit threw the tru-cool, I used a 7mm drill bit.
when drilling, make sure to put wood behind it.
for the guys who don't work with refrigerant or A/C
at a static reading your pressure will be almost equal to ambient, so your shops 70 deg, the AC will be at about 65PSI. Refrigerant is attracted to the closest moisture...which are your eyes when your sitting on a stool drilling holes. It will blind you.
Get The tru-cool ready:
I picked up a couple of quick connect fittings from Napa, like $4 each
Last edited by AUTOT3K; 04-05-2014 at 04:20 PM.
04-05-2014, 03:43 PM
#123
TECH Fanatic
Thread Starter
iTrader: (3)
Join Date: Sep 2012
Location: Calgary, Alberta, Canada
Posts: 1,327
Likes: 0
Received 1 Like
on
1 Post
Installing Tru-Cool:
Now your ready to install the cooler, put it up into place, install the 3 bolts & nuts and just thread them in finger tight. at this point. I popped the lines into the connectors (remember the compression fitting is still loose)
the kit comes with some straps/brackets to use, for that upper left mounting spot this is where it comes in handy. you'll notice if you go behind the cooler..it wont sit right, but if you put the piece in front..still doesn't sit right!
get out your grinder and cut off wheel and make it fit. you'll have to drill another hole in the hood latch bracket.
I used a lock washer on the nut side, as well as a dab of red Loctite on all the mounting bolts. now your ready to tighten everything down!
Compression Fitting:
Now that everything is installed and in place its time to tighten the compression fitting.
making sure the tubes are fully inserted, hold the center, and tighten the top and bottom separately. its really a matter of feel, I went pretty tight on mine.
pic repeat but it works

Reinstall Hood Latch Bracket:
Put your hood latch bracket back in place
this piece is adjustable, so put the bolts back where they came out, you'll see where the bolts used to sit before
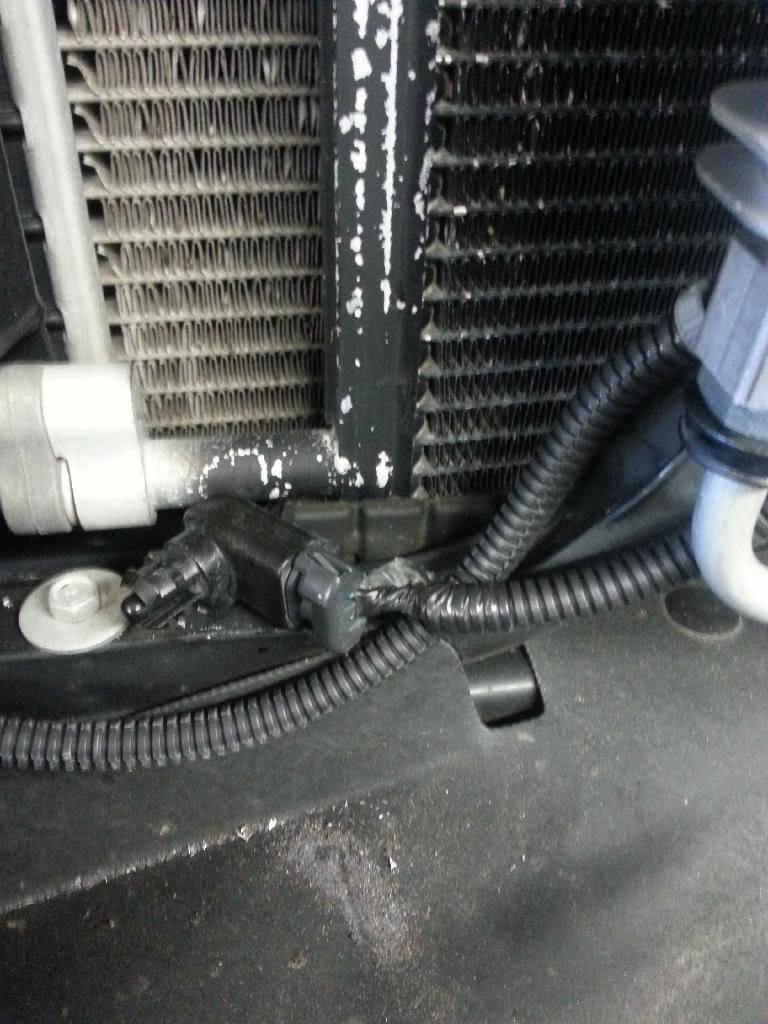
Odds N Ends:
Your ambient air sensor wont have a home anymore, relocate it to wherever you would like using a drill bit, I put mine here
Im ****:
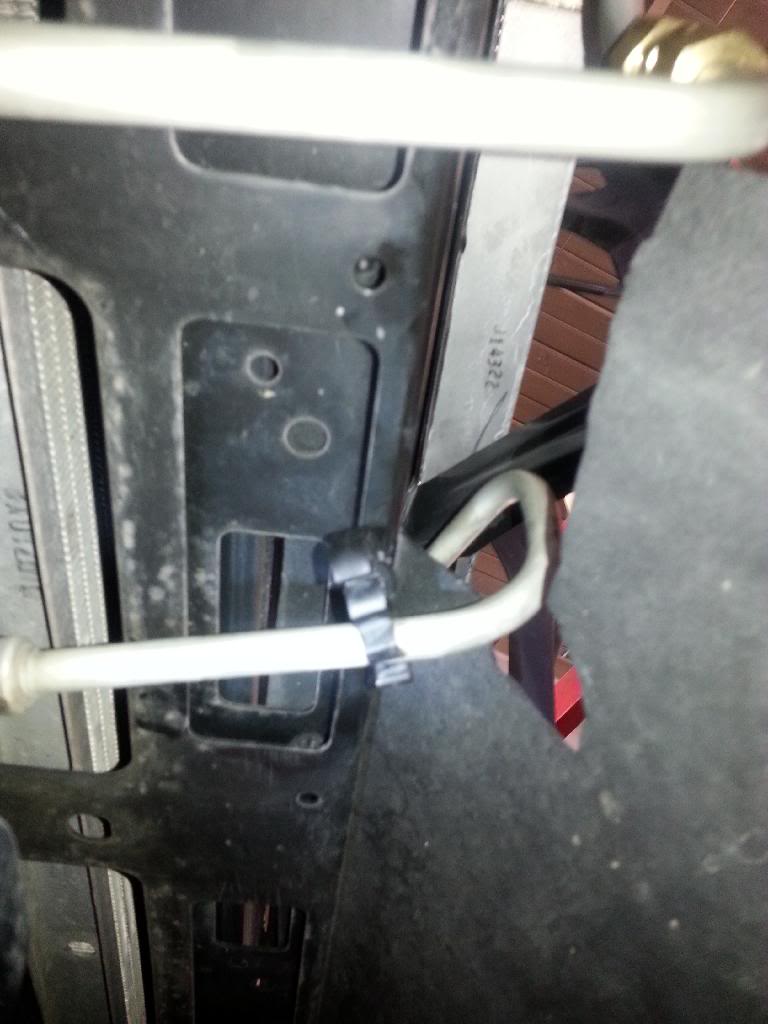
I didn't like how that driver side line (the long one) would flop around like it did, not much but enough to bug me. The old trans line clip is useless now anways...or is it?
from the bottom side...I drilled a hole, popped that clip in and now that long line is solid!
Start'er Up:
Jump in, fire up the truck and immediately run to the front cause if your like me...you think everything is gonna leak. if its good, go back, run it from rev-dr-park. let it idle for a while, check your fluid level. I added 0.5L at this time and that brought me back to the middle of the hot cross hatch (I had been driving before starting the job)
Instead of installing the grille and hoping everything was good, I decided to just close the hood and go for a drive
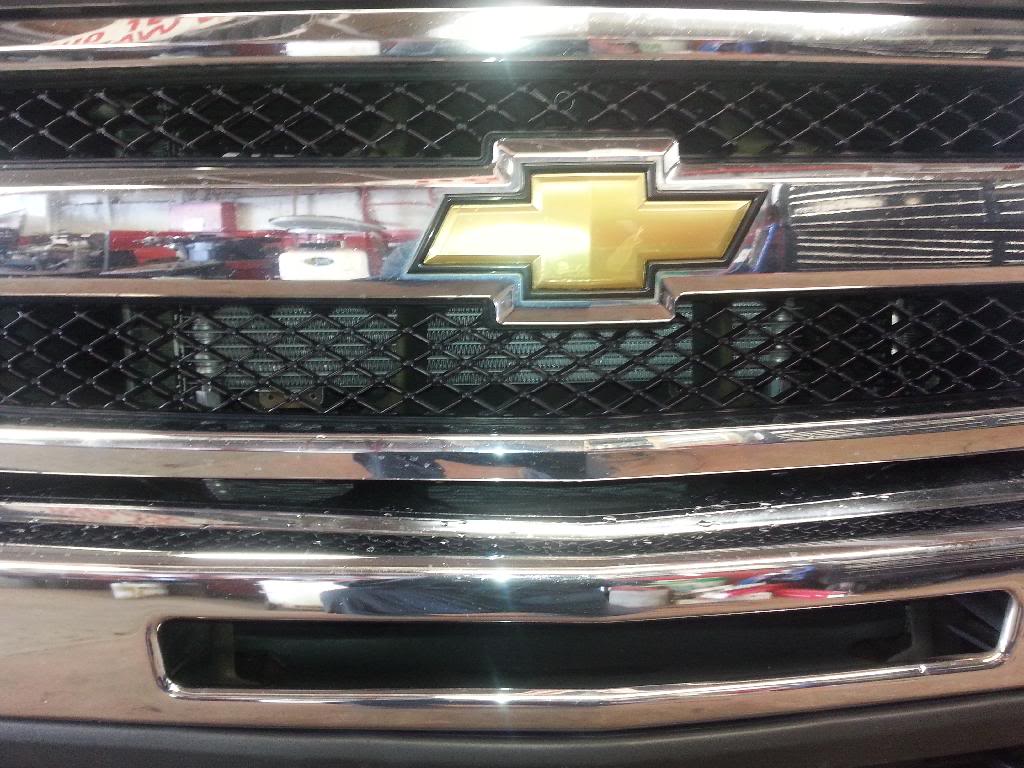
Recheck & Install Grille:
after the drive, come back, recheck the fluid level. I had to add another 0.2L to get it right where I want it. I decided to give the compression fitting a touch more on the tightness. reinstall grille and grille cover.
FIN
Now your ready to install the cooler, put it up into place, install the 3 bolts & nuts and just thread them in finger tight. at this point. I popped the lines into the connectors (remember the compression fitting is still loose)
the kit comes with some straps/brackets to use, for that upper left mounting spot this is where it comes in handy. you'll notice if you go behind the cooler..it wont sit right, but if you put the piece in front..still doesn't sit right!
get out your grinder and cut off wheel and make it fit. you'll have to drill another hole in the hood latch bracket.
I used a lock washer on the nut side, as well as a dab of red Loctite on all the mounting bolts. now your ready to tighten everything down!
Compression Fitting:
Now that everything is installed and in place its time to tighten the compression fitting.
making sure the tubes are fully inserted, hold the center, and tighten the top and bottom separately. its really a matter of feel, I went pretty tight on mine.
pic repeat but it works
Reinstall Hood Latch Bracket:
Put your hood latch bracket back in place
this piece is adjustable, so put the bolts back where they came out, you'll see where the bolts used to sit before
Odds N Ends:
Your ambient air sensor wont have a home anymore, relocate it to wherever you would like using a drill bit, I put mine here
Im ****:
I didn't like how that driver side line (the long one) would flop around like it did, not much but enough to bug me. The old trans line clip is useless now anways...or is it?
from the bottom side...I drilled a hole, popped that clip in and now that long line is solid!
Start'er Up:
Jump in, fire up the truck and immediately run to the front cause if your like me...you think everything is gonna leak. if its good, go back, run it from rev-dr-park. let it idle for a while, check your fluid level. I added 0.5L at this time and that brought me back to the middle of the hot cross hatch (I had been driving before starting the job)
Instead of installing the grille and hoping everything was good, I decided to just close the hood and go for a drive
Recheck & Install Grille:
after the drive, come back, recheck the fluid level. I had to add another 0.2L to get it right where I want it. I decided to give the compression fitting a touch more on the tightness. reinstall grille and grille cover.
FIN
Last edited by AUTOT3K; 04-05-2014 at 04:01 PM.

 04-08-2014, 09:20 PM
#127
TECH Fanatic
Thread Starter
iTrader: (3)
Join Date: Sep 2012
Location: Calgary, Alberta, Canada
Posts: 1,327
Likes: 0
Received 1 Like
on
1 Post
What weight of oil are you guys running?
After I did the heads, I drained the oil pan, swapped the filter and I've been running it since. I've probly got about 800mi on the oil, but its been a HARD 800mi so I'm thinking I should change it. last night I started getting some louder then normal valve train noise.
Not enough to pull a valve cover...yet but I'm hoping its just the fact the oil needs to be changed, I'm going to do that Thursday
I run Royal Purple 5w30, maybe I should consider a 5w40?
04-11-2014, 11:00 AM
#128
TECH Fanatic
Thread Starter
iTrader: (3)
Join Date: Sep 2012
Location: Calgary, Alberta, Canada
Posts: 1,327
Likes: 0
Received 1 Like
on
1 Post
I dropped the oil and it was pretty dark and felt a little thin, I cut open the filter and everything looked good.
the valve train definitely quieted down a fair bit but I find its still noisey after a hard accel and i'm decelerating / coasting afterwards.
maybe thats just normal for dual valve springs? its definitely not a "hitting" noise but its a loud sewing machine noise
anyone else with dual springs have any input?
edit to add... oil pressure is very good at idle and WOT
04-13-2014, 12:11 AM
#129
TECH Fanatic
Thread Starter
iTrader: (3)
Join Date: Sep 2012
Location: Calgary, Alberta, Canada
Posts: 1,327
Likes: 0
Received 1 Like
on
1 Post
I was out cruising this evening and decided to just put the phone on that empty battery tray and drive threw a parking lot.
Heres the video
there's a lot of noise going on but you can definitely hear valve train, I'm just trying to see if that's a normal sound for having link bar lifters and dual valve springs. my lifters are about 0.050" preload and according to Brian Tooley that's exactly where they should be, but he also mentioned they have about 0.200" travel so maybe I should go with 0.025" longer
here's a idle video right after I swapped the heads and lifters on for comparison, I put the phone up to the valve covers