
GMC Syclone rebuild


 01-12-2011, 02:04 AM
#33
Teching In
Thread Starter
Join Date: Jun 2009
Location: Torrance, CA
Posts: 47
Likes: 0
Received 0 Likes
on
0 Posts
The L35 heads. I have heard vortecs have a bit of a different angle so my stock intake manifold wouldn't work which would be more $$. But the L35's still flow quite a bit better than stock. the LB4 engine naturally aspirated does 160 hp and the L35 engine does 200 and the biggest difference was the head design. I was going to port em, but the budget doesn't allow for that right now...
08-04-2011, 12:10 AM
#35
Teching In
Thread Starter
Join Date: Jun 2009
Location: Torrance, CA
Posts: 47
Likes: 0
Received 0 Likes
on
0 Posts
Other than slowly, lol
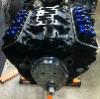
I have actually been making some good progress recently and expect the motor to be finished in a week or two! It has been a while since I updated this, so this is my status as of now.
Here are the pistons and rods put together. Way too sexy to be hidden in the engine block, haha

Pulled out the crank and admired it for a bit before installing.

Dropped or actually set her in the block and threaded the main cap studs.

Cool stamp so I know the torques for the main studs and weight oil to thread them with

Pistons and rods installed


And thats about all I got for now, but I should have no issue finishing the engine within a week since all of the parts are now in!
Just gotta get my ported heads back in the next few days and degree the cam then finish assembly. The more exciting stuff is coming up so stay tuned!
But for now she just looks mad at me...

I have actually been making some good progress recently and expect the motor to be finished in a week or two! It has been a while since I updated this, so this is my status as of now.
Here are the pistons and rods put together. Way too sexy to be hidden in the engine block, haha
Pulled out the crank and admired it for a bit before installing.
Dropped or actually set her in the block and threaded the main cap studs.
Cool stamp so I know the torques for the main studs and weight oil to thread them with
Pistons and rods installed
And thats about all I got for now, but I should have no issue finishing the engine within a week since all of the parts are now in!
Just gotta get my ported heads back in the next few days and degree the cam then finish assembly. The more exciting stuff is coming up so stay tuned!
But for now she just looks mad at me...


 10-09-2013, 09:58 AM
#39
Teching In
Thread Starter
Join Date: Jun 2009
Location: Torrance, CA
Posts: 47
Likes: 0
Received 0 Likes
on
0 Posts
I will start to update this again after 2 years!! I got pretty busy with work and started to work on the truck only a couple days here and there. I got a new job now and have been able to concentrate on it a little more now, and ill actually start updating the thread a bit more. I'll start updating to current time. This was done in April 2012.
After finishing the long block and starting to bolt on accessories I got pretty eager to start getting he together, so I decided to drop in the engine the night before I had to go out of town again.


When I got home I immediately started working on it day after day had some help from a couple local friends along with advice from syty.net. Last week I was able to start it for the first time and then drive it up and down the street that weekend.
And here she is sitting happily in her home...


Sorry about the crummby video, and excuse the power steering pump, but she really sounds pretty mean!
First Drive
And I have a baseline tune on it now, but I still haven't woken her up like shes going to be!
After finishing the long block and starting to bolt on accessories I got pretty eager to start getting he together, so I decided to drop in the engine the night before I had to go out of town again.
When I got home I immediately started working on it day after day had some help from a couple local friends along with advice from syty.net. Last week I was able to start it for the first time and then drive it up and down the street that weekend.
And here she is sitting happily in her home...
Sorry about the crummby video, and excuse the power steering pump, but she really sounds pretty mean!
First Drive
And I have a baseline tune on it now, but I still haven't woken her up like shes going to be!
Last edited by Quinnster; 10-09-2013 at 01:10 PM.
10-09-2013, 01:12 PM
#40
Teching In
Thread Starter
Join Date: Jun 2009
Location: Torrance, CA
Posts: 47
Likes: 0
Received 0 Likes
on
0 Posts
Last year I was out of town 250 days and barely had any time to pay attention to the truck since I never had any time. Then this year I was pretty busy up until a couple months ago, so I got back on it.
After it got stolen I pulled out the whole interior and went through everything, straightened out wiring, pre wired for my stereo so I don't have to pull up the carpet again and sound deadened the floor, back wall, doors and ceiling.


interior in

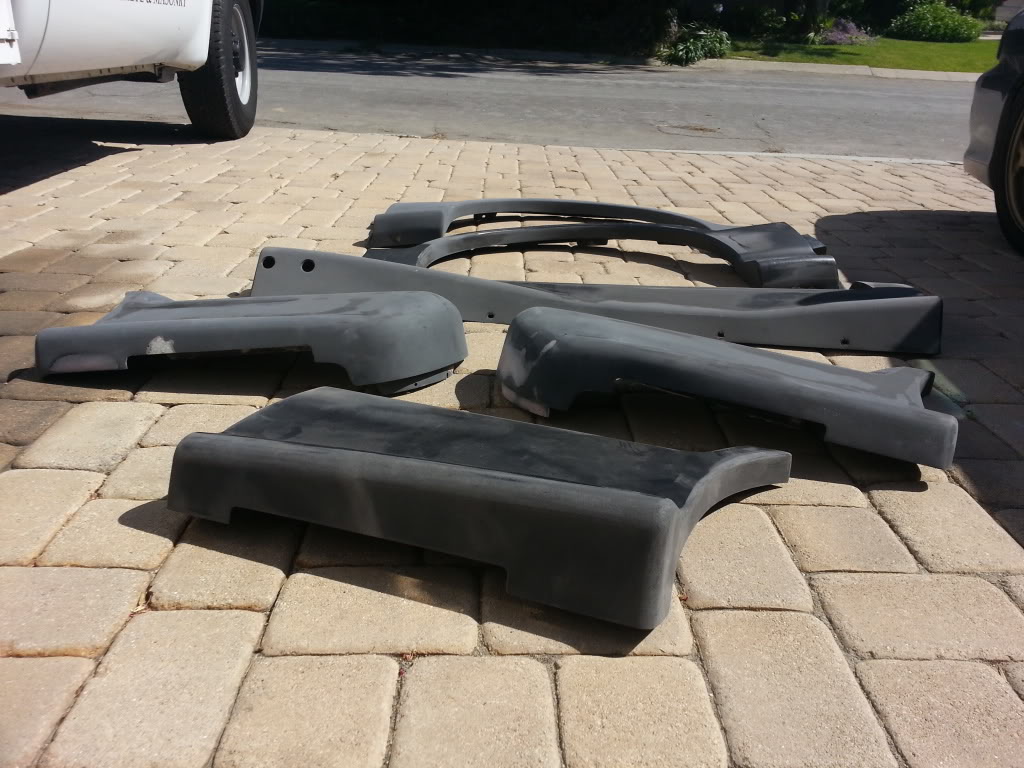
I put it all back together for a while and was driving it every now and then, but the paint on it always bothered me. It wasn't terrible but the roof was chipping and the hood was faded. I decided I would pull the trigger and spend the $$ and get it done. So I pulled off the cladding and about 10lbs of dirt!

Even though the cladding all looked good on the outside there were things that needed fixing all over, so I spent a fair amount of time fixing it all up.
I always loved hard tonneau's more than the other styles so I contacted ******** Lids and had them make me a custom one which looks awesome, but no pictures of it yet. I do have pics of the carpet kit I test fit and I was a great fit.
bed carpet

I liked the look of the wheels I had on it, but I really wanted to have that 12.5" rear tire width so I found a set of the 90's ZR1's had them refinished and put tires on them. They are now just awaiting the truck to get back.


After it got stolen I pulled out the whole interior and went through everything, straightened out wiring, pre wired for my stereo so I don't have to pull up the carpet again and sound deadened the floor, back wall, doors and ceiling.


interior in

I put it all back together for a while and was driving it every now and then, but the paint on it always bothered me. It wasn't terrible but the roof was chipping and the hood was faded. I decided I would pull the trigger and spend the $$ and get it done. So I pulled off the cladding and about 10lbs of dirt!

Even though the cladding all looked good on the outside there were things that needed fixing all over, so I spent a fair amount of time fixing it all up.

I always loved hard tonneau's more than the other styles so I contacted ******** Lids and had them make me a custom one which looks awesome, but no pictures of it yet. I do have pics of the carpet kit I test fit and I was a great fit.
bed carpet

I liked the look of the wheels I had on it, but I really wanted to have that 12.5" rear tire width so I found a set of the 90's ZR1's had them refinished and put tires on them. They are now just awaiting the truck to get back.

