My new powerplant (408 with a healthy direct port shot)


 11-20-2008, 09:14 PM
#83
TECH Veteran
LOL, everytime someone say's that the 65E won't survive behind xxxx another level V FLT 65E sets a record.
 That is a nice looking piece you got there. Vince
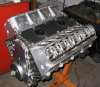 02-22-2009, 05:28 PM
#86

Well, its been a while since an update so I figured a couple of quick pictures are in order. I have mainly been working on tuning and wiring so the pig is FILTHY! It will clean up just fine, I swear 
O.K. here is the location of the switches for the direct port:
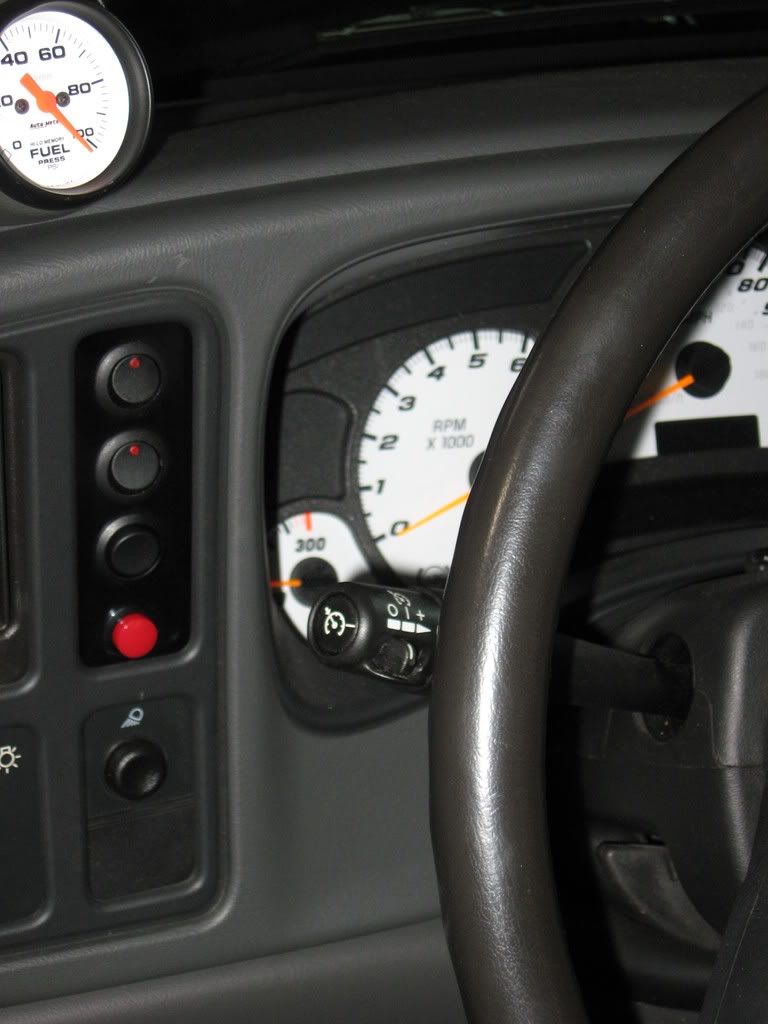
The top rocker switch will control the relay for the stand alone fuel pump, the second rocker down from the top will be the main arming switch for the N2O in conjunction with the Trick P-Gauge controller, the 3rd down from the top is a 3 position rocker to activate a remote bottle opener and last is the purge activation. That is the plan at the moment however could change. I am kicking around the idea of another kit (dry) since the DP set-up is not a dual stage. I would really like to leave off the line with a nice 50-75 shot and have the DP set-up come on progressively through 2nd gear or even only in 3rd. We'll see
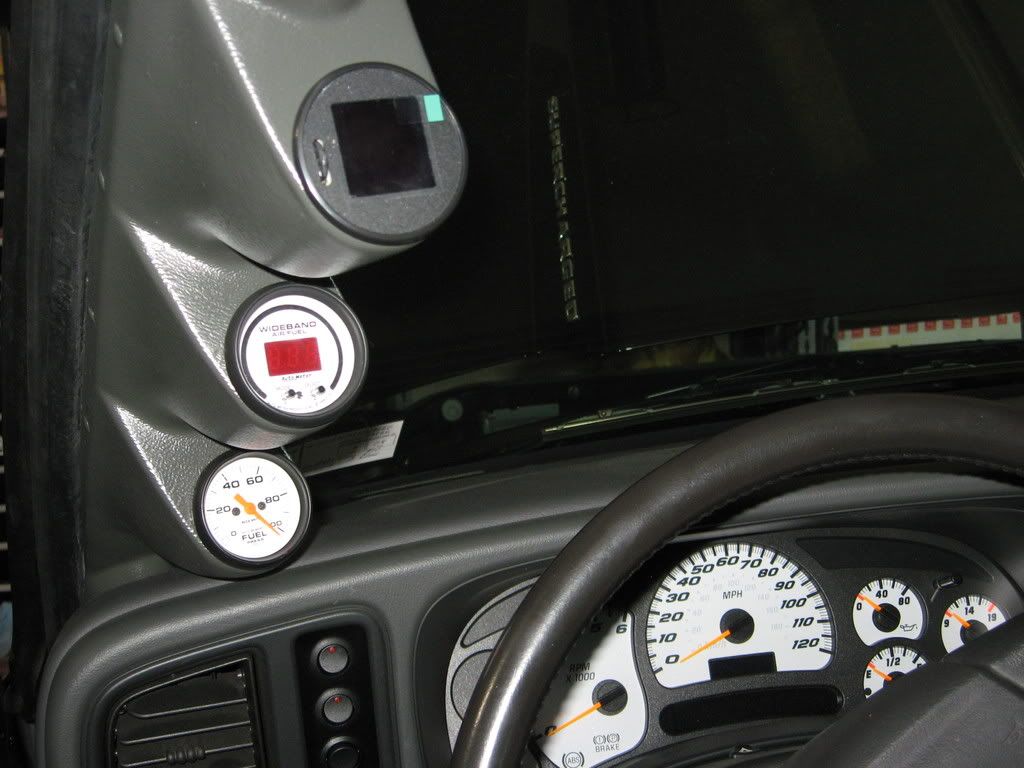
Alright, here is the 3 pillar gauge pod all wired up. Top gauge is the Trick Performance P-gauge, center gauge is the wideband and the bottom gauge is fuel pressure (for the motor).
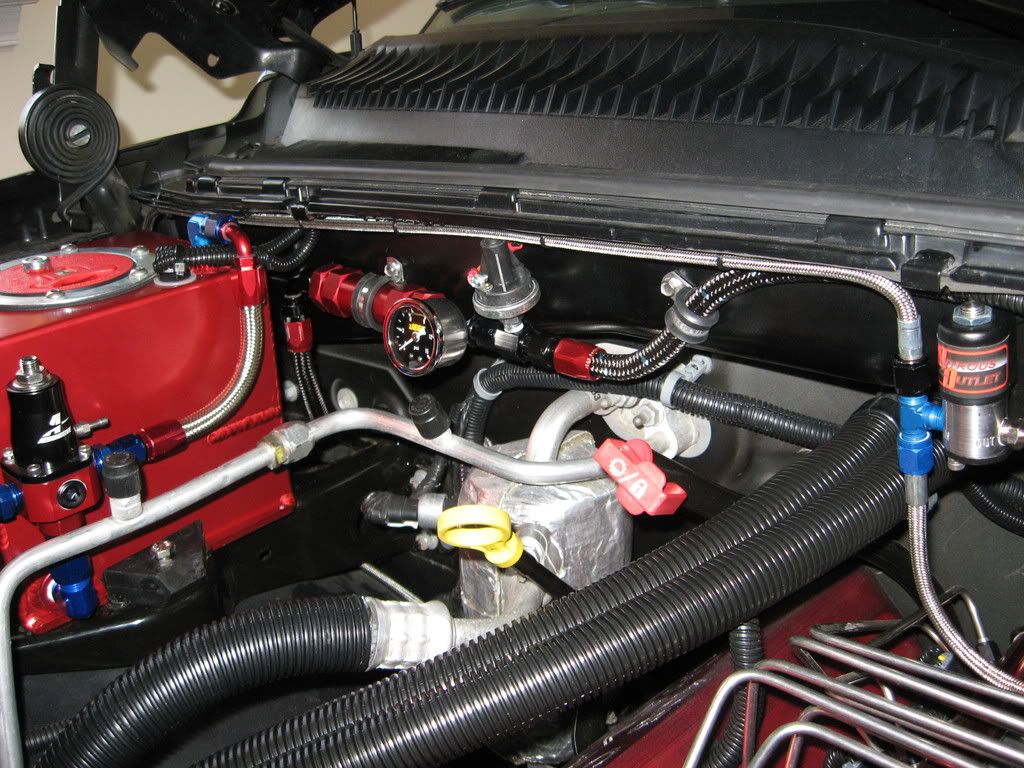
Here is a picture of the stand alone all wired up and plumbed as well as the purge solenoid and nitrous feed line:

I did the stand alone fuel system in -6AN since I had some left over fittings and line. I added a replaceable media billet fuel filter (anodized red of course), a mechanical fuel pressure gauge (to set the pressure by) and a fuel pressure safety switch (this will fail the solenoids in the event of lost pressure and save the motor). I tucked this mess all up under the cowl base and dropped the fuel line down on the other side of the motor...from the back. This will clean up all of the spagetti involved with a stand alone and all the wiring involved. Wiring was tucked in convoluted tubing and mounted next to the fuel line. The wires consist of ... Fuel pump for the stand alone, Fuel pressure safety switch, purge solenoid, main N20 and Fuel solenoid. Lots of wires to tuck up there.
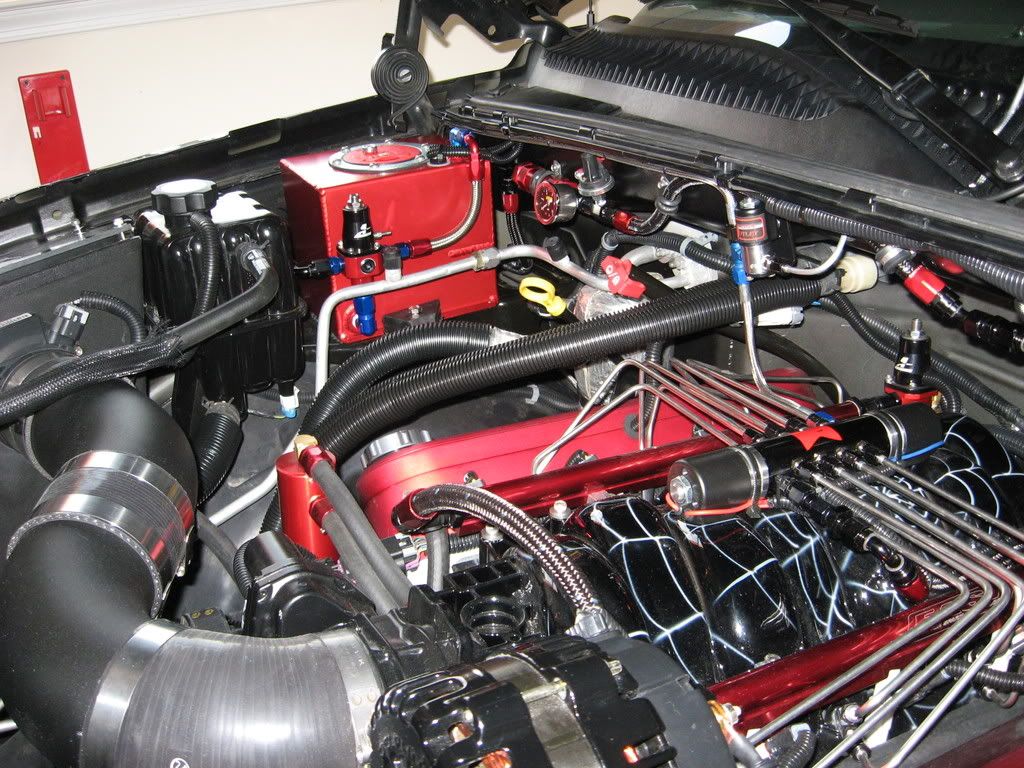
I made a custom bracket for the purge solenoid, mounted it on the "firewall", drilled and grommeted a hole for the purge line and poked it through just under the center of the windshield. The point of locating the purge vent at this location is to SEE when you are done venting the air from the line and the nitrous begins to flow through the purge vent. IMHO, the ideal location is is in the center of the base of the windshield for optimum visibility.
Here is a little closer shot of the goods:
Other than that, I had the exhaust buttoned up (too quiet now IMO), I have been working on the bottle mounting bracketry for the bed, I powdercoated my intake tubing black, started adding convoluted tubing where appropriate and changing around numerous vacuum tubing lines and junk like that. Here is a little wider shot so far outlining the new intake color:
I should have my DUAL bottle mounting strategy all ironed out next weekend with pictures of that maybe the week after. She is coming together!
O.K. here is the location of the switches for the direct port:
The top rocker switch will control the relay for the stand alone fuel pump, the second rocker down from the top will be the main arming switch for the N2O in conjunction with the Trick P-Gauge controller, the 3rd down from the top is a 3 position rocker to activate a remote bottle opener and last is the purge activation. That is the plan at the moment however could change. I am kicking around the idea of another kit (dry) since the DP set-up is not a dual stage. I would really like to leave off the line with a nice 50-75 shot and have the DP set-up come on progressively through 2nd gear or even only in 3rd. We'll see
Alright, here is the 3 pillar gauge pod all wired up. Top gauge is the Trick Performance P-gauge, center gauge is the wideband and the bottom gauge is fuel pressure (for the motor).
Here is a picture of the stand alone all wired up and plumbed as well as the purge solenoid and nitrous feed line:
I did the stand alone fuel system in -6AN since I had some left over fittings and line. I added a replaceable media billet fuel filter (anodized red of course), a mechanical fuel pressure gauge (to set the pressure by) and a fuel pressure safety switch (this will fail the solenoids in the event of lost pressure and save the motor). I tucked this mess all up under the cowl base and dropped the fuel line down on the other side of the motor...from the back. This will clean up all of the spagetti involved with a stand alone and all the wiring involved. Wiring was tucked in convoluted tubing and mounted next to the fuel line. The wires consist of ... Fuel pump for the stand alone, Fuel pressure safety switch, purge solenoid, main N20 and Fuel solenoid. Lots of wires to tuck up there.
I made a custom bracket for the purge solenoid, mounted it on the "firewall", drilled and grommeted a hole for the purge line and poked it through just under the center of the windshield. The point of locating the purge vent at this location is to SEE when you are done venting the air from the line and the nitrous begins to flow through the purge vent. IMHO, the ideal location is is in the center of the base of the windshield for optimum visibility.
Here is a little closer shot of the goods:
Other than that, I had the exhaust buttoned up (too quiet now IMO), I have been working on the bottle mounting bracketry for the bed, I powdercoated my intake tubing black, started adding convoluted tubing where appropriate and changing around numerous vacuum tubing lines and junk like that. Here is a little wider shot so far outlining the new intake color:
I should have my DUAL bottle mounting strategy all ironed out next weekend with pictures of that maybe the week after. She is coming together!