
SHOPTRK build
 11-18-2012, 09:52 PM
#41

Didn't do too awfully much today, made a little bracket to support the turbo/manifold and got the front end painted and back on.
Bracket thinger, haven't welded it on yet. Two holes and a little bend to get it to fit nice/flat on both the head and the manifold.


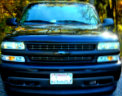
Painting the front end stuff

Attempting to color match the emblem to the truck haha, it came out a little darker than I wanted after I cleared it...oh well.

Front end on.

I also ended up switching throttle bodies from a F-body one back to a truck one. I wasn't aware that the F-body pulley was considerable larger/longer than the stock truck unit. Thus making my throttle cable too short. I also wish I'd known this earlier, would've really helped last winter when we swapped a LS1/T56 into a '69 Jaguar E-type haha.


Thinking I might have to paint the bumper itself the same color as the truck to break up the all black front, but we'll see what it looks like outside *shrug*


 11-19-2012, 08:47 PM
#44
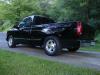
Got a temporary exhaust on it now, straight 3", 12" glass pack and a turn down. Debating running it out/through the passenger side, lower bed, in front of the rear wheel lol.
Truck runs/moves!!!! Took it down the dirt road and back tonight, TruTrac works hahah.
Getting across the border is super easy, I just got an Enhanced Drivers License so all I need is that and I'm set haha.
Truck runs/moves!!!! Took it down the dirt road and back tonight, TruTrac works hahah.
Getting across the border is super easy, I just got an Enhanced Drivers License so all I need is that and I'm set haha.
12-09-2012, 09:01 PM
#46
I did not weld in the little upper bracket, I looked into doing that for about, oohhh, half a second lol. Once I had started trying to put the pedal in and said screw that. The pedal assembly/firewall/brake master flexes a bit, but until it breaks I'm just gonna run it. I've got some other plans for the truck come spring/summer time so we'll see, I might end up going with a custom Wilwood brake/clutch pedal assembly.
Sorry for the delay everyone, been super swamped at work and with the holidays it hasn't left me a whole lot of time for the truck. I was also in West Virginia last weekend for a drift event so I lost a weekend there too haha.
Thanksgiving day was spent in the shop making the bedside exit exhaust lol.

Got to drive the truck around a bit the weekend after Thanksgiving.

Barn pic


This weekend we yanked the bed off!

With the bed off, it made the Walbro 400lph and Racetronix hotwire kit install super simple. I can't say enough how awesome this Racetronix kit was. Everything was super simple to install and everything worked perfectly, definitely worth the money!


In order to fit the Walbro 400lph and filter/sock in the stock bucket, I had to trim/break the bottom pedestal thingy off. I forgot to get a before pic, but if any of you are doing this install, here's some after pics, you'll know what I'm talking about haha.

Replaced the stock ancient brittle plastic feed line with some new high pressure EFI stuff. Extended.

Compressed.

Frame cleaned up and ready for some Chassis Saver

I degreased/scrubbed/hosed everything off after it was ground down.

While waiting for the frame and what not to dry, I decided to see if I could get the stock shackle bolts free, and if so, install the 2" DJM Drop shackles.


I ended up spinning the nuts off about 1/8" - 3/16" from tight, then air hammering the ends of the bolts to see if they would move, and surprisingly they did! It took quite a bit of air hammering but all 4 broke free and came out without a hitch!
Head of the bolt starting to move haha

Thank god for this thing

Today, once everything sat overnight and was dry I painted up the frame, leafs and rear axle.


That's all for now! I've got a bunch of pictures of the bedside exit exhaust, but I guess I forgot to upload them :-/ Tomorrow night I'll get them online!
Hopefully I can get the bed back on tomorrow, order up a shift boot of some sort and then it's off to ESP in Mass on Saturday for some dyno/tuning time!
12-11-2012, 12:42 PM
#47
Teching In

Join Date: Mar 2012
Location: Florida
Posts: 19
Likes: 0
Received 0 Likes
on
0 Posts
Love the exhaust setup man!
Does it feel like the pedal is going to break? What size hole did you drill? I saw someone welded a brace on the firewall under the hood to help solve this issue.
Does it feel like the pedal is going to break? What size hole did you drill? I saw someone welded a brace on the firewall under the hood to help solve this issue.
 12-13-2012, 11:49 AM
#49
I believe the holesaw bit I used was 1 5/8"...not 100% sure as it was a while back now, but that's the number that comes to mind haha. I wouldn't say it feels like it's going to break at all, just feels kinda weird haha. I'm used to it now after driving the truck a bit.
Dents and what not are all staying! I'm sure it'll get more down the road and this way I don't have to worry about parking next to door dingers and all that.
Dents and what not are all staying! I'm sure it'll get more down the road and this way I don't have to worry about parking next to door dingers and all that.
