SHOPTRK build
 03-01-2013, 11:44 PM
#61

Fancy shmancy e-brakey things
So, being that I've decided to build this truck up and use it for some grassroots drifting, I knew first thing up was going to be a new E-brake system, because, let's face it, the stock kick in/kick out thing is never going to work. I've also decided that I'd like to build/custom fab as much as possible on this truck, so instead of buying another $200 ASD billet super awesome ebrake like in my racecar. I decided to use ideas from that brake in my own design, mainly the heim joint and bearing pivot to aid in smooth and stable pull action no matter how much abuse it sees.
First up was the handle that I'd be pulling on all the time, I've seen some people use this as a shifter before, but I haven't seen it used as an e-brake yet. When our weekly Snap-On dealer showed up, I picked up a new 18" striking pry bar, only to cut it up an hour later!


I had been thinking about how I was going to build this setup and made a few preliminary drawings, ending up with a pretty solid idea. I would be cutting the prey/flared end off of the pry bar, then sliding it into some similar sized square stock, plug welding the bar into the square stock, and then going from there.
First step was to cut the end off, and then grind all the anti-rust coating off the bar.

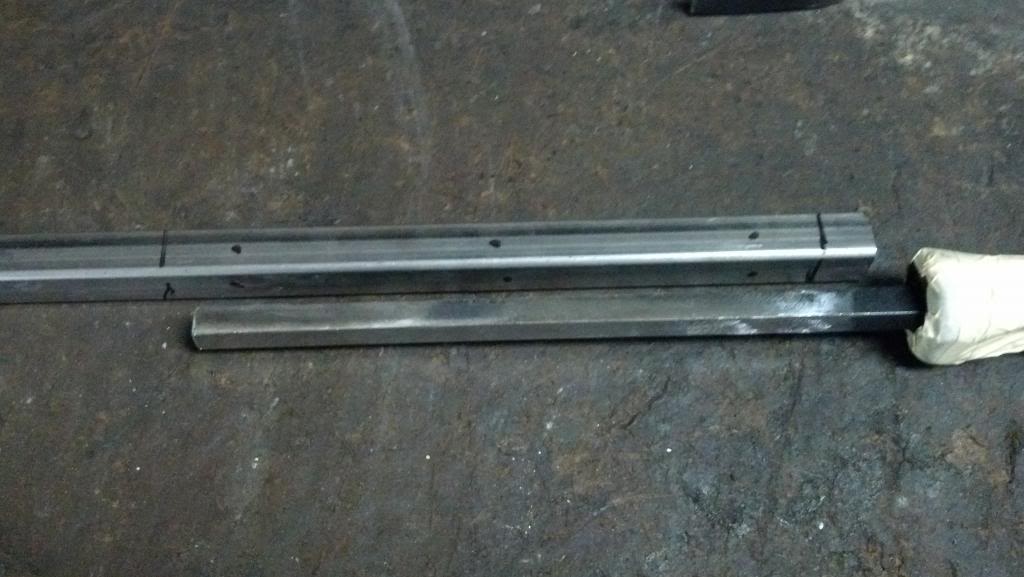
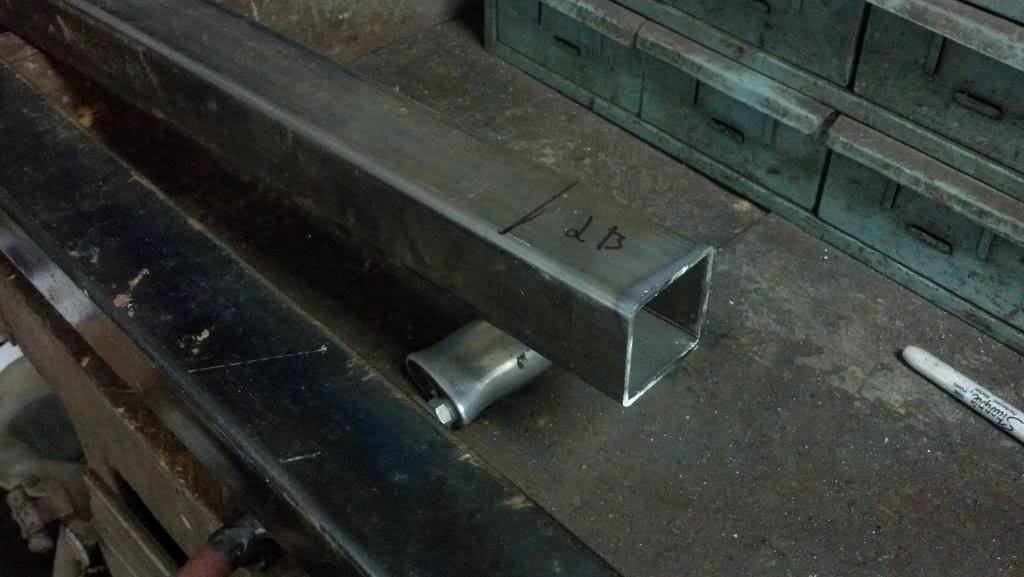
Bar all cleaned up, and the square stock marked on where the bar would end, where I didn't want to weld above, and where I would drill.
Holes drilled!

Getting the square stock level in the vice so the bar would sit level inside and not be crooked, thus pissing my OCD self off every time I get in the truck haha.


I then went ahead and slide the bar in, went to tack welding opposing spots until every hole had a tack, then I got to fully plug welding each hole.


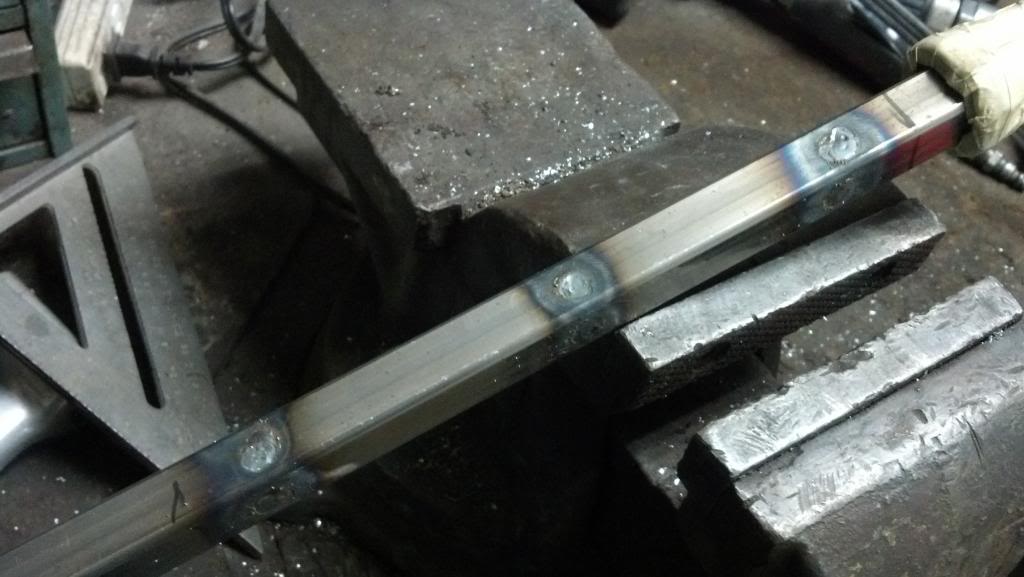
Fully welded and ready for some grinding and filling!
First coat of filler on and sanded
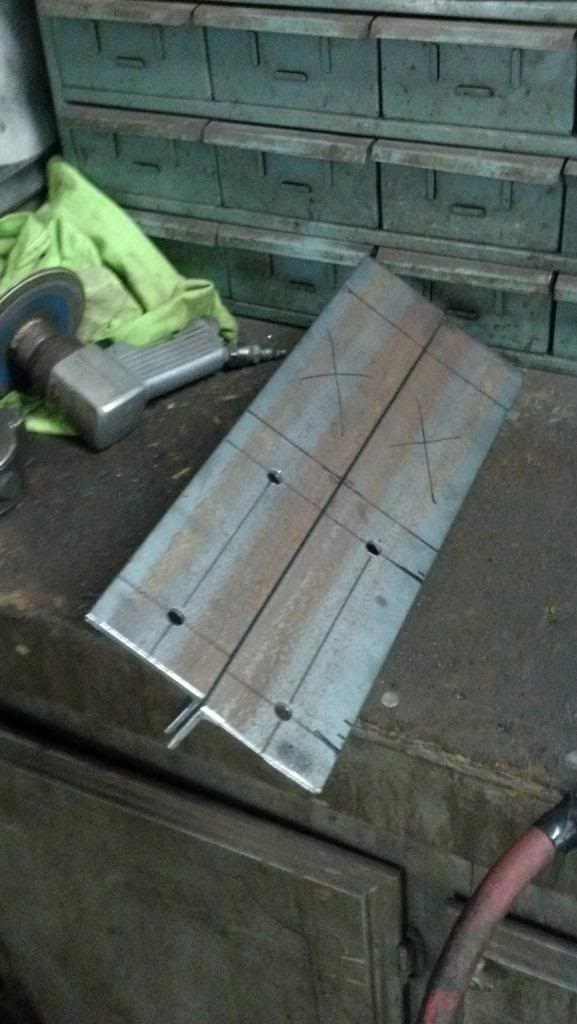
While the next layer was drying, I started drilling out the plate to mount the master cylinder too. This plate will later be welded into two uprights and blah blah, you'll see.
Bolted up. Middle hole took about 20min to cut because my 1.5" holesaw was ancient and super worn out. Should've taken 10min to go get a new one, but oh well, lol@me.

I held things and eye balled where stuff would go for about 15minutes, made a few marks, and then drilled a couple holes in the angle iron (clamped together so the hole was straight through both), cut one how I wanted it, then traced the patter on the other and cut it out. These were 3/16" pieces of angle iron steel, and this was all done with a cutoff wheel and mini grinder.....I had had enough of this and we bought a plasma cutter earlier today hahah.

I forgot to take some pics for the next few steps, but I ended up eye balling where I would want the handle in the truck, measuring the length of what the handle should be, cutting the handle to length. Then welding the end of the handle/bar shut and drilling a 3/8" hole in the bottom of it for the main pivot, and a 1/4" hole (about an inch above the main pivot hole) for the heim joint/pulling joint.
Once the handle was set, I mocked up the rough location of where the master cylinder and plate would go and tacked that into place. I really liked how everything ended up so I welded it all solid.


With this rough mock up, I was able to tell the simple drilled holes and a bolt through the main pivot was NOT going to work....the damn thing flopped around more than a beached wale or some other sort of cool saying or whatever.
My father had just rebuild the front end of his snowmobile with all new bushings and bolts....and after rummaging through the leftovers, we found a 3/8" bolt that was the perfect length for the main pivot, AND two sweet little bushing/insert things that went with that exact bolt. With those clutch pieces in hand, I enlarged the main pivot hole of the handle to one drill size below the bushing diameter, then pressed them into the handle using the vice!
Bushing thinger


Both pressed into the handle

So, being that I've decided to build this truck up and use it for some grassroots drifting, I knew first thing up was going to be a new E-brake system, because, let's face it, the stock kick in/kick out thing is never going to work. I've also decided that I'd like to build/custom fab as much as possible on this truck, so instead of buying another $200 ASD billet super awesome ebrake like in my racecar. I decided to use ideas from that brake in my own design, mainly the heim joint and bearing pivot to aid in smooth and stable pull action no matter how much abuse it sees.
First up was the handle that I'd be pulling on all the time, I've seen some people use this as a shifter before, but I haven't seen it used as an e-brake yet. When our weekly Snap-On dealer showed up, I picked up a new 18" striking pry bar, only to cut it up an hour later!
I had been thinking about how I was going to build this setup and made a few preliminary drawings, ending up with a pretty solid idea. I would be cutting the prey/flared end off of the pry bar, then sliding it into some similar sized square stock, plug welding the bar into the square stock, and then going from there.
First step was to cut the end off, and then grind all the anti-rust coating off the bar.
Bar all cleaned up, and the square stock marked on where the bar would end, where I didn't want to weld above, and where I would drill.
Holes drilled!
Getting the square stock level in the vice so the bar would sit level inside and not be crooked, thus pissing my OCD self off every time I get in the truck haha.
I then went ahead and slide the bar in, went to tack welding opposing spots until every hole had a tack, then I got to fully plug welding each hole.
Fully welded and ready for some grinding and filling!
First coat of filler on and sanded
While the next layer was drying, I started drilling out the plate to mount the master cylinder too. This plate will later be welded into two uprights and blah blah, you'll see.
Bolted up. Middle hole took about 20min to cut because my 1.5" holesaw was ancient and super worn out. Should've taken 10min to go get a new one, but oh well, lol@me.
I held things and eye balled where stuff would go for about 15minutes, made a few marks, and then drilled a couple holes in the angle iron (clamped together so the hole was straight through both), cut one how I wanted it, then traced the patter on the other and cut it out. These were 3/16" pieces of angle iron steel, and this was all done with a cutoff wheel and mini grinder.....I had had enough of this and we bought a plasma cutter earlier today hahah.
I forgot to take some pics for the next few steps, but I ended up eye balling where I would want the handle in the truck, measuring the length of what the handle should be, cutting the handle to length. Then welding the end of the handle/bar shut and drilling a 3/8" hole in the bottom of it for the main pivot, and a 1/4" hole (about an inch above the main pivot hole) for the heim joint/pulling joint.
Once the handle was set, I mocked up the rough location of where the master cylinder and plate would go and tacked that into place. I really liked how everything ended up so I welded it all solid.
With this rough mock up, I was able to tell the simple drilled holes and a bolt through the main pivot was NOT going to work....the damn thing flopped around more than a beached wale or some other sort of cool saying or whatever.
My father had just rebuild the front end of his snowmobile with all new bushings and bolts....and after rummaging through the leftovers, we found a 3/8" bolt that was the perfect length for the main pivot, AND two sweet little bushing/insert things that went with that exact bolt. With those clutch pieces in hand, I enlarged the main pivot hole of the handle to one drill size below the bushing diameter, then pressed them into the handle using the vice!
Bushing thinger
Both pressed into the handle
 03-01-2013, 11:44 PM
#62
I dug through the leftover bushings and found a couple broken sleeves that would work perfectly as a spacer for the main pivot. Somehow, I got lucky and ended up trimming the first one, first try, to the perfect length haha. Assembled it and viola! Handle is super tight, no flopping side to side and pulls super smooth!


And that's it for the rough mock up! Everything is apart and getting painted right now. The angle iron has been cut and now they're more of just 3/16" side plates instead of angle iron, pics will make sense unlike my words haha. I used angle mainly for ease of assembly and fabbing it up without a jig of sorts. Pics of the finished product should be tomorrow evening or sometime Sunday. Next on the fab list is a back rack.
If anyone's got any questions, as always feel free to ask!
-Tanner
03-03-2013, 11:15 PM
#63
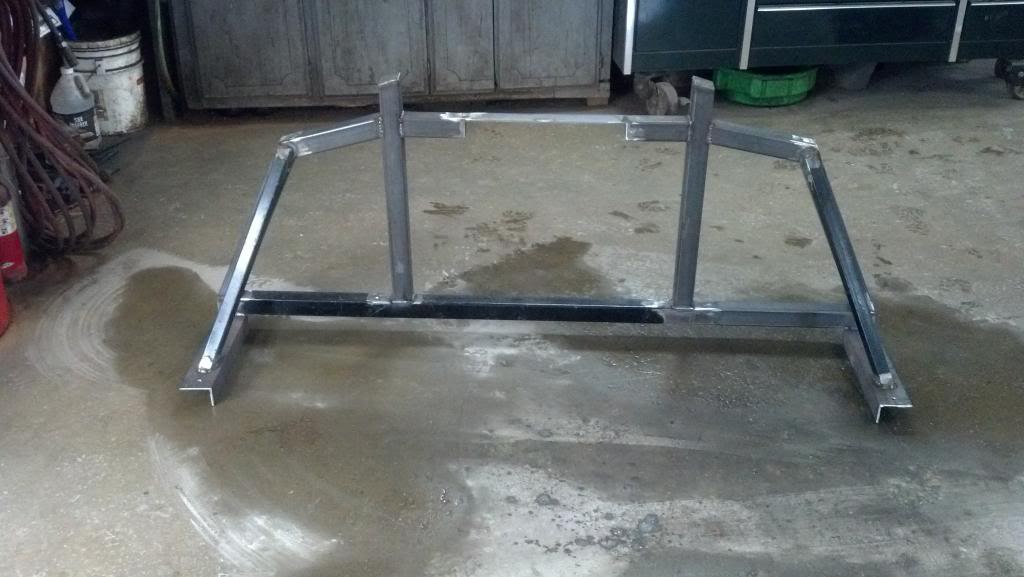
Started working on stuff around 11am today. Got right to work on the back rack. Yesterday I had cut the uprights and angled the tops, made little cap/filler pieces and welded those to the top. Next was to add in the little inward piece thingers, no clue what to call them haha.

I had a friend help and I held things where I thought they might work and he walked around the truck and said yes or no, then helped me measure and make marks that when on the ground would ease in tacking everything together.

Meanwhile paint was drying on the e-brake handle and base


Once the side piece thingys were tacked in place on the backrack, it was then time to add the flat plate between the two pieces. It took me a bit of thinking to figure out just how to do this, but I ended up getting lucky with some scrap pieces of metal and did the following. Clamped a piece of 2x2" angle iron to the side pieces, and then clamped the flat stock to the angle iron. The angle iron I grabbed out of the scrap pile was the perfect length to fit between the uprights perfectly haha.


When that was all tacked together my buddy David held it all up so I could take a look at it.


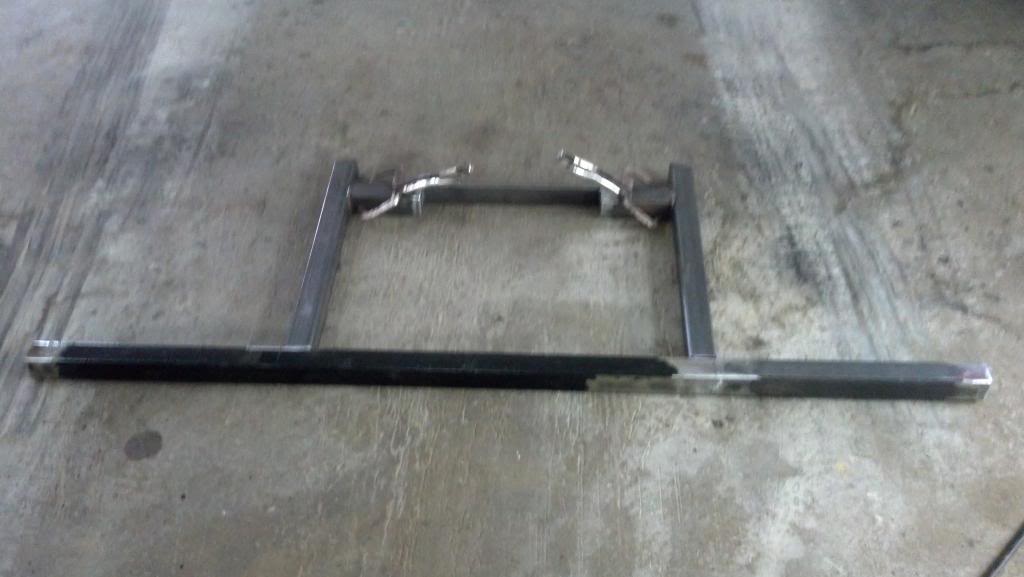
Aaaannnndddd here's the finished e-brake product!!!!


Back to the backy racky. Welded the flat stock in and then added some end caps to the open pipe, then ground them smooth and errthang.


I had a friend help and I held things where I thought they might work and he walked around the truck and said yes or no, then helped me measure and make marks that when on the ground would ease in tacking everything together.
Meanwhile paint was drying on the e-brake handle and base
Once the side piece thingys were tacked in place on the backrack, it was then time to add the flat plate between the two pieces. It took me a bit of thinking to figure out just how to do this, but I ended up getting lucky with some scrap pieces of metal and did the following. Clamped a piece of 2x2" angle iron to the side pieces, and then clamped the flat stock to the angle iron. The angle iron I grabbed out of the scrap pile was the perfect length to fit between the uprights perfectly haha.
When that was all tacked together my buddy David held it all up so I could take a look at it.
Aaaannnndddd here's the finished e-brake product!!!!
Back to the backy racky. Welded the flat stock in and then added some end caps to the open pipe, then ground them smooth and errthang.
03-03-2013, 11:15 PM
#64
I then had to make the main bottom bar, I didn't have a length of square stock long enough to get across both bed rails and local metal shops are closed and I'm impatient. So I came up with a plan to use a part of an old dodge back rack and a bit of the leftover new metal to make the bottom piece. I knew simply butt welding the two pieces wouldn't be strong enough or keep it lined up properly. I ended up using two 6" pieces of 1x1" 1/8" thick angle iron, slid in on opposite sides of each other, clamped level/straight and then plug welded; along with the butt welds between the two main pieces of square stock. Here's the process:


One side plug welded, other piece hammered on/slid over


All welded up


Then I put the bar across the bed rails, took some measurements, cut the pipe to length, made some end caps, welded them in and then ground it all smooth.


I grabbed the upright piece, measured here, measured there and then tacked the upright onto the main/bottom bar.
Lined up and ready to tack

Next I figured out where to drill the base plates, measured and drilled them out
Bed marked to be drilled

All tacked


Holes in the plates and bed sides lined up perfectly!

Installed/tacked onto the base bar


Tomorrow will be finish welding it up, possibly install the ebrake assembly (no lines or calipers or anything) and whatever else I can think of haha.
One side plug welded, other piece hammered on/slid over
All welded up
Then I put the bar across the bed rails, took some measurements, cut the pipe to length, made some end caps, welded them in and then ground it all smooth.
I grabbed the upright piece, measured here, measured there and then tacked the upright onto the main/bottom bar.
Lined up and ready to tack
Next I figured out where to drill the base plates, measured and drilled them out
Bed marked to be drilled
All tacked
Holes in the plates and bed sides lined up perfectly!
Installed/tacked onto the base bar
Tomorrow will be finish welding it up, possibly install the ebrake assembly (no lines or calipers or anything) and whatever else I can think of haha.
03-10-2013, 10:13 PM
#65
Been super busy this week running the shop solo and working on the truck. Got a lot done though. Backrack is done, front and rear drop is all done and the rear end is rebuilt, around 75miles into the break in process and it's still quiet! Fingers crossed haha.
Finishing up the backrack process. Had some nice mig welds here and there

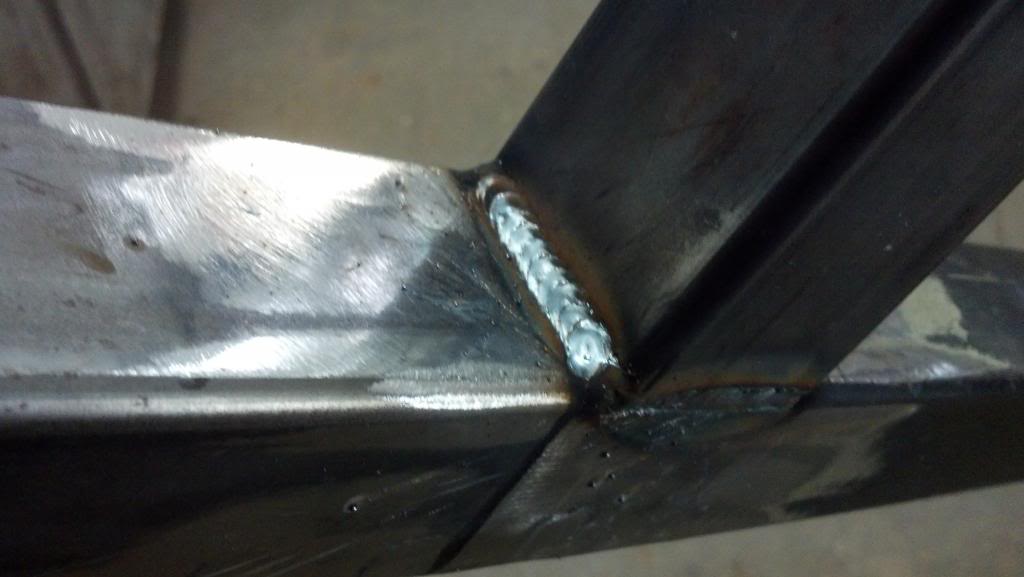
The side posts were a huge pain in the ***....I'm not a genius or a nerd with angles and pretty much just eye balled and made chop saw cuts and made it work.


All tacked up!
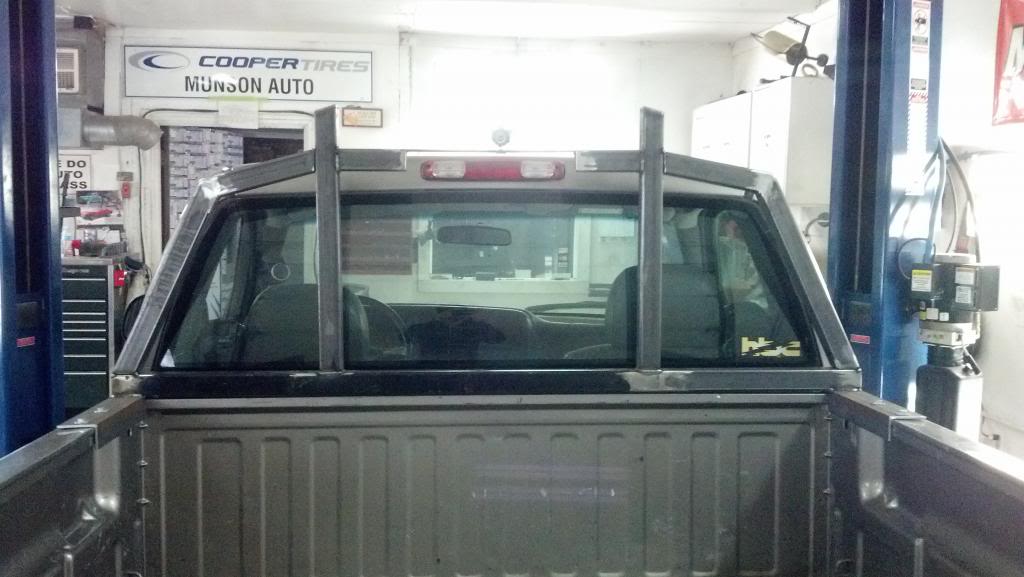


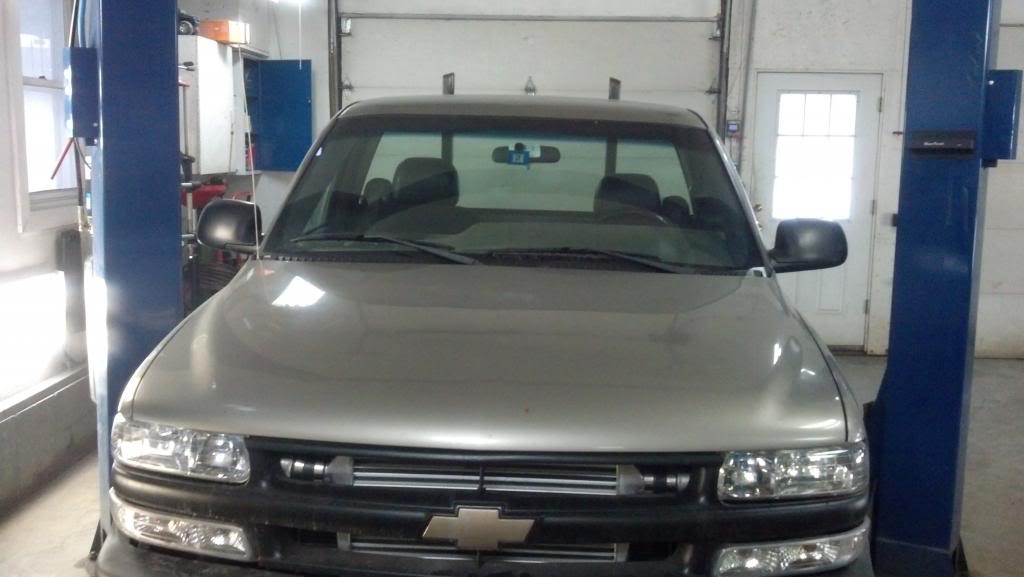
Backed the truck out to see how it looked and if I liked the side/down bars I mocked up


Caltracs came in!

Welded up and ready for paint
Drop kit arrived!

All drop parts lined up!

Finishing up the backrack process. Had some nice mig welds here and there
The side posts were a huge pain in the ***....I'm not a genius or a nerd with angles and pretty much just eye balled and made chop saw cuts and made it work.
All tacked up!
Backed the truck out to see how it looked and if I liked the side/down bars I mocked up
Caltracs came in!
Welded up and ready for paint
Drop kit arrived!
All drop parts lined up!