
PerformaBuilt Christmas SALE 10% off all till christmas eve
 12-17-2007, 06:25 PM
#1
10% off everything from now till Christmas sale.
Call to make your order today!
As allways you get.
1-FREE SHIPPING IN THE MAINLAND USA
2-FREE 22000 GVW COOLER
3-NO CORE REQUIREMENT OR CORE CHARGE
4-EVERY TRANS IS TESTED IN OUR TEST VEHICLE FOR 1 HOUR, SHIFT QUALITY, LINE PRESURE VERIFIED.
5-1 YEAR WARRANTY WITH CONVERTER/TRANS COMBOS, THE BEST WARRANTY IN THE BUSINESS.
LAYWAYS ARE PERMITTED WITH THIS SALE!
You may ask what happened to the countdown to christmas sale. Well management got generaous and I got tired of counting down lol , So its just 10 percent off period.
 12-20-2007, 03:17 PM
#2
bump for the day And some information on our level 1 build


These are just a few of the things used in the level 1 build
1-Shown 1st and 2nd pictures are the rear and front planets. The planet clearance is allowed by GM up to .025 we never use a planet with excess of .020 clearance.
2-Next shown is the new low/reverse clutch set. All frictions are replaced with new.
3-The 4th picture shown is the new low/reverse steel plates
4-The 5th picture shown is a device called a case saver. It replaces the stock anti clunk spring and more evenly distributes shock against the case lugs. This helps to prevent excessive lug wear in the case or breakage of the case or lugs.
5-The 6th picture shown are the forward frictions these are the borg warner type. They are only used in our level 1. They are and exceelent clutch but we use something different in our levels 2 and 3.
6-The 7th picture shown is of the new forward clutch steels Notice on all steels the finish is not real slick rather its just a litle rough, This is to allow some oil to remain trapped between the frictions and the steels for cooling.
7-8th picture is of the high energy frictions used in the 3-4 clutch in this level, We install 9 of them stock is six or seven depending on model years 7004r-4l65e. The levels 2 and 3 get a diffeent clutch set.
8-The 9th picture is of new reverse input frictions again frictions are never reused in any of our units.
9-The 10th picture is of the red wide band we use it has porven itself and impressive peice and is used in both our levels 1 and 2
10-11th pic is of the new pump stator Its very important this peice be in good shape for those rebuilding transmissions thenselves there is a comonly missed problem with these. Always feel around carefully where the teflon rings from the input shaft ride inside this tube as any wear there or even small grooves will result in premature failure of one or more of the clutch sets in the input drum.
11-The Precision seal kit we use is shown in the 12th picture. All seals are replaced in every unit.
12-13 and 14 are two of the steel pistons we use in place of the aluminum pistons that come stock in many units. Very late units allready have these. They are replaced in every unit.
13-15 is a pictures of the pump vanes these are replaced in every unit along with many of the other parts in the pump. I didnt have pictures of.
14-Picture 16 is of a new corvette servo used in our level 1 (Stock in F bodies and GTOs) Our levels 2 and 3 use upgraded servos
15- This picture # 17 is a picture of the bushings and some of the accum servos we replace in every unit.
16-#18 is a picture of a Borg Warner dual cage input sprag standard on all our build levels
17-#19 is a picture of one of the new style wiring harnesses we use with late models. Theres a nice improvement done to the plug for the PCS eliminating loose conection problems associated with the previous design.
18-#20 is a picture os the beast sun shell the sungear installed. The beast is not used with the level-1 but is with the levels-2 and 3. The level 1 gets a new hardened late GM style sunshell which though not as strong as the beast is a nice peice. Didnt have a picture of it.
Anyway these are just a few of the things that go into our level one at lease things I have pictures of. All friction areas are allways replaced never reused. All seals and steel modled pistons and new. Along with many other things I have not gone into. Just though this would be and interesting twist to just the daily bump on a sale. The level 1 has surprised us several times as a number of people have bought it and then later exceeded the max rating we placed on it and the are still going strong. Its and excellent moderate bolt on application performance transmission.
Plus I now know how to post pictures here
12-21-2007, 10:14 AM
#3
Bump for the day and a little about our level 2 build.
1-The planets , These are carfully inspected pinion to side clearance must be less than .020 max allowed GM clearance is .020 they are also inspected for anysigns of stress or wear and if do not meet our minimum standards are replaced.
The LOW/REVERSE friction we use are the same in all Levels High quality Borg warner or Raybestos. These frictions are only applied in manual low 1 and reverse and are never on in any other gear position. Or during any automatic shift. I have noted that some people think these clutches are the first gear clutches. In fact there are no first gear clutches, Actual first gear is created when the low/roller sprag holds and the forward clutch is on. This set only acts to provide the engine overun braking effect in manual low. However having the car in manual low on a hard launch can be benificial as this set being on does help to support the low roller clucth just as the Overun clutch set can also help support the Input sprag as it is also on in manual Low 1. Just a little FYI. Launchig in manual low can be good to help strengthen these two areas of the trans.
Next the center support/Low roller clutch is inspected and a new roller/spring assembly install. I didnt have any pictures of this. But do have a picture of the case saver used in all levels. We use this in place of the anti clunk spring to help protect the case from damage from the very agressive shift of the center support that can occur during a hard launch. This peice eliminates case damage caused by the metal support slamming into the case by distributing the force more evenly.
Next in the level 2 we install the Beast sun shell along with sun gear which contains a new bushing and improvments to increase lube to the rear planet.We have to date never seen a beast shell strip or break. This is and exstremely strong peice and needs to be since it takes the full force of the engine on the second,fourth and reverse gears.
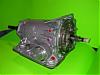
Next the input drum we remove the input shaft from the and inspect both the shaft and the drum for wear/cracks or any other damage.Reinstall the shaft into the drum and install new teflon rings on the shaft. We then install new steel molded steel pistons into the drum these are preferred to the aluminum pistons that are prone to crack and cause failure. Along with these we install new return spring cages and snap ring to hold it all in place. I did not have pictures of all of this. But here ae a couple I did have of the steel pistons.
We then install new overun frictions, The lube seal and The new Borg Warner dual cage sprag. We the install the forward frictions this is where our level 2 starts to differ from the level 1. Rather than using the paper grooved frictions like we do in the level 1 we opt to use the smoothe composite frictions here. The plus side is tighter grip, better heat durability and more surface area in this clutch pack which must hold all the engines power through all the forward gears except 4th.The only downside we have found is a slightly firmer engagment into drive from reverse,neutral or park. Of course with a high stall converter this is not noticable at all.

Now again different from the level 1 we use the ZPack by Raybestos we have had excellent results with these. I have seen situation where there was a presure issue Such as low fluid level or PCS failure where these clutches became really hot from slipping under those conditions and yet on tear down though you could certainly tell they got really hot they were nearly still in good enough shape to reuse, I was impressed. Of course we wouldnt reuse them it was just very nice to see how well they had endured. I have seen OEM frictions and some aftermarkets that have been through the same thing and the friction material usually paper be completely gone, Burned away.We set a minimum clearance for this set and then reinstall the square helper springs into the drum. The purpose in these is not well understood by many. But they prevent centrifical apply of the 3-4 clutch at High RPM this happens when fluild cannot escape from the 3-4 clutch chamber fast enough and it literally climbs the walls of the drum and applies the 3-4 clutch piston partially causing over a period of Hi RPM runs to eventually cause the 3-4 clutch to burn or wear excessivley.


Heres a short video from Raybestos about this design
http://www.raybestospowertrain.com/mov/zpak.wmv
Now we inspect the reverse inout drum replacing bushings and measuring the run out accross the 2-4 band apply surface. MAX runout when using the Wide band can be no more than .005 from edge to edge. If it is more than this the drum must be replaced and we end up doing that quite often. In either case the drum is resurfaced with the apropriate finish and a light crosshatch for the band. The new Seals and A new friction set is installed. The drum is then placed on the input drum and the assembly installed. At this time we temporarily install the pump and set inout shaft end play to as close to min spec as possible with the assorted selective washers used on top of the input drum. Dont have alot of pictures yet for this. Heres a picture of the reverse input frictions.
The Wide Redlined band is installed the same one used in the level 1 as its plenty durable with reinforced band lug area we have never seen one tear through or break.Now this again is where things start to change from the level 1 We now use and install the fairbanks one peice billet servo. This servo has the largest apply area of any servo possible. Its a very simple billet aluminum cut and very durable. It also have the added benifit of reducing 3-4 clutch accumulation. It does not completely eliminate it however since a much heavier return spring is used between it and the case. So the 3-4 clutch oil must still fill the chamber to release the band. Band clearance is checked and ajusted as needed. We then use the SONNAX dual picton super hold servo for 4th gear. Between it, The wide band and the Zpack holding WOT ,shifts to 4th should never be a problem.The band clearance must be checked for both the second and fourth servos as one could be fine and the other be excessive, We do not suggest using the Fairbanks billet servo with any stock band as the band lugs are not strong enough and this will result in band lug tearing through the eye causing loss of second and fourth gears. For upgrades to the stock trans stick with the corvette or sonnax second gear servo.


We now assemble the pump with new bushings and Vanes all clearances are carefully checked and the nessesary actions taken where needed to assure the pump is straight and clean. And questionable part is replaced without exception and a large boost valve installed.Along with mods for increased lubrication cooling and converter charge. All seals again are new. The stator is removed and changed as needed. Many end up being changed. A common mistakein a build is not checking the inside of the tube where the input shaft teflon rings ride and grrove or wear here will cause premature failure of the frictions in the Input drum. If theres any wear here grooves etc at all the stator tube must be replaced. Again dont have pictures of this as I had no idea I was going to write this till now.So just using what I do have.

The valve body is the disassembled and carefuly inspected. Solenoids replaced. Our own shift kit installed it provides nice part throttle shifts reasonabe but firm and as throttle is increased the shift become progressivly firmer. We use new accumulator pistons and we do not restrict 1-2 accumulator function in any manor as the Billet servo has plenty adequate force and hold to provide a positive 1-2 shift. And helps considerably with the 2-3 shift with nether being too agressive. The valve body plate is inspected, If it is bent holes warn or inferior in anyway it is replaced with a new one.Its a pretty simple call they are either perfect or they are not. Many of our cores are 03 up so we get quite a few good ones,
The wiring harness again is carfully inspected and new oring installed and these are only reused when is absolutly perfect condition again its a simple call its either perfect or bad. If its bad a new one is installed
1-The planets , These are carfully inspected pinion to side clearance must be less than .020 max allowed GM clearance is .020 they are also inspected for anysigns of stress or wear and if do not meet our minimum standards are replaced.
The LOW/REVERSE friction we use are the same in all Levels High quality Borg warner or Raybestos. These frictions are only applied in manual low 1 and reverse and are never on in any other gear position. Or during any automatic shift. I have noted that some people think these clutches are the first gear clutches. In fact there are no first gear clutches, Actual first gear is created when the low/roller sprag holds and the forward clutch is on. This set only acts to provide the engine overun braking effect in manual low. However having the car in manual low on a hard launch can be benificial as this set being on does help to support the low roller clucth just as the Overun clutch set can also help support the Input sprag as it is also on in manual Low 1. Just a little FYI. Launchig in manual low can be good to help strengthen these two areas of the trans.
Next the center support/Low roller clutch is inspected and a new roller/spring assembly install. I didnt have any pictures of this. But do have a picture of the case saver used in all levels. We use this in place of the anti clunk spring to help protect the case from damage from the very agressive shift of the center support that can occur during a hard launch. This peice eliminates case damage caused by the metal support slamming into the case by distributing the force more evenly.
Next in the level 2 we install the Beast sun shell along with sun gear which contains a new bushing and improvments to increase lube to the rear planet.We have to date never seen a beast shell strip or break. This is and exstremely strong peice and needs to be since it takes the full force of the engine on the second,fourth and reverse gears.
Next the input drum we remove the input shaft from the and inspect both the shaft and the drum for wear/cracks or any other damage.Reinstall the shaft into the drum and install new teflon rings on the shaft. We then install new steel molded steel pistons into the drum these are preferred to the aluminum pistons that are prone to crack and cause failure. Along with these we install new return spring cages and snap ring to hold it all in place. I did not have pictures of all of this. But here ae a couple I did have of the steel pistons.
We then install new overun frictions, The lube seal and The new Borg Warner dual cage sprag. We the install the forward frictions this is where our level 2 starts to differ from the level 1. Rather than using the paper grooved frictions like we do in the level 1 we opt to use the smoothe composite frictions here. The plus side is tighter grip, better heat durability and more surface area in this clutch pack which must hold all the engines power through all the forward gears except 4th.The only downside we have found is a slightly firmer engagment into drive from reverse,neutral or park. Of course with a high stall converter this is not noticable at all.
Now again different from the level 1 we use the ZPack by Raybestos we have had excellent results with these. I have seen situation where there was a presure issue Such as low fluid level or PCS failure where these clutches became really hot from slipping under those conditions and yet on tear down though you could certainly tell they got really hot they were nearly still in good enough shape to reuse, I was impressed. Of course we wouldnt reuse them it was just very nice to see how well they had endured. I have seen OEM frictions and some aftermarkets that have been through the same thing and the friction material usually paper be completely gone, Burned away.We set a minimum clearance for this set and then reinstall the square helper springs into the drum. The purpose in these is not well understood by many. But they prevent centrifical apply of the 3-4 clutch at High RPM this happens when fluild cannot escape from the 3-4 clutch chamber fast enough and it literally climbs the walls of the drum and applies the 3-4 clutch piston partially causing over a period of Hi RPM runs to eventually cause the 3-4 clutch to burn or wear excessivley.
Heres a short video from Raybestos about this design
http://www.raybestospowertrain.com/mov/zpak.wmv
Now we inspect the reverse inout drum replacing bushings and measuring the run out accross the 2-4 band apply surface. MAX runout when using the Wide band can be no more than .005 from edge to edge. If it is more than this the drum must be replaced and we end up doing that quite often. In either case the drum is resurfaced with the apropriate finish and a light crosshatch for the band. The new Seals and A new friction set is installed. The drum is then placed on the input drum and the assembly installed. At this time we temporarily install the pump and set inout shaft end play to as close to min spec as possible with the assorted selective washers used on top of the input drum. Dont have alot of pictures yet for this. Heres a picture of the reverse input frictions.
The Wide Redlined band is installed the same one used in the level 1 as its plenty durable with reinforced band lug area we have never seen one tear through or break.Now this again is where things start to change from the level 1 We now use and install the fairbanks one peice billet servo. This servo has the largest apply area of any servo possible. Its a very simple billet aluminum cut and very durable. It also have the added benifit of reducing 3-4 clutch accumulation. It does not completely eliminate it however since a much heavier return spring is used between it and the case. So the 3-4 clutch oil must still fill the chamber to release the band. Band clearance is checked and ajusted as needed. We then use the SONNAX dual picton super hold servo for 4th gear. Between it, The wide band and the Zpack holding WOT ,shifts to 4th should never be a problem.The band clearance must be checked for both the second and fourth servos as one could be fine and the other be excessive, We do not suggest using the Fairbanks billet servo with any stock band as the band lugs are not strong enough and this will result in band lug tearing through the eye causing loss of second and fourth gears. For upgrades to the stock trans stick with the corvette or sonnax second gear servo.
We now assemble the pump with new bushings and Vanes all clearances are carefully checked and the nessesary actions taken where needed to assure the pump is straight and clean. And questionable part is replaced without exception and a large boost valve installed.Along with mods for increased lubrication cooling and converter charge. All seals again are new. The stator is removed and changed as needed. Many end up being changed. A common mistakein a build is not checking the inside of the tube where the input shaft teflon rings ride and grrove or wear here will cause premature failure of the frictions in the Input drum. If theres any wear here grooves etc at all the stator tube must be replaced. Again dont have pictures of this as I had no idea I was going to write this till now.So just using what I do have.
The valve body is the disassembled and carefuly inspected. Solenoids replaced. Our own shift kit installed it provides nice part throttle shifts reasonabe but firm and as throttle is increased the shift become progressivly firmer. We use new accumulator pistons and we do not restrict 1-2 accumulator function in any manor as the Billet servo has plenty adequate force and hold to provide a positive 1-2 shift. And helps considerably with the 2-3 shift with nether being too agressive. The valve body plate is inspected, If it is bent holes warn or inferior in anyway it is replaced with a new one.Its a pretty simple call they are either perfect or they are not. Many of our cores are 03 up so we get quite a few good ones,
The wiring harness again is carfully inspected and new oring installed and these are only reused when is absolutly perfect condition again its a simple call its either perfect or bad. If its bad a new one is installed
12-21-2007, 10:15 AM
#4
A test pan and filter are placed on each unit, It is Then installed in our test vehicle filled with fluid and run for at least 1 hour, Constantly being shifts up and down through the gears. Lockup being turned off and on over and over. While this is dont the presure is monitored for any unusual deviations. With any sign of trouble the unit is pulled and checked to find out why, Once the unit has passed the test and the test chart filled out, The unit is removed and the pan removed and inspected for any unusual debris etc, If all is clear there antoher pan and a new fitler is installed and the trans is packed for shipping.
During the test notes are made on a sheet that goes in the ttransmission buyers folder we keep for presure in all gears, Shift feel and temperatures reached. So we are confident about the product we ship.
__________________
During the test notes are made on a sheet that goes in the ttransmission buyers folder we keep for presure in all gears, Shift feel and temperatures reached. So we are confident about the product we ship.
__________________

Thread
Thread Starter
Forum
Replies
Last Post
BROKE-aSS-BLAZER
GM Parts Classifieds
7
10-13-2017 03:50 PM
TrickTurbo
Sponsor's Announcements, Sales, and Specials
3
09-23-2015 08:41 PM
Alvin@PCMofNC
Sponsor's Announcements, Sales, and Specials
0
09-03-2015 06:38 AM