
Installing 06 Chevy E-fans on a 01 Chevy
 07-01-2011, 05:14 PM
#1
This is a step by step tutorial on how to upgrade any 99-02 GMT800 truck or SUV to the 05-06 GMT800 electric cooling fans. This same setup can be used on 03-04 trucks as well, however the only difference is the wiring that connects to the PCM. I will also add that a custom tune from someone like Blackbear Performance (who is a site sponsor by the way) is also needed, because the pins to control the fans in the PCM need to be turned on with the tuning software.
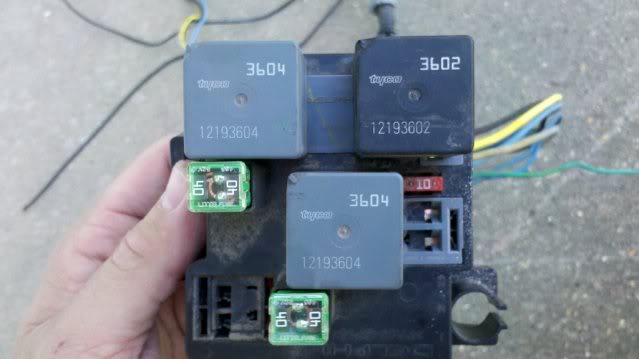
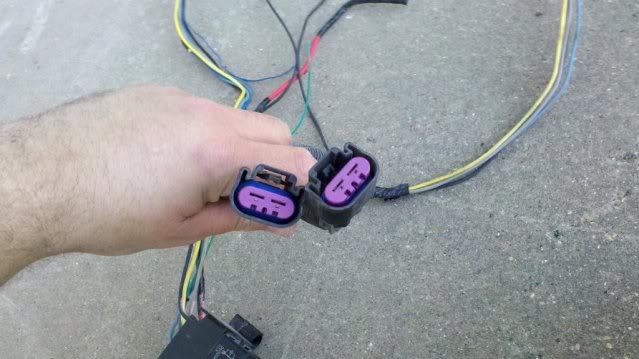
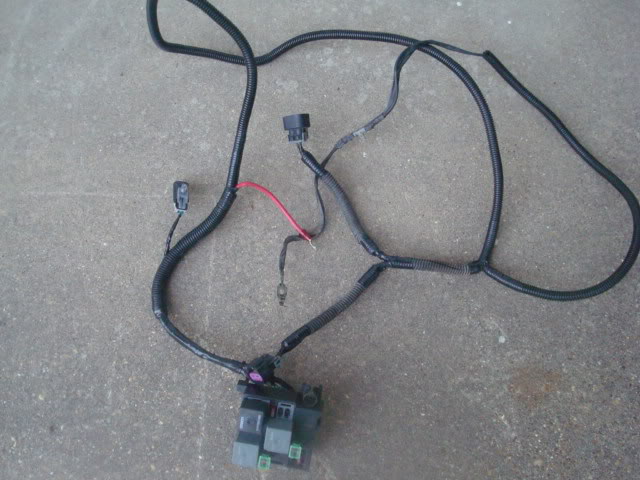
First of all, you need to measure your radiator to see what size it is. Some trucks came with a smaller radiator, (28 inches wide I think) and some have the larger radiator, which is 34 inches wide. The 05-06 Tahoe/Silverado electric fans can only be used if you have the larger radiator. So if you have the smaller one, you need to upgrade your radiator first. If you have the 34 inch radiator, like I do, the fans will bolt right up as if they were made for your truck. The holes for the fan to bolt on are already in the radiator support. It uses the same bolts as the radiator. So if you didn't get the bolts with your new fan, just go grab some radiator bolts off a truck in the junkyard. I got my fans from a 2006 Chevy Silverado in the junkyard. I was also able to pick apart the wiring harness and get that as well. I even got the pin that needs to be added to the PCM harness. So now I have an OEM wiring harness complete with fan relays. This actually clips right onto the side of your underhood fuse panel once you remove the cover. Here is the fans and the harness that I got.
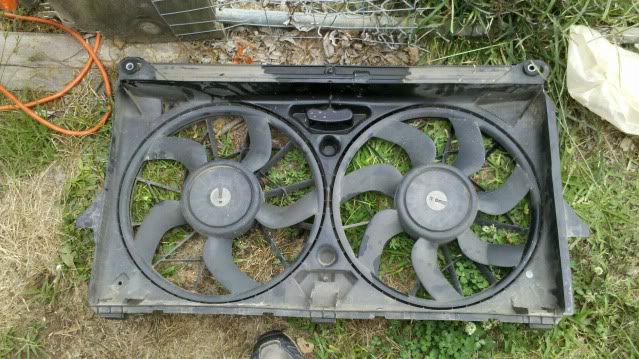

I cleaned up the harness and added some wire loom to it and made it look cleaner, for a cleaner install.
You can buy a pre-made harness from Blackbear Performance for a very easy install. Or if you are able to procure the correct pigtails for the fans and the PCM, you can custom make your own harness. Here is a wiring diagram of how the fans are factory wired on the 05-06 GM trucks.
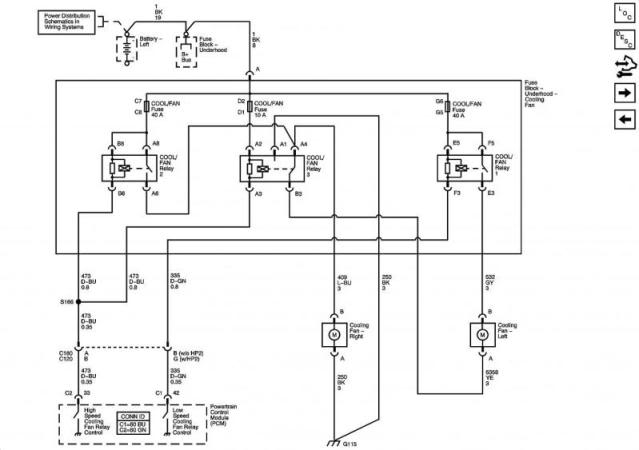
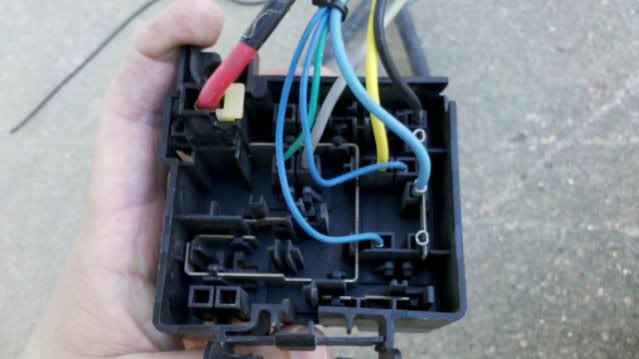
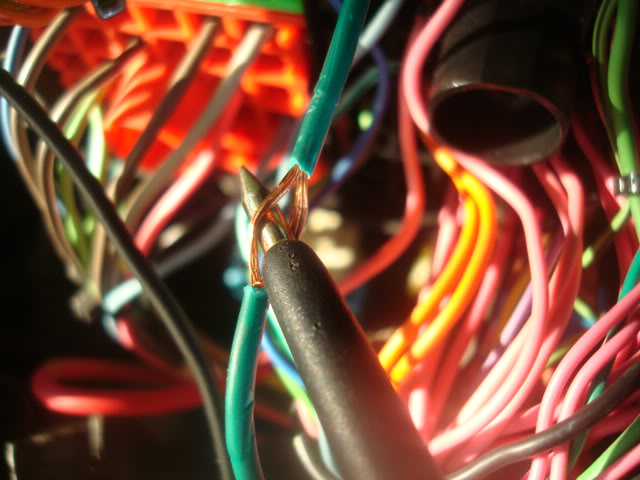
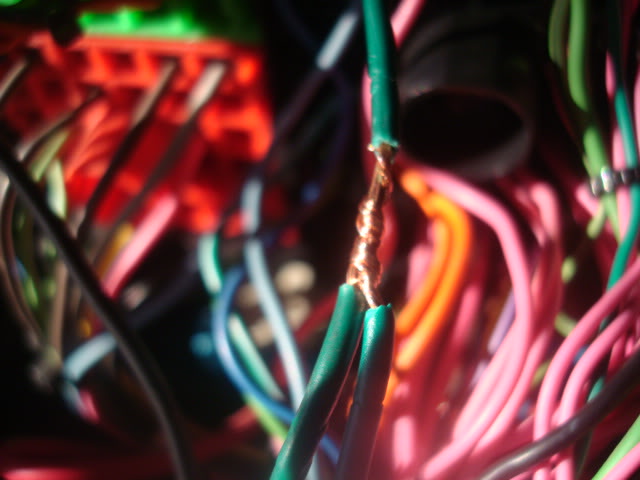
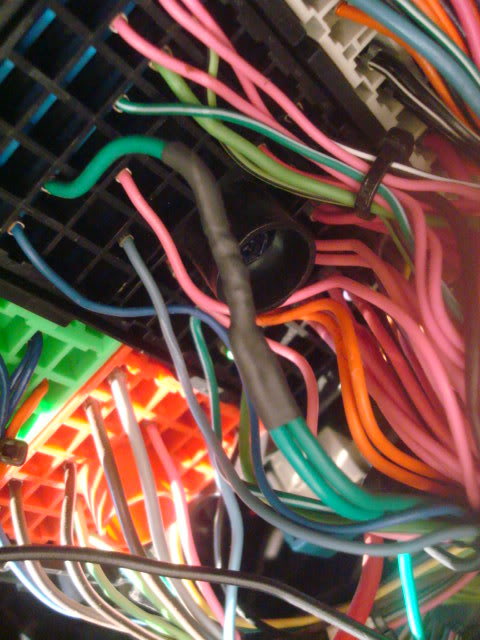
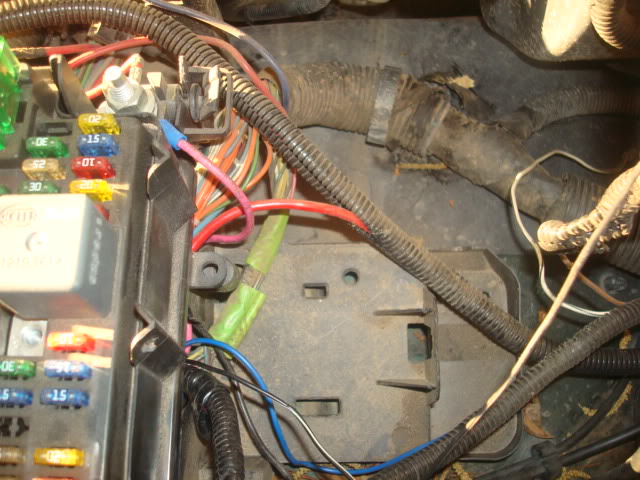
If you have an 03-04 truck, then you will wire it exactly like this diagram shows. But on a 99-02, the PCM only has pin 42 available to use. The other trigger wire has to be connected to the AC compressor clutch relay wire. That wire is positive, so by me using an OEM harness, I had to add a relay to that wire to change it to a negative in order to trigger the fan relay pack, which is set up to be triggered by negative signals from the PCM. This extra relay is not needed if you use the pre-made harness from Blackbear. Thier harness is already setup to use a positive trigger from the AC wire. Now onto the wiring. First you want to remove your underhood fuse panel cover. Not just the lid, the entire cover. You will have to unbolt the corner fender brace in order to get it up and off. Now lift up the fuse junction block to get access to the underside. You will need to splice into the dark green AC clutch relay wire. This is the wire you need.

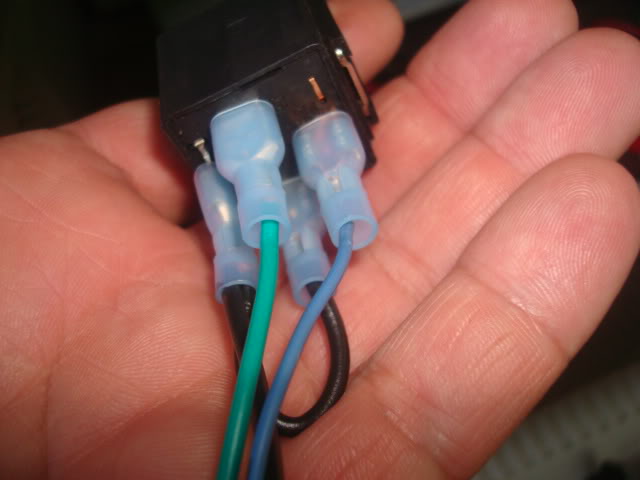
This is where you will tie in your relay (or trigger wire if using a Blackbear harness). The relay needs to be wired as follows:
86-Green AC wire
85-Ground
87-Ground
30-Blue trigger wire on OEM fan relay pack
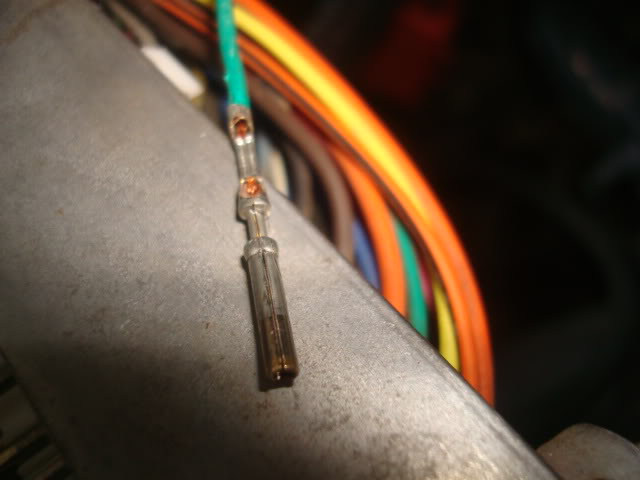
And here is how your relay should look.

Now take the green wire on your relay and splice it into the factory Green AC wire with solder and heat shrink tubing.
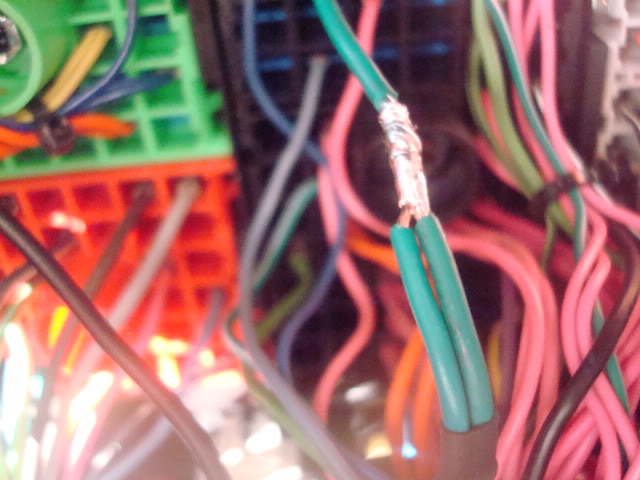
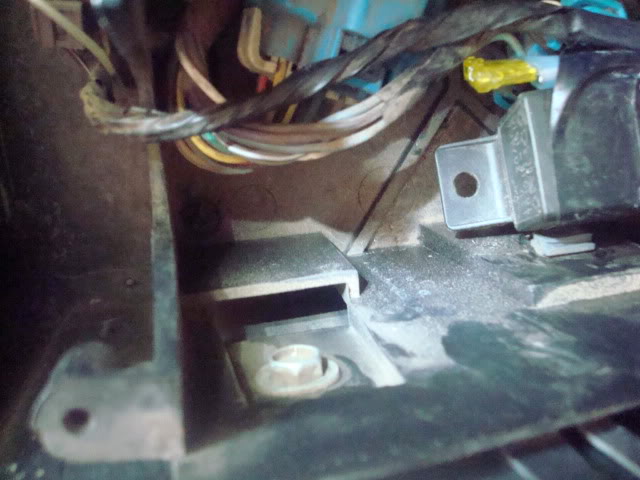
I grounded the ground wire to this bolt on the fender, right below the fuse block.
First of all, you need to measure your radiator to see what size it is. Some trucks came with a smaller radiator, (28 inches wide I think) and some have the larger radiator, which is 34 inches wide. The 05-06 Tahoe/Silverado electric fans can only be used if you have the larger radiator. So if you have the smaller one, you need to upgrade your radiator first. If you have the 34 inch radiator, like I do, the fans will bolt right up as if they were made for your truck. The holes for the fan to bolt on are already in the radiator support. It uses the same bolts as the radiator. So if you didn't get the bolts with your new fan, just go grab some radiator bolts off a truck in the junkyard. I got my fans from a 2006 Chevy Silverado in the junkyard. I was also able to pick apart the wiring harness and get that as well. I even got the pin that needs to be added to the PCM harness. So now I have an OEM wiring harness complete with fan relays. This actually clips right onto the side of your underhood fuse panel once you remove the cover. Here is the fans and the harness that I got.
I cleaned up the harness and added some wire loom to it and made it look cleaner, for a cleaner install.
You can buy a pre-made harness from Blackbear Performance for a very easy install. Or if you are able to procure the correct pigtails for the fans and the PCM, you can custom make your own harness. Here is a wiring diagram of how the fans are factory wired on the 05-06 GM trucks.
If you have an 03-04 truck, then you will wire it exactly like this diagram shows. But on a 99-02, the PCM only has pin 42 available to use. The other trigger wire has to be connected to the AC compressor clutch relay wire. That wire is positive, so by me using an OEM harness, I had to add a relay to that wire to change it to a negative in order to trigger the fan relay pack, which is set up to be triggered by negative signals from the PCM. This extra relay is not needed if you use the pre-made harness from Blackbear. Thier harness is already setup to use a positive trigger from the AC wire. Now onto the wiring. First you want to remove your underhood fuse panel cover. Not just the lid, the entire cover. You will have to unbolt the corner fender brace in order to get it up and off. Now lift up the fuse junction block to get access to the underside. You will need to splice into the dark green AC clutch relay wire. This is the wire you need.
This is where you will tie in your relay (or trigger wire if using a Blackbear harness). The relay needs to be wired as follows:
86-Green AC wire
85-Ground
87-Ground
30-Blue trigger wire on OEM fan relay pack
And here is how your relay should look.
Now take the green wire on your relay and splice it into the factory Green AC wire with solder and heat shrink tubing.
I grounded the ground wire to this bolt on the fender, right below the fuse block.
 07-01-2011, 05:14 PM
#2
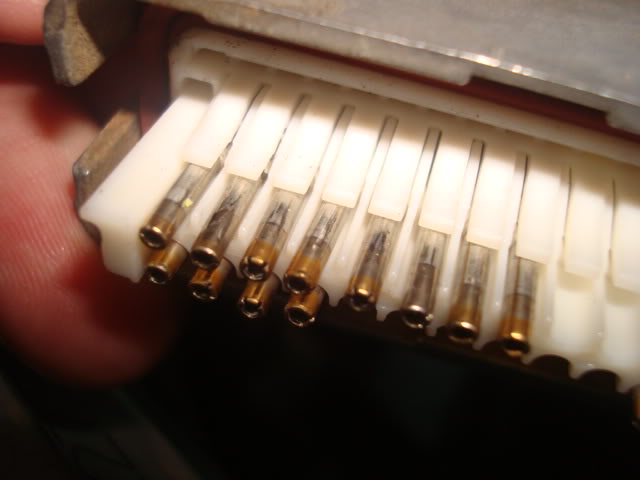
Now the low speed fan trigger needs to be connected to the PCM. Remove the PCM from its mounting bracket and unplug the wiring harness, which is held in with one screw. Unscrew it and slowly wiggle it side to side until it comes loose. You will need to insert a pin into an empty slot, pin 42 on the side that says "BLUE". Carefully remove the blue plastic cap on the side of the harness that plugs into the PCM. (Sorry, I didn't get a picture of that)
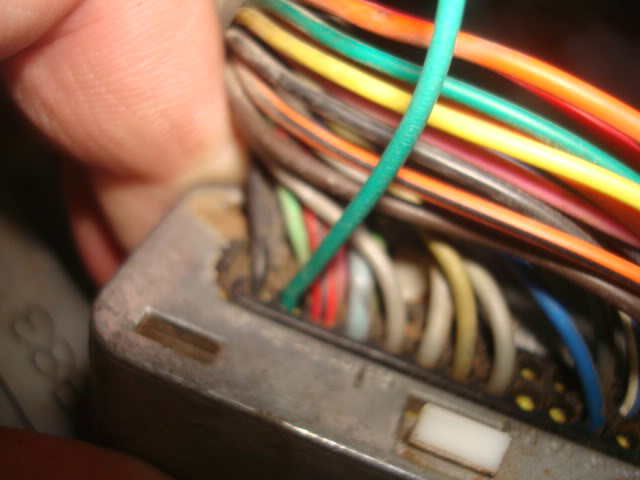
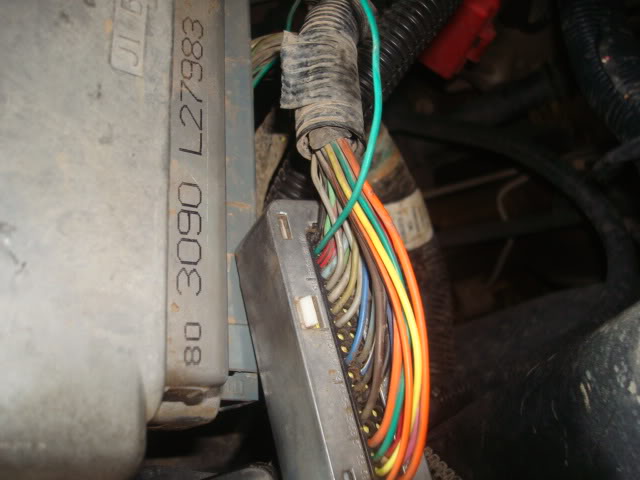
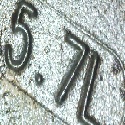
Here is where you need to insert your green trigger wire pin.
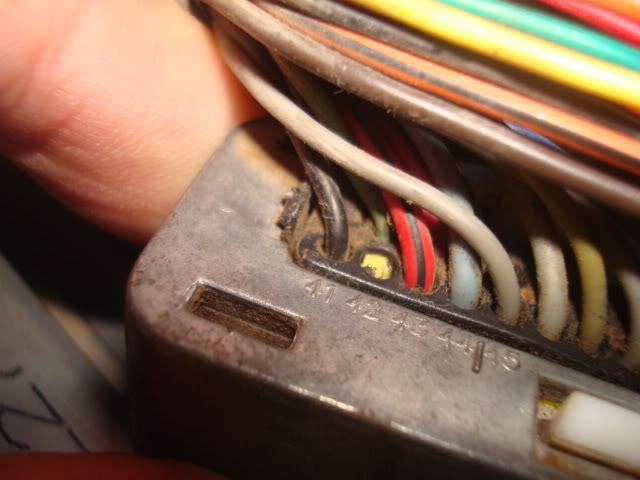
The empty spot labeled 42. I poked an awl thru the yellow rubber to make it easier to get the pin thru.
Here is the inner side with the blue cover removed.
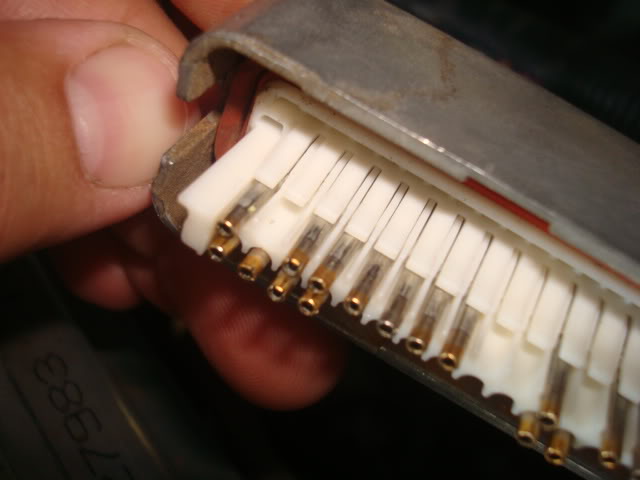
Now take your pin, and carefully push it thru the pin 42 hole until it is fully seated just like the rest of the pins.
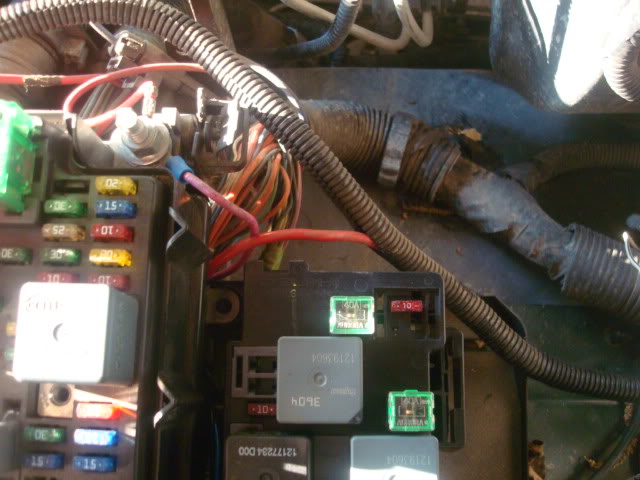
Now you need to mount your relays. If you are using a Blackbear harness, you can mount them wherever you choose. But I have the OEM harness, so I am putting it right alongside the fuse block, right where it sits on a 05-06 truck.
It just clips right in.
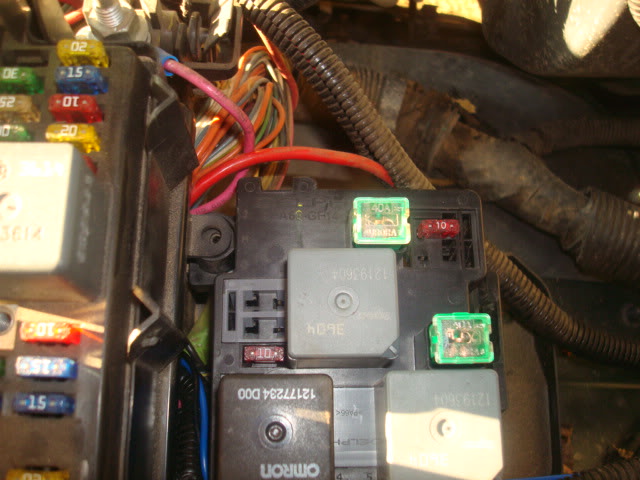
And then the main power feed for the relay needs to be connected to the battery, and the ground needs to be secured to a factory boly on the frame or body. I secured mine to the horn mounting bracket, because the OEM harness grounds in that general area on a 06 truck.
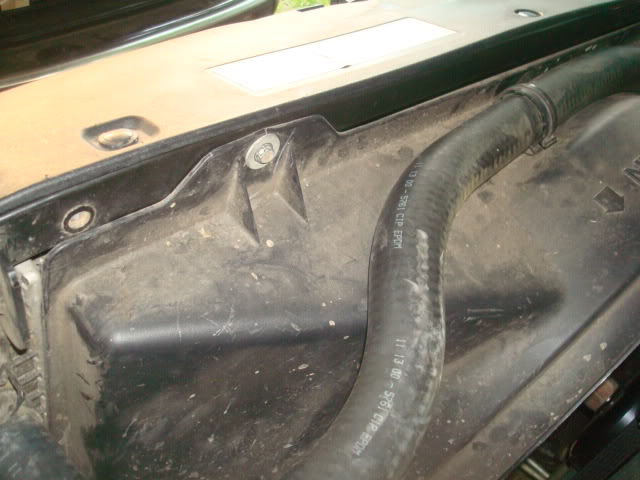
I just zip tied my harness alongside another factory wire loom that runs alongside the bottom of the radiator.
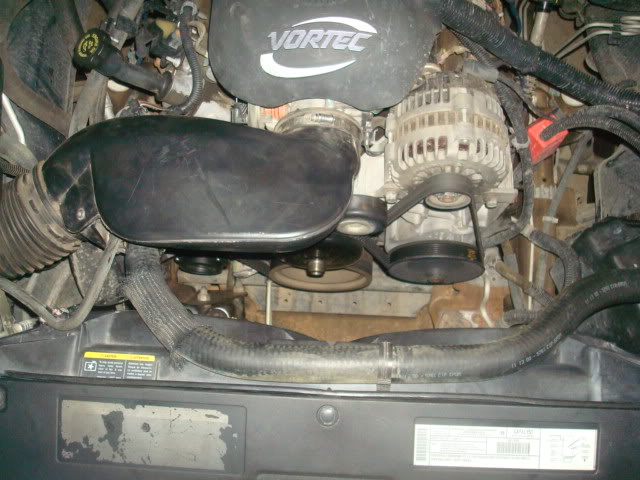
Now that the wiring is squared away, on to the actual fan swap. First, you need to remove your air intake tube. Next, you want to remove the upper half of your fan shroud, which is held on with two 10mm bolts on the top, and two plastic push rivets on each side. Notice the empty bolt hole just to the left of the 10mm bolt that secures the fan shroud. This is where the electric fan shroud will bolt up to.
I find that using a door panel removal tool is perfect for getting the plastic rivets out. If you dont have one, a pair of wire cutters will work too.

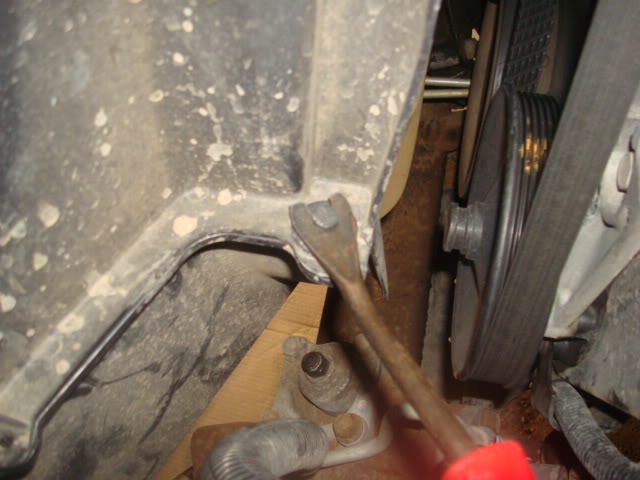
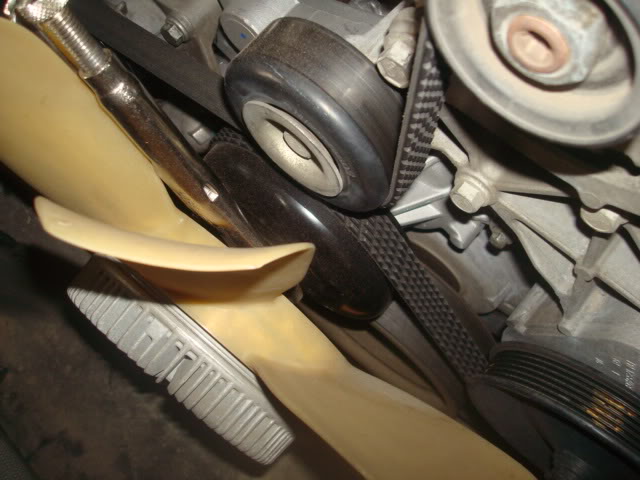
Now once the yop half of the fan shroud is off, you need to remove the factory fan by unbolting the fan clutch. You need a big *** wrench and a hammer. Hit it with the hammer to turn it counter clockwise to break it loose. I used a pair of vise grips on mine. I have heard of some people also using an air chisel to get it off as well.
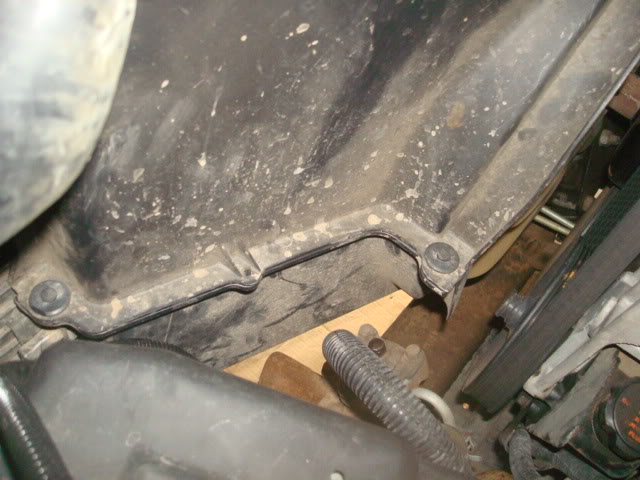
Now once you get the fan off, the bottom half of the fan shroud will simply lift right out.

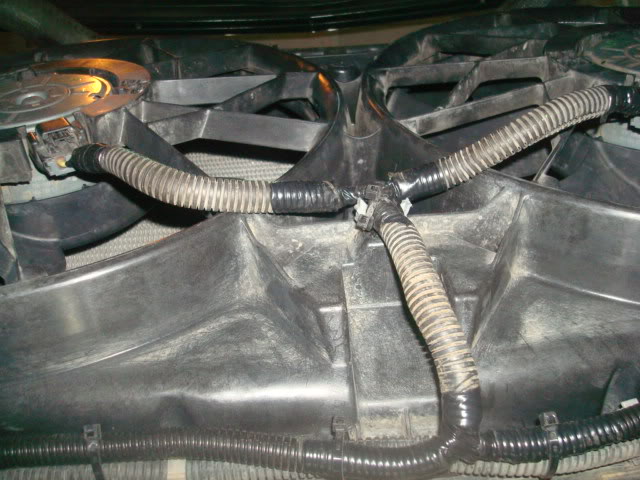
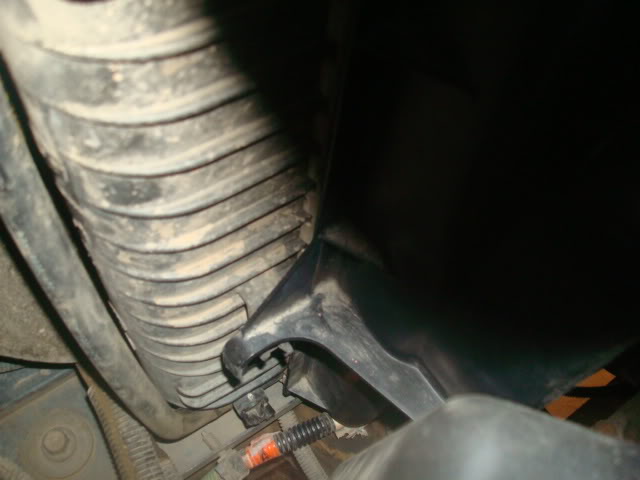
Now just drop your new electric fans down where the fan shroud was. You will have to do a little wiggling to get it around the radiator hoses. The bottom of the shroud rests on the radiator support just like the original fan shroud did. It also rests in the "hooks" that are molded into the radiator tank.
Now look at the top and the two monting holes should line up perfectly with the two holes in the radiator support. Now just bolt it in.
Then I climbed underneath and finished securing all the wiring.
Now just bolt your air intake tube back on and you are done!
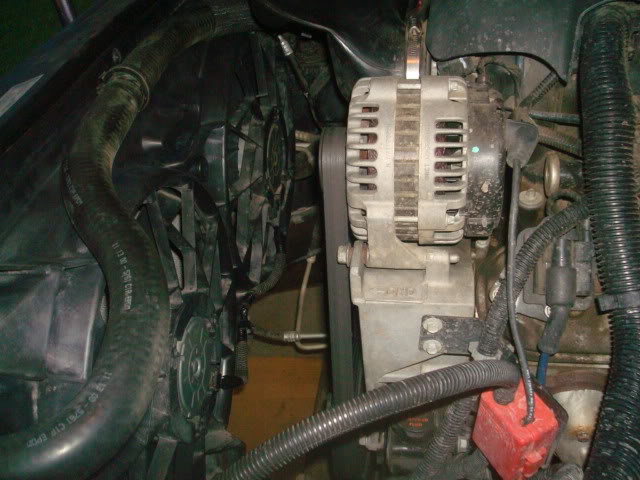
And one more thing, if your truck has the 105 amp alternator, I strongly suggest that you upgrade to the 130 amp or 145 amp version. I have the 130 amp one in mine, and I am noticing my volts guage drop from 14 down to 12 or 13 when both fans are on and I am idling. The volts will increase if I rev the engine though. I am planning on upgrading my alternator when I get more funds. I have since upgraded he stock alternator wire. Got rid of the stock 8 guage wire and installed a 2 guage wire, which does help with the voltage drop some.
EDIT: Mine simply dropped right in because my truck already had the larger 34" radiator. If your truck has the smaller 28" radiator then you will need to change your radiator to the larger one. If you buy a radiator to fit a 01 Suburban with rear AC, then that will be the radiator you need. (Or any 05+ radiator will work as well.)
Here is where you need to insert your green trigger wire pin.
The empty spot labeled 42. I poked an awl thru the yellow rubber to make it easier to get the pin thru.
Here is the inner side with the blue cover removed.
Now take your pin, and carefully push it thru the pin 42 hole until it is fully seated just like the rest of the pins.
Now you need to mount your relays. If you are using a Blackbear harness, you can mount them wherever you choose. But I have the OEM harness, so I am putting it right alongside the fuse block, right where it sits on a 05-06 truck.
It just clips right in.
And then the main power feed for the relay needs to be connected to the battery, and the ground needs to be secured to a factory boly on the frame or body. I secured mine to the horn mounting bracket, because the OEM harness grounds in that general area on a 06 truck.
I just zip tied my harness alongside another factory wire loom that runs alongside the bottom of the radiator.
Now that the wiring is squared away, on to the actual fan swap. First, you need to remove your air intake tube. Next, you want to remove the upper half of your fan shroud, which is held on with two 10mm bolts on the top, and two plastic push rivets on each side. Notice the empty bolt hole just to the left of the 10mm bolt that secures the fan shroud. This is where the electric fan shroud will bolt up to.
I find that using a door panel removal tool is perfect for getting the plastic rivets out. If you dont have one, a pair of wire cutters will work too.
Now once the yop half of the fan shroud is off, you need to remove the factory fan by unbolting the fan clutch. You need a big *** wrench and a hammer. Hit it with the hammer to turn it counter clockwise to break it loose. I used a pair of vise grips on mine. I have heard of some people also using an air chisel to get it off as well.
Now once you get the fan off, the bottom half of the fan shroud will simply lift right out.
Now just drop your new electric fans down where the fan shroud was. You will have to do a little wiggling to get it around the radiator hoses. The bottom of the shroud rests on the radiator support just like the original fan shroud did. It also rests in the "hooks" that are molded into the radiator tank.
Now look at the top and the two monting holes should line up perfectly with the two holes in the radiator support. Now just bolt it in.
Then I climbed underneath and finished securing all the wiring.
Now just bolt your air intake tube back on and you are done!
And one more thing, if your truck has the 105 amp alternator, I strongly suggest that you upgrade to the 130 amp or 145 amp version. I have the 130 amp one in mine, and I am noticing my volts guage drop from 14 down to 12 or 13 when both fans are on and I am idling. The volts will increase if I rev the engine though. I am planning on upgrading my alternator when I get more funds. I have since upgraded he stock alternator wire. Got rid of the stock 8 guage wire and installed a 2 guage wire, which does help with the voltage drop some.
EDIT: Mine simply dropped right in because my truck already had the larger 34" radiator. If your truck has the smaller 28" radiator then you will need to change your radiator to the larger one. If you buy a radiator to fit a 01 Suburban with rear AC, then that will be the radiator you need. (Or any 05+ radiator will work as well.)
Last edited by ScottyBoy; 05-21-2013 at 08:13 AM.


Trending Topics
07-11-2011, 02:22 PM
#9
Yes. I took this from a 2006 truck in the junkyard. I picked the fan wiring out and left the rest of the harness with the horn, headlight, and airbag wiring and everything else there. By cleaning it up, I covered the exposed wires with new wire loom and electric tape. I just zip tied this harness along side my stock harness that runs along the bottom of the radiatior.