
Card style MAF, 4.0 CAI and HOW TO TUNE FOR IT...
 12-10-2011, 07:33 PM
#1

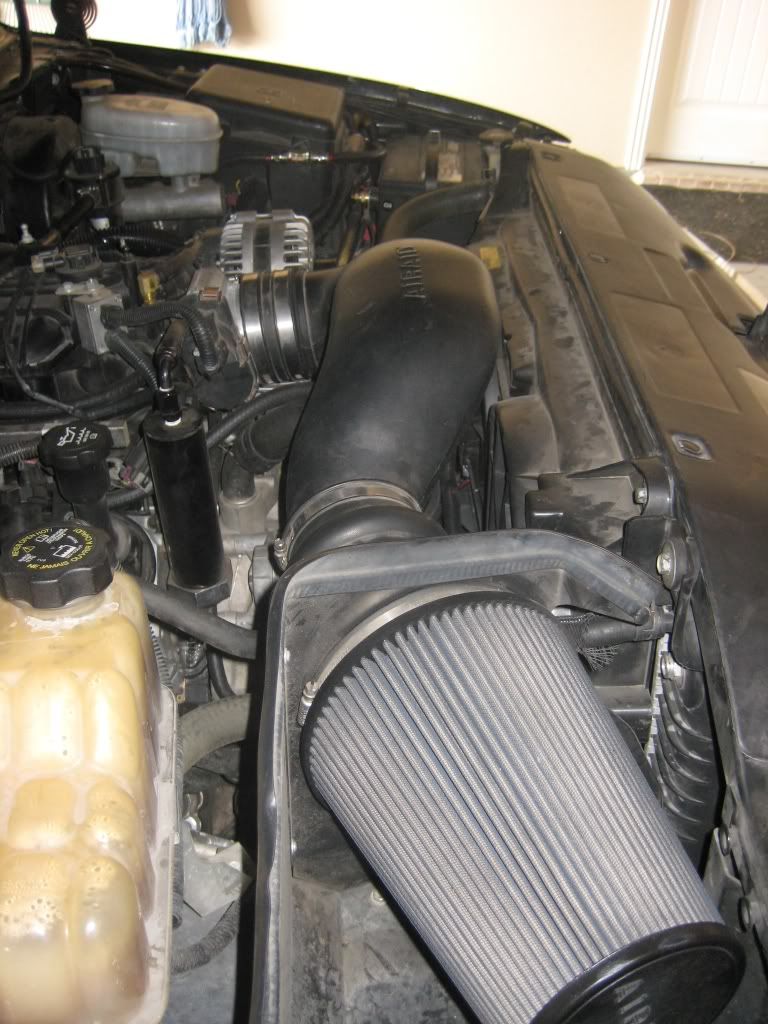
Well i finally got around to installing the new card style MAF and 4.0 CAI... After alot of research on MAF, I found that they work best when the airflow is straight before and after them... This is why i bought the airflow straighteners (screens) and installed them before and after, so the airflow going across the MAF was straight as possible, no turbulence... Also i tried to make the CAI as straight as possible.
The results were great! no power loss at all and it gain a decent amount from what i could tell, no WOT thou since i don't wanna smash this trans while i am building my 4L80....
Previous thread where i sourced alot of parts...
https://www.performancetrucks.net/fo...rd-maf-491783/
The PN for the MAF is GM 15965791, ACDelco 213-4222
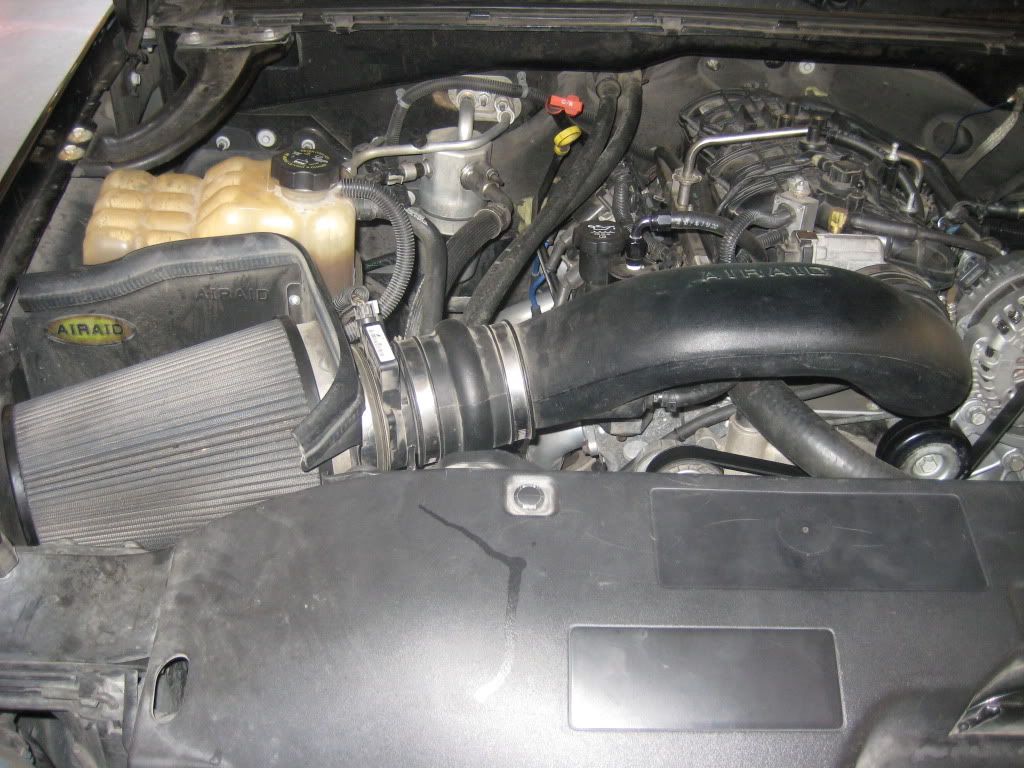
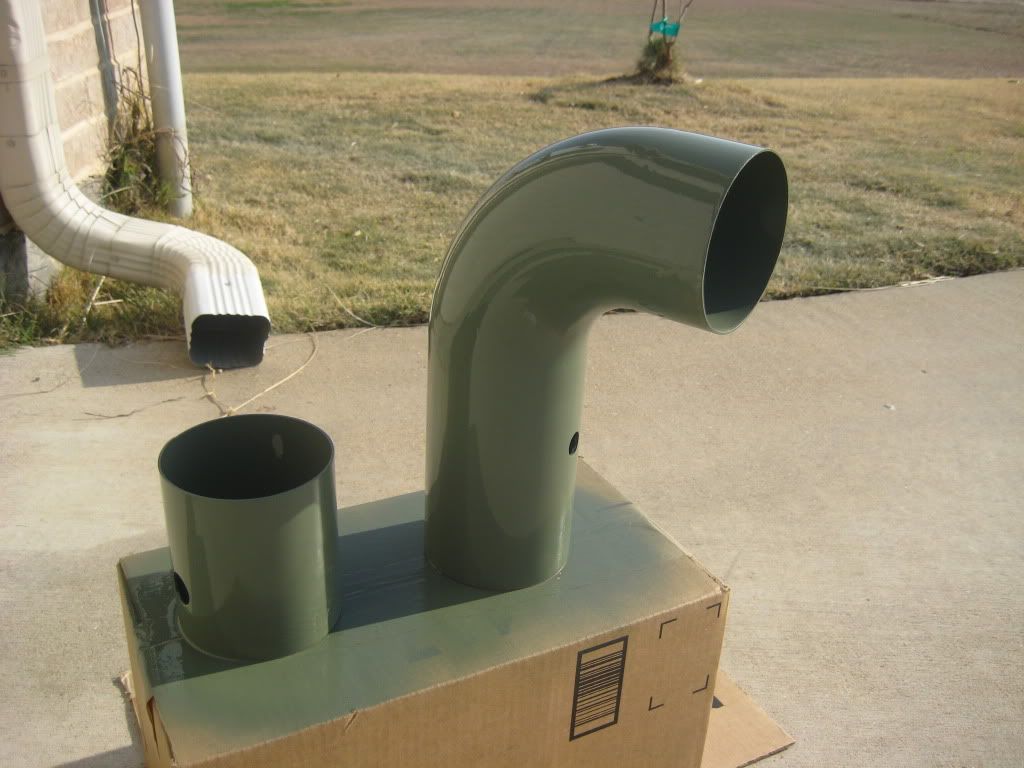
I used a ADM MAF housing and 4.0 Aluminum pipping.
Here are the pics, tuning step up below.
Before
First up was straightening the air box, and you can see the air filter sits at an angle..
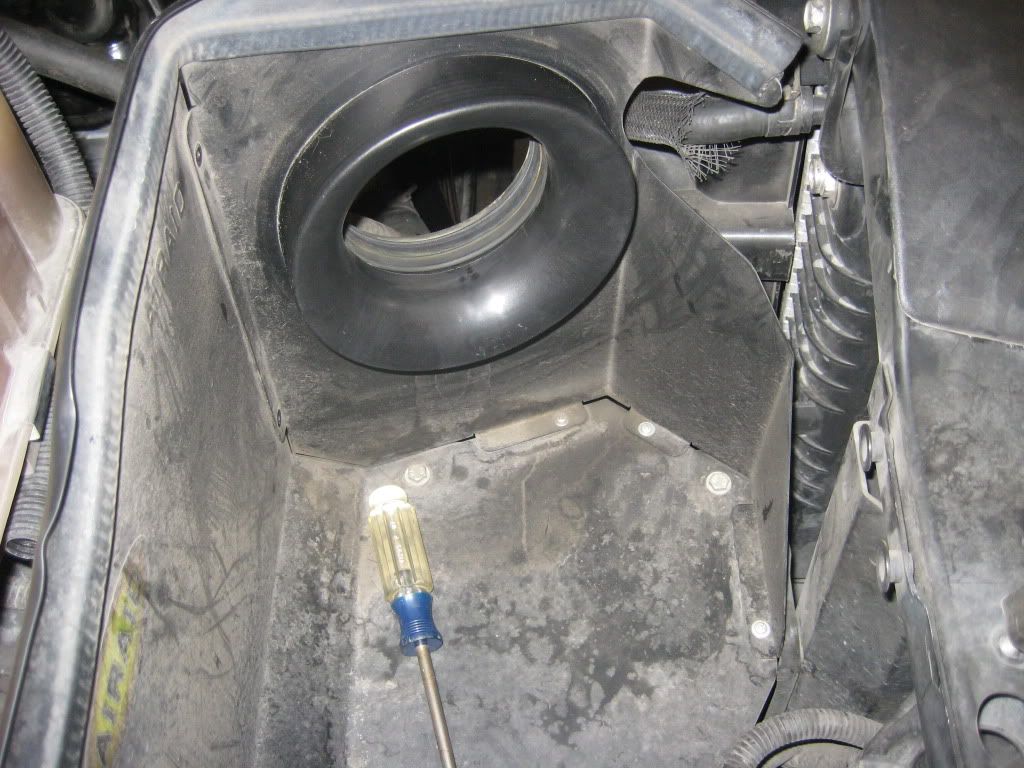
Basically all i did was bend it straight, so it is 90* with the side and I redrilled the bottom holes. The Air filter sits a little tight in there but it is OK...
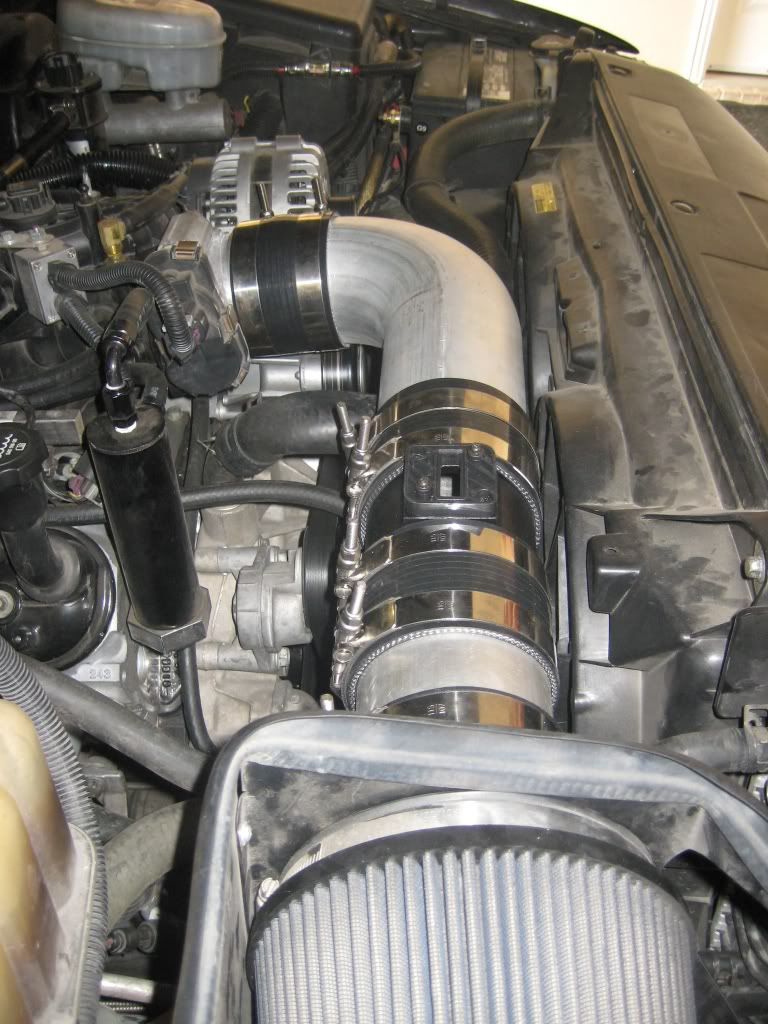
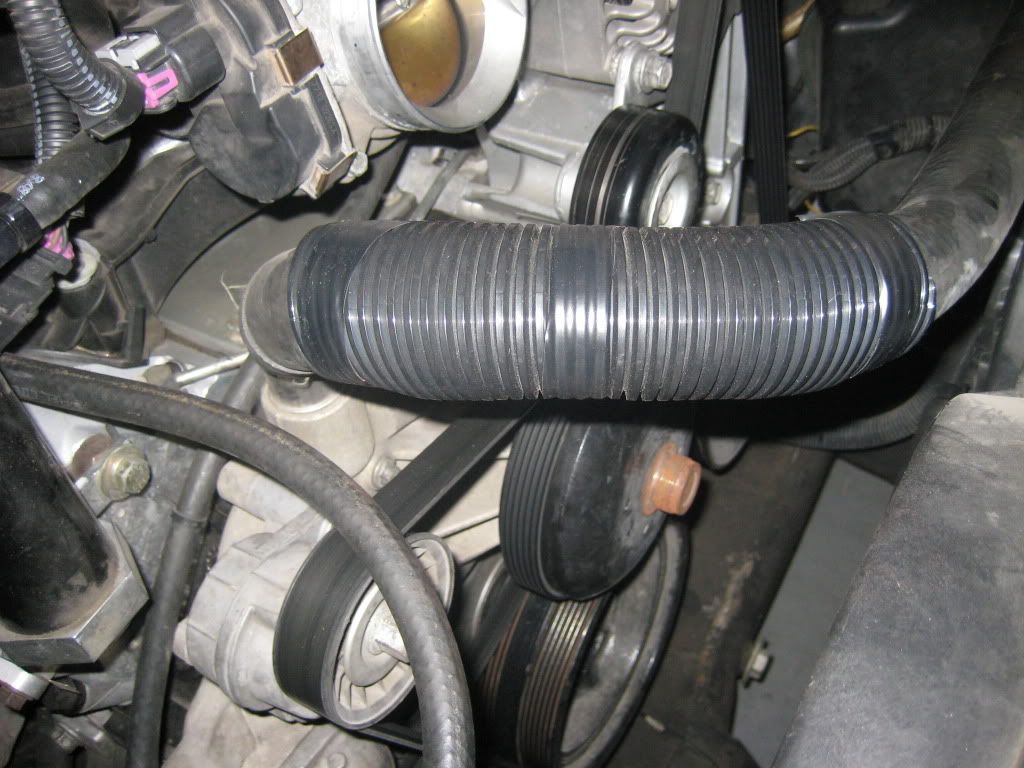
Next i started piecing together the rest of the CAI... Starting with the hump hose, the hump hose is to help with engine moving around..
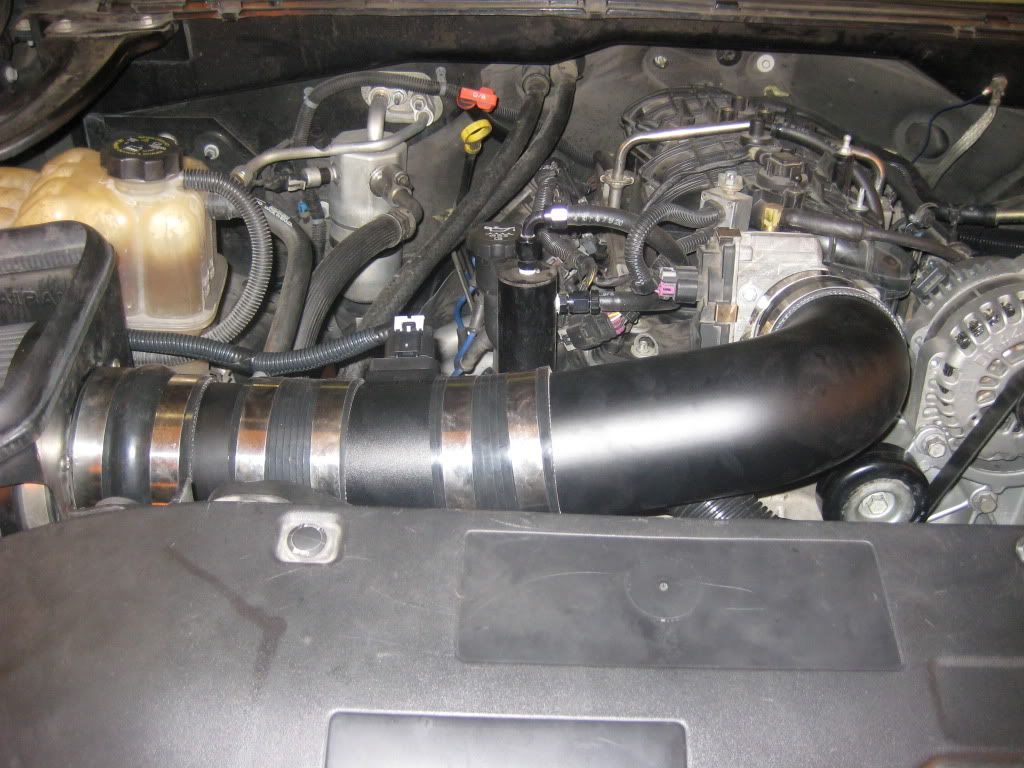
Then the rest followed
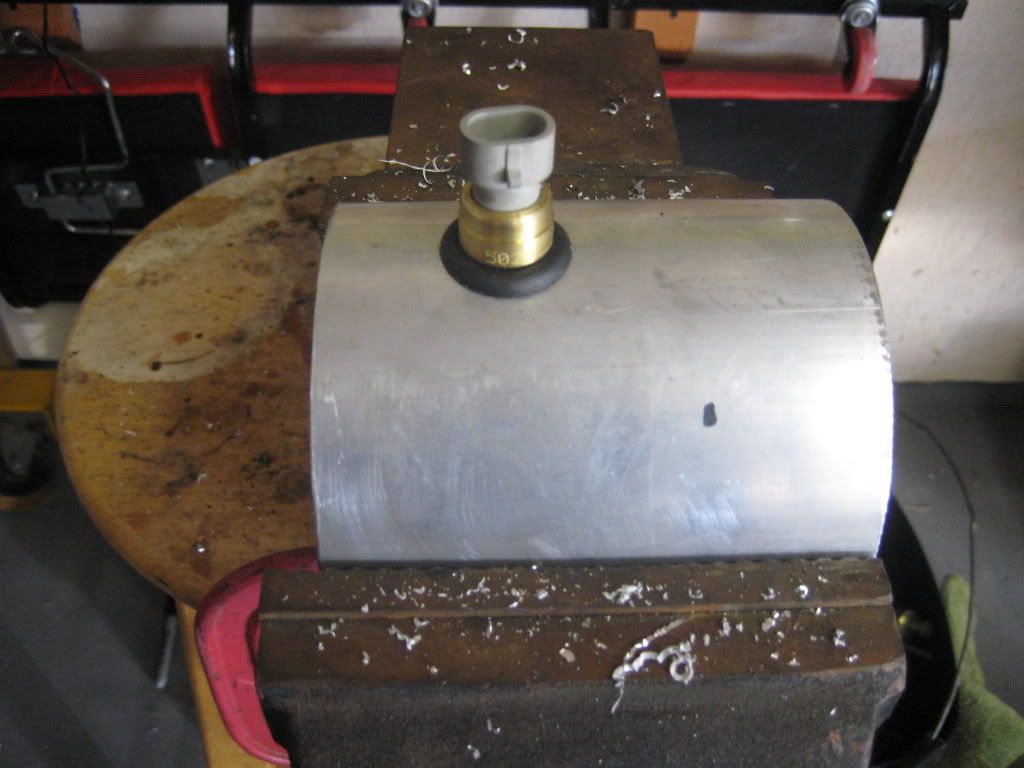
Next cam the air feed for the crank case... I found this little fitting that came with a rubber grommet.
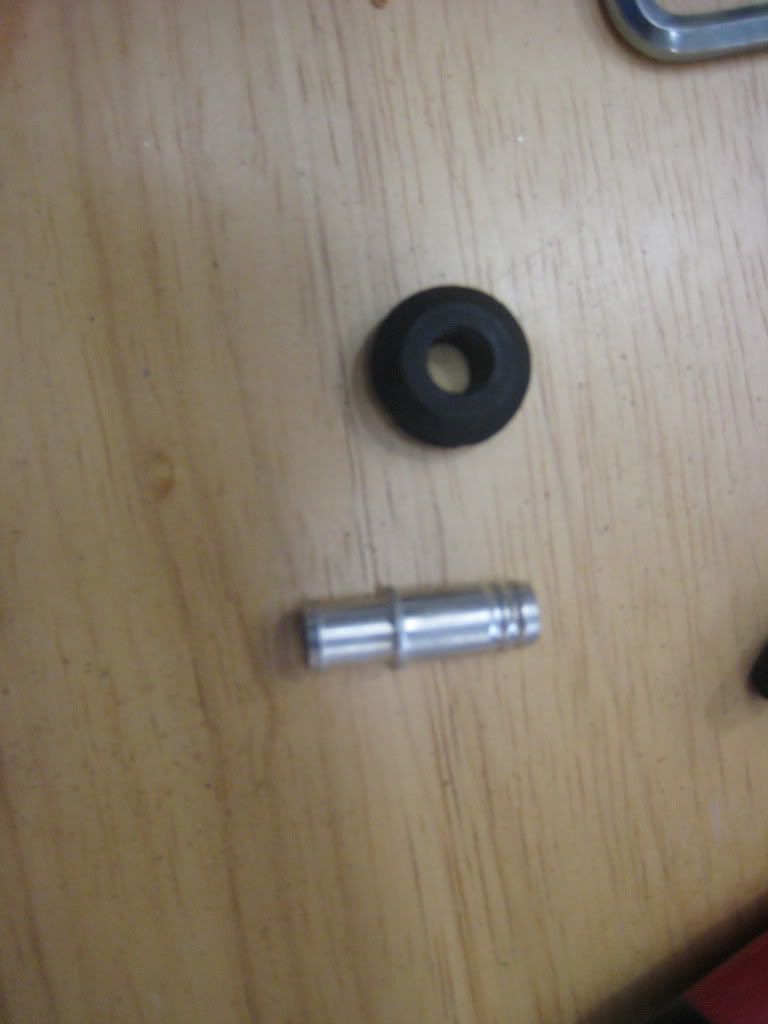
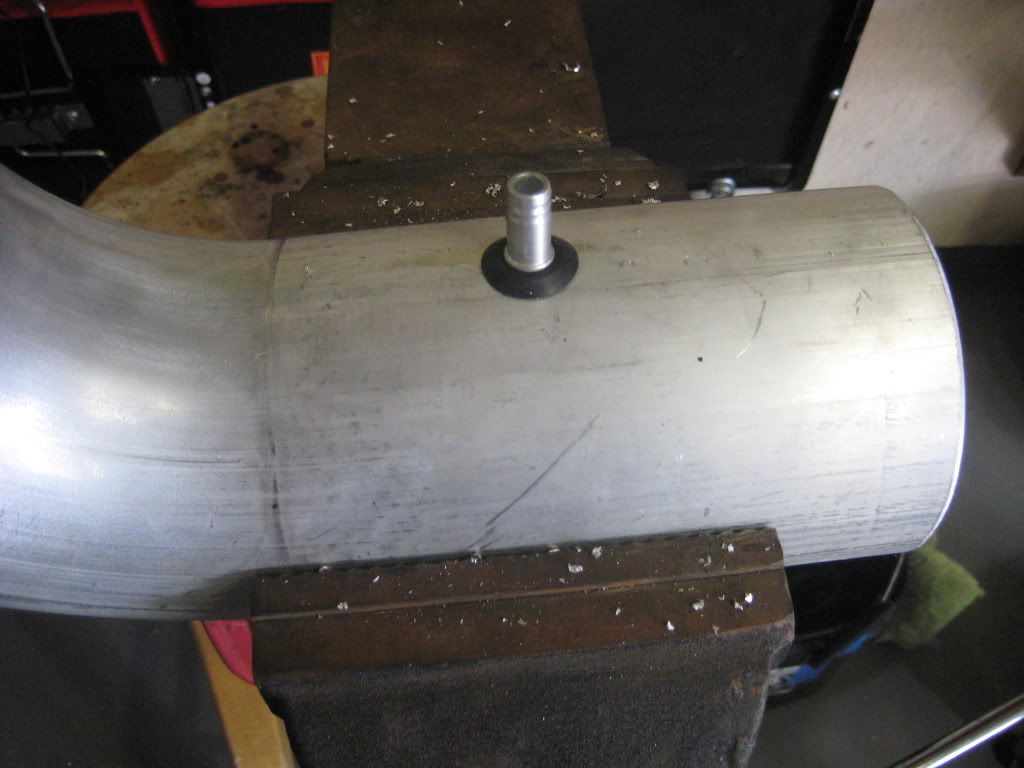
Next came the IAT sensor, this is a edlebrock IAT sensor that comes with a grommet.
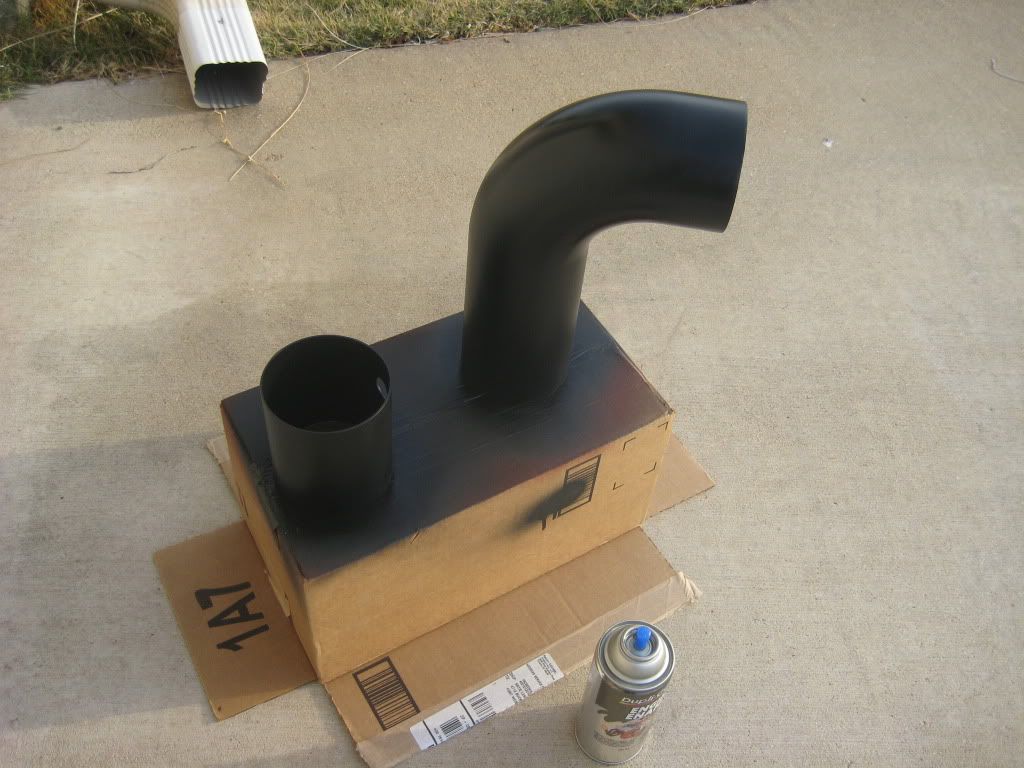
Next some paint, i started with 2 coats of self-etching primer, then wet sanded with 320, then 2 coats of high build primer, then wet sanded with 320, then 3 coats of semi-gloss black engine paint... No pics of the high build primer, i guess i forgot...
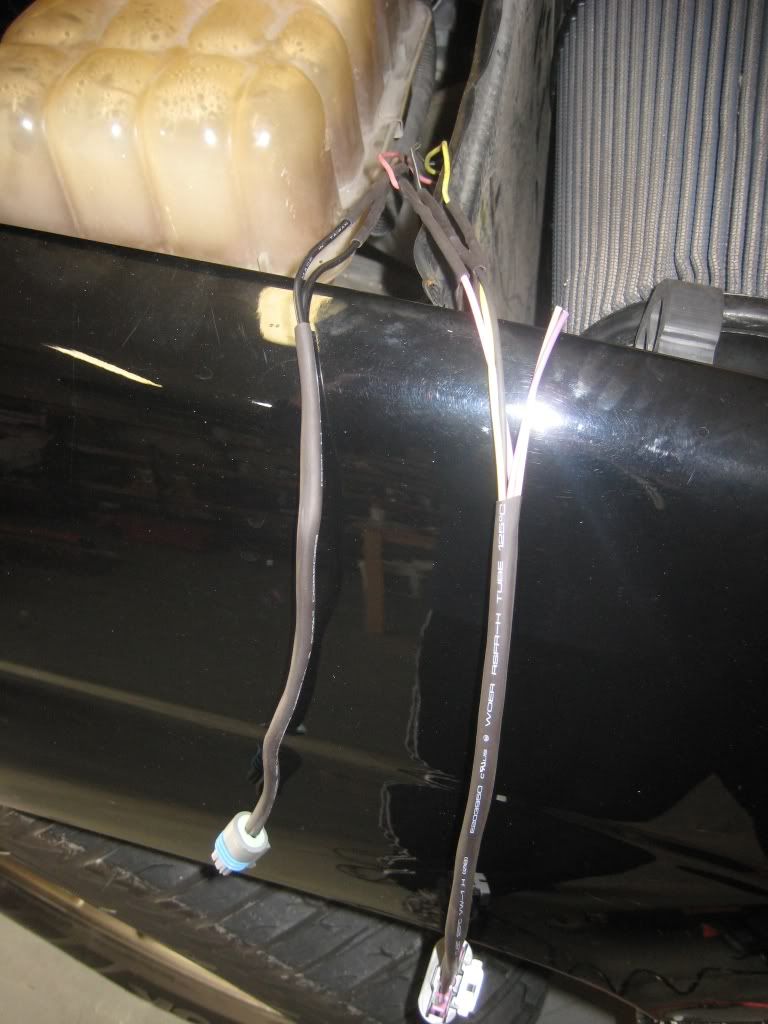
Next cam the wiring, i picked up a MAF pigtail on ebay and i also picked up a IAT sensor pigtail.. Everything soddered and heat shrunk.
Here is the pinout for the MAF incase anyone is interested. The sensor is labeled so it is pretty easy swap
MAF part
Pin A yellow - MAF signal to ECM
Pin B black/white - ground
Pin C pink - ignition 1 voltage from fuse block
IAT part
Pin D tan - low reference from ECM
Pin E tan - intake air temp signal to ECM
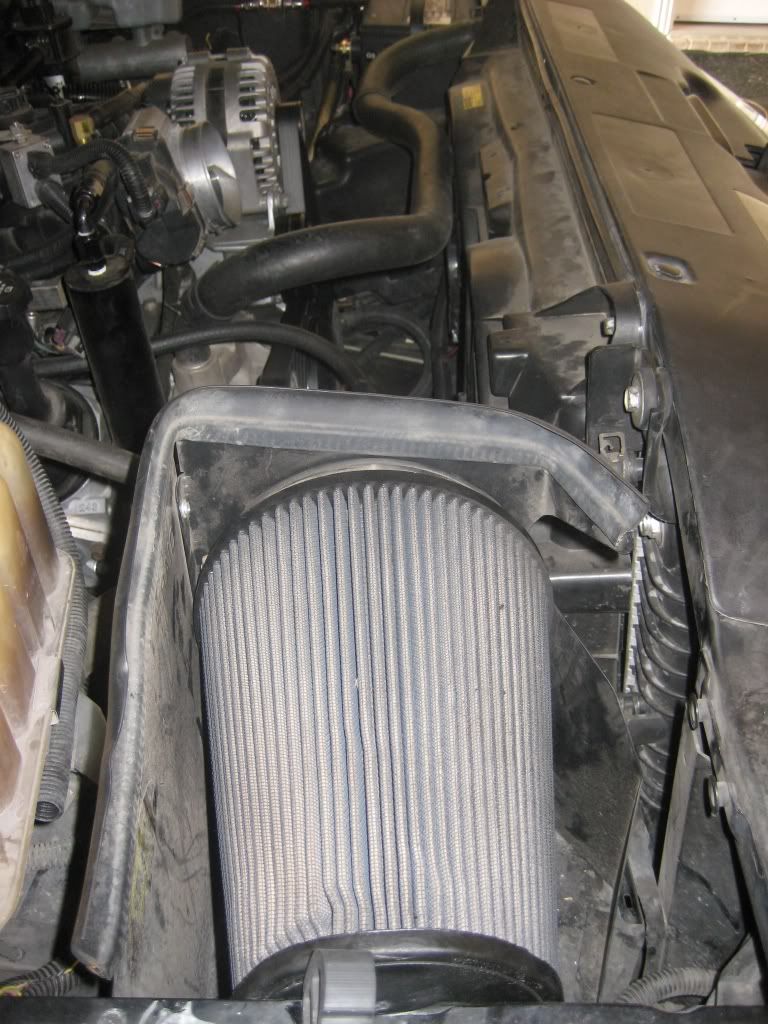
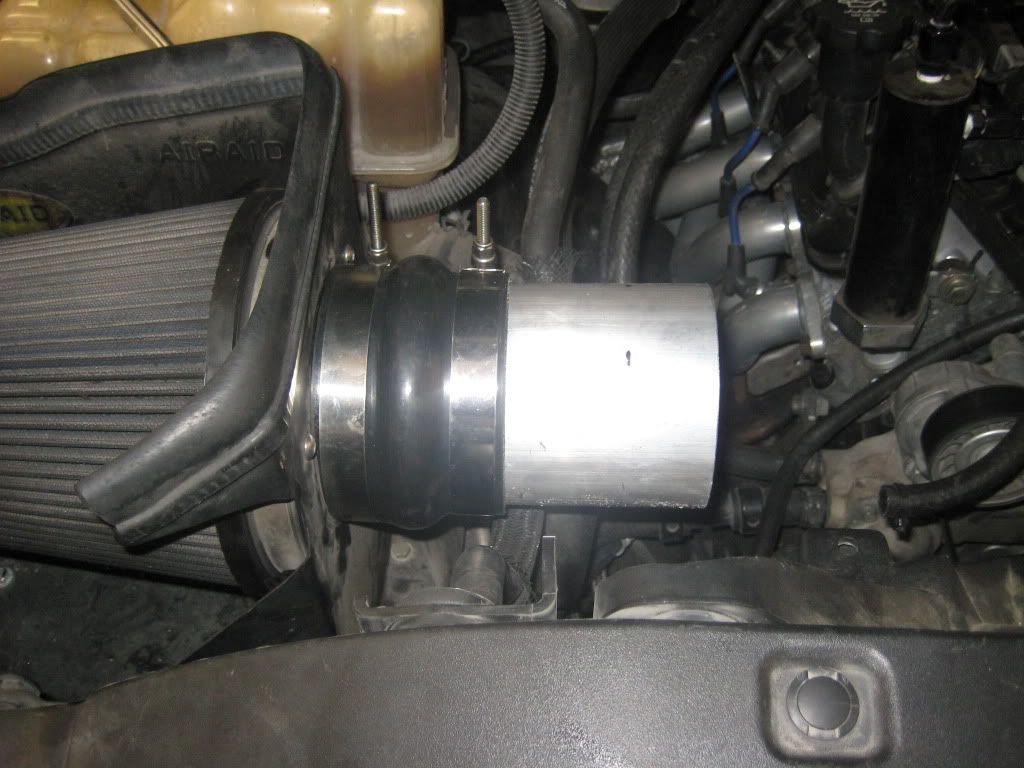
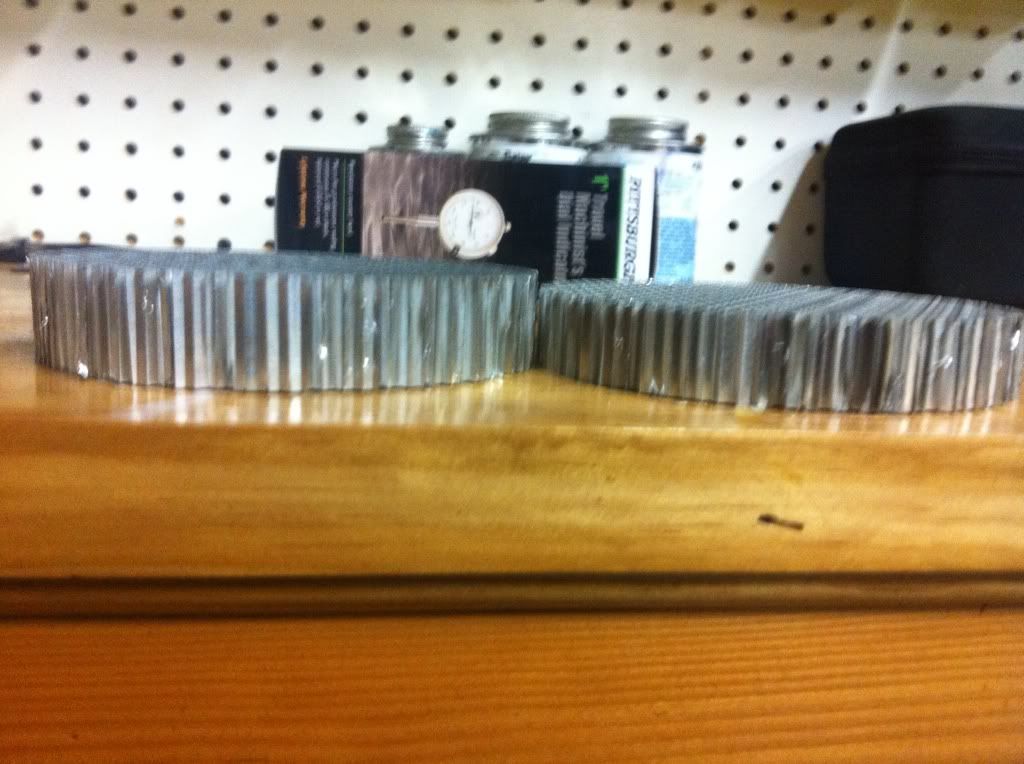
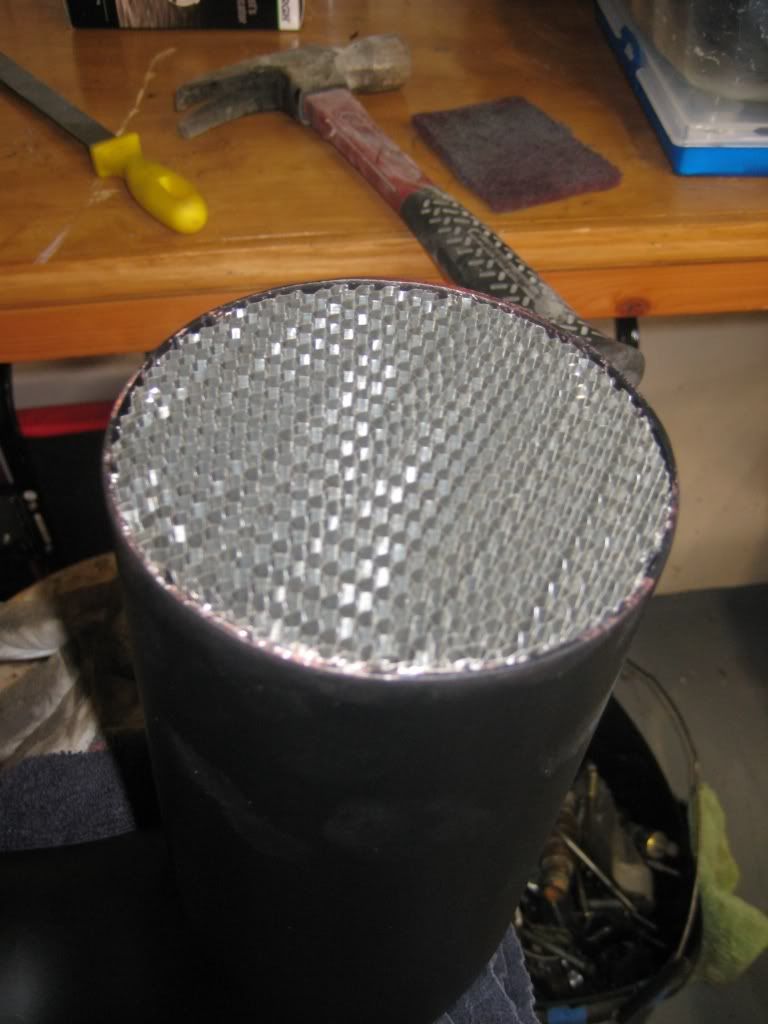
Next i installed the airflow straighteners, I order 2 thicknesses... The thicker one went in the front and the thinner one went behind the MAF... These things took a little coaxing to get in there but they are not going anywhere with how tight they fit.
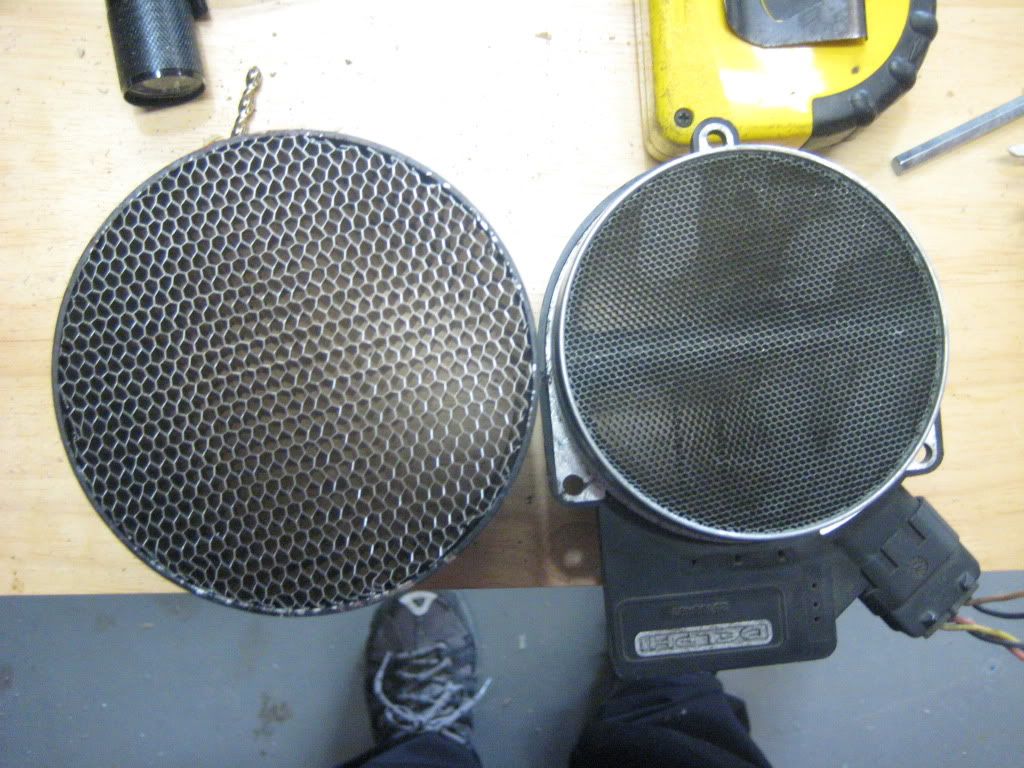
Here is a pic next to the stock MAF.
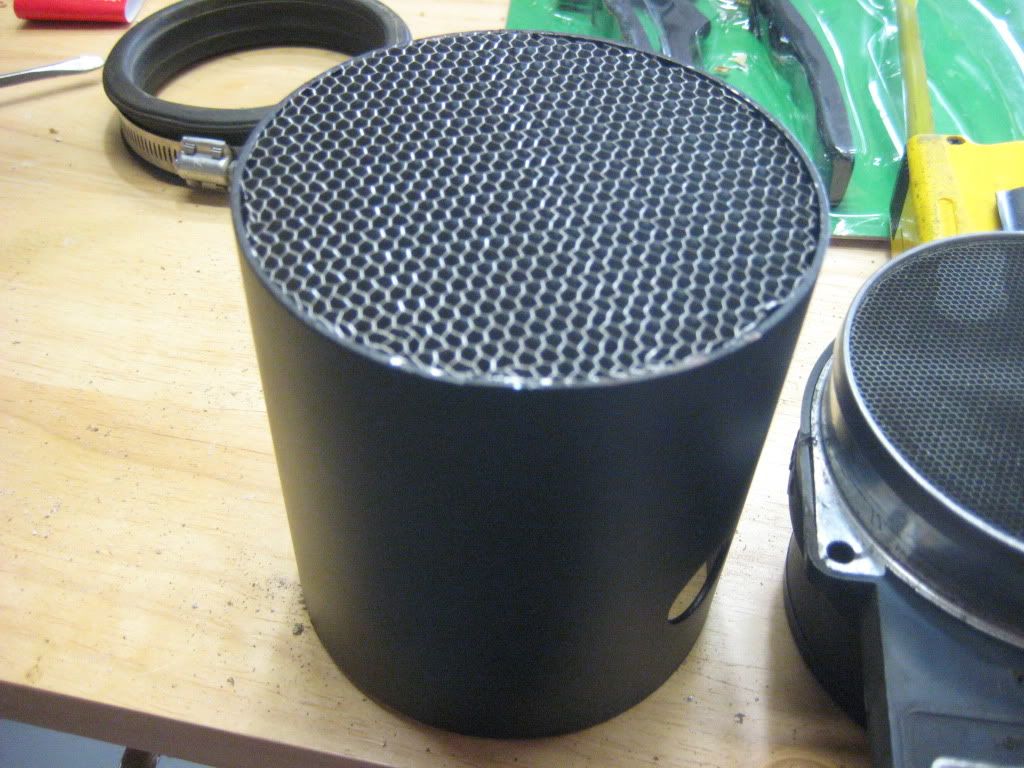
I put some wire covering on the radiator hose in hope it will help keep the heat off the tube. I covered it twice!
The results were great! no power loss at all and it gain a decent amount from what i could tell, no WOT thou since i don't wanna smash this trans while i am building my 4L80....
Previous thread where i sourced alot of parts...
https://www.performancetrucks.net/fo...rd-maf-491783/
The PN for the MAF is GM 15965791, ACDelco 213-4222
I used a ADM MAF housing and 4.0 Aluminum pipping.
Here are the pics, tuning step up below.
Before
First up was straightening the air box, and you can see the air filter sits at an angle..
Basically all i did was bend it straight, so it is 90* with the side and I redrilled the bottom holes. The Air filter sits a little tight in there but it is OK...
Next i started piecing together the rest of the CAI... Starting with the hump hose, the hump hose is to help with engine moving around..
Then the rest followed
Next cam the air feed for the crank case... I found this little fitting that came with a rubber grommet.
Next came the IAT sensor, this is a edlebrock IAT sensor that comes with a grommet.
Next some paint, i started with 2 coats of self-etching primer, then wet sanded with 320, then 2 coats of high build primer, then wet sanded with 320, then 3 coats of semi-gloss black engine paint... No pics of the high build primer, i guess i forgot...
Next cam the wiring, i picked up a MAF pigtail on ebay and i also picked up a IAT sensor pigtail.. Everything soddered and heat shrunk.
Here is the pinout for the MAF incase anyone is interested. The sensor is labeled so it is pretty easy swap
MAF part
Pin A yellow - MAF signal to ECM
Pin B black/white - ground
Pin C pink - ignition 1 voltage from fuse block
IAT part
Pin D tan - low reference from ECM
Pin E tan - intake air temp signal to ECM
Next i installed the airflow straighteners, I order 2 thicknesses... The thicker one went in the front and the thinner one went behind the MAF... These things took a little coaxing to get in there but they are not going anywhere with how tight they fit.
Here is a pic next to the stock MAF.
I put some wire covering on the radiator hose in hope it will help keep the heat off the tube. I covered it twice!
 12-10-2011, 07:36 PM
#2
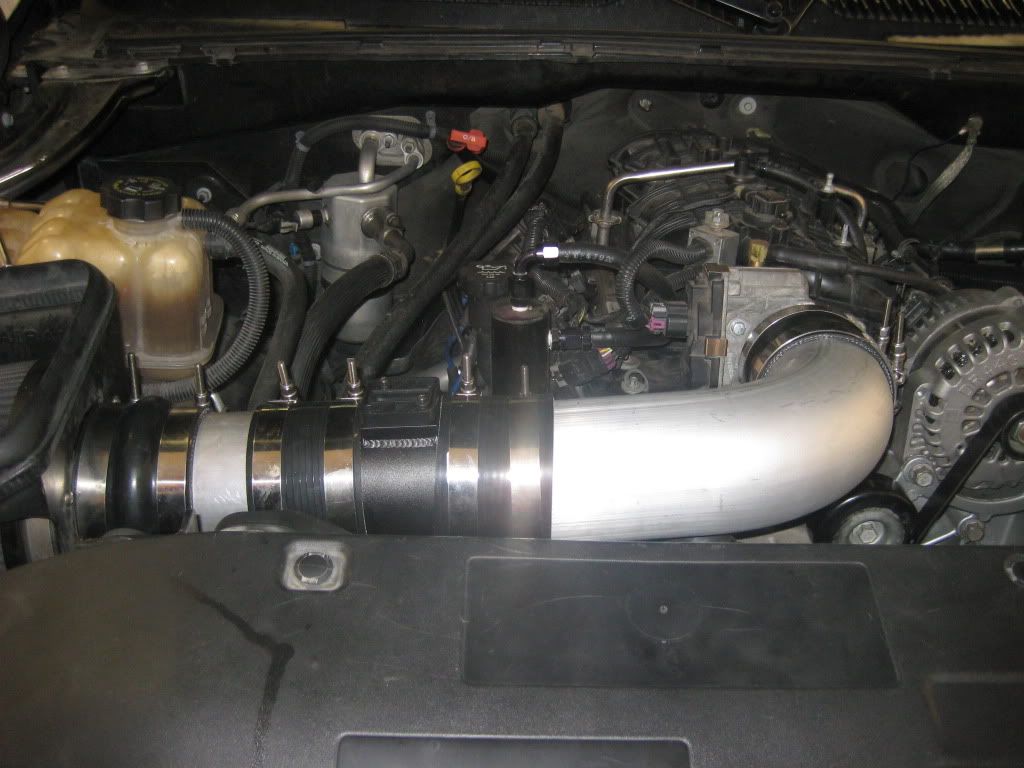
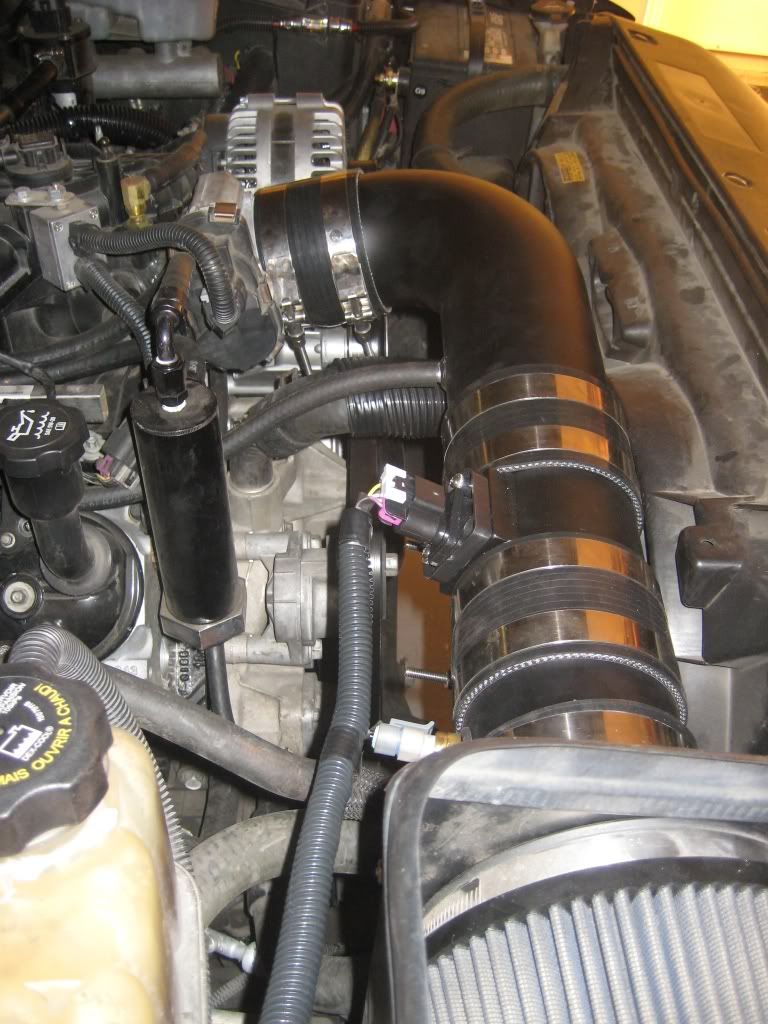
Finished product
Next came the tuning.... This was actually pretty simple... This process can be used to step up and MAF, it really helps get you to a good starting point then you just tweak from there. This depends on your VE table being dialed in... Also i was tooo lazy to break out the wideband cable, so i tweaked with LTFTs...
Beofre you start driving you want to find the "sweet spot" for the MAF. Drag your laptop around to the front of the truck. Log the MAF Hertz, rotate the MAF until the MAF Herts are flat/stable as possible. Since my CAI is straight this was kinda pointless. But for those with more curves in the CAI this really helps. The reason it helps is a CAI with alot of curves pushed the air to one side of the tube, this also causes some turbulence. Rotating the maf will help find the less turbulent air.
First start out in SD mode, but log the MAF and GM.DYNAIR. You need to build a MAP (EFI) or histogram (HPT) that looks like your MAF table. You want to use GM.DYNAIR as the data value... No go for a drive at varying speed but keeping the throttle transitions to a minimum, meaning no sudden changes in TPS.
Here is what your MAP/Histogram should look like
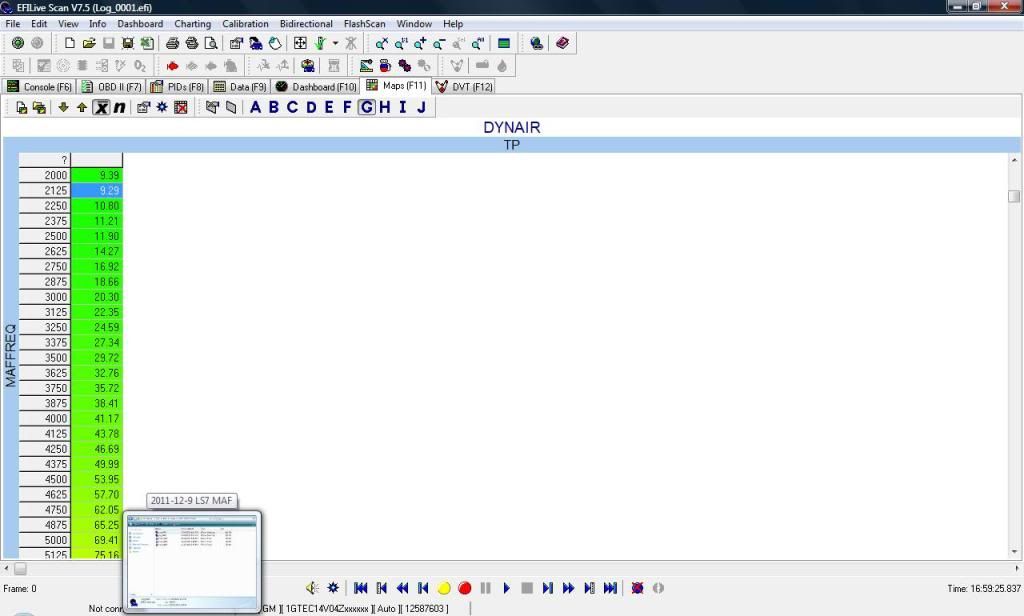
No you just past those values directly into the MAF table.
It should come out looking like this...
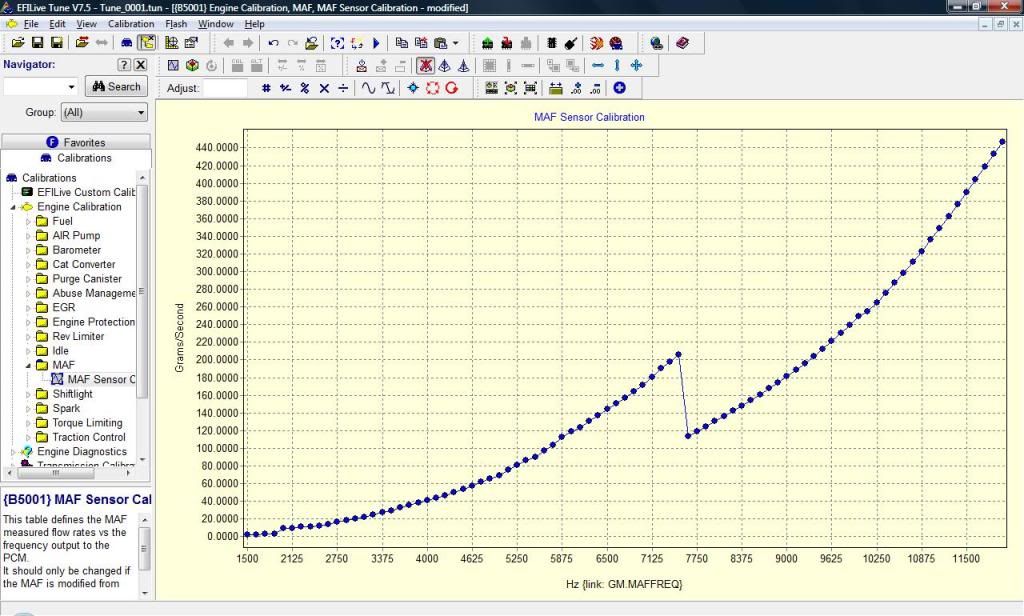
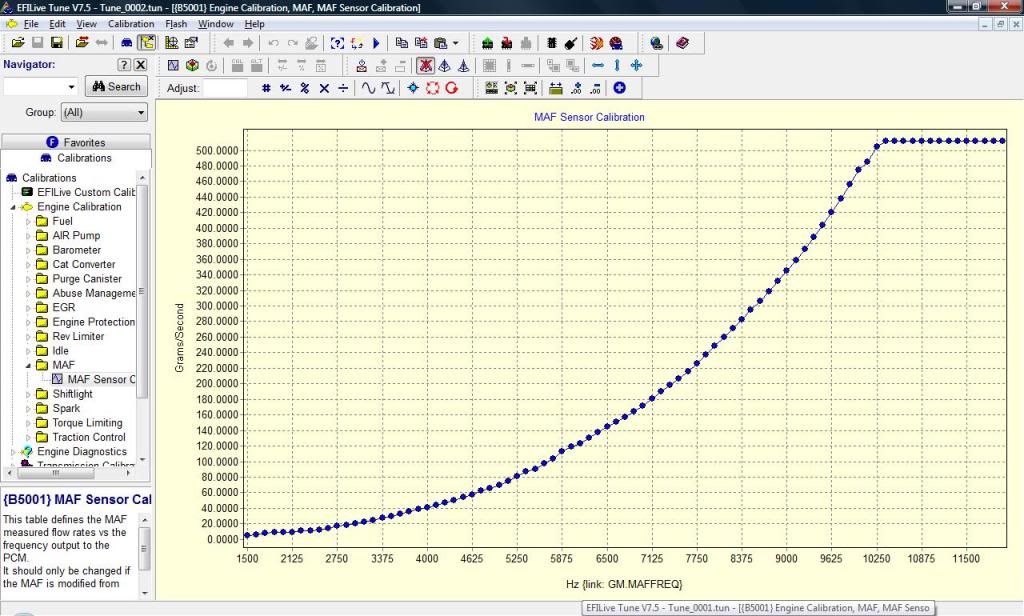
It looks kinda crazy, so you have scale up the unlogged cells, since i did not do any WOT runs. It should end up looking like this after you scale up the unlogged cells
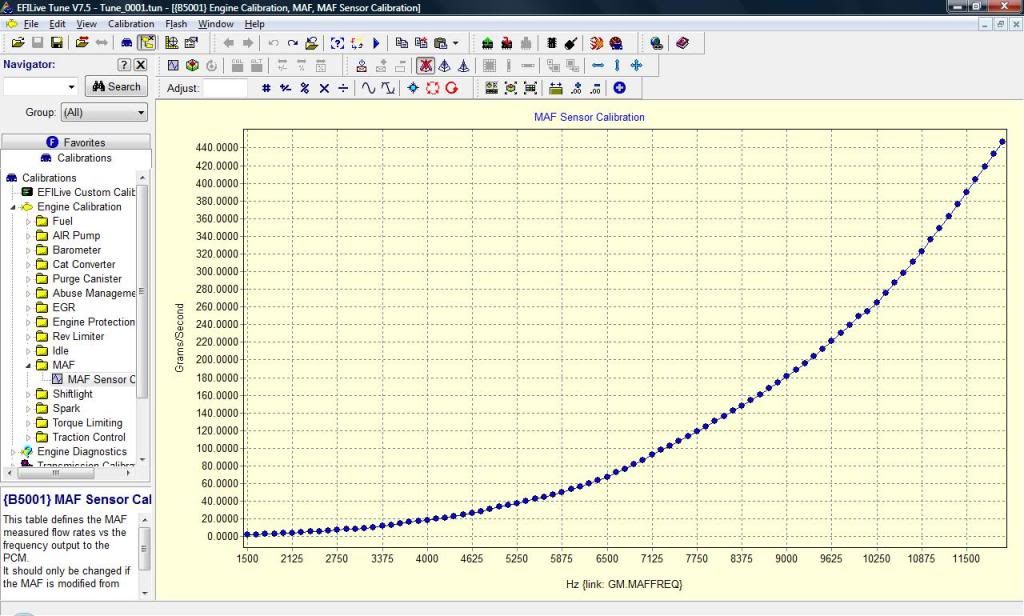
Here is what the stock MAF looked like on my setup... Keep in mind this was tuned heavy, so it just shows what that new CAI and MAF sensor do to the tune...
I have attached the tunes and logs for this...
Tune_0001 was my starting point (SD Closed Loop)
Tune_0002 was with the new MAF table derived from Log_0001 (MAF Closed Loop)
Tune _0003 is what i ended up with derived from Log_0002.
One thing to keep in mind when tuning the MAF, is i use half of the BENs, meaning if the BEN says .97, i only reduce that cell by -1.5... Also it is important to take out the transient conditions....
Well that is it. The truck runs real smooth now, i do have some tweaking to do but it can wait until i get the 4L80 installed , then i can finally do some WOT tuning...
Next came the tuning.... This was actually pretty simple... This process can be used to step up and MAF, it really helps get you to a good starting point then you just tweak from there. This depends on your VE table being dialed in... Also i was tooo lazy to break out the wideband cable, so i tweaked with LTFTs...
Beofre you start driving you want to find the "sweet spot" for the MAF. Drag your laptop around to the front of the truck. Log the MAF Hertz, rotate the MAF until the MAF Herts are flat/stable as possible. Since my CAI is straight this was kinda pointless. But for those with more curves in the CAI this really helps. The reason it helps is a CAI with alot of curves pushed the air to one side of the tube, this also causes some turbulence. Rotating the maf will help find the less turbulent air.
First start out in SD mode, but log the MAF and GM.DYNAIR. You need to build a MAP (EFI) or histogram (HPT) that looks like your MAF table. You want to use GM.DYNAIR as the data value... No go for a drive at varying speed but keeping the throttle transitions to a minimum, meaning no sudden changes in TPS.
Here is what your MAP/Histogram should look like
No you just past those values directly into the MAF table.
It should come out looking like this...
It looks kinda crazy, so you have scale up the unlogged cells, since i did not do any WOT runs. It should end up looking like this after you scale up the unlogged cells
Here is what the stock MAF looked like on my setup... Keep in mind this was tuned heavy, so it just shows what that new CAI and MAF sensor do to the tune...
I have attached the tunes and logs for this...
Tune_0001 was my starting point (SD Closed Loop)
Tune_0002 was with the new MAF table derived from Log_0001 (MAF Closed Loop)
Tune _0003 is what i ended up with derived from Log_0002.
One thing to keep in mind when tuning the MAF, is i use half of the BENs, meaning if the BEN says .97, i only reduce that cell by -1.5... Also it is important to take out the transient conditions....
Well that is it. The truck runs real smooth now, i do have some tweaking to do but it can wait until i get the 4L80 installed
, then i can finally do some WOT tuning...
Last edited by BlackGMC; 12-10-2011 at 07:48 PM.


Trending Topics
 12-10-2011, 11:39 PM
#9
Ya it basically shifted down about 1000hz. Kinda strange but it is what it is. Like i mentioned above, i still have not logged it at WOT so i dont know how it is up top as far as grams sec vs hertz. I will say that the ouput is alot steadier especially at idle and off idle.
